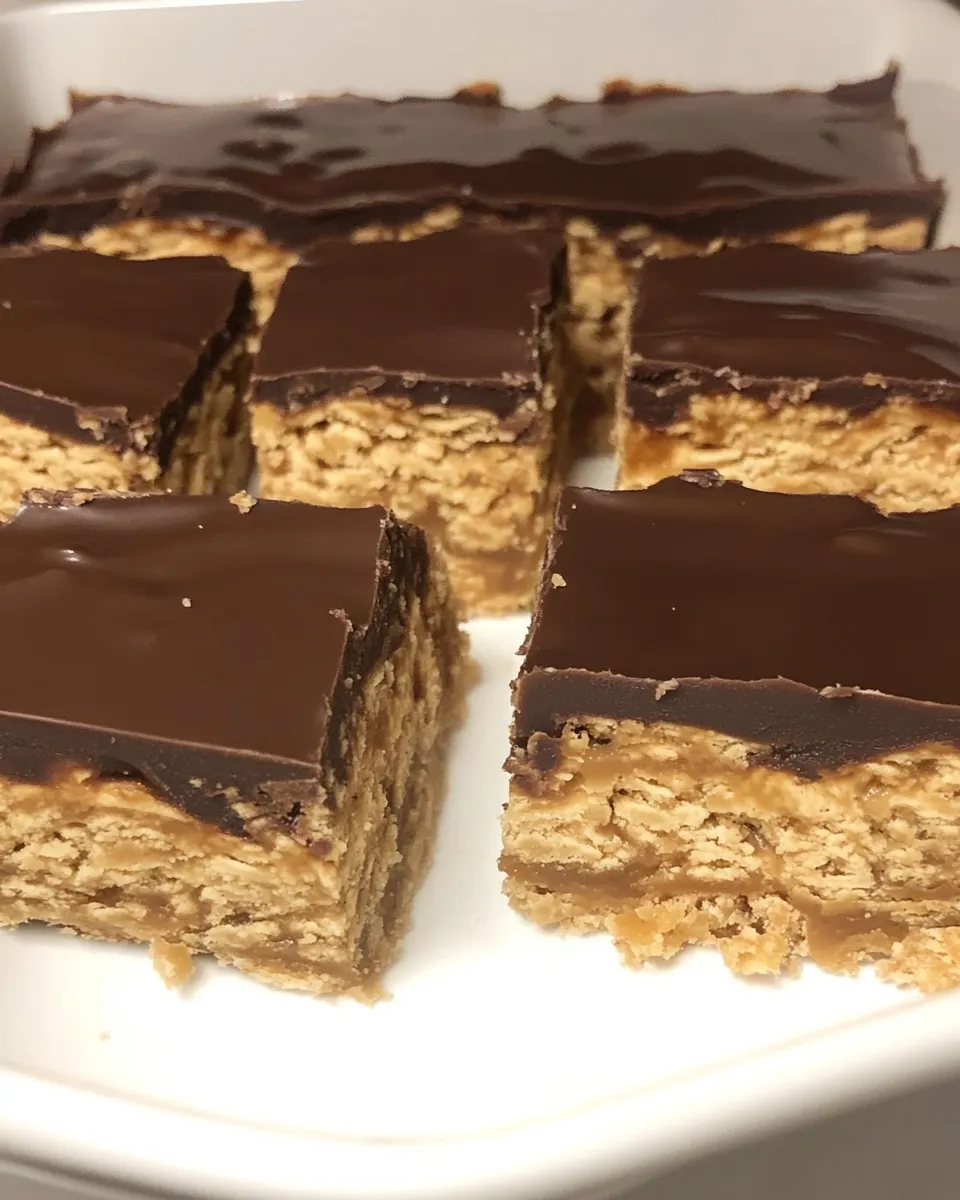
Special K Bars
I love a recipe that stars pantry staples and comes together fast. These Special K Bars are exactly that — crisp cereal coated in a warm, sweet binder, topped with a glossy chocolate layer. They’re not fussy, they travel well, and they disappear at bake sales and weekend coffee runs.
There’s something reassuring about a recipe with a short ingredient list and a clear method. You’ll notice the ingredient list is honest and specific. The steps move from melting and coating to pressing and chilling, and they reward a little speed and attention more than technical skill.
In this post I’ll walk you through the exact ingredients and steps, troubleshooting for common missteps, and practical storage notes so your batch lasts. No fluff — just the kind of useful tips I use when I make these at home.
Gather These Ingredients
Ingredients
- 4 1/2 cups Corn Flakes (I fill up a 4 cup Pyrex measuring cup) — the crunchy base; measure by volume for the texture you expect.
- 1 cup Karo Syrup — binds the cereal and provides shine and chew; use the standard light corn syrup specified.
- 1 cup peanut butter, (not oily) — adds flavor and helps hold the mixture together; choose a spreadable, homogenous jar without oil separation.
- 1 cup sugar — sweetens and helps the binder set; dissolve it fully while heating.
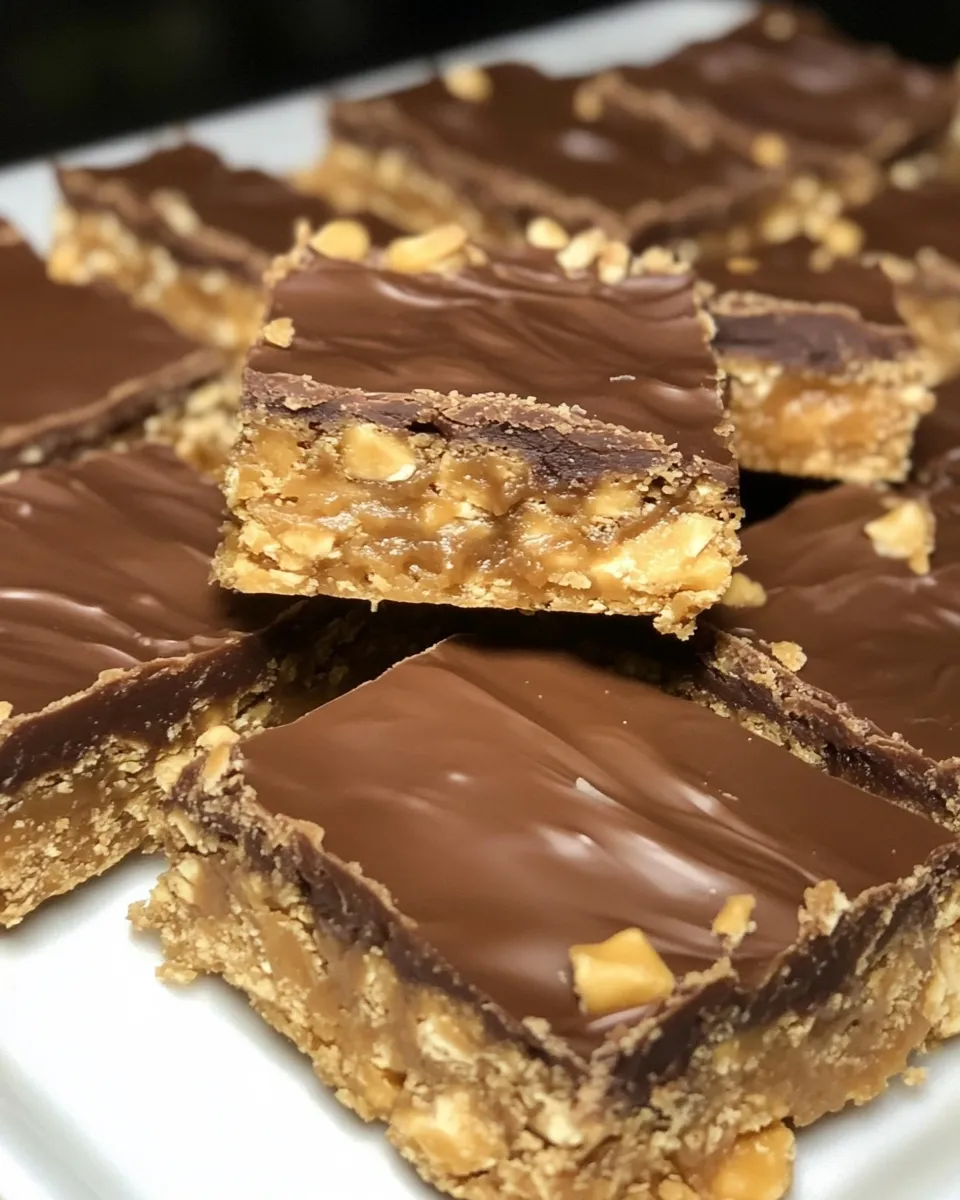
- 3 cups Nestle semi sweet chocolate chips — melts into a smooth topping; three cups cover the layer nicely when melted and spread.
Special K Bars — Do This Next
- Lightly grease a 9×13-inch Pyrex pan (bottom and sides).
- In a large saucepan, combine 1 cup Karo Syrup, 1 cup peanut butter (not oily), and 1 cup sugar.
- Heat the mixture over medium-low heat, stirring constantly, until the sugar is dissolved and the mixture is hot and steaming but not boiling; be careful not to burn it.
- Remove the saucepan from the heat and immediately stir in 4 1/2 cups Corn Flakes until evenly coated.
- Transfer the coated Corn Flakes into the prepared pan and press the mixture firmly and evenly into an even layer (use a spatula or lightly greased hands). Work quickly before it cools and hardens.
- Place 3 cups Nestle semi sweet chocolate chips in a microwave-safe Pyrex measuring cup. Microwave at 50% power in 30-second intervals, stirring well between intervals, until the chocolate is completely melted and smooth. (Alternatively, melt the chocolate in a heatproof bowl set over simmering water, stirring until smooth.)
- Spread the melted chocolate evenly over the pressed Corn Flake layer, smoothing the top with a spatula.
- Refrigerate the pan for about 2 hours, or until the chocolate is set and the bars are firm. Keep refrigerated for storage.
Why It’s My Go-To
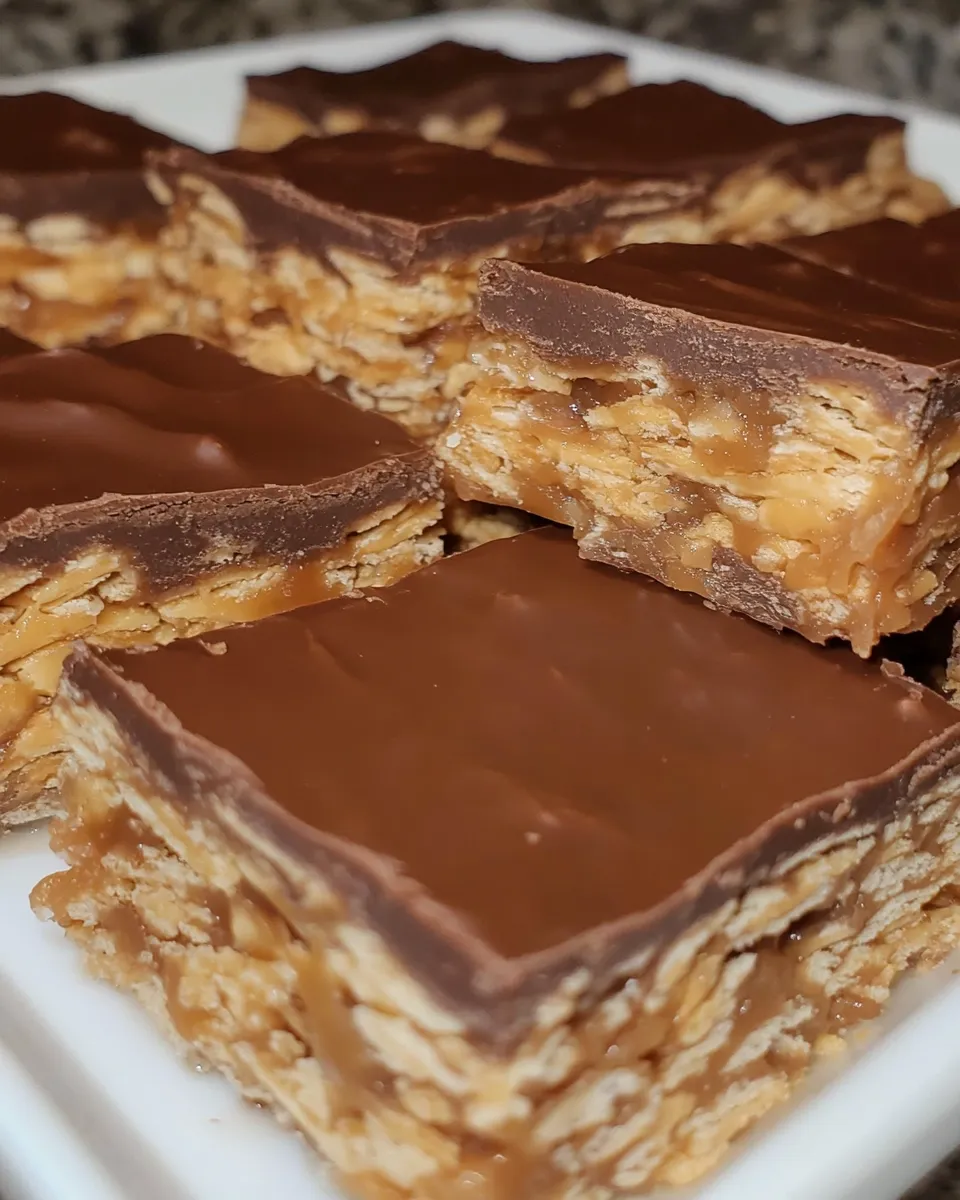
These bars hit the sweet spot between simplicity and satisfaction. A short ingredient list means fewer excuses not to make them, and the method is forgiving: as long as you dissolve the sugar and keep the heat controlled, the results are consistent.
They come together quickly, but the texture feels homemade — crunchy, slightly chewy, and finished with a neat chocolate top. I reach for this recipe when I need a treat that will hold up during transport or sit nicely on a dessert tray without a mess.
Finally, they’re adaptable without changing the spirit of the recipe. Small technique choices — like how firmly you press the mixture into the pan or how thin you spread the chocolate — let you dial the chew and chocolate ratio to your preference.
No-Store Runs Needed
If you keep a basic pantry, you probably have everything here. Corn flakes, a jar of peanut butter, sugar, some corn syrup, and chocolate chips are the core. Because the method depends on heat and timing rather than specialty items, you can usually assemble these from what’s already on your shelves.
Need to avoid a fresh trip to the store? Check the back of your cupboard for cereal and a jar of spreadable peanut butter. The recipe doesn’t require fresh eggs, baking powder, or timed rises — those are the timesaver features that make an at-home batch realistic on a weeknight.
If one jar of chocolate chips is all you have, weigh what you have and spread it a little thinner; the chocolate does more than flavor — it seals the bars — but a lighter coating still gives a pleasant finish.
Cook’s Kit
- 9×13-inch Pyrex pan — this is the pan used in the directions and gives the right thickness.
- Large saucepan — wide enough to stir the syrup, peanut butter, and sugar comfortably.
- Rubber spatula or wooden spoon — for stirring and getting every last bit of binder out of the pan.
- Measuring cups (including a 4-cup Pyrex measuring cup if you have it) — the recipe references that measurement for the corn flakes.
- Microwave-safe Pyrex measuring cup or heatproof bowl — for melting chocolate safely.
- Offset spatula or regular spatula — to smooth the chocolate layer cleanly.
- Plastic wrap or lid for the pan — if you’ll refrigerate for storage or transport.
Common Errors (and Fixes)
Pressing too long or too lightly: If you press too lightly the bars will be crumbly; press too hard and they’ll be overly dense. Aim for firm, even pressure with a spatula or lightly greased hands. Press until the surface is compact but not smashed flat.
Sugar not dissolving: If you speed the heating, you can end up with grainy spots. Keep the heat at medium-low and stir constantly until the sugar visibly dissolves and the mixture is steaming. If a few grains remain, let them melt fully off the heat with gentle stirring for a few more seconds.
Burning the binder: Peanut butter and sugar scorch quickly when the pan is too hot. If you smell anything moving from sweet to bitter, remove it from the heat immediately. Use medium-low heat and patience — this is not the moment to crank the stove.
Chocolate seizing or overheating: Melt the chocolate gently. If using the microwave method, follow the 50% power intervals and stir between bursts. If you see the chocolate starting to clump or steam, stop heating and keep stirring; residual warmth will finish the melt. Water droplets or steam can cause chocolate to seize, so use dry utensils.
Bars too soft after chilling: If the bars aren’t firm after refrigerating, they may not have been pressed firmly enough or the binder ratio was disturbed. Make sure you use the stated amounts and press firmly into the pan before the mixture cools.
How to Make It Lighter
If you want a lighter finish without changing the recipe’s intent, here are practical tweaks that don’t invent new ingredients:
– Spread a thinner layer of melted chocolate rather than a thick coating. It reduces chocolate-per-bite while keeping the flavor profile.
– Cut the bars into smaller pieces. Smaller portions make each serving feel lighter while leaving the recipe intact.
– Chill until very firm, then slice with a sharp knife and store in smaller containers to control portioning. Sometimes the simplest approach is portion control.
Pro Perspective
Work quickly once the corn flakes are coated. The binder sets as it cools, and the difference between an easy press and a crumbly finish can be those first few minutes when the mixture is still warm and malleable.
Temperature control matters. The syrup-peanut butter-sugar mixture needs to be hot and steaming but not boiling; that’s the sweet spot for dissolving sugar without overcooking the peanut butter. If you have an instant-read thermometer, aim for a warm mixture where the sugar has fully dissolved (visual cues and stirring work fine).
When melting chocolate, use a Pyrex measuring cup or a heatproof bowl and low, steady heat. Stirring between short microwave intervals distributes heat and prevents hotspots. If you prefer the stovetop method, use a dry, simmering water bath and keep the bowl above the water — not touching it.
For a neat finish, smooth the chocolate with an offset spatula and refrigerate on a level surface. Uneven chilling or a tilt will give you a sloped chocolate top.
Make-Ahead & Storage
These bars are great for making ahead. Refrigerate them in the pan and take them out to slice when you’re ready to serve. Leftover bars keep well in the refrigerator — covered — for up to a week. The chocolate stays firm and the cereal retains a good crunch while chilled.
If you need to transport them, press the mixture into the pan, chill until firm, then lift the whole slab out on parchment and wrap it well. Keep it cool during transit to avoid melting. For longer storage, you can slice into portions and freeze them in a single layer on a tray until solid, then stack with parchment between layers in an airtight container; thaw in the fridge when you want a treat.
Popular Questions
- Can I use another cereal? The recipe is written for Corn Flakes; the texture and volume are specific to that cereal. Substitutions will change texture and may require adjusting how much cereal you use.
- What if my peanut butter is oily? The recipe specifies “not oily” because an oily peanut butter can separate and affect binder consistency. If yours separates, stir it until homogenous or use a jar that doesn’t have visible oil on top.
- Can I skip the chocolate? You can, but the chocolate does two jobs: flavor and a sealing finish. Without it, the top will be less tidy and slightly more prone to crumble.
- Why refrigerate instead of just letting it set at room temperature? Refrigeration speeds the set and keeps the chocolate and binder firm, especially in warmer kitchens. It also helps the bars cut cleaner.
See You at the Table
These Special K Bars are the kind of recipe that earns repeat requests. They’re straightforward, reliably good, and forgiving when you give them just a touch of care. Make a pan for an after-school snack or a casual get-together — they’ll travel, store, and vanish with equal ease.
If you try a batch, press firmly, melt the chocolate gently, and let them chill fully. Then slice, serve, and enjoy that satisfying crunch. See you at the table — and happy baking.

Special K Bars
Ingredients
Equipment
Method
- Lightly grease a 9×13-inch Pyrex pan (bottom and sides).
- In a large saucepan, combine 1 cup Karo Syrup, 1 cup peanut butter (not oily), and 1 cup sugar.
- Heat the mixture over medium-low heat, stirring constantly, until the sugar is dissolved and the mixture is hot and steaming but not boiling; be careful not to burn it.
- Remove the saucepan from the heat and immediately stir in 4 1/2 cups Corn Flakes until evenly coated.
- Transfer the coated Corn Flakes into the prepared pan and press the mixture firmly and evenly into an even layer (use a spatula or lightly greased hands). Work quickly before it cools and hardens.
- Place 3 cups Nestle semi sweet chocolate chips in a microwave-safe Pyrex measuring cup. Microwave at 50% power in 30-second intervals, stirring well between intervals, until the chocolate is completely melted and smooth. (Alternatively, melt the chocolate in a heatproof bowl set over simmering water, stirring until smooth.)
- Spread the melted chocolate evenly over the pressed Corn Flake layer, smoothing the top with a spatula.
- Refrigerate the pan for about 2 hours, or until the chocolate is set and the bars are firm. Keep refrigerated for storage.