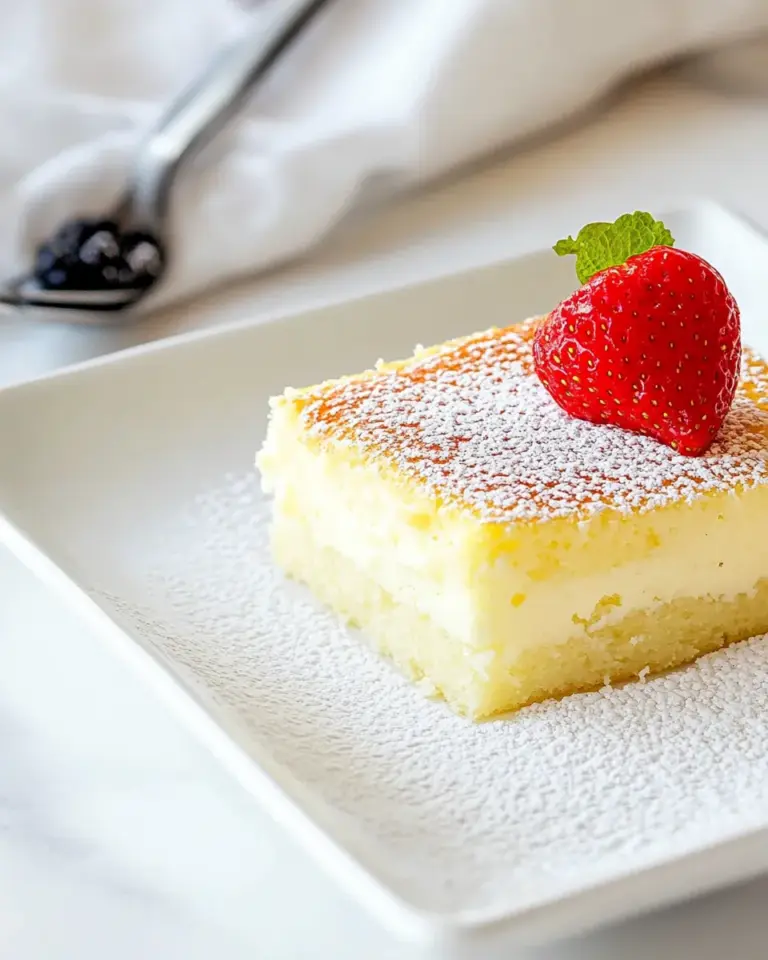
Strawberry Pie Bars
These Strawberry Pie Bars are the kind of dessert that lands at every potluck and disappears first. Think sturdy, buttery base; jammy, bright strawberry filling; and a scatter of tender dough on top, finished with a simple glaze. They’re easy to slice, easy to transport, and they keep well—perfect when you need something that travels and still tastes like you fussed.
I make a pan of these when I want a dessert that serves a crowd without demanding a lot of hands-on time. The recipe relies on pantry-friendly staples and two cans of Lucky Leaf strawberry pie filling, so the fresh strawberry season is a bonus rather than a necessity. The result is comforting and familiar: a cross between a cookie bar and a fruit pie, with a glossy dollop of glaze to cut the sweetness just right.
Below you’ll find everything I use and why, common problems and how to avoid them, and the exact steps to follow. Read the notes for small technique tweaks that make a big difference—then press your pan into the oven and let the scent of baked strawberries fill the kitchen.
The Essentials

Strawberry Pie Bars are straightforward: a buttery, sweet dough pressed into a jelly roll pan, two cans of strawberry pie filling spread across the crust, and the rest of the dough dropped on top in spoonfuls before baking. After cooling, a simple powdered sugar glaze gives a polished finish. The structure relies on a dense, cohesive dough that holds the filling and bakes to golden edges while remaining tender inside.
Timing and temperature are forgiving. Bake time ranges because pan depths and ovens vary, so watch for golden edges and a clean toothpick in the dough (not the filling). Cooling fully in the pan before glazing keeps the topping from running and prevents soggy bars.
Strawberry Pie Bars Cooking Guide
Work with room-temperature butter and eggs for the creamiest dough. When creaming butter and sugar, aim for lightness—this incorporates air for a tender crumb. Pressing two-thirds of the dough into the pan gives a sturdy base; the remaining dough becomes the rustic topping. The pie filling doesn’t need thickening or pre-cooking since it bakes in place and sets as it cools.
Use a jelly roll pan as specified; the shallow rim gives the right thickness. If your pan is smaller or larger, expect changes in bake time and bar thickness. Let the bars cool completely before glazing, or skip the glaze until serving if you need to store them overnight.
Why This Strawberry Pie Bars Stands Out
It’s the balance of textures that makes these bars memorable. The base is dense enough to support the filling but tender to bite through. The canned pie filling gives concentrated, reliably sweet strawberry flavor and a glossy, jam-like consistency that keeps the bars moist without making the dough soggy. The dropped-top bits bake golden and slightly crisp at the edges, creating contrast with the jammy center.
Also, this is one of those recipes that scales well for gatherings. A jelly roll pan makes a large batch with minimal fuss—no rolling, lattice work, or delicate threading. That simplicity is the reason I return to it when I need a reliable crowd-pleaser.
What to Use Instead

Two cans of Lucky Leaf strawberry pie filling are specified because their texture and sweetness match the original intent. If you don’t have those exact cans, any similar-brand strawberry pie filling will work; look for a thick, jam-like consistency rather than a syrupy fruit topping. Avoid thin, watery preserves unless you reduce them first on the stove.
If you prefer a chunkier texture, swap one can for a small jar of strawberry preserves, but mix preserves with a little cornstarch before spreading so the filling won’t run. For a mixed-berry profile, use blueberry or cherry pie filling instead—trade flavors but keep amounts identical.
Kitchen Gear Checklist

Here’s what I use and recommend for making these bars reliably:
- Jelly roll pan (the recipe specifies this; it keeps bars the right thickness).
- Large mixing bowl for creaming butter and sugar.
- Hand mixer or stand mixer for creaming—optional but makes the process faster.
- Measuring cups and spoons for accurate proportions.
- Spatula for pressing dough and spreading filling.
- Toothpick for testing the dough doneness.
- Wire rack for cooling the pan completely before glazing.
Pitfalls & How to Prevent Them
Common issues are underbaked edges, soggy bars, and glaze that runs. Here’s how to avoid each:
- Underbaked edges: Make sure your oven is fully preheated to 350°F and bake until edges are golden. If the center is still soft but edges are dark, reduce temperature by 10–15°F and extend bake time slightly next time.
- Soggy bars: Cool completely in the pan before glazing. If you must store overnight, wait to glaze until serving. Using the right amount of filling (the two cans specified) keeps balance between crust and topping.
- Glaze runs: Let bars cool thoroughly. If glaze still runs, use slightly less milk or add a touch more powdered sugar to thicken it.
Better-for-You Options
If you want lighter choices, consider small substitutions, but be mindful they change texture. Swap half the butter for a neutral-flavored applesauce to lower fat—expect a softer, less golden crust. Reduce sugar by up to 1/3 for less sweetness; the pie filling will still add a lot of sugar, so taste preferences matter.
For a whole-grain tweak, try replacing up to one cup of the flour with whole-wheat pastry flour. The bars will be nuttier and slightly denser. Keep amounts otherwise the same and don’t overwork the dough to maintain tenderness.
Recipe Notes & Chef’s Commentary
Small habits make this recipe easier and more consistent. Measure flour with the spoon-and-level method to avoid dense dough: spoon the flour into the cup and level with a knife instead of scooping directly from the bag. Use room-temperature butter and eggs so the butter creams properly with the sugar; cold butter won’t incorporate air and results will be heavier.
When pressing the dough into the pan, press evenly but don’t compact it aggressively—compact dough can bake tough. Leaving the topping “dropped” by tablespoonfuls creates the classic, rustic look and allows the filling to peek through. If you prefer full coverage, crumble the remaining dough and spread it more closely, but accept a slightly different texture.
Keep It Fresh: Storage Guide

These bars keep well and are forgiving. Store cooled, glazed bars in an airtight container at room temperature for 1–2 days. If you need to keep them longer, refrigerate up to 5 days. If you’ll be serving the next day, don’t glaze until just before serving to avoid sogginess—this keeps the top crisp.
For freezing: cool completely, wrap the pan portion tightly in plastic wrap and then foil, or slice into bars and freeze layered with parchment paper. Thaw overnight in the refrigerator and add the glaze when you’re ready to serve.
Quick Questions
Q: Can I use fresh strawberries? A: Fresh strawberries can be used if cooked down into a thick jam first; straight fresh berries will release too much juice during baking and make the bars soggy.
Q: Can I halve the recipe? A: Yes, halve ingredients and use a smaller pan. Bake time will change—check starting at 30 minutes.
Q: Can I omit the almond extract? A: Yes. The almond extract is a background note—you can omit it or replace it with an equal amount of additional vanilla if you prefer a simpler flavor.
Ingredients
- 1 cup butter, softened — provides the rich base and tender crumb; use room-temperature butter for best creaming.
- 2 cups sugar — sweetens the dough and helps with browning; measure accurately.
- 4 eggs — bind and enrich the dough; add one at a time as instructed for even mixing.
- 1 teaspoon vanilla extract — adds warm, sweet aroma that enhances the filling.
- 1/4 teaspoon almond extract — small amount gives a nutty note that complements strawberry; optional if allergic.
- 3 cups flour — the structure of the crust and topping; spoon and level for accuracy.
- 1 teaspoon salt — balances sweetness and enhances flavor.
- 2 cans (21 ounce) Lucky Leaf strawberry pie filling — the jammy, glossy strawberry center; the specified brand/amount gives the expected texture.
- Glaze — a simple sweet finish to brighten the bars; add just before serving if storing overnight.
- 1 cup powdered sugar — base of the glaze; sift if lumpy for a smooth finish.
- 1/2 teaspoon vanilla extract — adds depth to the glaze.
- 1/2 teaspoon almond extract — echoes the dough’s flavor; optional.
- 2 tablespoons milk — thins the glaze to a drizzleable consistency; use more or less to adjust thickness.
Ready, Set, Cook
- Preheat oven to 350°F. Grease a jelly roll pan.
- In a large bowl, cream 1 cup softened butter and 2 cups sugar until light and fluffy.
- Add 4 eggs one at a time, beating after each addition. Stir in 1 teaspoon vanilla extract and 1/4 teaspoon almond extract.
- Add 3 cups flour and 1 teaspoon salt; mix until a thick, cohesive dough forms.
- Press about two-thirds of the dough evenly into the bottom of the greased jelly roll pan to form a base; leave the remaining dough in the bowl for the topping.
- Spread the contents of both 21-ounce cans of Lucky Leaf strawberry pie filling evenly over the dough base.
- Drop the reserved dough by tablespoonfuls over the strawberry filling, leaving some filling exposed between the pieces of dough.
- Bake at 350°F for 45–60 minutes, or until the edges are golden and a toothpick inserted into the dough (not the filling) comes out clean. Remove from oven and cool completely in the pan.
- For the glaze, whisk together 1 cup powdered sugar, 1/2 teaspoon vanilla extract, 1/2 teaspoon almond extract, and 2 tablespoons milk until smooth.
- Drizzle the glaze over the cooled bars. If serving the next day, wait to add the glaze until just before serving to prevent the bars from becoming soggy.
Slice into bars and serve. These hold up well on a dessert tray and pair nicely with plain whipped cream or a scoop of vanilla ice cream if you want to dress them up. Enjoy.

Strawberry Pie Bars
Ingredients
Equipment
Method
- Preheat oven to 350°F. Grease a jelly roll pan.
- In a large bowl, cream 1 cup softened butter and 2 cups sugar until light and fluffy.
- Add 4 eggs one at a time, beating after each addition. Stir in 1 teaspoon vanilla extract and 1/4 teaspoon almond extract.
- Add 3 cups flour and 1 teaspoon salt; mix until a thick, cohesive dough forms.
- Press about two-thirds of the dough evenly into the bottom of the greased jelly roll pan to form a base; leave the remaining dough in the bowl for the topping.
- Spread the contents of both 21-ounce cans of Lucky Leaf strawberry pie filling evenly over the dough base.
- Drop the reserved dough by tablespoonfuls over the strawberry filling, leaving some filling exposed between the pieces of dough.
- Bake at 350°F for 45–60 minutes, or until the edges are golden and a toothpick inserted into the dough (not the filling) comes out clean. Remove from oven and cool completely in the pan.
- For the glaze, whisk together 1 cup powdered sugar, 1/2 teaspoon vanilla extract, 1/2 teaspoon almond extract, and 2 tablespoons milk until smooth.
- Drizzle the glaze over the cooled bars. If serving the next day, wait to add the glaze until just before serving to prevent the bars from becoming soggy.