The Best Air Fryer Pizza
I make pizza at home more than I probably should admit. It’s quick, forgiving, and when you’ve got an air fryer, it becomes a weeknight staple that still feels special. This method gives you a crisp, golden crust and melty cheese with very little fuss and almost no babysitting.
No oven preheating, no stone to warm up, and you can get dinner on the table in under 15 minutes once the fryer is hot. The approach below is straightforward: roll, sauce, air-fry, top with cheese, finish, and serve. It’s practical cooking that still tastes like you ordered in from a great pizzeria.
Stick to the simple ingredient list and follow the step-by-step instructions exactly as written for the best results. I’ll also walk through common problems, quick fixes, what gear helps, and how to store leftovers so you can recreate this again and again.
Ingredients
- 4 homemade pizza dough balls, or store-bought, about 350g/12oz each — choose dough that will roll thin enough to fit your basket; room temperature dough is easier to stretch.
- 500g homemade pizza sauce, or store-bought — enough sauce for four small pizzas; a thin, even layer prevents a soggy center.
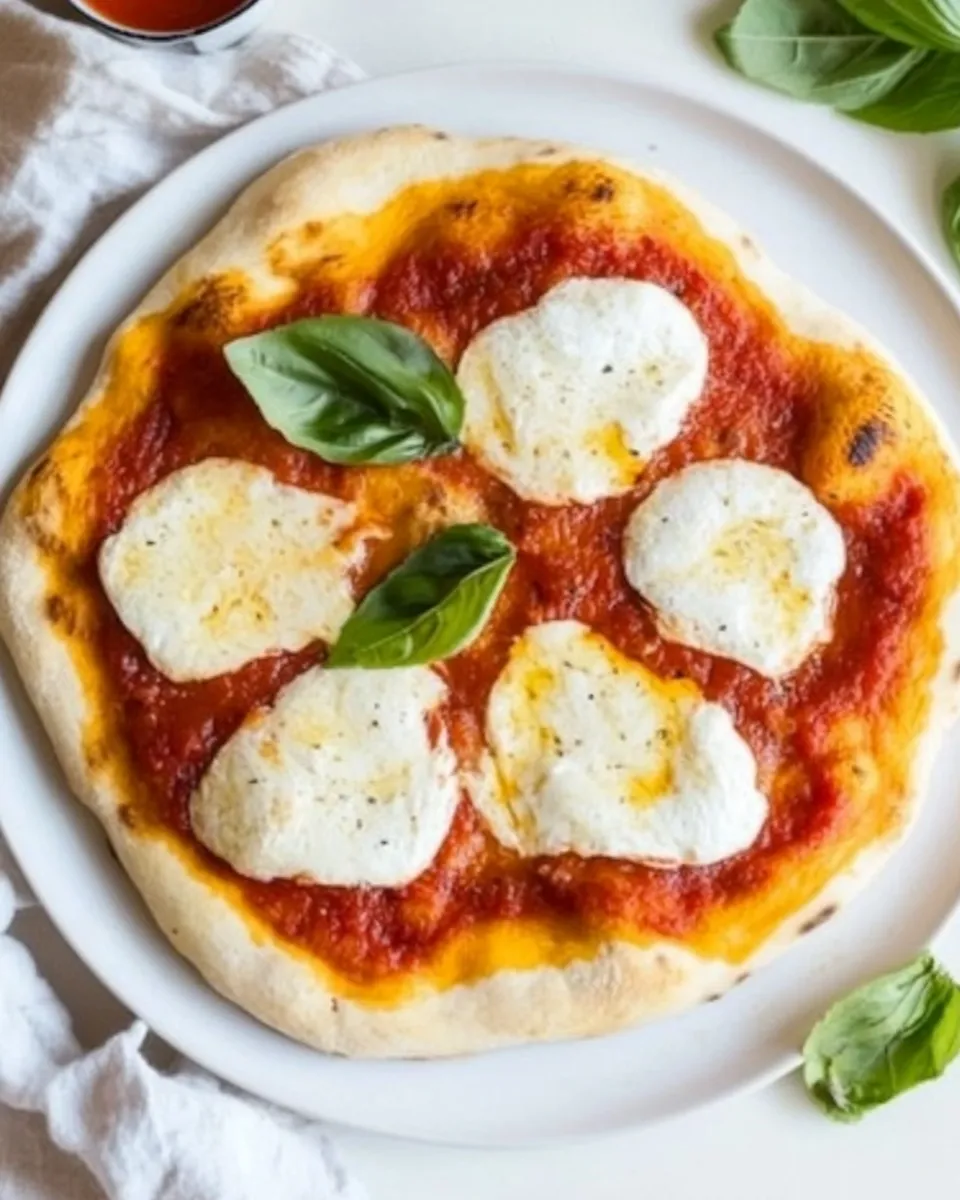
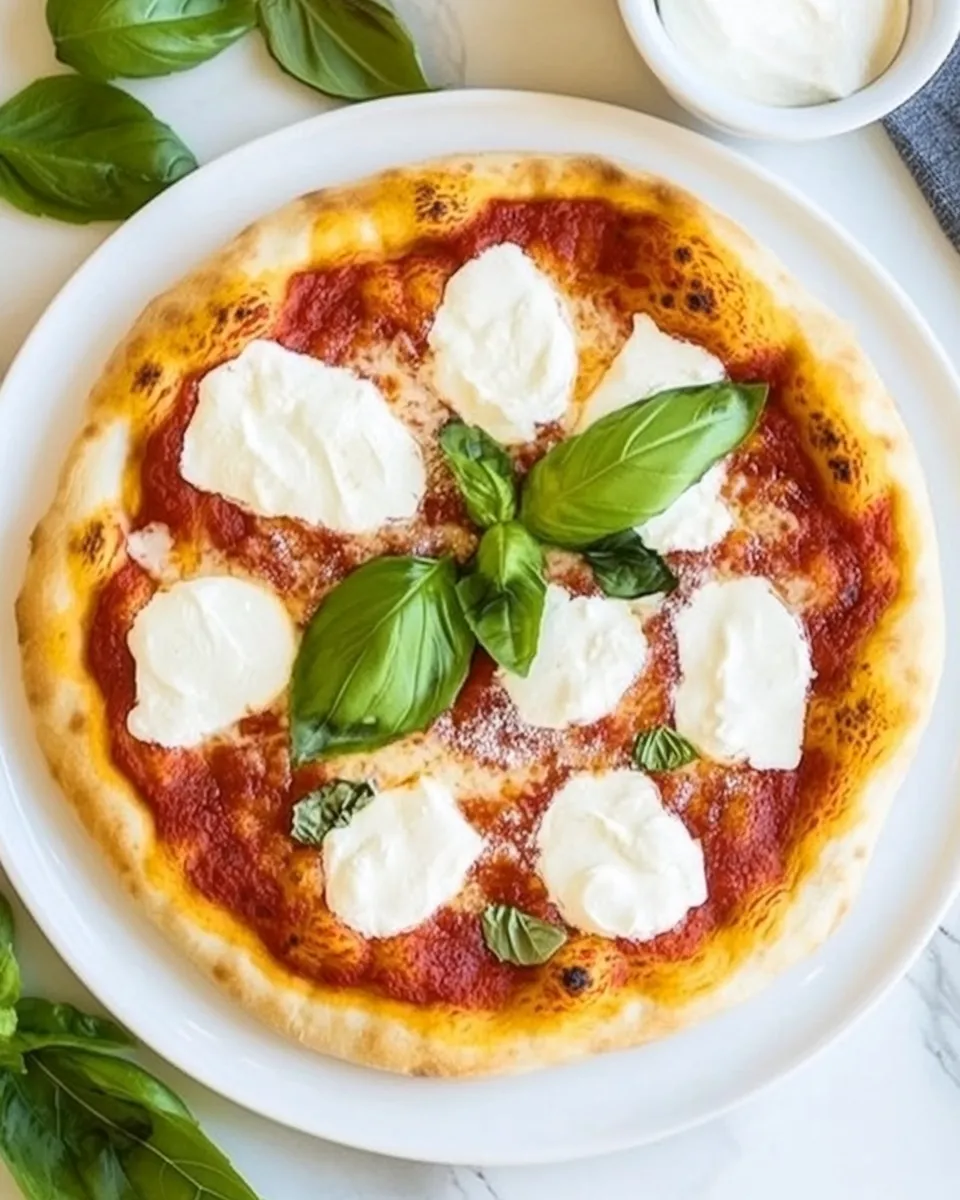
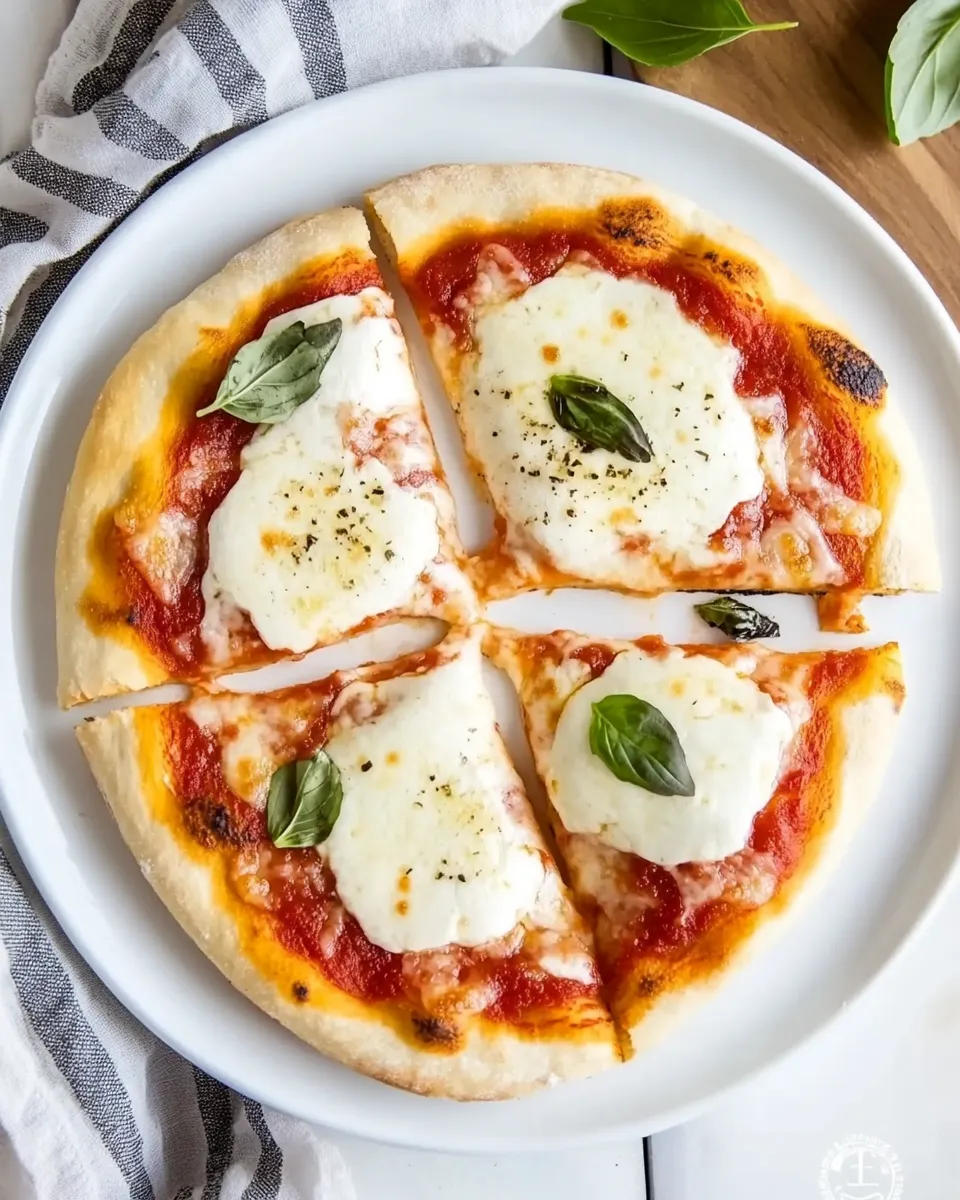
- 4 mozzarella or burrata cheese — tear or cut into pieces for even melting; burrata adds creaminess if you prefer.
- basil leaves — added at the end for freshness and aroma; don’t cook them or they’ll lose color and brightness.
What You’ll Gather
Gather the ingredients above and set up a small work station: a lightly floured surface for rolling, your sauce in a bowl with a spoon, the cheese torn into pieces, and a plate or parchment nearby for finished pies. Work efficiently — the air fryer cooks fast, so have everything ready before you place the first pizza inside.
Make sure your air fryer basket is clean and dry. If your basket tends to stick, line it with a piece of parchment (cut to size) or spray very lightly with high-smoke-point oil. You’ll also want a thin, flexible spatula to remove the pizza without tearing the crust.
Cook Air Fryer Pizza Like This
- Preheat your air fryer to 180°C (350°F).
- On a clean, lightly floured surface, roll each dough ball into a pizza base just large enough to fit your air fryer basket, leaving a small border for the crust.
- Divide the 500 g pizza sauce evenly among the four bases and spread each sauce layer on its base, leaving the border uncovered.
- If your air fryer basket only fits one pizza, cook the pizzas one at a time; otherwise arrange as many as fit without overlapping.
- Place a prepared pizza in the air fryer basket and cook at 180°C for about 8 minutes, or until the crust is golden.
- While the pizza cooks (or just after removing it), tear or cut one mozzarella or burrata into pieces and place the pieces over the pizza.
- Return the pizza to the air fryer and cook an additional 1–2 minutes, or until the cheese has melted.
- Remove the pizza from the air fryer with a spatula, top with basil leaves, allow to cool slightly, and serve.
Why Cooks Rave About It
The air fryer concentrates heat and circulates it quickly, so pizza gets a crisp exterior and a soft interior without drying out. The short initial cook firms the dough and develops a golden color. A brief return to the fryer after adding cheese melts it perfectly without overcooking the base.
It’s fast. Most household ovens take longer to heat, and a thin, home-rolled base can easily go from perfect to overdone while you wait. The air fryer takes the guesswork out of timing for single-serving pies. And because you can cook pizzas one at a time, you control doneness for each person at the table.
Ingredient Swaps & Substitutions
This recipe intentionally keeps the ingredient list tight. Here are practical switches you can make while staying within the provided ingredients:
- Select between homemade pizza dough balls or store-bought dough depending on time and comfort; both will work with this method.
- Use homemade pizza sauce if you want to control seasoning; store-bought saves time and gives consistent results.
- Choose mozzarella for classic stretch and mild flavor, or burrata for a creamier, richer finish; either is added after the first cook to avoid scorching.
- Basil leaves are used as written; add them only after cooking to preserve color and aroma.
Kitchen Gear Checklist
- Air fryer with a basket large enough to hold the dough you plan to roll.
- Thin, flexible spatula for removing cooked pizzas from the basket.
- Rolling pin or your hands for stretching dough on a lightly floured surface.
- Spoon or small ladle to spread the sauce evenly.
- Small bowls or plates to hold torn cheese and basil for quick assembly.
Things That Go Wrong
Even this forgiving method can hit snags. The most common issues are uneven cooking, soggy centers, and sticking to the basket.
- If the crust is pale after 8 minutes, your air fryer may run cool or you rolled the dough too thick. Thin the base slightly and increase the initial cook by a minute if needed.
- Soggy centers usually mean too much sauce or an undercooked base. Spread sauce thinly and ensure the base has crisped before adding cheese.
- If your pizza sticks, use a small square of parchment under the dough or a very light spray of oil. Avoid heavy sprays—they can smoke in some fryers.
Seasonal Spins
Seasonality is limited by the ingredient list here, but you can still make small, seasonal shifts that rely on the same core items. If you make your pizza sauce from scratch, adjust the herbs or density to match the season — a thinner sauce in summer, a heartier, slower-simmered sauce in winter. Swap between mozzarella and burrata to change the pizza’s feel: burrata feels luxurious in cooler months; mozzarella is bright and familiar year-round.
Seasonal basil (if you grow it or buy local) will always taste best fresh. Use the brightest, most tender leaves as a final flourish — they make the pizza smell like summer even on a cold night.
What Could Go Wrong
Let’s be very practical: sometimes the fryer door gets opened too often, or you overload the basket. Opening the basket mid-cycle cools the unit and can lengthen cooking time unpredictably. Try to resist checking until the final minute unless you’re troubleshooting.
Overcrowding is another trap. The recipe mentions cooking pizzas one at a time if your basket only fits one. Do that. Overlapping dough steams instead of crisps, and you’ll lose the texture that makes this method sing.
Storing Tips & Timelines
Cooked pizzas store well for short periods. Keep leftovers in an airtight container or wrapped tightly in the refrigerator and eat within 2–3 days for best texture. Reheat in the air fryer at a lower temperature — around 160°C (320°F) — for 3–5 minutes to re-crisp the crust and gently warm the cheese. Avoid microwaves unless you don’t mind a softer crust.
If you want to prep ahead, portion the dough and keep it refrigerated or frozen according to the dough recipe you used. Thaw frozen dough overnight in the refrigerator before bringing it to room temperature to roll. Sauces keep for several days in the fridge; cheese should be used promptly once opened for the best melt.
Your Questions, Answered
Q: Can I assemble pizzas completely and then cook them? A: You can, but the sauce-to-dough balance matters. If the sauce is heavy, it can make the base soggy before the crust crisps. It’s safer to spread sauce thinly and add cheese after the initial cook, as directed.
Q: What if my air fryer is small? A: Cook one pizza at a time. It’s quick, and you can keep finished pizzas warm in a low oven or covered on a warmed plate while you finish the batch.
Q: Do I need to preheat? A: Yes. Preheating to 180°C (350°F) ensures the crust sees immediate, focused heat and crisps properly within the 8-minute initial cooking time.
Bring It Home
Follow the method here and you’ll have reliably delicious, single-serve pizzas without complicated techniques. The two-step cook — initial crisp, then low finishing heat for cheese — is the key. Keep the ingredient list simple, prepare everything before you start, and respect the basket capacity of your air fryer.
Make this your go-to for nights when you want something homemade but quick. Once you’ve made Air Fryer Pizza a few times, you’ll know how thin to roll your dough and how much sauce your fryer prefers. That little bit of practice gets you to perfect every time.
The Best Air Fryer Pizza
Ingredients
Equipment
Method
- Preheat your air fryer to 180°C (350°F).
- On a clean, lightly floured surface, roll each dough ball into a pizza base just large enough to fit your air fryer basket, leaving a small border for the crust.
- Divide the 500 g pizza sauce evenly among the four bases and spread each sauce layer on its base, leaving the border uncovered.
- If your air fryer basket only fits one pizza, cook the pizzas one at a time; otherwise arrange as many as fit without overlapping.
- Place a prepared pizza in the air fryer basket and cook at 180°C for about 8 minutes, or until the crust is golden.
- While the pizza cooks (or just after removing it), tear or cut one mozzarella or burrata into pieces and place the pieces over the pizza.
- Return the pizza to the air fryer and cook an additional 1–2 minutes, or until the cheese has melted.
- Remove the pizza from the air fryer with a spatula, top with basil leaves, allow to cool slightly, and serve.
Notes
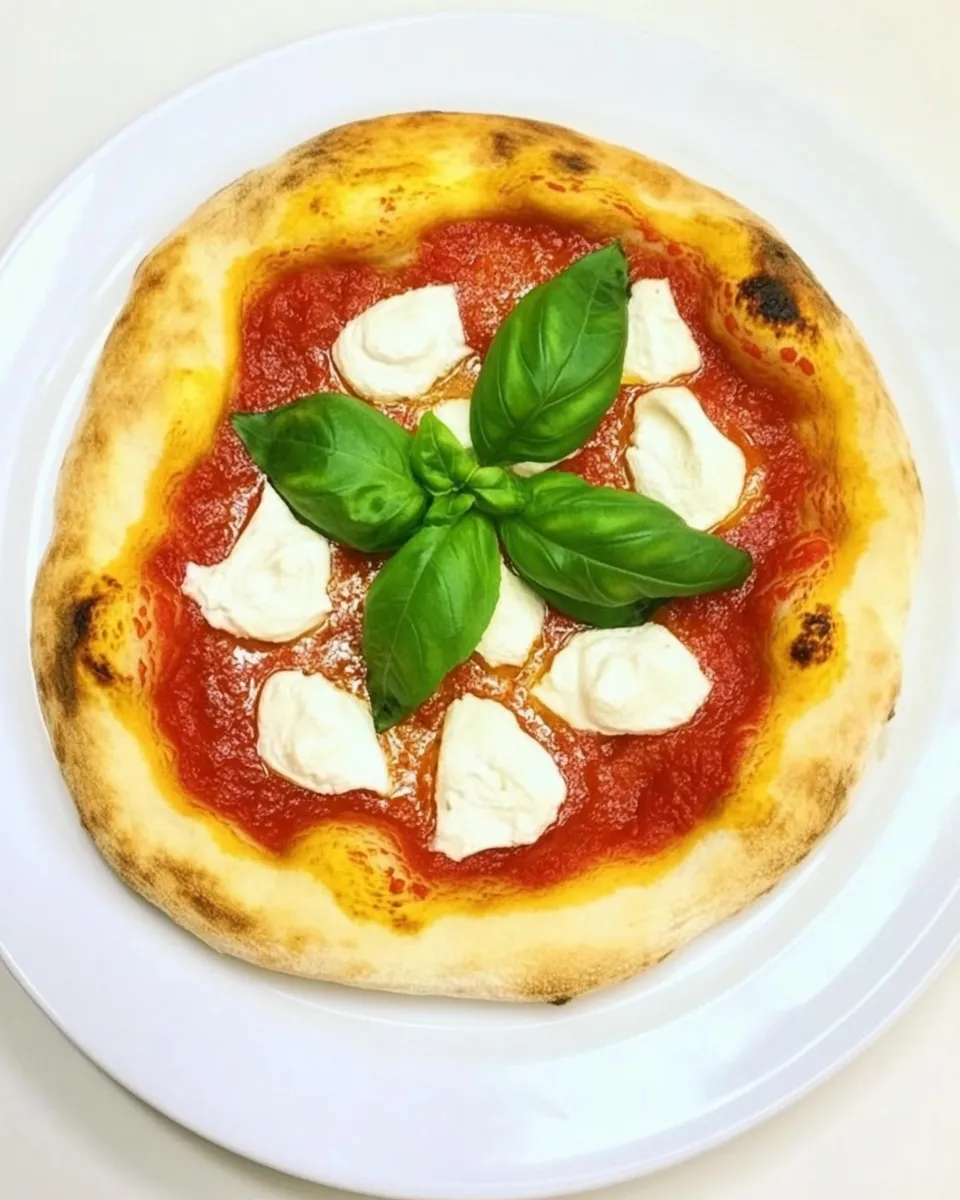
For a thin base with an airy crust (like the Neapolitan pizza) roll the dough very thin or up to ¼ inch.
This is optional, but I like to place a small round sheet of baking paper under the pizza base before transferring it to the air fryer.
You canprecook the pizza base for 3 minutesif you like, then add tomato sauce and all the toppings and continue to cook the pizza for further 6 minutes.
After you have baked your pizza, you can freeze the leftovers.
Place leftover pizzas on a baking sheet, freeze for 30 minutes, then transfer in ziplock bags and store in the freezer for up to 3 months.