The Best and The Easiest Molten Chocolate Lava Cakes
These molten chocolate lava cakes are the dessert I reach for when I want something that reads fancy but comes together in about twenty minutes. They’re compact, deeply chocolatey, and reliably gooey at the center — the sort of dessert that makes a simple weeknight feel like a celebration without a lot of fuss.
I test this recipe because timing and temperature matter. Small ramekins, a hot oven, and a tiny bit of patience at the end give you the dramatic molten center every single time. You don’t need special technique; follow the steps and you’ll get restaurant-style results at home.
Below you’ll find a shopping list, an ingredient breakdown, precise step-by-step instructions straight from the recipe, and practical notes: what to avoid, simple swaps, and how to serve these while the centers are perfectly warm. Let’s get to it.
Shopping List
- Dark chocolate or bittersweet baking chocolate — buy a quality bar or baking chocolate (2 ounces required).
- Unsalted butter — 1/2 stick (¼ cup).
- Confectioners’ sugar — ½ cup.
- Eggs — at least 1 large egg plus 1 additional yolk.
- All-purpose flour — 3 tablespoons.
- Instant espresso granules (optional) — 1 teaspoon, if you want to enhance chocolate flavor.
- Ice cream and hot fudge (optional) — for serving, if you prefer.
- Ramekins (3–4 inches / ~4-ounce) and a baking sheet — equipment to have on hand.
Molten Chocolate Lava Cakes — Do This Next
Follow these steps exactly in order for the best results.
- Preheat oven to 425°F (220°C). Spray two ramekins (about 3–4 inches in diameter or about 4 ounces each) with cooking spray and place them on a baking sheet; set aside.
- Place 2 ounces dark or bittersweet baking chocolate and 1/4 cup (1/2 stick) unsalted butter in a medium microwave-safe bowl.
- Microwave on high for 1 minute. Remove and whisk until smooth. If the mixture is not fully melted, return to the microwave in 15-second increments, whisking between intervals, until completely smooth.
- Add 1/2 cup confectioners’ sugar to the melted chocolate mixture and whisk until combined.
- Add 1 large egg and 1 egg yolk (discard or save the egg white for another use) and whisk until the batter is smooth and glossy.
- Add 3 tablespoons all-purpose flour and 1 teaspoon instant espresso granules (optional). Stir gently until just combined—do not overmix.
- Divide the batter evenly between the two prepared ramekins.
- Bake on the baking sheet in the preheated oven for about 12 minutes, or until the edges are set and the centers are still soft and slightly jiggly. Baking time may vary with oven and ramekin size; check at 10 minutes and adjust as needed.
- Remove the baking sheet from the oven and let the cakes cool in the ramekins for about 1 minute.
- Run a small knife around the inner edge of each ramekin to loosen the cakes.
- Invert each ramekin onto a serving plate and gently lift to release the cake.
- Serve immediately, optionally topped with ice cream and hot fudge. Cakes are best warm and fresh.
Ingredients
- 2 ounces dark chocolate or bittersweet baking chocolate — I used Trader Joe’s Dark Chocolate Bar; I prefer bars or baking chocolate to chocolate chips.
- ¼ cup unsalted butter — 1/2 of 1 stick; melts with the chocolate for a glossy batter.
- ½ cup confectioners’ sugar — sweetens and helps set the edges while keeping the center soft.
- 1 large egg + 1 egg yolk — discard white or save for another use; eggs provide structure and silkiness.
- 3 tablespoons all-purpose flour — just enough to hold the cake without drying the center.
- 1 teaspoon instant espresso coffee granules — optional but recommended; enhances the chocolate flavor without tasting like coffee.
- ice cream for serving — optional but recommended for contrast in temperature and texture.
- hot fudge for serving — homemade or storebought, optional but recommended.
Why Cooks Rave About It
These lava cakes deliver big payoff for very little effort. The method is forgiving: you melt chocolate and butter together, whisk in sugar and eggs, fold in a few spoonfuls of flour, and bake. No delicate folding or tempering. The result is a rich crust with a molten center that looks and tastes indulgent but doesn’t require complicated pastry skills.
People rave because the texture is dramatic and immediate. Serve it warm and the center spills out. Add a scoop of cold vanilla ice cream and the contrasts — hot and cold, dense and creamy — make a simple dessert feel thoughtful and special.
Swap Guide

This recipe already includes minimal, purposeful ingredients. When the recipe lists an option, use it; otherwise stick to what’s listed.
- You can use either dark or bittersweet baking chocolate — both are listed and interchangeable at the 2-ounce quantity.
- The recipe notes a preference for bars or baking chocolate over chips; choose a bar if you prefer that smoother melt.
- Instant espresso granules are optional — leave them out if you don’t have them. They only enhance, they don’t transform the basic chocolate flavor.
- Ice cream and hot fudge are optional serving items; omit either or both if you want a simpler presentation.
Hardware & Gadgets
- Ramekins (3–4 inches / ~4 ounces) — two small ones, as specified in the steps; size affects bake time and center consistency.
- Baking sheet — to hold the ramekins in the oven and catch any spills.
- Microwave-safe bowl — for melting chocolate and butter quickly and evenly.
- Whisk or fork — to combine melted chocolate, sugar, and eggs until glossy.
- Measuring cups and spoons — the recipe uses small measures; accurate teaspoons and tablespoons help.
- Small knife — for loosening the cakes before inverting as directed.
Steer Clear of These
- Do not overbake. The whole trick is set edges and a soft, jiggly center. If yours pull away or look fully set in the middle, they’re likely overbaked.
- Don’t skip greasing the ramekins. A light spray or brush of butter ensures the cake releases cleanly after that brief cool-down.
- Avoid overmixing once you add the flour. Stir just until the flour disappears; overmixing can make the texture dense instead of tender with a molten core.
- Don’t skip the minute of cooling. That short rest helps the cake exterior firm enough to release without collapsing the center.
Make It Diet-Friendly
Trim calories without inventing ingredients by adjusting portions and serving choices included in the recipe: serve one small cake split between two people, or skip the hot fudge and ice cream. The cakes are already small (about 4 ounces each) and meant to be rich; a single cake makes for a satisfying portion for most people.
Because the recipe is compact, controlling portion size and toppings is the simplest way to make it lighter while keeping the same steps and ingredients.
What Could Go Wrong
Common issues are simple to troubleshoot.
- Centers not molten: either they were overbaked or your ramekins are larger/deeper than specified. Check at 10 minutes and trust the jiggle.
- Cakes won’t release: likely insufficient greasing or not loosening the edges with a knife. Run the knife carefully around the interior edge before inverting.
- Chocolate seizing or grainy batter: if the chocolate cools before it fully melts with butter, rewarm gently in 15-second microwave bursts and whisk until glossy.
- Batter too thin or too thick: if ingredients aren’t measured, especially flour, the balance changes. Use the exact measures provided for consistent results.
Prep Ahead & Store
These cakes are best finished and served warm, right after baking, so I don’t recommend baking and storing. However, you can prepare the batter ahead and keep it in the ramekins in the refrigerator for a few hours. If you do that, allow a minute or two extra in the oven since the batter will be cold when it goes in.
Leftovers after baking will lose that molten center quality as they cool. If you end up with cold cakes, a short warm-up in a 300°F oven for a few minutes or a brief microwave zap can restore warmth, but the texture won’t be exactly the same as freshly baked.
Frequently Asked Questions
How long should I bake them? The recipe specifies about 12 minutes at 425°F (220°C), but ovens and ramekin sizes vary. Start checking at 10 minutes: you want set edges and a slightly jiggly center.
Can I make more than two cakes? Yes, scale the batter and use more ramekins. Keep an eye on bake times; larger or deeper ramekins will need more time, smaller ones less.
What does the espresso granules do? The recipe includes 1 teaspoon instant espresso granules as optional. They intensify the chocolate flavor without making the cakes taste like coffee.
Can I melt chocolate on the stovetop instead of the microwave? The instructions use a microwave for speed, but you can melt chocolate and butter together in a heatproof bowl set over barely simmering water (double boiler) if you prefer. Return to microwave guidance only as a timed option in the original steps.
Serve & Enjoy
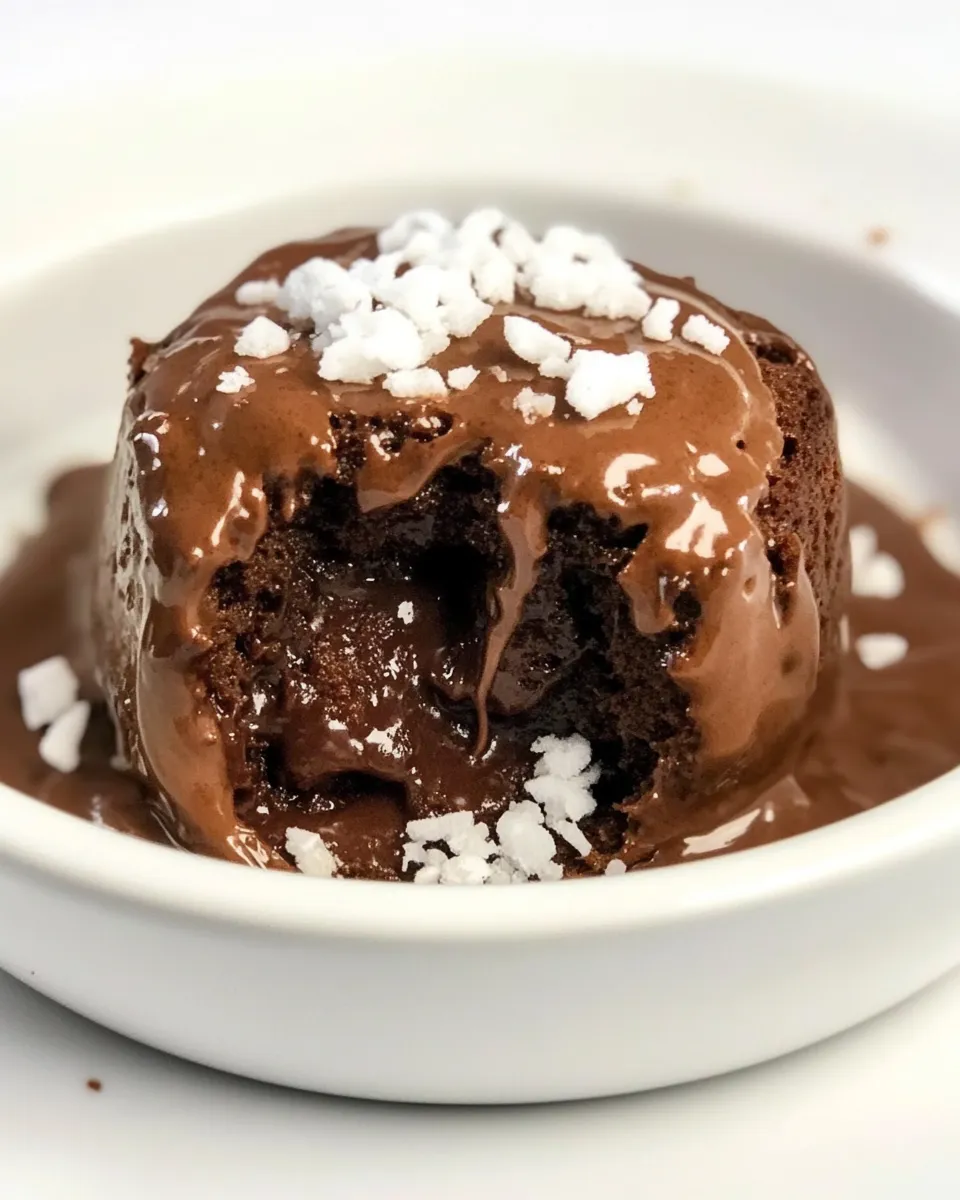
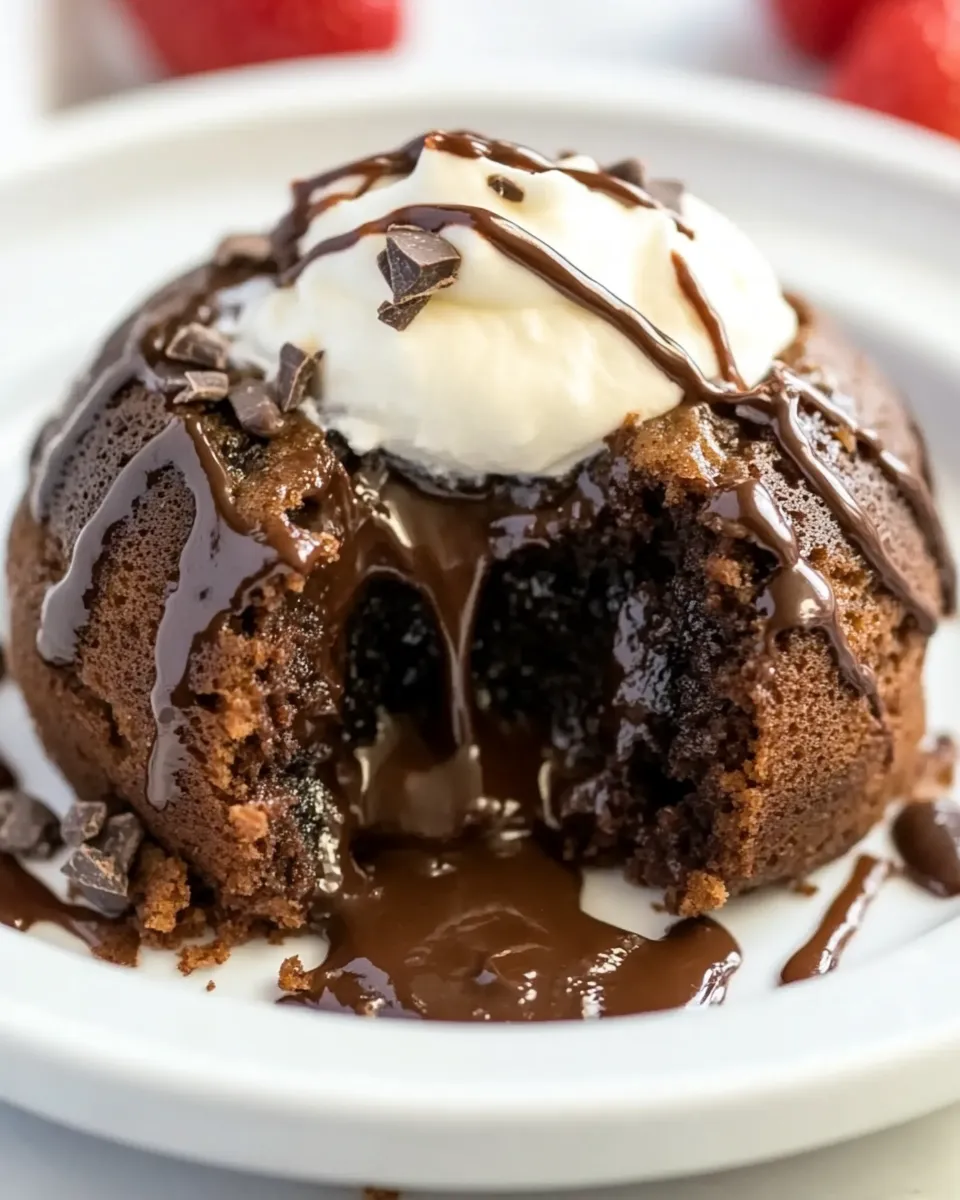
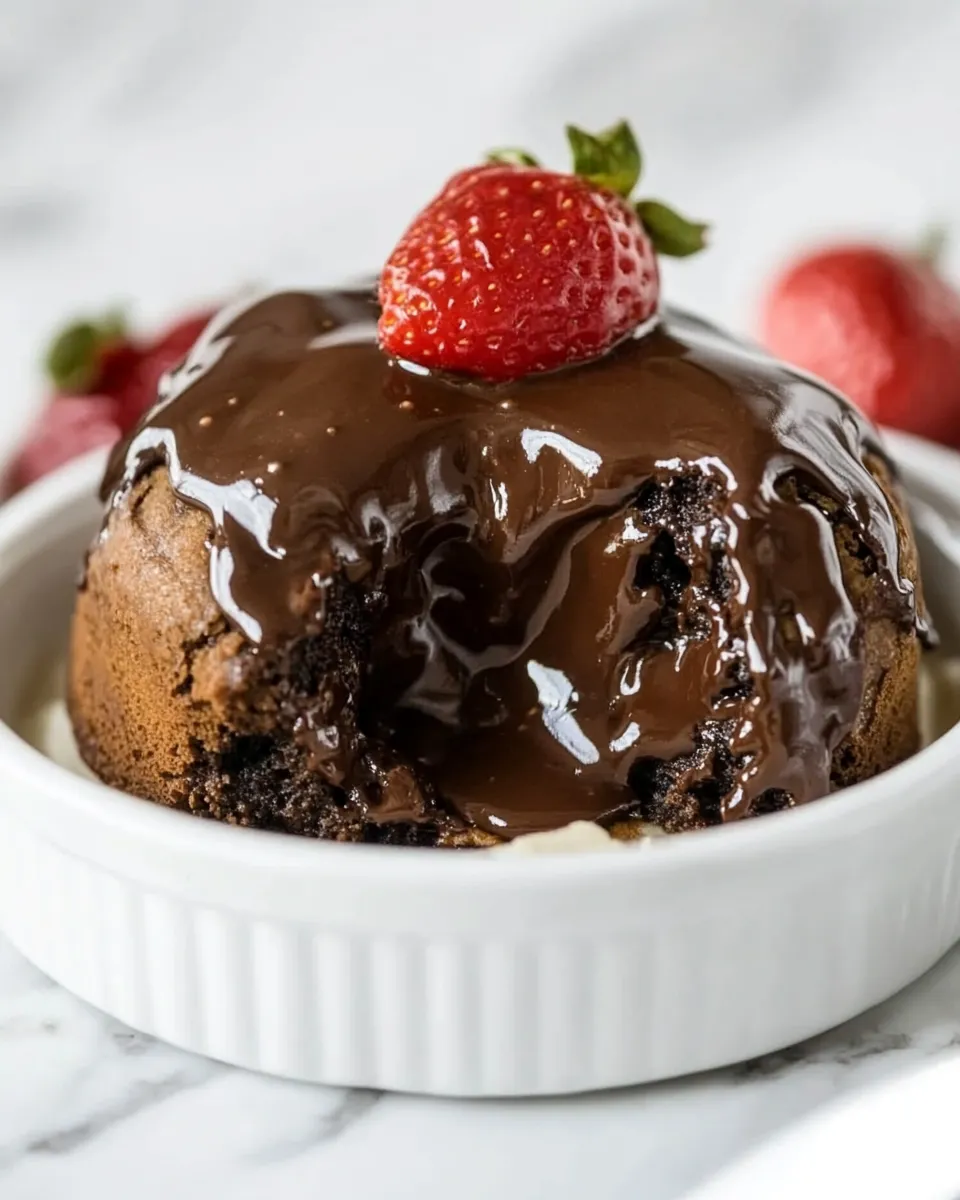
Invert the ramekin, and watch the molten center spill out. Serve immediately with a scoop of vanilla ice cream and a drizzle of hot fudge if you like — both are optional but recommended in the ingredients. The contrast of temperatures and textures is why this dessert is beloved.
Keep presentation simple: a dusting of confectioners’ sugar, a tiny sprinkle of flaky salt, or a fresh berry on the side can elevate the plate without masking the chocolate. Most important: serve while hot. The center hardens as the cakes cool, and that first spoonful while it’s still flowing is the whole point.
The Best and The Easiest Molten Chocolate Lava Cakes
Ingredients
Equipment
Method
- Preheat oven to 425°F (220°C). Spray two ramekins (about 3–4 inches in diameter or about 4 ounces each) with cooking spray and place them on a baking sheet; set aside.
- Place 2 ounces dark or bittersweet baking chocolate and 1/4 cup (1/2 stick) unsalted butter in a medium microwave-safe bowl.
- Microwave on high for 1 minute. Remove and whisk until smooth. If the mixture is not fully melted, return to the microwave in 15-second increments, whisking between intervals, until completely smooth.
- Add 1/2 cup confectioners’ sugar to the melted chocolate mixture and whisk until combined.
- Add 1 large egg and 1 egg yolk (discard or save the egg white for another use) and whisk until the batter is smooth and glossy.
- Add 3 tablespoons all-purpose flour and 1 teaspoon instant espresso granules (optional). Stir gently until just combined—do not overmix.
- Divide the batter evenly between the two prepared ramekins.
- Bake on the baking sheet in the preheated oven for about 12 minutes, or until the edges are set and the centers are still soft and slightly jiggly. Baking time may vary with oven and ramekin size; check at 10 minutes and adjust as needed.
- Remove the baking sheet from the oven and let the cakes cool in the ramekins for about 1 minute.
- Run a small knife around the inner edge of each ramekin to loosen the cakes.
- Invert each ramekin onto a serving plate and gently lift to release the cake.
- Serve immediately, optionally topped with ice cream and hot fudge. Cakes are best warm and fresh.
Notes
Storage:
Cakes are best served warm from the oven but will keep airtight at room temp for up to 2-3 days or in the refrigerator for up to 4-5 days.