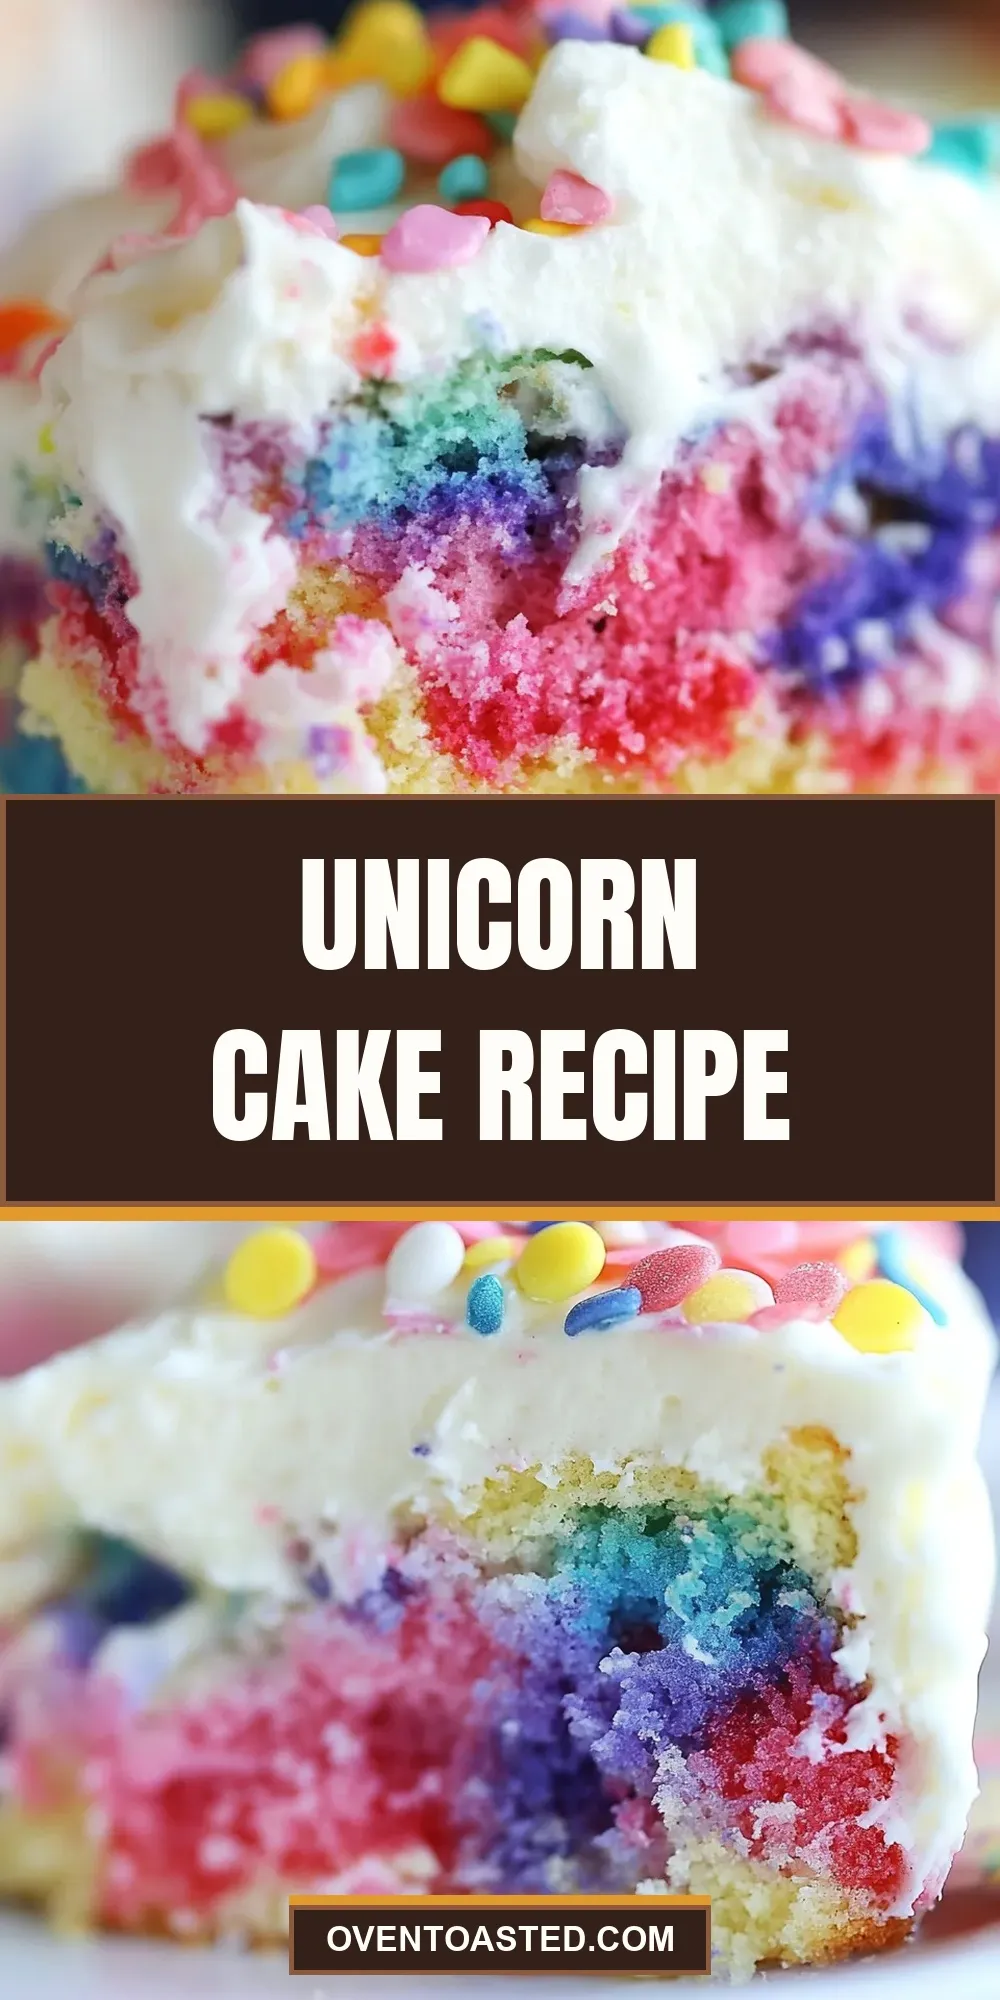
Unicorn Cake Recipe
I make this Unicorn Cake whenever someone asks for something colorful, festive and relatively fuss-free. It looks like a party centerpiece but comes together from pantry staples and a few small tricks. If you want a showstopper that doesn’t demand advanced baking skills, this is it.
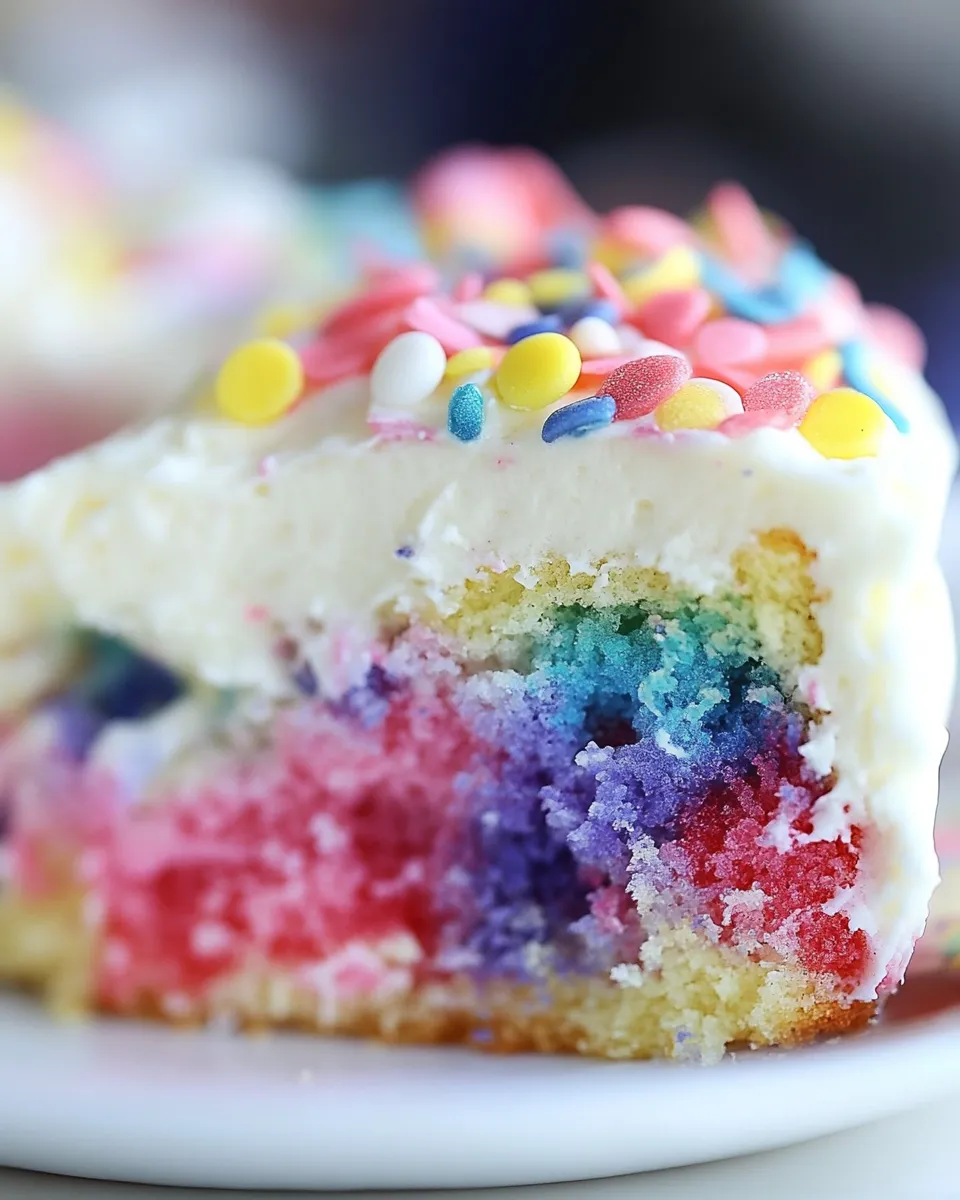
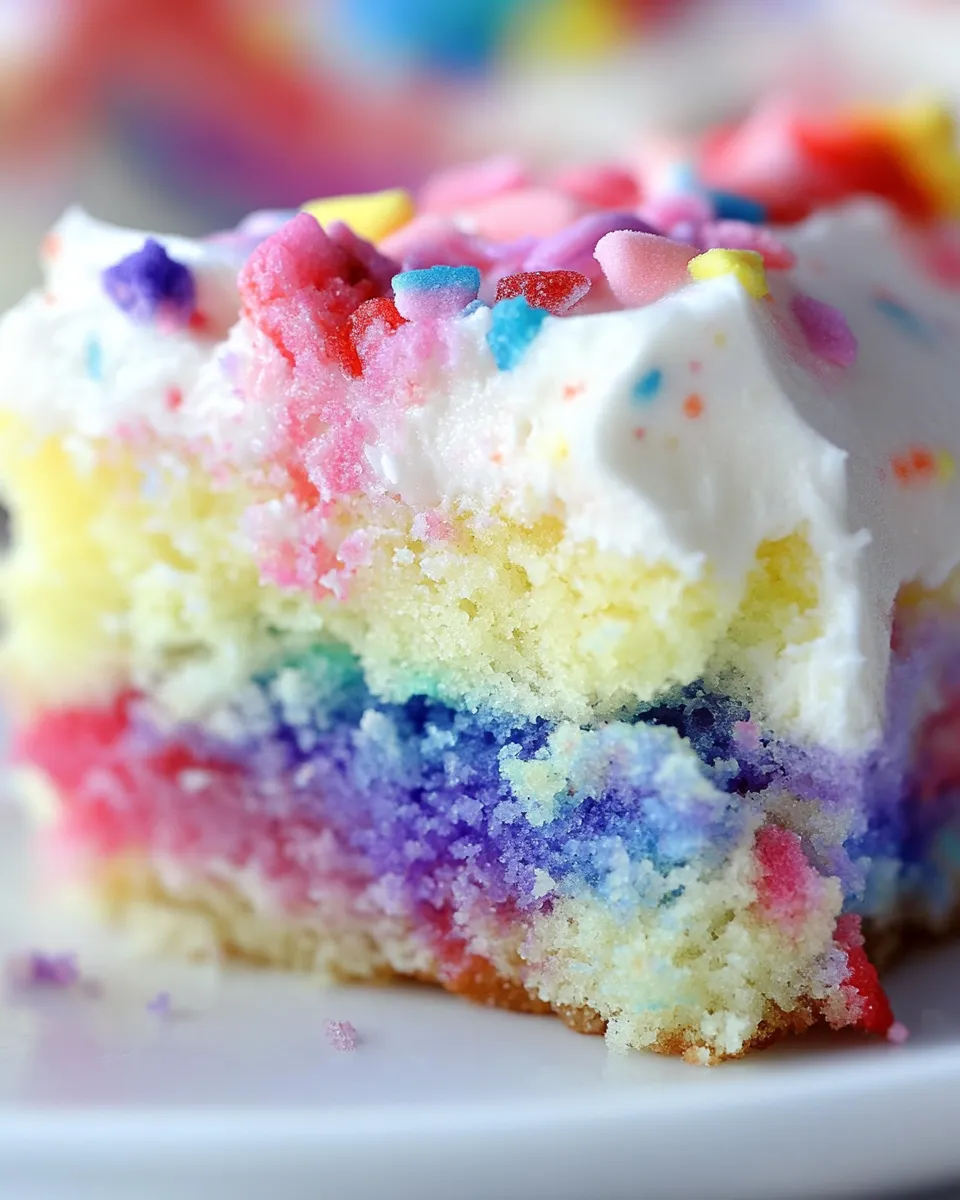
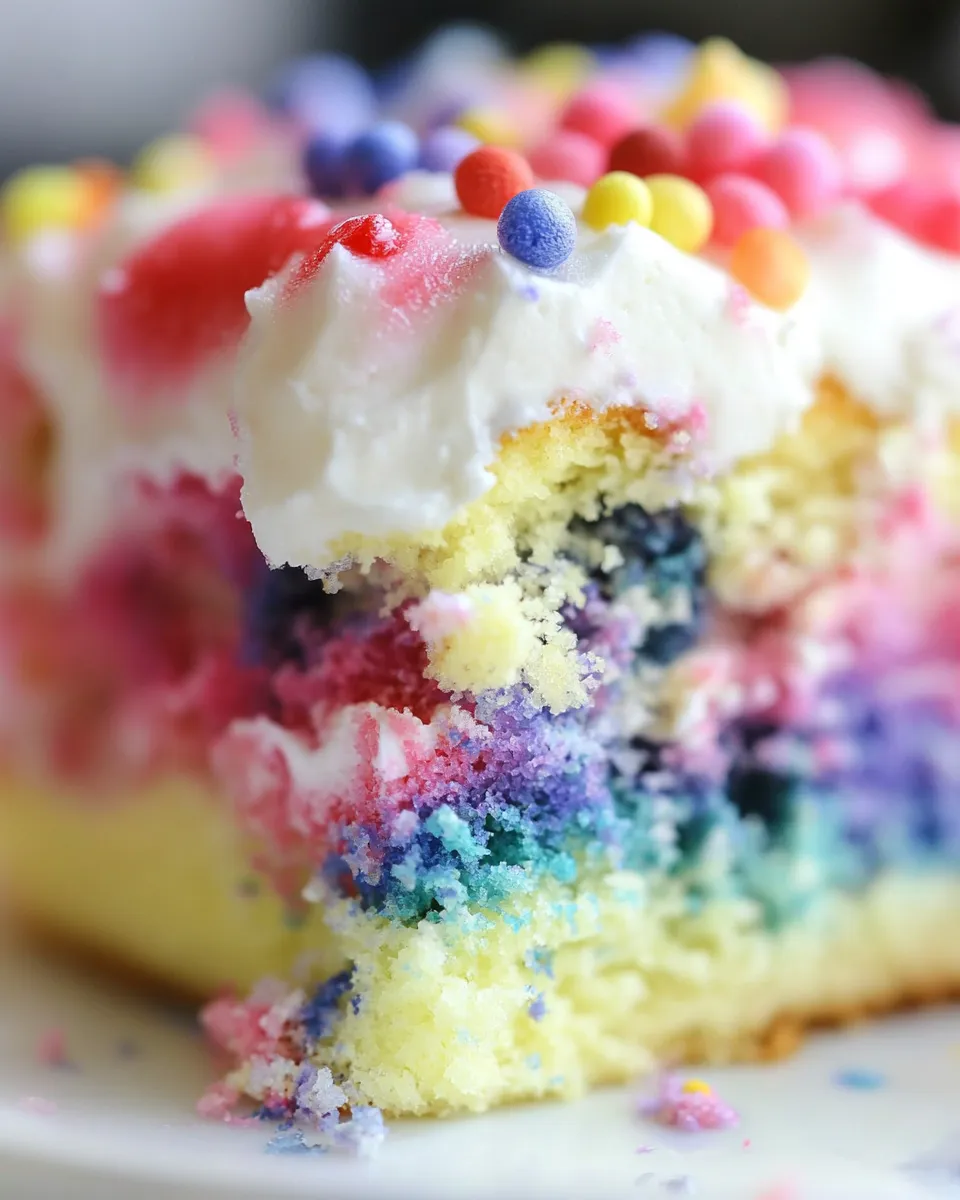
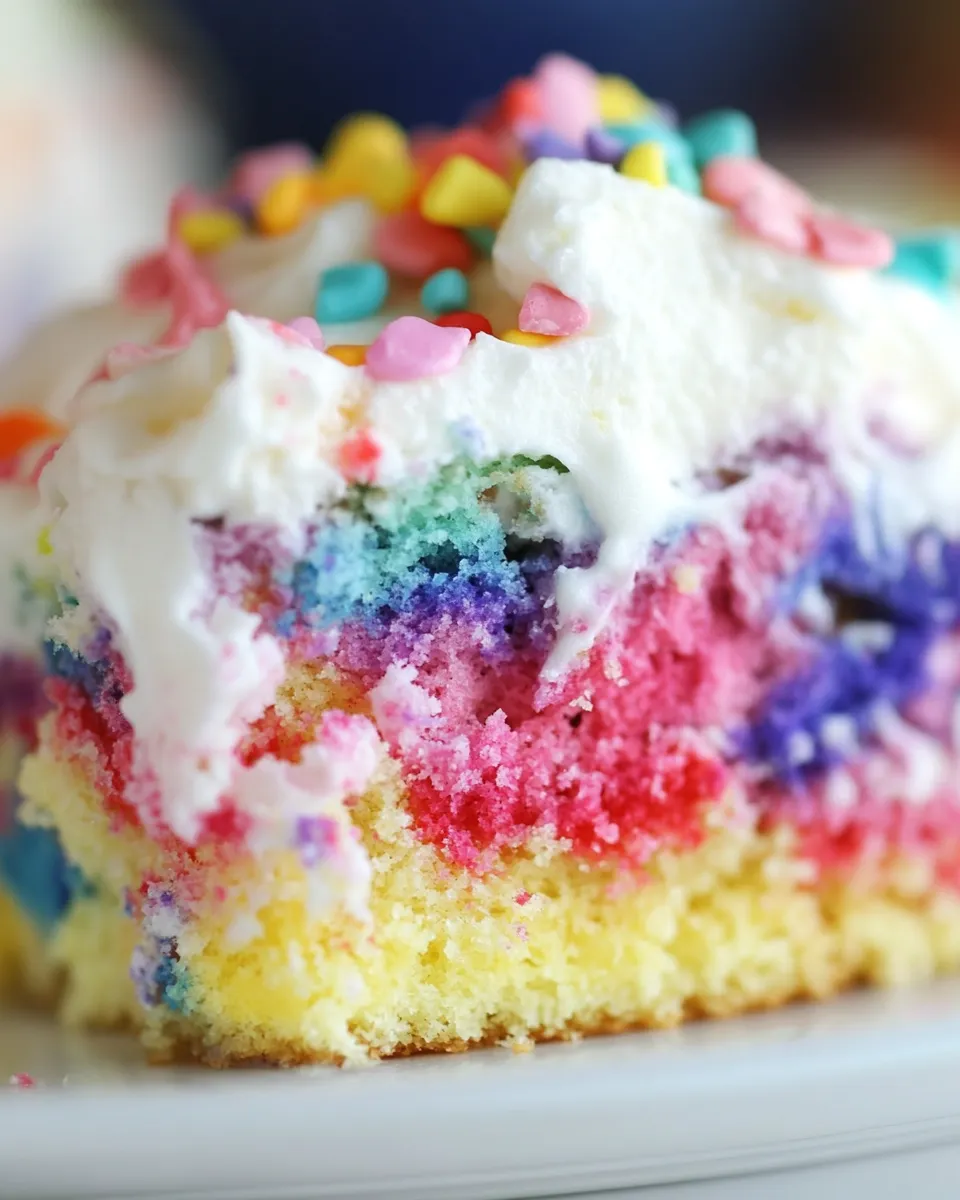
There are a few straightforward stages: bake a simple white cake base, color and swirl the batter, poke holes and soak the cake with a sweet white chocolate-condensed milk mixture, layer two instant puddings, then chill and frost. The payoff is a tender, creamy, pastel-filled cake with a playful texture and a surface made for sprinkles.
I’ll walk you through the exact ingredients and steps, plus shopping notes, equipment, common mistakes and ideas for seasonal twists. Read the ingredients list first, then follow the method step by step — timing and temperature matter, but the technique is forgiving.
What to Buy
When you shop for this cake, aim for reliable convenience brands: a standard white cake mix you trust, the instant pudding mixes in the flavors listed, and a good-quality sweetened condensed milk. Gel food coloring (in small tubes) gives bright, concentrated color without thinning the batter; pick blue, purple and pink as called for. White chocolate chips and a tub of whipped topping round out the finish.
Also buy sturdy sprinkles that won’t bleed color into the whipped topping. If you don’t have gel food coloring available, plan to get it — liquid food coloring can dilute batter and won’t produce the same vivid pastels.
Ingredients
- 1 package white cake mix plus ingredients needed to prepare the cake mix — the base for the cake; prepare the mix exactly as the box instructs for best results.
- 2 teaspoons vanilla extract — enhances the cake’s flavor; add directly to the batter as instructed.
- Blue Gel Food Coloring — concentrated color for one bowl of batter; gel keeps batter viscosity steady.
- Purple Gel Food Coloring — concentrated color for the second bowl of batter.
- Pink Gel Food Coloring — concentrated color for the third bowl of batter.
- 2 cups condensed milk — sweet soak to keep the cake moist and add richness; combined with white chocolate for a silkier soak.
- 2 cups white chocolate chips — melts into the condensed milk to make a thick, sweet pour-over that sinks into the cake.
- 3.4 ounces package vanilla pudding mix — instant mix; prepare as directed and pour over cake to set a creamy layer.
- 3.4 ounces package strawberry pudding mix — instant mix; prepared and layered on top of the vanilla pudding for color and flavor contrast.
- 4 cups milk — total milk needed to prepare both pudding mixes (2 cups per pudding mix).
- 8 ounces container whipped topping — spread over the chilled cake for a light, stable finish.
- 1/3 cup sprinkles — adds sparkle and texture; use nonpareils or small jimmies for an even look.
Method: Unicorn Cake
- Preheat oven to 350°F. Grease a 9×13-inch baking dish and set aside.
- Prepare the white cake mix according to the package directions, adding the 2 teaspoons vanilla extract to the batter.
- Divide the batter evenly into 3 bowls. Stir blue gel food coloring into one bowl, purple gel into a second bowl, and pink gel into the third bowl.
- Alternating colors, drop heaping spoonfuls of the three batters randomly into the prepared baking dish until all batter is used.
- Bake 25–30 minutes or until a toothpick inserted in the center comes out clean. Cool in the pan for 10 minutes.
- Using the end of a wooden spoon (or similar tool), poke large holes all over the warm cake.
- In a medium microwave-safe bowl combine the 2 cups condensed milk and 2 cups white chocolate chips. Microwave 1 minute, stir until combined and the chocolate is melted; if needed microwave an additional 30 seconds and stir until smooth.
- Pour the condensed milk/white chocolate mixture evenly over the cake, allowing it to seep into the holes.
- Prepare each 3.4-ounce pudding mix according to its package directions, using a total of 4 cups milk (2 cups milk per pudding mix). Stir each pudding until it begins to thicken.
- Immediately pour the prepared vanilla pudding over the cake first, pressing it into the holes, then add the prepared strawberry pudding and spread evenly over the cake.
- Let the cake come to room temperature, then refrigerate for at least 6 hours to set.
- After chilling, frost the cake with the 8-ounce container of whipped topping and sprinkle the 1/3 cup sprinkles over the top.
- Refrigerate at least 1 hour more before serving.
Why Unicorn Cake is Worth Your Time
This cake offers maximum visual impact for relatively little technical effort. Instead of sculpting or intricate piping, you use colored batter, a soaked center and layered instant puddings to create color and texture. The soaking step with condensed milk and melted white chocolate adds a custardy richness that turns a boxed cake into something that feels homemade and indulgent.
It’s versatile: you can keep the palette pastel for a baby shower or spice up colors for a teen’s birthday. The make-ahead nature is a real time-saver — most of the work happens up front, then the cake chills and develops flavor.
Flavor-Forward Alternatives
Want to tweak flavor while keeping the technique? Consider these practical swaps:
- Swap the white chocolate chips for cream cheese chips if you find them — they’ll offer a tangier soak (note: ingredient availability varies).
- Replace one pudding flavor with lemon instant pudding to add a citrus brightness beneath the whipped topping.
- Fold a teaspoon of almond extract into the cake batter if you’d like a nuttier background note; use sparingly so it doesn’t overpower the vanilla.
Equipment & Tools
Gather these basics before you start:
- 9×13-inch baking dish — the size specified in the recipe.
- Mixing bowls — at least three for colored batter plus one for the condensed milk and chocolate.
- Wooden spoon or similar blunt tool — used to poke holes once the cake has cooled slightly.
- Microwave-safe bowl — to melt the white chocolate and condensed milk together.
- Spatula or offset spatula — for spreading puddings and whipped topping evenly.
- Measuring cups and spoons — so you can prepare puddings and measure milk accurately.
Optional extras
- Electric mixer — handy for preparing pudding if you prefer, though instant pudding is easy to whisk by hand.
- Cooling rack — helpful if you plan to lift the pan to cool elsewhere, though the recipe cools in the pan for 10 minutes before poking holes.
Learn from These Mistakes
Common missteps that affect final texture and appearance:
- Failing to cool for 10 minutes before poking holes. If the cake is too hot it can crumble; too cool and the soak won’t penetrate as well.
- Using liquid food coloring instead of gel. Liquids thin the batter and mute the colors; gels give bright pastels without changing consistency.
- Overbaking. The cake should be just set — overbaked cake will be drier and won’t soak as well.
- Skipping the microwave stirring steps. If the white chocolate isn’t fully melted or stirred smooth, the soak can sit unevenly on the surface instead of seeping into the holes.
- Not chilling long enough. The puddings need those six hours to properly set; cutting into it too early results in a loose, runny top layer.
Fresh Takes Through the Year
Seasonality is mostly about color and toppings here. For spring, go with softer pastels and edible flowers for a baby shower. Summer calls for brighter gels and fresh berries on each slice at serving time. For fall, substitute springy pastels for richer tones — deep magenta, teal and gold sprinkles will read autumnal under warm indoor light.
Holiday variations are easy: green and red gel for a Christmas twist, or bold black and orange accents for Halloween (keep textures kid-friendly by using stable whipped topping and firm sprinkles).
Behind the Recipe
I developed this version because I needed a colorful, low-stress cake for a last-minute birthday. I wanted the soaked, custard-like interior that tres leches provides but without separate baking or long prep. Using a white cake mix, a condensed milk/white chocolate soak, and instant puddings created layers of texture and sweetness that taste much more complex than the steps suggest.
This recipe is a mix of convenience and small, intentional techniques: gel colors for vibrancy, poking holes for even soaking, and pud-ding layers for creaminess. It’s the kind of “party cake” that looks like you spent hours on it, but success mostly comes down to following the order and allowing sufficient chill time.
Cooling, Storing & Rewarming
Store this cake covered in the refrigerator. Because of the soaked center and pudding layers it must stay chilled. It keeps well for 3–4 days; the texture changes slightly over that time as the puddings and soak fully meld with the cake.
To freeze: you can freeze individual slices wrapped tightly in plastic for up to a month. Thaw in the refrigerator overnight. Note that freezing may slightly change the texture of the whipped topping; if you plan to freeze before serving, consider adding fresh whipped topping and sprinkles after thawing.
There’s no rewarming step — serve chilled or at cool room temperature after removing from the fridge for 10–15 minutes. The pudding layers are best experienced cold.
Reader Q&A
Q: Can I make this in two 8- or 9-inch round pans instead of a 9×13? A: The method is designed for a 9×13. If you change pan sizes you’ll need to adjust baking time and how you layer the batters. The soaking and puddings will still work, but I recommend sticking to 9×13 for predictable results.
Q: Can I use homemade cake batter instead of a boxed white cake mix? A: Yes. The important parts are color distribution, the soak, and pudding layers. If you use a homemade white cake recipe, keep the batter consistency similar to a typical boxed mix and follow the same division and drop method.
Q: Can I substitute heavy cream or whipped cream for the whipped topping? A: Whipped topping is stable and spreads easily after chilling. Fresh whipped cream can work but may be softer and could weep over time; stabilize it with a small amount of gelatin if you prefer homemade cream.
Q: Will the sprinkles bleed into the whipped topping overnight? A: Small, non-bleeding sprinkles usually hold their color. To be safe, add a light dusting of sprinkles right before serving if you’re worried about color transfer.
Serve & Enjoy
Slice this cake into generous squares using a sharp, warm knife for clean cuts — dip the blade in hot water and wipe between cuts. Serve chilled or after a short rest at room temperature so the pudding layers aren’t too firm. A simple scoop of fresh berries on the side pairs nicely, and extra sprinkles at the table are always a hit with kids.
This cake is best enjoyed within a few days while the layers are still distinct and the texture is tender. Make it for birthdays, showers, school parties, or any time you want color and creaminess with minimal drama. It’s bright, friendly and easier than it looks — that’s the real magic.
Unicorn Cake Recipe
Ingredients
Equipment
Method
- Preheat oven to 350°F. Grease a 9x13-inch baking dish and set aside.
- Prepare the white cake mix according to the package directions, adding the 2 teaspoons vanilla extract to the batter.
- Divide the batter evenly into 3 bowls. Stir blue gel food coloring into one bowl, purple gel into a second bowl, and pink gel into the third bowl.
- Alternating colors, drop heaping spoonfuls of the three batters randomly into the prepared baking dish until all batter is used.
- Bake 25–30 minutes or until a toothpick inserted in the center comes out clean. Cool in the pan for 10 minutes.
- Using the end of a wooden spoon (or similar tool), poke large holes all over the warm cake.
- In a medium microwave-safe bowl combine the 2 cups condensed milk and 2 cups white chocolate chips. Microwave 1 minute, stir until combined and the chocolate is melted; if needed microwave an additional 30 seconds and stir until smooth.
- Pour the condensed milk/white chocolate mixture evenly over the cake, allowing it to seep into the holes.
- Prepare each 3.4-ounce pudding mix according to its package directions, using a total of 4 cups milk (2 cups milk per pudding mix). Stir each pudding until it begins to thicken.
- Immediately pour the prepared vanilla pudding over the cake first, pressing it into the holes, then add the prepared strawberry pudding and spread evenly over the cake.
- Let the cake come to room temperature, then refrigerate for at least 6 hours to set.
- After chilling, frost the cake with the 8-ounce container of whipped topping and sprinkle the 1/3 cup sprinkles over the top.
- Refrigerate at least 1 hour more before serving.