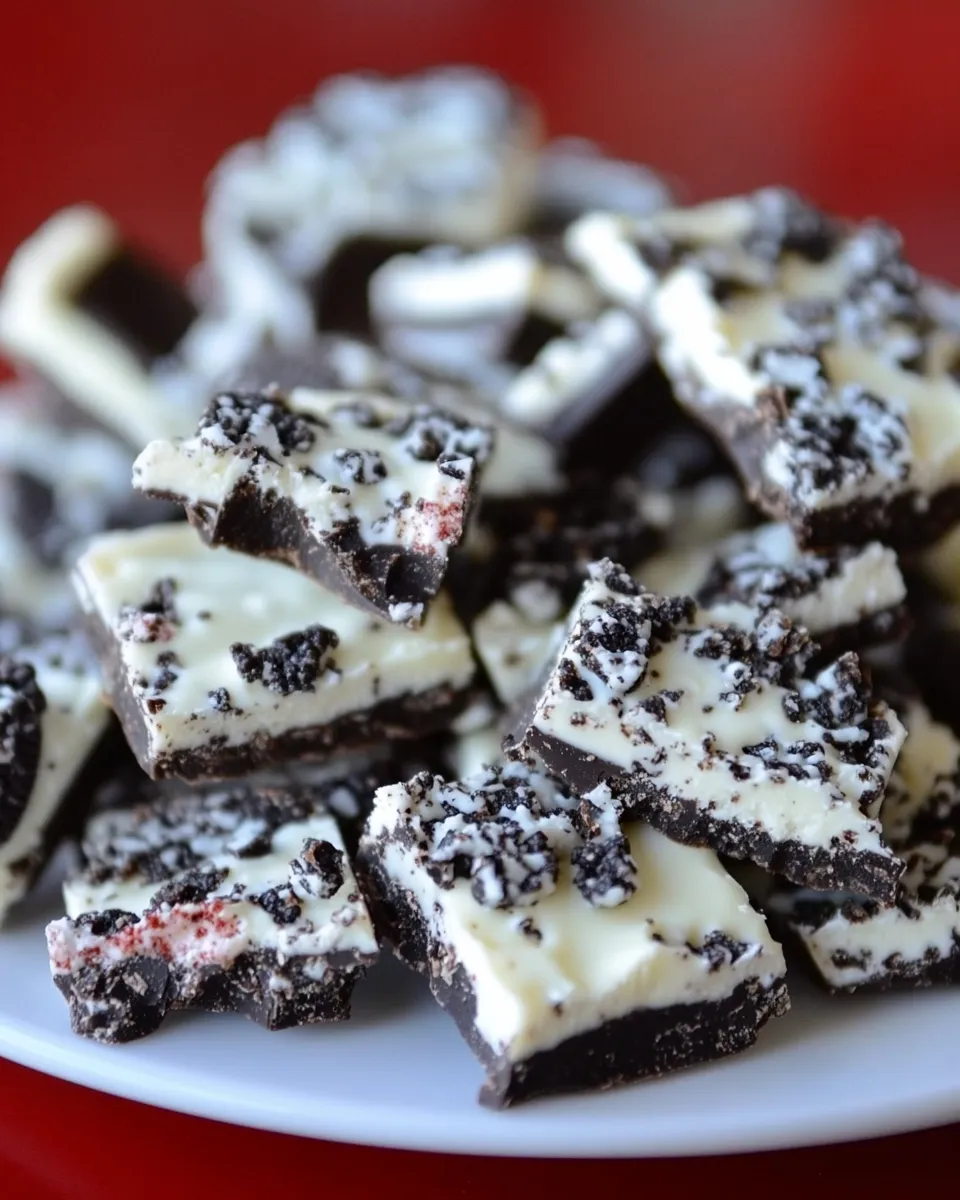
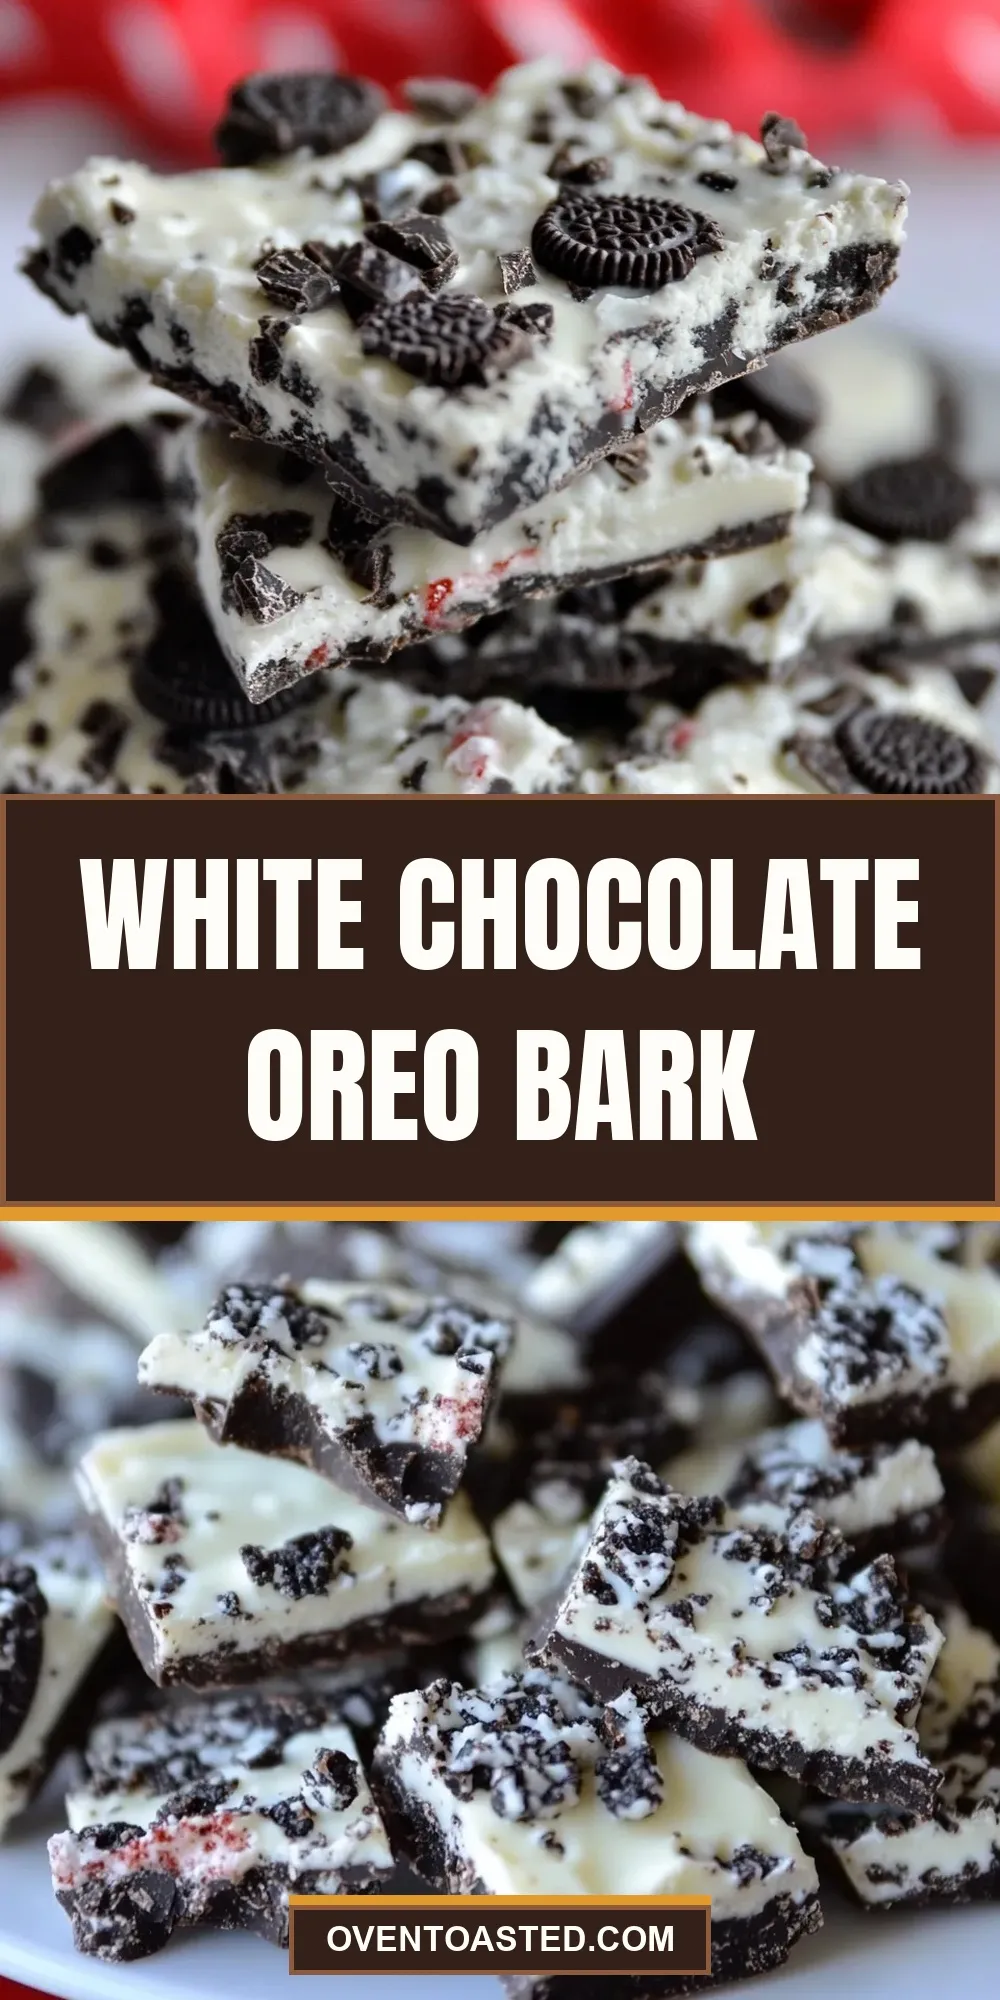
White Chocolate Oreo Bark
This is the kind of no-fuss treat I turn to when I want something impressive that really doesn’t take much time. It’s sweet, a little crunchy, and so simple you can talk someone through it while you crush the cookies. White chocolate Oreo bark is the shortcut candy that always disappears fast at parties, bake sales, and holiday plates.
The beauty of this recipe is in the texture contrast: creamy white chocolate wrapped around crisp Oreo pieces. You only need a few pantry staples, and the steps are straightforward. If you can melt chocolate and crush cookies, you can make this.
Below I’ve laid out everything clearly — what goes in, the step-by-step, testing notes, and helpful substitutions. Keep the pan handy and let’s get to it.
What Goes In
Ingredients
- 1 18-ounce package Oreo cookies (about 40 cookies) — The crunchy mix-in that gives the bark its cookie bite; some whole pieces for texture are good.
- 2 bags (about 4 1/2 cups) white chocolate chips (I use Ghiradelli chips) — The coating and flavor base; use good-quality chips for a creamier, sweeter bark.
- 2 tablespoons vegetable shortening — Helps the white chocolate melt smoothly and gives the finished bark a slightly silkier set.
White Chocolate Oreo Bark — Do This Next
- Line a 13″ x 9″ pan with parchment paper and lightly spray the parchment with non-stick cooking spray.
- Place the 18-ounce package of Oreo cookies in a gallon-sized Ziploc bag and crush them with a rolling pin until broken into mostly small pieces with some larger chunks remaining. (Alternatively, break the cookies in a large bowl using a wooden spoon.)
- Put the 2 bags (about 4 1/2 cups) white chocolate chips and the 2 tablespoons vegetable shortening in a large microwave-safe bowl.
- Microwave the chips and shortening at 50% power for 30 seconds. Remove and stir. Continue microwaving at 50% power in 15-second increments, stirring after each increment, until the chips are mostly melted. Remove from the microwave and stir until completely smooth. (Total time will vary by microwave; avoid overheating.)
- Add the crushed Oreo pieces to the melted white chocolate and gently fold until the cookie pieces are evenly coated and distributed.
- Pour and spread the mixture evenly into the prepared 13″ x 9″ pan, using a spatula or the back of a spoon to level the surface.
- Let the bark harden until firm — about a couple of hours at room temperature, or place the pan in the refrigerator to speed the process (check after 30–60 minutes).
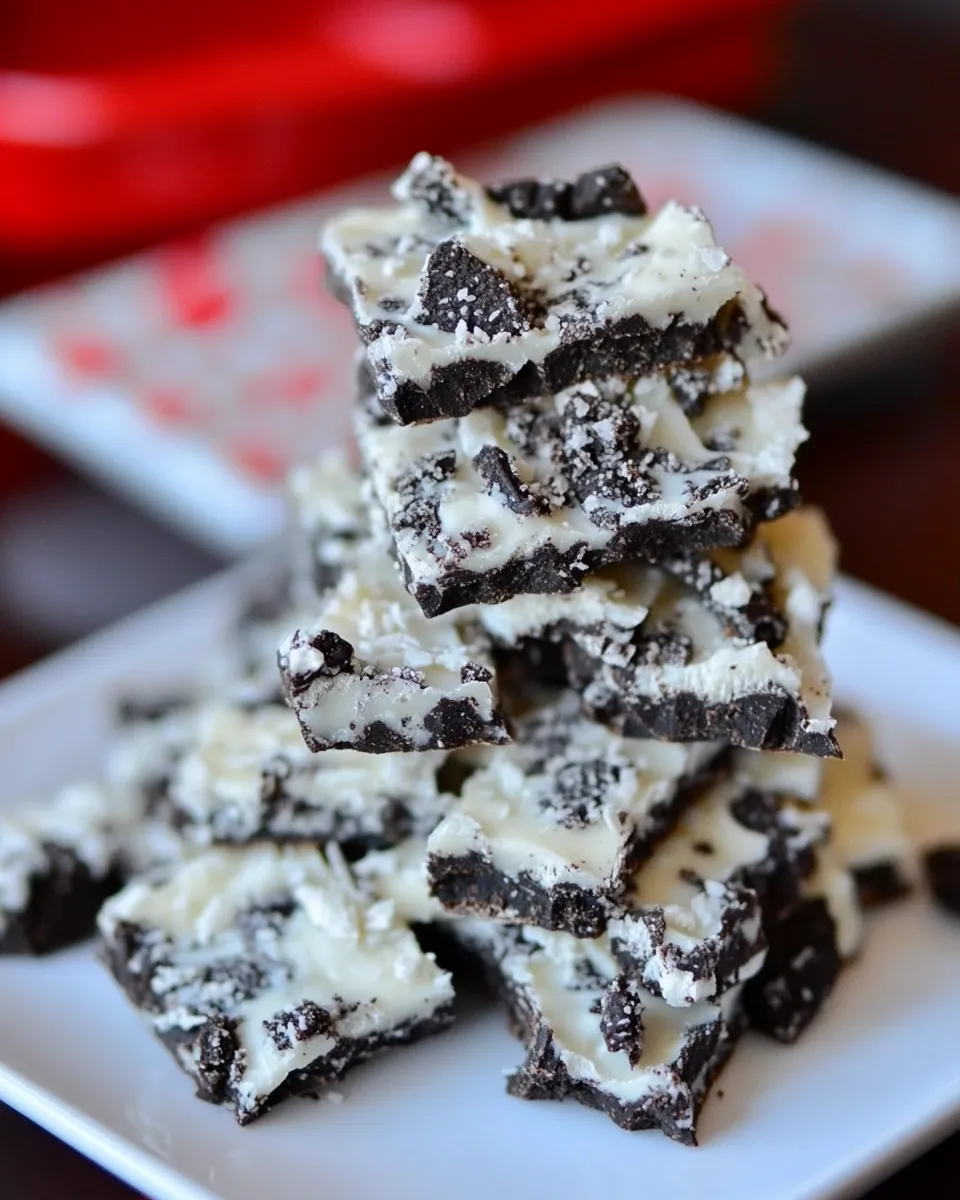
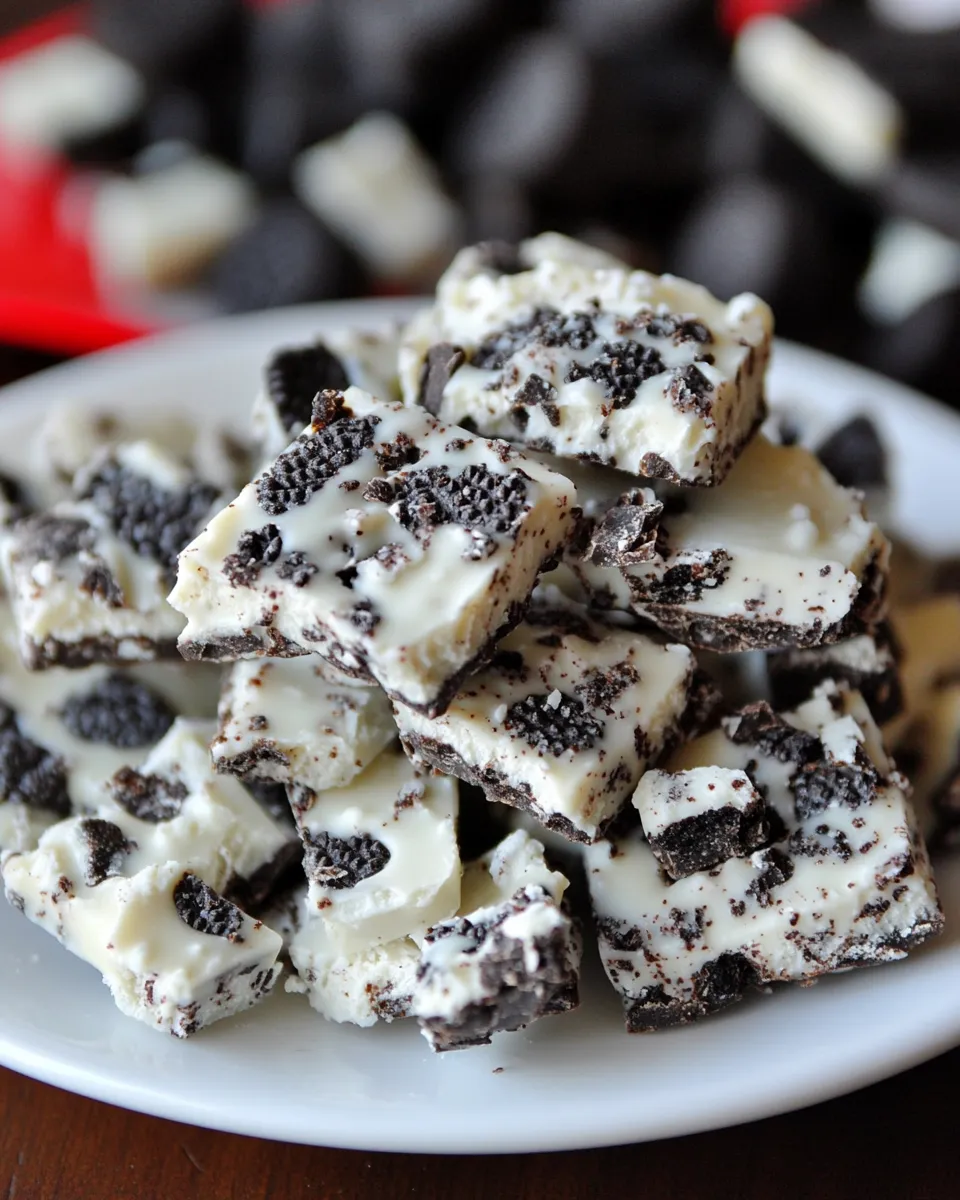
- When completely firm, lift the bark from the pan using the parchment paper and peel the parchment away. Use a sharp knife to cut the bark into pieces; if the knife sticks, warm it briefly under hot water, dry it, and then cut.
Why It’s Crowd-Pleasing
There are a few simple reasons this bark vanishes quickly. White chocolate provides a sweet, creamy backdrop that pairs perfectly with the familiar crunch of Oreos. The cookie pieces create bite-sized pockets of texture in every piece, so every piece feels like a little reward.
It’s also visually appealing. The contrast of white chocolate and dark cookie fragments looks great on a platter without any extra decoration. And because it’s so easy to portion, folks tend to grab one or two — then come back for more.
Allergy-Friendly Substitutes
If you need to accommodate common allergies or dietary preferences, there are straightforward swaps you can make without changing the process.
- Milk/dairy allergy: Use a dairy-free white chocolate alternative made from cocoa butter or specialized vegan white melts. Texture will vary, so choose a brand known for melting smoothly.
- Soy allergy: Check the ingredient label on both the chips and Oreos; some white chocolate chips and Oreos contain soy lecithin. Look for soy-free certified options for both components.
- Gluten sensitivity: Use a gluten-free sandwich cookie substitute in place of Oreos. There are several brands that recreate the same cookie-and-cream experience.
- Shortening substitute: If you prefer not to use vegetable shortening, a neutral-tasting oil with a high smoke point (like refined coconut oil) can be used in small amounts to help the chocolate melt smoothly. Note: coconut oil may affect set time and texture.
Kitchen Gear Checklist
- Parchment paper — for easy lift-out and cleanup.
- 13″ x 9″ pan — the recipe is scaled for this size.
- Gallon-sized Ziploc bag or large bowl — for crushing the cookies.
- Rolling pin or wooden spoon — to break the Oreos to the right size.
- Large microwave-safe bowl — for melting chips and shortening.
- Spatula or the back of a spoon — for spreading and leveling.
- Sharp knife and a towel — to warm and dry the knife if it sticks while cutting.
Steer Clear of These
- Overheating the white chocolate. White chocolate burns easily and becomes grainy — melt slowly at 50% power and stir frequently.
- Crushing the Oreos too fine. If the cookie pieces are pulverized, you lose the contrast in texture. Aim for mostly small pieces with some larger chunks.
- Skipping the parchment paper. Without it, the bark can stick to the pan and tear when you lift it out.
- Rushing the set. Cutting the bark before it’s fully firm creates messy edges and crumbly pieces. Check firmness before slicing.
Smart Substitutions
- Use high-quality white chocolate chips rather than budget melts if you want a creamier finish and better melt behavior.
- Swap vegetable shortening for refined coconut oil for a more natural pantry option; expect a slightly different mouthfeel and setting behavior.
- Stir in a teaspoon of vanilla extract if you want a subtle boost of flavor. Add it after the chips are removed from heat and are mostly melted so it blends evenly.
- For a festive twist, reserve a handful of larger Oreo chunks to press on top before the bark sets for a more decorative look.
Notes from the Test Kitchen
Temperature, texture, and timing
We tested this at room temperature and chilled. Room temperature yields a slightly softer bark that’s easier to bite through, while chilling makes firmer, cleaner-cut pieces. If you refrigerate, check at 30–60 minutes so it doesn’t pick up fridge odors or become overly brittle.
When melting white chocolate, patience is everything. I use 50% power and stir every 15 seconds once it’s mostly melted. The residual heat finishes the job; stopping earlier and stirring avoids scorchy bits. If you see any graininess, keep stirring off heat — sometimes that rescues it.
When folding in the Oreo pieces, be gentle. You want even distribution without breaking the larger chunks into dust. Pressing reserved chunks on top after spreading gives you pretty, intentional pieces when you cut.
Freezer-Friendly Notes
This bark freezes well. Layer pieces between sheets of parchment or wax paper in an airtight container to prevent sticking and odor absorption. Thaw in the refrigerator or at room temperature for about 30–60 minutes before serving. Keep in mind freezing can slightly change the texture of white chocolate, so allow time to come back to serving temperature for best flavor.
Common Qs About White Chocolate Oreo Bark
Q: Can I melt the white chocolate on the stove?
A: Yes. Use a double boiler (a heatproof bowl set over simmering water) and stir constantly. Remove from heat while there are still small unmelted bits and stir until smooth. Direct heat will scorch white chocolate, so avoid that.
Q: Can I add extras like nuts or sprinkles?
A: You can. Fold in small additions sparingly so they don’t overwhelm the cookie pieces. Press delicate decorations on top just before the bark sets so they stay visible and crisp.
Q: How big should the bark pieces be?
A: There’s no right answer. Bite-sized pieces are 1–2 inches. Larger squares make a richer bite and are great for gift boxes. Cut to your preference once the bark is fully firm.
Q: Will the bark keep at room temperature?
A: Yes, for a couple of days in an airtight container. Keep it in a cool, dry place away from direct sunlight. If your home is warm, refrigerate to prevent softening.
Serve & Enjoy
Cut the bark into pieces and arrange them on a simple tray or stack them in a mason jar for gifting. If you’re serving at a party, place napkins nearby — a little powdered sugar or cookie dust sometimes falls off when people pick pieces up. Keep plates shallow; the pieces are sweet, so smaller portions usually work best.
White Chocolate Oreo Bark is a reliable crowd-pleaser that looks like you put in more effort than you did. Make a batch, stash some for yourself, and send the rest home with friends. It’s easy, forgiving, and always appreciated.
White Chocolate Oreo Bark
Ingredients
Equipment
Method
- Line a 13" x 9" pan with parchment paper and lightly spray the parchment with non-stick cooking spray.
- Place the 18-ounce package of Oreo cookies in a gallon-sized Ziploc bag and crush them with a rolling pin until broken into mostly small pieces with some larger chunks remaining. (Alternatively, break the cookies in a large bowl using a wooden spoon.)
- Put the 2 bags (about 4 1/2 cups) white chocolate chips and the 2 tablespoons vegetable shortening in a large microwave-safe bowl.
- Microwave the chips and shortening at 50% power for 30 seconds. Remove and stir. Continue microwaving at 50% power in 15-second increments, stirring after each increment, until the chips are mostly melted. Remove from the microwave and stir until completely smooth. (Total time will vary by microwave; avoid overheating.)
- Add the crushed Oreo pieces to the melted white chocolate and gently fold until the cookie pieces are evenly coated and distributed.
- Pour and spread the mixture evenly into the prepared 13" x 9" pan, using a spatula or the back of a spoon to level the surface.
- Let the bark harden until firm — about a couple of hours at room temperature, or place the pan in the refrigerator to speed the process (check after 30–60 minutes).
- When completely firm, lift the bark from the pan using the parchment paper and peel the parchment away. Use a sharp knife to cut the bark into pieces; if the knife sticks, warm it briefly under hot water, dry it, and then cut.