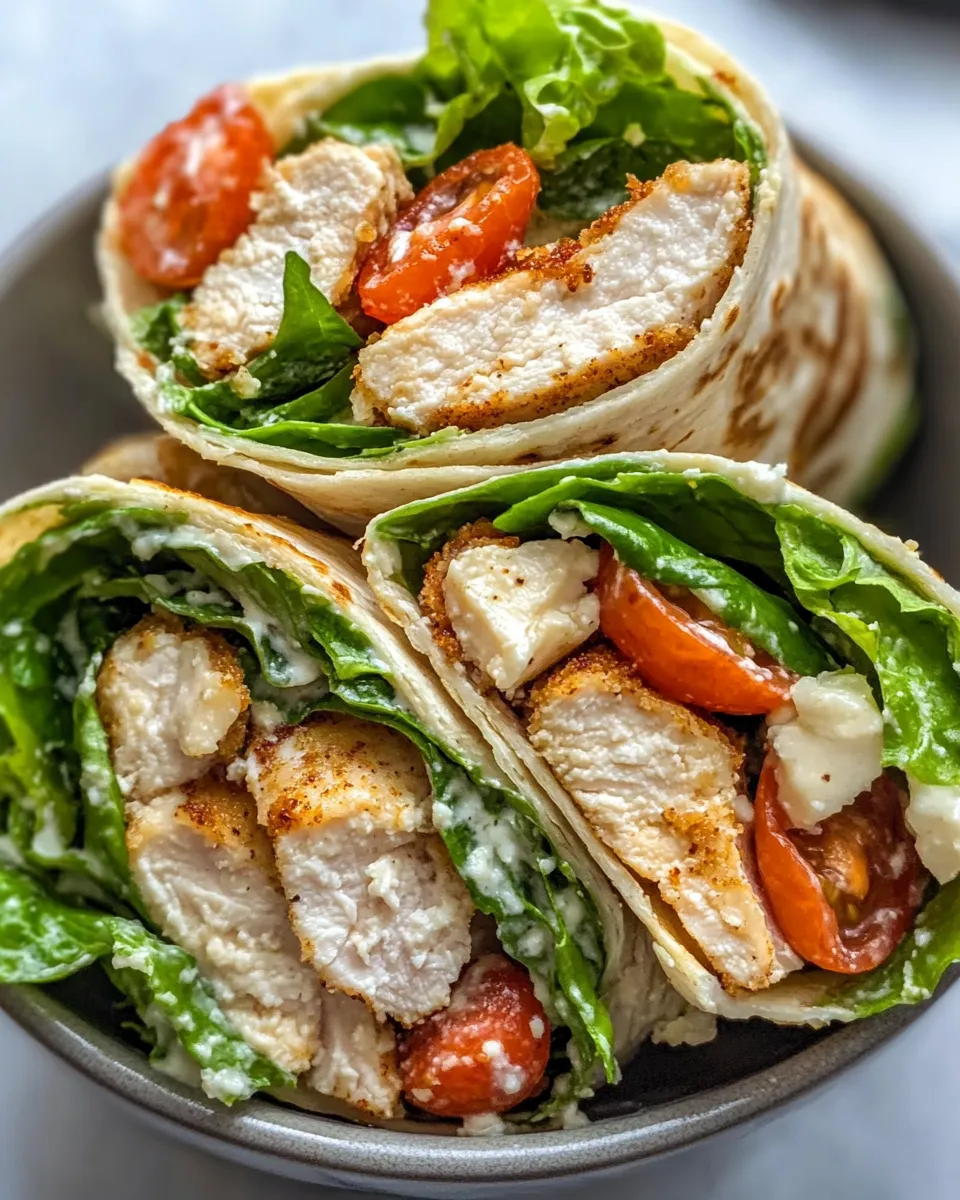
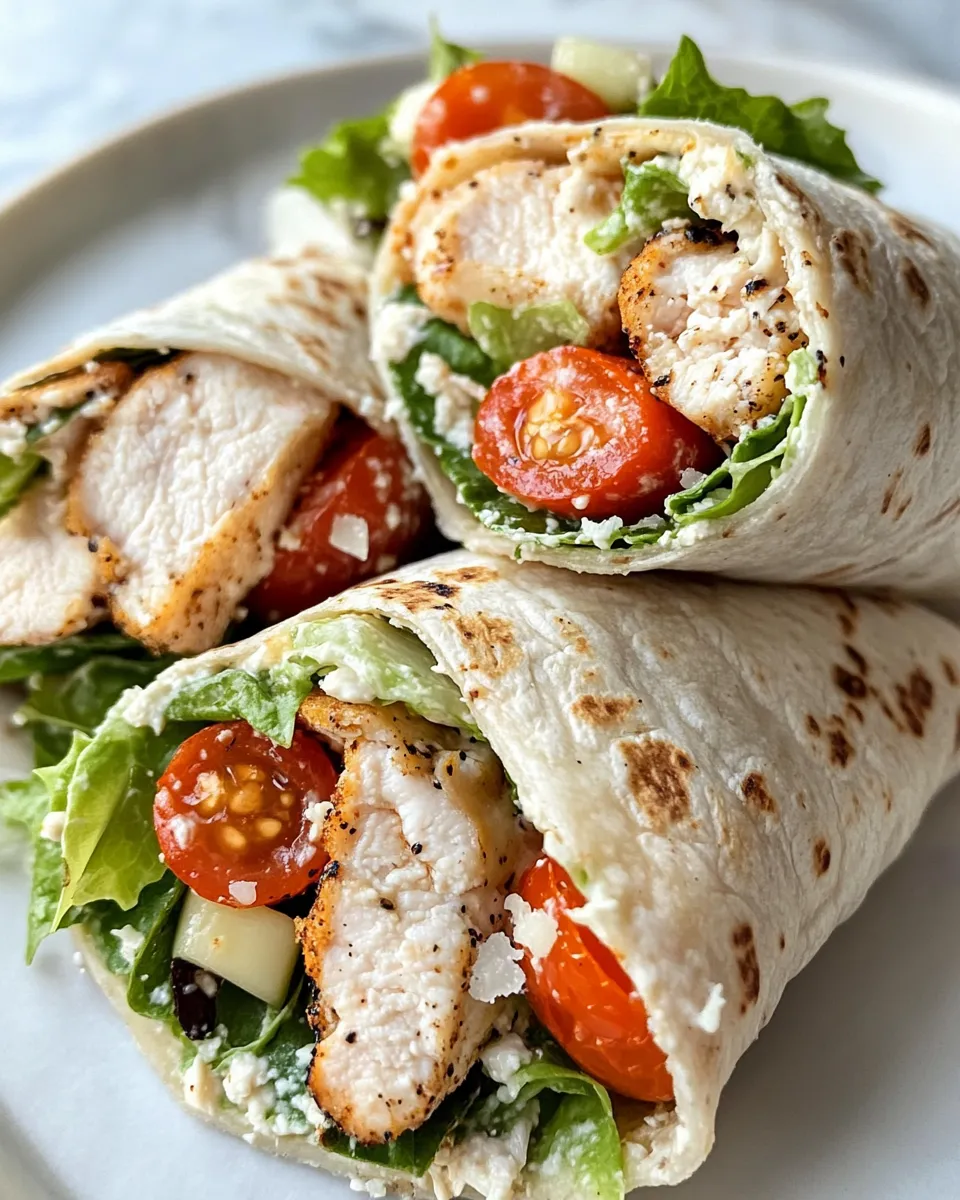
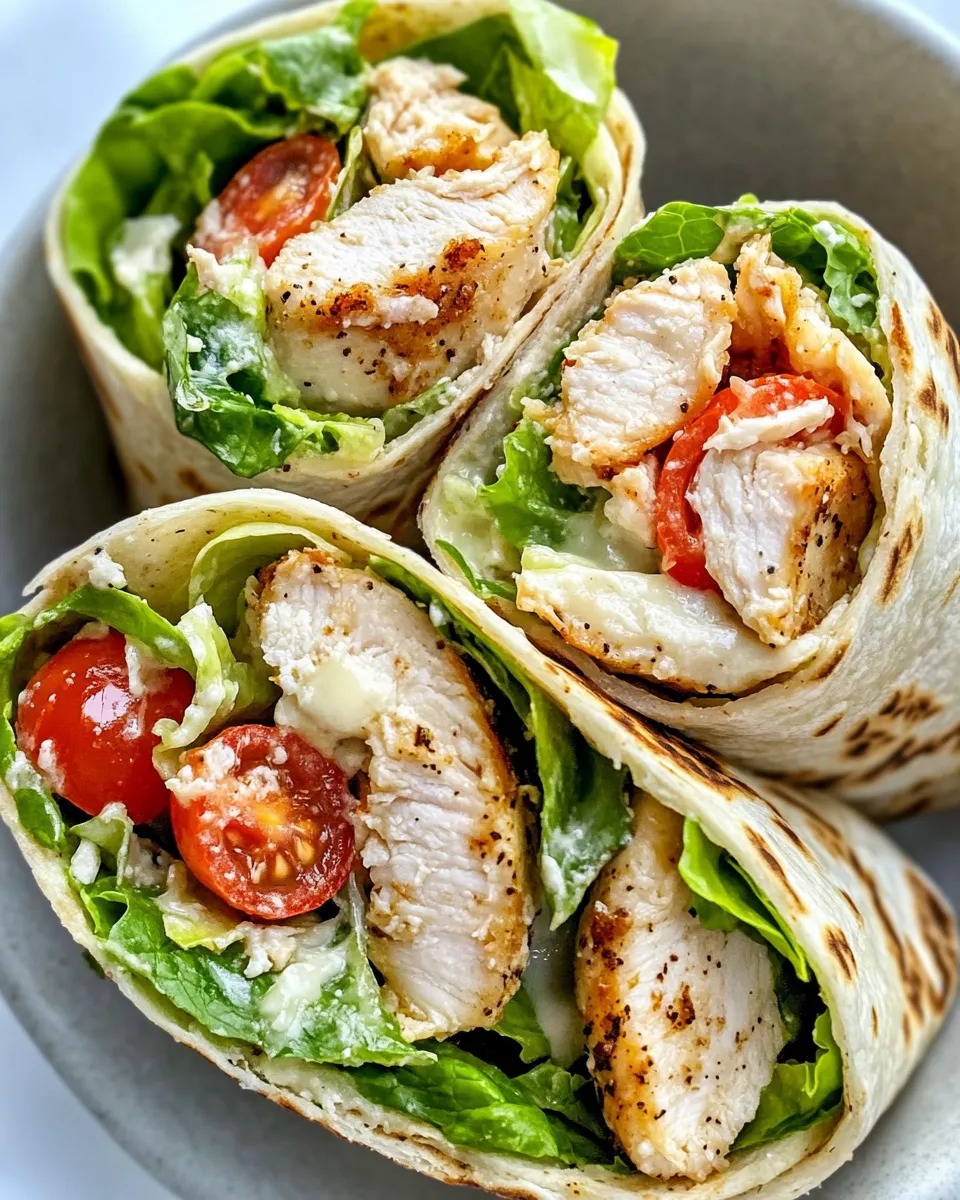
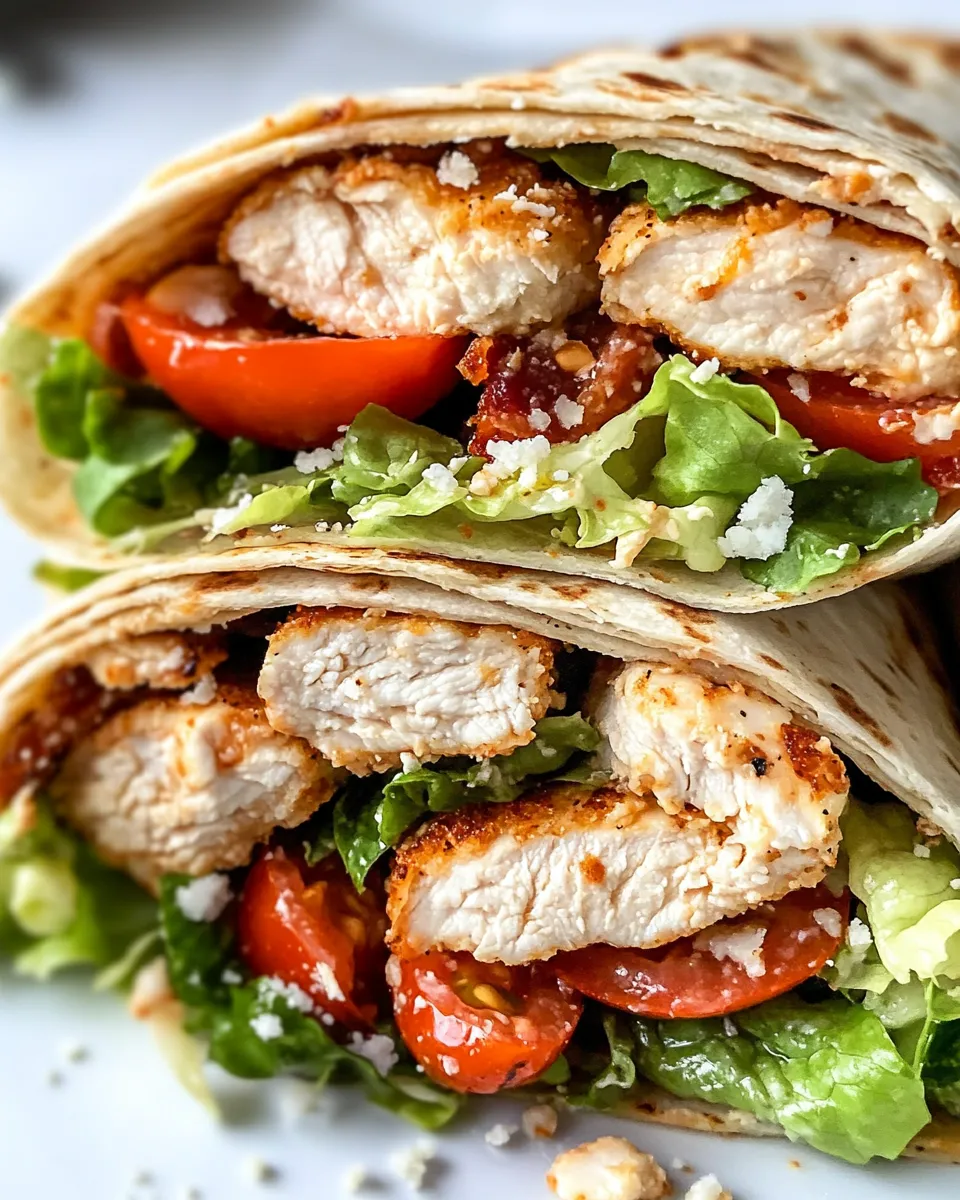
20-Min Crispy Chicken Caesar Wraps
There’s something incredibly satisfying about a wrap that’s both crispy and fresh, especially when it comes together in just 20 minutes. Enter the 20-Min Crispy Chicken Caesar Wraps — a perfect blend of juicy, seasoned chicken, crunchy romaine, and tangy Caesar dressing, all wrapped up in a warm whole wheat tortilla. This recipe is your go-to for a quick lunch or a weeknight dinner that feels indulgent without a long prep time. Whether you’re packing it for lunch or serving it fresh from the kitchen, these wraps hit the mark on flavor, texture, and convenience.
The Upside of 20-Min Crispy Chicken Caesar Wraps
If you need a meal that’s fast, flavorful, and versatile, the 20-Min Crispy Chicken Caesar Wraps have got you covered. Here’s why you’ll love them:
- Speed meets satisfaction: Ready in only 20 minutes, this recipe is perfect for busy days when you want something homemade without the wait.
- Healthy and hearty: Whole wheat tortillas, lean chicken breasts, and fresh veggies keep this wrap balanced and filling.
- Customizable: Add your favorite extras like crispy chicken tenders or swap in turkey bacon for a smoky crunch.
- Perfect for meal prep: These wraps hold up well in the fridge, making them ideal for grab-and-go meals during the week.
- Flavor-packed: The classic Caesar dressing with Parmesan and garlic powder brings a savory punch that keeps you coming back for more.
The Ingredient Lineup
- 2 large chicken breasts, cooked and sliced – Grilled, baked, or pan-seared works perfectly.
- 1 cup romaine lettuce, chopped – For crisp freshness and that signature Caesar crunch.
- 1/2 cup cherry tomatoes, halved – Adds a burst of juicy sweetness.
- 1/4 cup Parmesan cheese, grated – The salty, nutty element that completes the Caesar experience.
- 1/4 cup Caesar dressing – Use your favorite creamy Caesar or make your own for extra zing.
- 4 whole wheat tortillas – Nutty flavor and extra fiber make these wraps more wholesome.
- Salt and pepper to taste – Essential seasoning for the chicken and veggies.
- 1/2 teaspoon garlic powder – Boosts the savory profile.
- 1/2 teaspoon black pepper – Adds a mild heat and complexity.
- Turkey bacon, cooked and crumbled (optional) – For a smoky, crunchy texture without overpowering the flavors.
Toolbox for This Recipe
- Cutting board and sharp knife – For slicing chicken and chopping veggies.
- Mixing bowl – To toss the ingredients together evenly.
- Large skillet or grill pan – For cooking the chicken breasts and optionally warming tortillas.
- Grater – To freshly grate Parmesan cheese.
- Measuring spoons and cups – For precise seasoning and dressing amounts.
- Spatula or tongs – To handle chicken and assemble wraps without mess.
Directions: 20-Min Crispy Chicken Caesar Wraps
Step 1: Cook and Season Your Chicken
Start by seasoning your chicken breasts with salt, pepper, garlic powder, and black pepper. Heat a skillet over medium heat with a little oil, then cook the chicken for about 6-8 minutes on each side until golden and cooked through. Let it rest for a few minutes before slicing it thinly. If you’re short on time, you can use pre-cooked chicken or try pulled chicken sliders style shredded chicken for a twist.
Step 2: Prepare the Veggies and Cheese
While the chicken cooks, chop the romaine lettuce and halve the cherry tomatoes. Grate fresh Parmesan cheese for that authentic Caesar flavor—freshly grated cheese makes a big difference here!
Step 3: Toss the Filling
In a large bowl, combine the sliced chicken, chopped romaine, cherry tomatoes, grated Parmesan, and Caesar dressing. Toss everything gently until well coated. If you want to add a smoky crunch, sprinkle in some cooked turkey bacon crumbles at this stage.
Step 4: Warm and Assemble Wraps
Warm your whole wheat tortillas briefly in a dry skillet or microwave to make them pliable. Lay each tortilla flat and spoon an even amount of the chicken Caesar mixture down the center. Fold the sides in and roll tightly, making sure the filling stays inside.
Step 5: Optional Crisp Finish
If you love a crispy exterior, place the wraps seam-side down on the skillet over medium heat for 2-3 minutes per side until golden and slightly crunchy. This step is especially delightful if you’re craving that extra texture contrast.
Step 6: Serve and Enjoy
Slice the wraps in half diagonally and serve immediately for the best texture. These wraps also travel well if you need a packed lunch or a quick dinner option.
Substitutions by Category
- Protein: Swap chicken breasts for grilled shrimp, turkey breast slices, or even crispy chicken tenders for a different texture.
- Greens: Romaine can be replaced with kale, spinach, or even Grilled Romaine Salad With Caesar Dressing for a smoky twist.
- Cheese: Parmesan can be swapped for Pecorino Romano or a mild Asiago.
- Wraps: Whole wheat tortillas can be substituted with gluten-free wraps, large lettuce leaves, or flatbreads.
- Dressing: Use a creamy avocado dressing or a light vinaigrette if you want a different flavor profile.
Flavor Logic
The magic of the 20-Min Crispy Chicken Caesar Wraps lies in a balance of textures and flavors:
- Crunch: Romaine lettuce and crisp turkey bacon give the wraps a satisfying bite.
- Richness: Caesar dressing and Parmesan cheese bring creamy, salty depth.
- Juiciness: Cherry tomatoes add bursts of sweetness that contrast beautifully with the savory chicken.
- Spice and warmth: Garlic powder and black pepper season the chicken to perfection.
- Whole wheat tortillas: The nutty flavor rounds out the wrap, making each bite wholesome and filling.
Refrigerate, Freeze, Reheat
These wraps are fantastic for meal prep but do best when stored and reheated properly:
- Refrigerate: Wrap tightly in foil or plastic wrap and store in an airtight container for up to 3 days. Keep the wraps chilled to maintain freshness.
- Freeze: While not ideal due to the lettuce, you can freeze the chicken filling separately for up to 2 months. Thaw and assemble wraps fresh.
- Reheat: For a warm wrap, heat gently in a skillet or microwave. Avoid overheating to prevent sogginess.
- Freshness tip: If packing ahead, consider keeping the dressing separate and adding it just before eating to keep the wrap crisp.
Ask the Chef
Can I make these wraps vegetarian?
Absolutely! Replace the chicken with grilled portobello mushrooms, crispy tofu, or seasoned chickpeas. Add extra Parmesan or a plant-based cheese alternative to maintain that rich Caesar flavor.
What’s the best way to cook chicken for this recipe?
Pan-searing chicken breasts with simple seasoning works wonderfully. You want a slightly crispy outside and juicy inside. Alternatively, grilling adds smoky notes that complement the Caesar dressing nicely.
Can I use store-bought Caesar dressing?
Yes, store-bought dressing works great for convenience. Just choose one with quality ingredients or lower sugar to keep the wrap fresh and flavorful. For a homemade touch, whisk together mayonnaise, lemon juice, Dijon mustard, anchovy paste (optional), garlic, and Parmesan.
How do I keep the tortillas from getting soggy?
Warming the tortillas before assembling makes them more flexible and less likely to tear. Also, avoid overloading with dressing and add the lettuce last to maintain crunch. If packing for later, keep the dressing separate.
Keep Cooking
- Grilled Romaine Salad With Caesar Dressing – A smoky, charred take on classic Caesar salad that pairs beautifully with your wraps.
- Buttermilk Ranch Chicken Tenders – Crispy, juicy chicken tenders that make a fun alternative protein in your wraps.
- Pulled Chicken Sliders – Another quick and delicious way to enjoy tender chicken with bold flavors.
Final Bite
The 20-Min Crispy Chicken Caesar Wraps are a shining example of how a handful of simple ingredients can come together to create something extraordinary. The crispy chicken, fresh greens, and tangy dressing wrapped in wholesome tortillas make for a meal that’s both comforting and invigorating. Fast to make and endlessly adaptable, these wraps are sure to become a staple in your recipe rotation. Whether you’re feeding a crowd or just yourself, this recipe delivers flavor and ease — a winning combo every time. Give it a try, and watch how quickly it becomes your favorite quick-fix meal.
Share on Pinterest

20-Min Crispy Chicken Caesar Wraps
Ingredients
Equipment
Method
- Start by seasoning your chicken breasts with salt, pepper, garlic powder, and black pepper. Heat a skillet over medium heat with a little oil, then cook the chicken for about 6-8 minutes on each side until golden and cooked through. Let it rest for a few minutes before slicing it thinly.
- While the chicken cooks, chop the romaine lettuce and halve the cherry tomatoes. Grate fresh Parmesan cheese for that authentic Caesar flavor.
- In a large bowl, combine the sliced chicken, chopped romaine, cherry tomatoes, grated Parmesan, and Caesar dressing. Toss everything gently until well coated. If desired, sprinkle in some cooked turkey bacon crumbles at this stage.
- Warm your whole wheat tortillas briefly in a dry skillet or microwave to make them pliable. Lay each tortilla flat and spoon an even amount of the chicken Caesar mixture down the center. Fold the sides in and roll tightly, making sure the filling stays inside.
- If you love a crispy exterior, place the wraps seam-side down on the skillet over medium heat for 2-3 minutes per side until golden and slightly crunchy.
- Slice the wraps in half diagonally and serve immediately for the best texture. These wraps also travel well if you need a packed lunch or a quick dinner option.
Notes
- For extra crunch, crisp the wraps in a skillet after assembling.
- Keep dressing separate if packing for later to avoid sogginess.
- Substitute chicken with turkey, shrimp, or crispy chicken tenders for variety.
- Store wraps wrapped tightly in the fridge for up to 3 days.
- Use freshly grated Parmesan for best flavor impact.