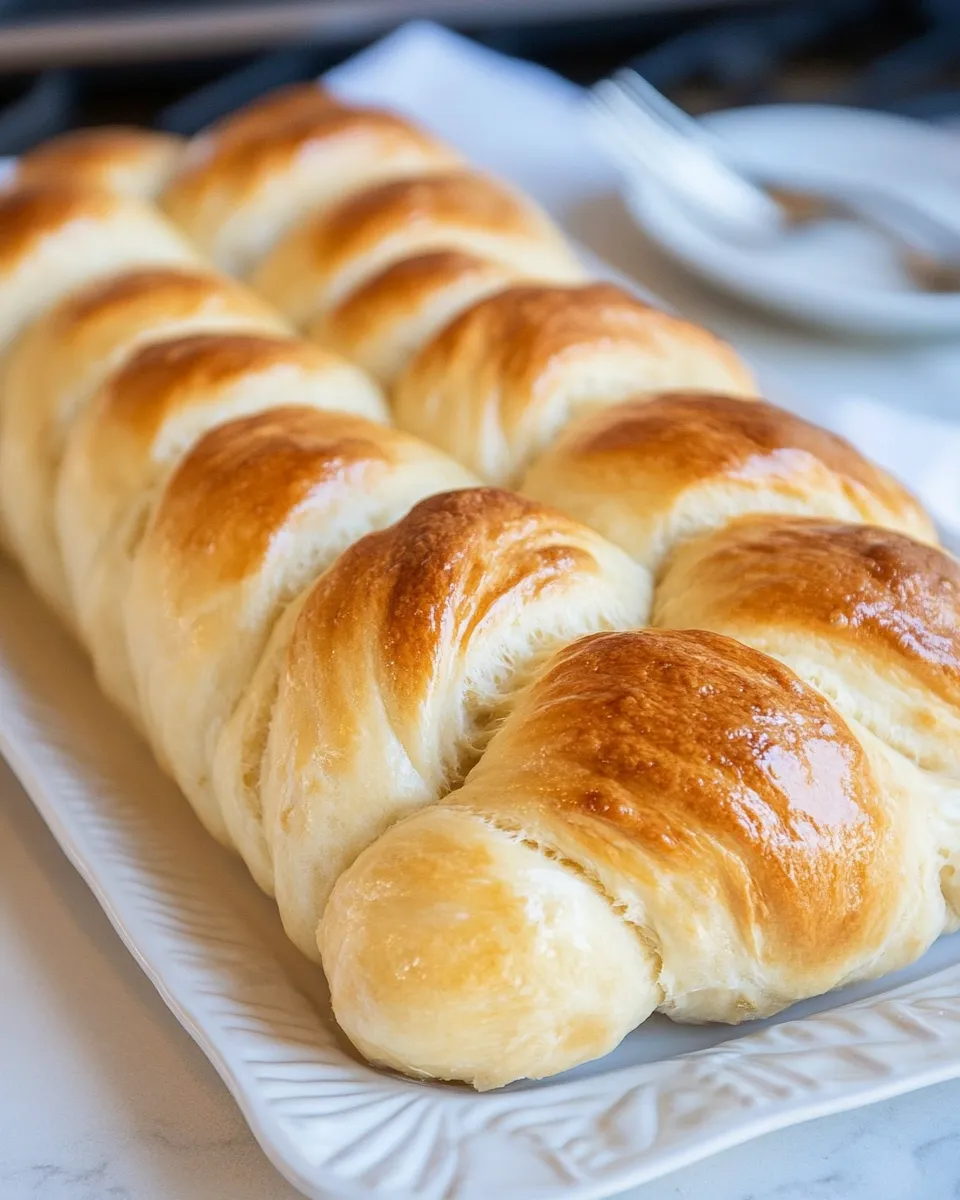
Challah
Challah, the beautifully braided bread that graces Jewish tables, is not just a staple for Shabbat and holidays; it’s a symbol of warmth and tradition. With its golden crust and soft, fluffy interior, making your own challah at home can be a delightful and rewarding experience. This recipe is straightforward, using simple ingredients that yield a deliciously sweet and tender loaf. Whether you’re a seasoned baker or a novice, you’ll find joy in crafting this beloved bread from scratch. Let’s dive into the details that make this challah recipe a success!
Why It Works Every Time
This challah recipe is crafted to ensure consistent results every time. The use of warm water activates the yeast, while the combination of eggs and honey contributes to the bread’s rich flavor and soft texture. The choice between oil and butter allows for personal preference, catering to those who enjoy a softer loaf or a crustier finish. Moreover, the method of braiding not only enhances the aesthetic but also helps in achieving even baking.
Ingredient Rundown
- Scant 1 cup water: Warmed to about 125°F for Platinum yeast, or 105 to 115°F for most other yeast types. This activates the yeast, ensuring a good rise.
- 2 teaspoons active dry yeast: One 1/4-ounce packet, preferably Red Star Platinum for reliable results.
- 2 large eggs: Provides richness and helps bind the dough together.
- 1/4 cup canola or vegetable oil: Use oil for a softer loaf, or substitute with 1/4 cup butter for a firmer, crustier texture.
- 1/4 cup honey: Adds sweetness and enhances the bread’s flavor.
- 3/4 tablespoon salt: Essential for flavor; adjust to taste. Some bakers even choose to omit it for a sweeter bread.
- 3 cups all-purpose flour: This recipe can also use 2 1/2 cups of bread flour for a chewier texture.
- 1 large egg: For the egg wash, giving the challah a beautiful golden color.
- Sesame or poppy seeds: Optional sprinkles for added texture and flavor.
Essential Tools for Success
- Mixing Bowl: A large bowl for mixing your ingredients and kneading the dough.
- Whisk: To blend the eggs, oil, and honey smoothly.
- Measuring Cups and Spoons: Accurate measurements are crucial for baking success.
- Stand Mixer (optional): If you prefer, a stand mixer with a dough hook can make kneading easier.
- Baking Sheet: A flat surface for baking the challah. Line with parchment for easy cleanup.
- Kitchen Towel: For covering the dough while it rises, keeping it warm and moist.
The Method for Challah
Step 1: Activate the Yeast
In a small bowl, combine the warm water and yeast. Allow it to sit for about 5-10 minutes until it becomes frothy. This step is crucial as it ensures your yeast is alive and ready to help the dough rise.
Step 2: Mix the Wet Ingredients
In a large mixing bowl, whisk together the eggs, canola oil (or melted butter), and honey until well combined. Then, pour in the activated yeast mixture and stir gently.
Step 3: Combine Dry Ingredients
In another bowl, whisk together the flour and salt. Gradually add the dry ingredients to the wet mixture, stirring until a shaggy dough forms.
Step 4: Knead the Dough
Turn the dough out onto a lightly floured surface and knead for about 8-10 minutes, until smooth and elastic. If using a stand mixer, knead on medium speed with the dough hook for about 5-7 minutes.
Step 5: First Rise
Shape the dough into a ball and place it in a greased bowl. Cover it with a kitchen towel and let it rise in a warm place for about 1-2 hours, or until doubled in size.
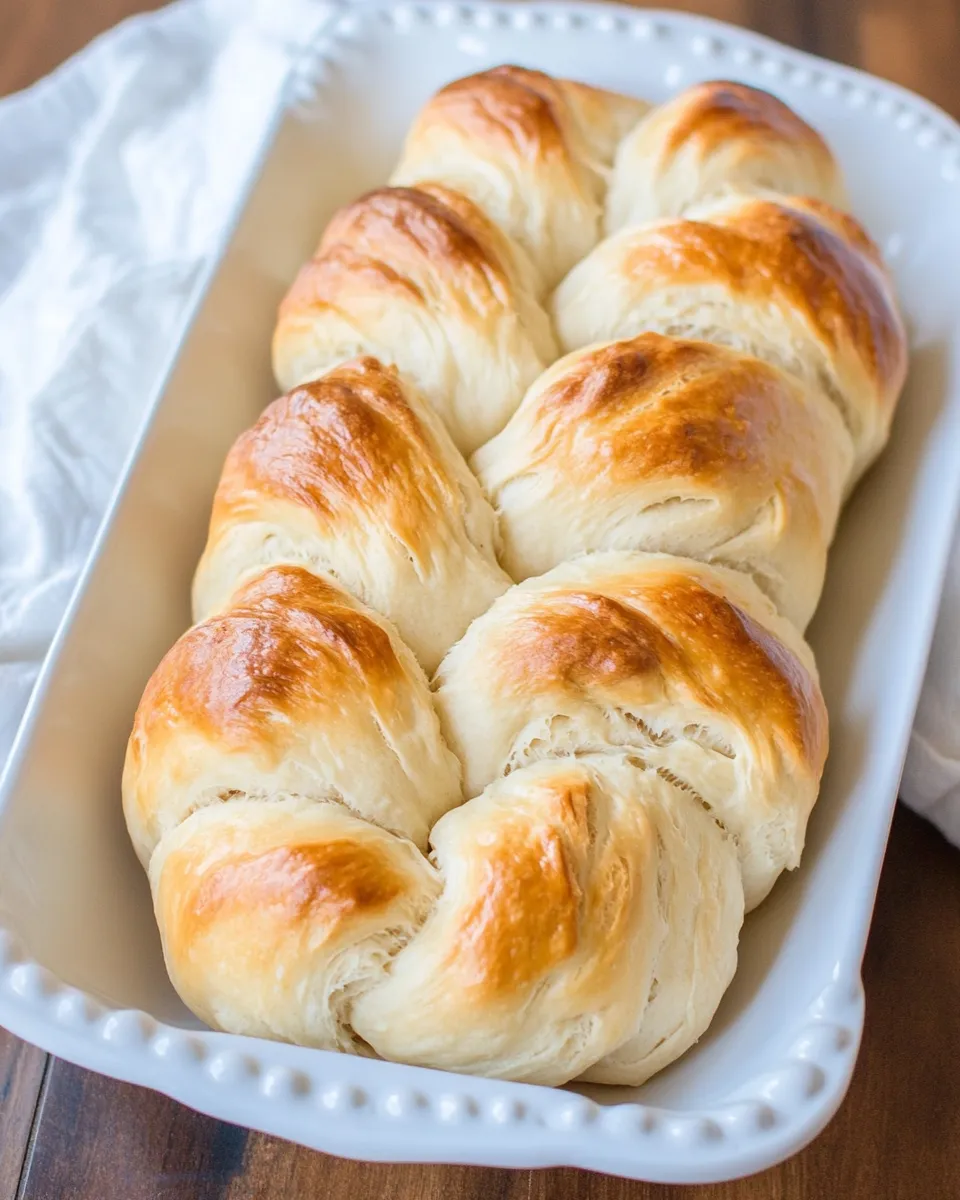
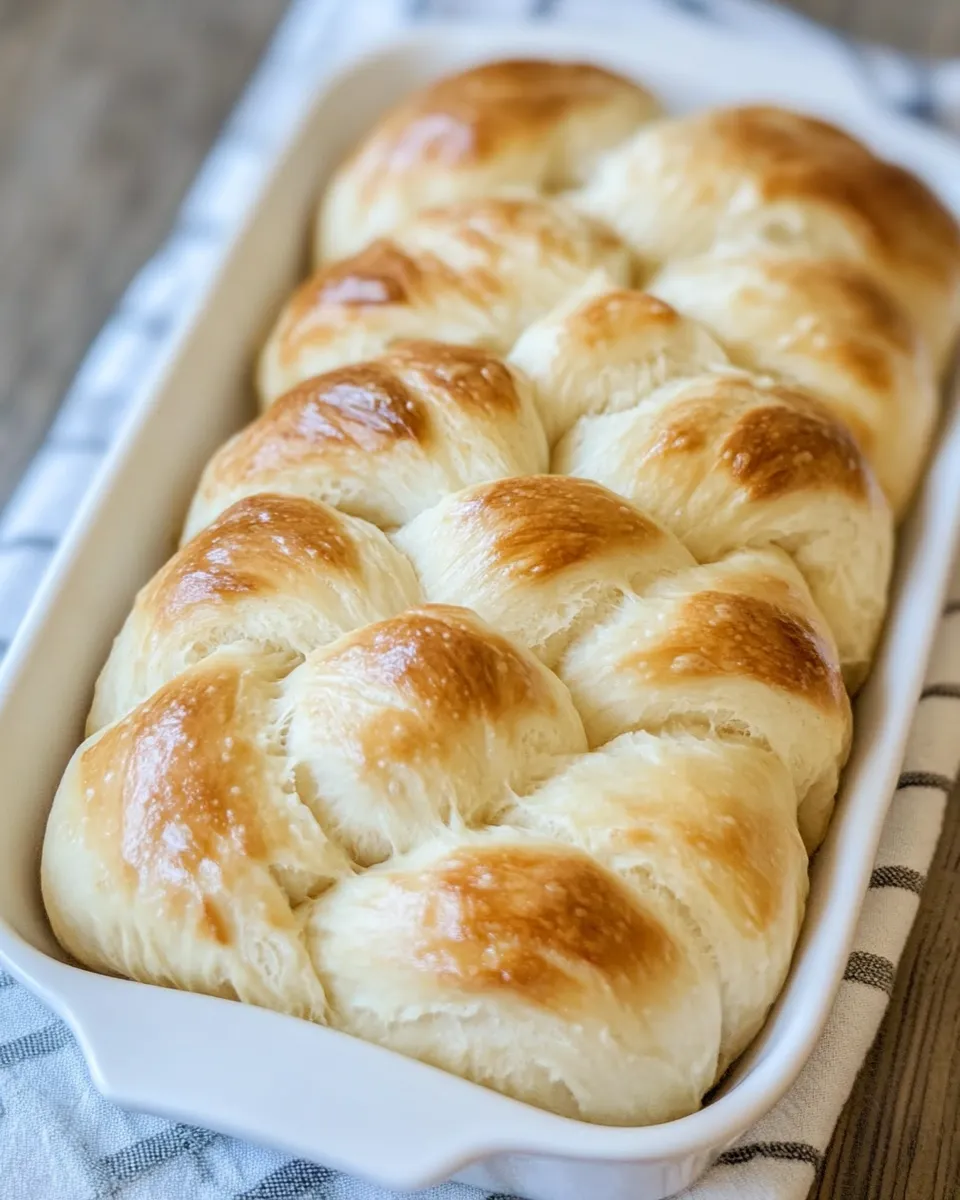
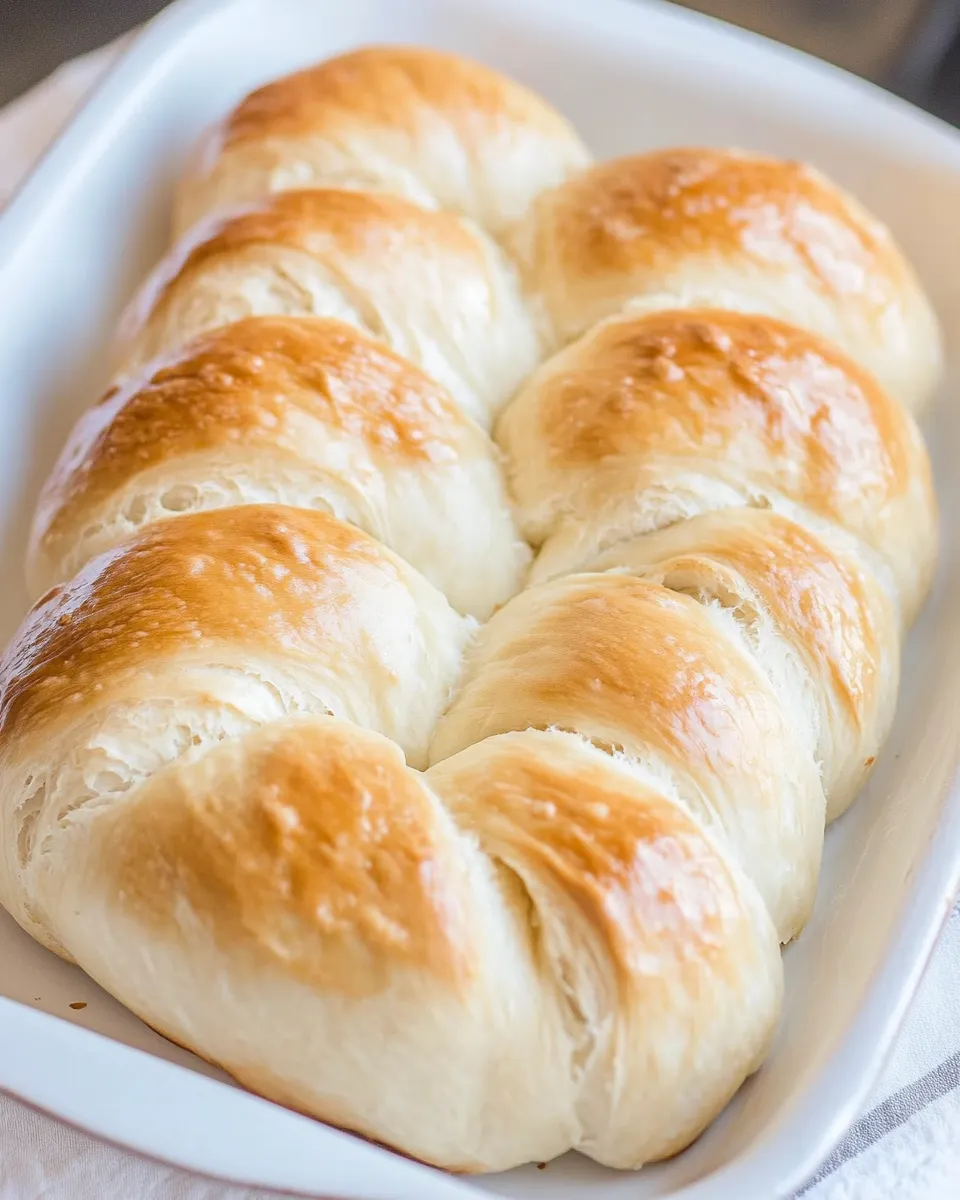
Step 6: Shape the Challah
Once risen, punch down the dough to release the air. Divide the dough into three equal pieces. Roll each piece into a long strand, about 12-14 inches long. Braid the strands together, pinching the ends to seal.
Step 7: Second Rise
Place the braided challah on a lined baking sheet. Cover it again with a towel and let it rise for another 30-45 minutes, or until puffed.
Step 8: Preheat the Oven
Preheat your oven to 350°F (175°C) during the last 15 minutes of the second rise.
Step 9: Egg Wash and Bake
Beat the remaining egg and brush it over the surface of the challah. If desired, sprinkle sesame or poppy seeds on top. Bake for 25-30 minutes, or until golden brown and the bread sounds hollow when tapped on the bottom.
Step 10: Cool and Serve
Remove the challah from the oven and let it cool on a wire rack. Once cooled, slice and enjoy your homemade challah!
Flavor-Forward Alternatives
- Herb-Infused Challah: Add finely chopped herbs like rosemary or thyme to the dough for a savory twist.
- Cinnamon Raisin Challah: Incorporate cinnamon and plump raisins into the dough for a sweet breakfast option.
- Chocolate Chip Challah: Fold in chocolate chips for a dessert-style bread that’s perfect for indulgent snacking.
- Seeded Challah: Experiment with different seeds like flax or sunflower for added texture and flavor.
Author’s Commentary
Making challah is as much about the process as it is about the final product. The act of kneading and braiding can be therapeutic, a way to connect with tradition. I love how adaptable this recipe is; you can make it your own with flavor variations or by adjusting the texture to your liking. Don’t be intimidated by the braiding – it’s easier than it looks! Plus, the wonderful aroma that fills your kitchen while this bread bakes is an experience in itself. Enjoy the journey as much as the delicious outcome!
Save for Later: Storage Tips
To keep your challah fresh, wrap it tightly in plastic wrap or store it in an airtight container at room temperature. It’s best consumed within a few days, but if you want to keep it longer, you can freeze it. Slice the challah before freezing for easy access. When you’re ready to enjoy it again, simply thaw at room temperature or warm it up in the oven for a few minutes.
Popular Questions
Can I use instant yeast instead of active dry yeast?
Yes, you can substitute instant yeast for active dry yeast. The process remains the same, but you can skip the activation step. Just mix the instant yeast directly with the dry ingredients.
How can I achieve a shinier crust?
For a shinier crust, try adding a touch of sugar to the egg wash before brushing it on the dough. This will enhance the color and sheen while baking.
What can I serve with challah?
Challah is versatile! It pairs beautifully with honey, butter, or spreads. It also makes excellent French toast, bread pudding, or can be enjoyed simply with a cup of tea.
Is it possible to make challah in advance?
Absolutely! You can prepare the dough ahead of time and refrigerate it after the first rise. Just allow it to come to room temperature before shaping and proceeding with the second rise.
Our Most-Loved Recipes
Final Bite
Crafting your own challah can be a transformative experience, weaving together history, tradition, and the joy of baking. With this approachable recipe, you’re not just making bread; you’re creating a centerpiece for family gatherings and celebrations. As you pull your challah out of the oven, let the aroma envelop you and enjoy the fruits of your labor. Happy baking!
Challah
Ingredients
Equipment
Method
- Step 1: Activate the Yeast - In a small bowl, combine the warm water and yeast. Allow it to sit for about 5-10 minutes until it becomes frothy.
- Step 2: Mix the Wet Ingredients - In a large mixing bowl, whisk together the eggs, canola oil (or melted butter), and honey until well combined. Then, pour in the activated yeast mixture and stir gently.
- Step 3: Combine Dry Ingredients - In another bowl, whisk together the flour and salt. Gradually add the dry ingredients to the wet mixture, stirring until a shaggy dough forms.
- Step 4: Knead the Dough - Turn the dough out onto a lightly floured surface and knead for about 8-10 minutes, until smooth and elastic.
- Step 5: First Rise - Shape the dough into a ball and place it in a greased bowl. Cover it with a kitchen towel and let it rise in a warm place for about 1-2 hours, or until doubled in size.
- Step 6: Shape the Challah - Once risen, punch down the dough. Divide into three equal pieces and braid together.
- Step 7: Second Rise - Place the braided challah on a lined baking sheet. Cover with a towel and let it rise for another 30-45 minutes.
- Step 8: Preheat the Oven - Preheat your oven to 350°F (175°C) during the last 15 minutes of the second rise.
- Step 9: Egg Wash and Bake - Brush the challah with beaten egg and sprinkle seeds on top. Bake for 25-30 minutes until golden brown.
- Step 10: Cool and Serve - Remove from the oven and let cool on a wire rack before slicing.
Notes
- Wrap your challah tightly in plastic wrap to keep it fresh.
- Freeze sliced challah for easy access later.
- Experiment with flavor variations like cinnamon raisin or chocolate chip.