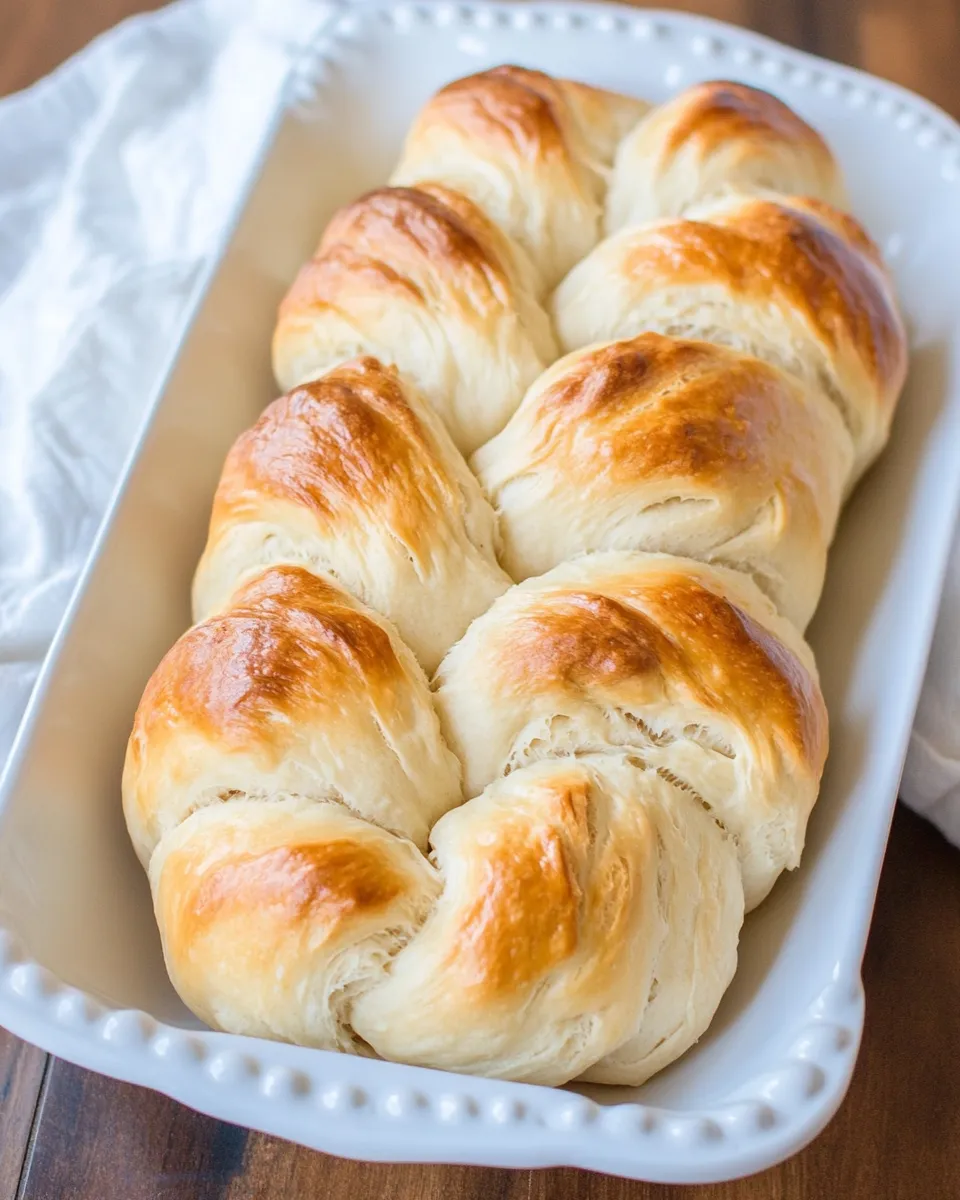
Challah
Challah is one of those loaves that makes a kitchen feel like a gathering place. It’s braided, glossy, and comforting — a bread you pull apart with your hands and share. This recipe gives you that classic, slightly sweet, buttery crumb with a shiny, golden crust. It’s forgiving in all the right ways: the dough is tacky and a bit wet, which is normal, and the results are reliably impressive.
I write this recipe for the home baker who wants a dependable loaf without fuss. Measure the flour as directed, follow the proven steps, and give the dough the time it needs to rise. A few small habits — like keeping your hands well-floured when shaping and using a second baking sheet under the first while baking — keep the loaf neat and prevent overbrowning.
You’ll find practical tips in every section here: what to buy, how to shape the braid, what to watch for while proofing, and how to store or freeze leftovers. I’ll also cover simple holiday touches and low-carb ideas if you’re avoiding carbs. Let’s get your oven warm and your hands floured.
Your Shopping Guide
When you shop for ingredients, focus on freshness and consistency. Use a reliably soft all-purpose flour for a tender crumb; older flour can make the dough less elastic. Pick instant or rapid-rise yeast — it’s convenient and consistent for this method. Buy large, room-temperature eggs the day you plan to bake so they blend easily into the dough.
Measure liquids carefully. Lukewarm water should feel like warm bath water — not hot. The oil and honey add tenderness and subtle sweetness, so choose a neutral vegetable oil you like the flavor of and a honey you’d gladly eat by the spoonful. If your kitchen runs cool, plan a warm, draft-free spot for rising: an oven with the light on, or atop a refrigerator, works well.
Ingredients
- 4¼ cups all-purpose flour — spooned into the measuring cup and leveled-off; plus more for dusting and shaping.
- 1 tablespoon instant/rapid-rise yeast — gives dependable rise; check the date on the packet.
- 2 teaspoons salt — essential for flavor and dough structure.
- ¾ cup lukewarm water — activates the yeast and hydrates the dough; should be warm, not hot.
- ¼ cup + 2 tablespoons vegetable oil — keeps the crumb tender and soft.
- ¼ cup + 2 tablespoons honey — adds mild sweetness and aids browning.
- 3 eggs — at room temperature; they enrich the dough and add structure.
- 1 egg yolk — at room temperature; reserved for the egg wash to give the loaf its sheen.
Challah: How It’s Done
- Measure the flour as listed (spoon into the measuring cup and level off). In the bowl of a stand mixer fitted with the dough hook, add the flour, the instant/rapid-rise yeast, and the salt. Mix on low speed about 30 seconds to combine.
- In a separate bowl, whisk together the lukewarm water, the vegetable oil, the honey, two of the whole eggs, and the separate egg yolk until blended.
- With the mixer running on medium-low speed, pour the wet mixture into the dry ingredients and knead 5 to 7 minutes, until the dough is sticky and clings to the bottom of the bowl. The dough should be tacky and slightly wet — this is normal.
- Generously dust your hands and a work surface with the extra flour from the ingredient list. Scrape the dough from the mixer bowl onto the floured surface, dust the top lightly with flour, and knead briefly just to form a smooth, soft ball.
- Lightly grease a large bowl with a little oil. Place the dough in the bowl, turn it once so the top is lightly oiled, and cover the bowl with plastic wrap. Let the dough rise in a warm, draft-free spot until it is puffy and doubled in size, about 2 to 3 hours.
- Prepare a lightly floured work surface. Invert the risen dough onto the surface and dust the top lightly with flour — the dough will deflate.
- Divide the dough into four even pieces (about 9 oz / 255 g each if you prefer to weigh them). Stretch and roll each piece into a rope about 20 inches (50 cm) long. Lay the four ropes side by side vertically and pinch them tightly together at the top; fan them out so they lie parallel and separate.
- Braid the four ropes using this method: always work with the strand farthest to the right. Take that rightmost strand and pass it leftward across the other strands in this sequence: over the first strand, under the next strand, then over the last strand. After that move, reposition the strands and again take the (new) rightmost strand and repeat over–under–over. Continue repeating this pattern — always starting with the strand farthest to the right — until you reach the ends.
- When the braid is complete, tuck the ends under to neaten the loaf and gently press to seal so the braid holds its shape.
- Line a 13 x 18-inch (33 x 46-cm) baking sheet with parchment paper and carefully transfer the braided loaf onto it. Loosely cover the loaf with plastic wrap and let it rise in a warm, draft-free spot until it is about 1.5 times its size, about 1 to 2 hours. Toward the end of this rising time, preheat the oven to 350°F (175°C) and set an oven rack in the middle position.
- In a small bowl, beat the remaining whole egg. Remove the plastic wrap and brush the beaten egg generously over the surface of the risen loaf.
- Place the prepared baking sheet on top of a second baking sheet (to help prevent the bottom from browning too much). Bake on the middle rack for 25 to 35 minutes, until the crust is a rich brown and an instant-read thermometer inserted into the center registers 190°F to 200°F (88°C to 93°C). Note that the loaf will continue to rise in the oven.
- Remove the challah from the oven and transfer it to a wire rack to cool. Let it cool before slicing. Store any leftovers in a sealed plastic bag for a few days.
Why This Recipe is a Keeper
This version balances ease and authenticity. The dough handles like a modern enriched bread: slightly sticky, forgiving, and straightforward to braid. The honey and eggs give sweetness and richness without overwhelming the bread, and the oil keeps the crumb soft for days. You don’t need an elaborate starter or long overnight fermentation to get a glossy, braid-worthy loaf.
It’s also a versatile template. Once you’re comfortable with the dough’s feel and the braiding pattern, you can scale it into smaller braids, rolls, or even a round holiday loaf. The timing is predictable — plan for a few hours total because of two rises, but most of that is hands-off waiting. That makes it excellent for a weekend bake when you want a fresh centerpiece without constant attention.
Low-Carb/Keto Alternatives
Traditional challah is naturally high in carbohydrates because it’s made from wheat flour. If you’re aiming for a lower-carb approach, know that the texture and structure will change significantly. You can experiment with low-carb bread recipes that rely on nut flours and extra binders, or make small, egg-forward loaves often called “cloud breads” that mimic the fluffy, tender feel without using wheat.
If keeping the flavor profile matters, consider making smaller portions of the original recipe to reduce per-serving carbs, or pair a modest slice with eggs, salad, or protein so the meal feels balanced. For strict ketogenic needs, look to purpose-built low-carb bread recipes rather than trying to substitute amounts in this formula — braids rely heavily on gluten and hydration for shape.
Equipment at a Glance
- Stand mixer with dough hook — speeds kneading and keeps hands clean; you can knead by hand if needed.
- Measuring cups and spoons — accurate flour measurement matters for this dough.
- Kitchen scale (optional) — useful for dividing dough into equal pieces (about 9 oz / 255 g each).
- Baking sheet + second baking sheet — stacking two sheets helps prevent overbrowning on the bottom.
- Parchment paper — makes transfer and cleanup effortless.
- Instant-read thermometer — the best way to confirm doneness: 190°F–200°F (88°C–93°C).
- Plastic wrap — for covering dough during rises to retain moisture.
Avoid These Traps
Don’t add too much flour if the dough looks tacky. The recipe expects a slightly wet, tacky dough; adding extra flour will stiffen it and make the loaf dense. Instead, work with floured hands and a floured surface when shaping.
Also, don’t rush the rises. The dough needs time to become puffy — underproofing leads to a tight crumb, while overproofing can cause the loaf to collapse in the oven. Aim for the visual cues (dough doubled or 1.5× in size at the second rise) rather than strictly relying on the clock.
Finally, be careful when brushing the egg wash: too much can drip and create uneven browning. A generous, even brush gives the signature shine without pooling.
Holiday & Seasonal Touches
Challah is already festive, but small additions can tailor it to the season. In cooler months, pair slices with butter and a smear of seasonal preserves. For holidays where sweetness is traditional, brush the loaf with a little warmed honey after baking for extra gloss and a deeper flavor.
Think about texture contrasts for serving: toasting slices lightly brings out nutty flavors; serving with roasted vegetables, stews, or a creamy dip makes it a centerpiece. For a celebratory table, tuck a small branch of fresh herbs next to the loaf or sprinkle seeds over the egg-washed surface before baking for a rustic look.
Cook’s Notes
The feel of the dough is your best guide. It should be tacky and cling slightly to the mixer bowl after kneading. If you use a different flour brand or live at a high altitude, you might notice slight differences — adjust by avoiding extra flour unless the dough is unmanageably sticky.
When dividing and shaping, keep the ropes even in thickness so the braid bakes uniformly. If one strand is thicker, it will rise differently and throw the braid’s shape off. Pinch the top tightly and tuck the ends under to help the loaf keep its neat form during the second rise and bake.
Freezer-Friendly Notes
You can freeze challah at two points: after baking, or after the first cool down. For freezing a baked loaf, cool completely, wrap tightly in plastic, then foil, and freeze for up to three months. Thaw overnight in the refrigerator and refresh in a 300°F (150°C) oven for 10–15 minutes if you want a crisped crust.
If you prefer freezing dough, freeze the shaped loaf (after the first rise) on a baking sheet until firm, then wrap tightly and freeze. Thaw in the refrigerator overnight, then let it come to room temperature and finish the final rise before baking. Times will vary based on chill.
Your Questions, Answered
- Can I make this without a stand mixer? — Yes. Knead by hand for about 10–12 minutes until the dough is tacky and cohesive. The dough will be sticky; use floured hands and a periodically floured surface.
- My loaf is browning too fast on the bottom. Why? — Try placing a second baking sheet under the first, as instructed, or move the rack up one slot. Also check that your oven temperature is accurate with an oven thermometer.
- How do I know when it’s done? — An instant-read thermometer should register 190°F–200°F (88°C–93°C) in the center. The crust will be a rich brown and the loaf will sound hollow when tapped on the bottom once cooled slightly.
- Can I add raisins or seeds? — Yes. Add-ins change the dough’s hydration slightly, so fold them in gently after the initial knead. For seeds, brush with egg wash and sprinkle before baking.
Hungry for More?
If you loved this challah, try making smaller braids or rolls next time to speed proofing and create individual servings. Braided breads are forgiving: once you master the motion, you can adapt the technique to enriched or plain doughs and experiment with shapes like rounds or nested braids. Keep practicing and you’ll have a beautiful loaf every time.
Challah
Ingredients
Equipment
Method
- Measure the flour as listed (spoon into the measuring cup and level off). In the bowl of a stand mixer fitted with the dough hook, add the flour, the instant/rapid-rise yeast, and the salt. Mix on low speed about 30 seconds to combine.
- In a separate bowl, whisk together the lukewarm water, the vegetable oil, the honey, two of the whole eggs, and the separate egg yolk until blended.
- With the mixer running on medium-low speed, pour the wet mixture into the dry ingredients and knead 5 to 7 minutes, until the dough is sticky and clings to the bottom of the bowl. The dough should be tacky and slightly wet — this is normal.
- Generously dust your hands and a work surface with the extra flour from the ingredient list. Scrape the dough from the mixer bowl onto the floured surface, dust the top lightly with flour, and knead briefly just to form a smooth, soft ball.
- Lightly grease a large bowl with a little oil. Place the dough in the bowl, turn it once so the top is lightly oiled, and cover the bowl with plastic wrap. Let the dough rise in a warm, draft-free spot until it is puffy and doubled in size, about 2 to 3 hours.
- Prepare a lightly floured work surface. Invert the risen dough onto the surface and dust the top lightly with flour — the dough will deflate.
- Divide the dough into four even pieces (about 9 oz / 255 g each if you prefer to weigh them). Stretch and roll each piece into a rope about 20 inches (50 cm) long. Lay the four ropes side by side vertically and pinch them tightly together at the top; fan them out so they lie parallel and separate.
- Braid the four ropes using this method: always work with the strand farthest to the right. Take that rightmost strand and pass it leftward across the other strands in this sequence: over the first strand, under the next strand, then over the last strand. After that move, reposition the strands and again take the (new) rightmost strand and repeat over–under–over. Continue repeating this pattern — always starting with the strand farthest to the right — until you reach the ends.
- When the braid is complete, tuck the ends under to neaten the loaf and gently press to seal so the braid holds its shape.
- Line a 13 x 18-inch (33 x 46-cm) baking sheet with parchment paper and carefully transfer the braided loaf onto it. Loosely cover the loaf with plastic wrap and let it rise in a warm, draft-free spot until it is about 1.5 times its size, about 1 to 2 hours. Toward the end of this rising time, preheat the oven to 350°F (175°C) and set an oven rack in the middle position.
- In a small bowl, beat the remaining whole egg. Remove the plastic wrap and brush the beaten egg generously over the surface of the risen loaf.
- Place the prepared baking sheet on top of a second baking sheet (to help prevent the bottom from browning too much). Bake on the middle rack for 25 to 35 minutes, until the crust is a rich brown and an instant-read thermometer inserted into the center registers 190°F to 200°F (88°C to 93°C). Note that the loaf will continue to rise in the oven.
- Remove the challah from the oven and transfer it to a wire rack to cool. Let it cool before slicing. Store any leftovers in a sealed plastic bag for a few days.
Notes
Active dry yeast may be used instead of instant/rapid-rise yeast, however, the dough will take longer to rise. If you’re using yeast that comes in the packets, the quantity required for this recipe (1 tablespoon) is more than one packet. When baking yeast breads, rising times are only a guide; the temperature in your kitchen, the humidity level outdoors, and how you knead the dough will all affect the rising time.
Make-Ahead Instructions:
Prepare the loaf up to the point where it’s braided and on the pan. Cover it with greased plastic wrap, and place it in the refrigerator overnight. The next day, remove the braided dough from the refrigerator and set it on the countertop (keep it covered). Let it come to room temperature and rise for about 1 hour before baking as directed.
Freezer-Friendly Instructions:
Challah can be baked, cooled, tightly wrapped, and frozen for up to 3 months. Allow it to thaw at room temperature for at least 3 hours before serving.