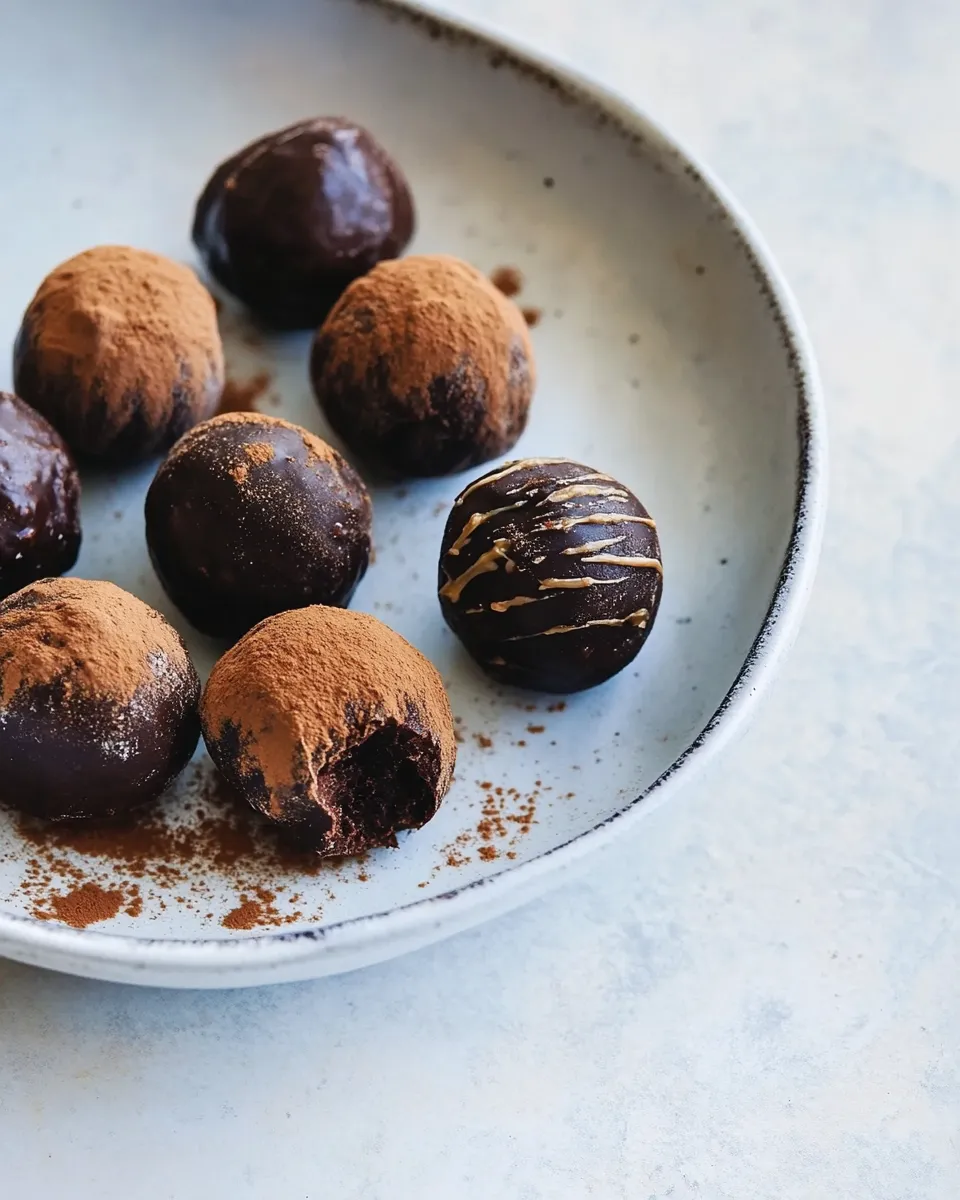
Chocolate Peanut Butter Bites
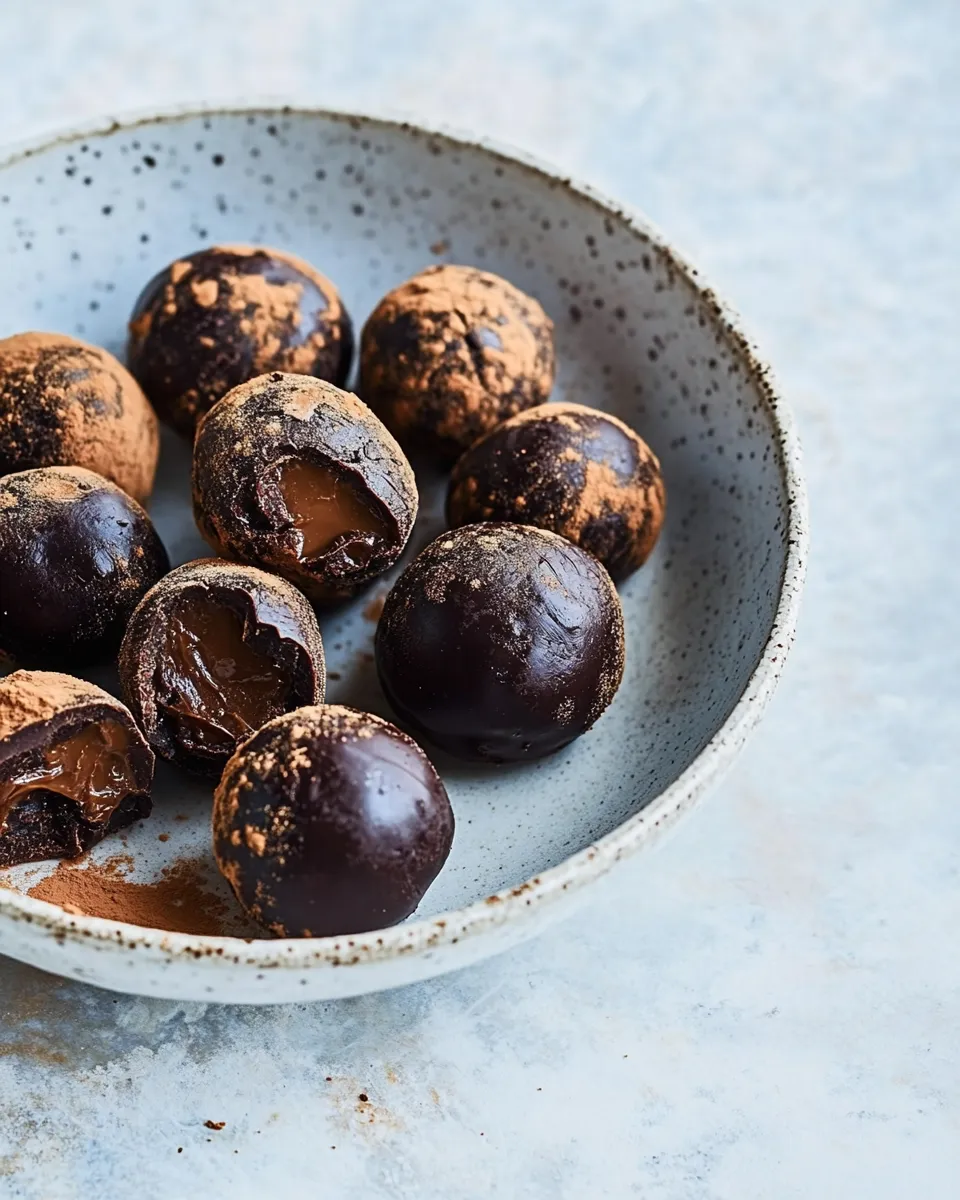
I make these bites every time I need something small, satisfying, and portable. They come together in under 30 minutes, they don’t require baking, and the texture is pleasantly chewy with a dusting of cocoa on the outside. I rely on them for snack boxes, quick dessert fixes, and to quiet the 3 p.m. sugar craving without reaching for candy.
They feel indulgent and simple at the same time. The dates give natural sweetness and binding power. The peanut elements deliver nutty depth and a little crunch. Cocoa ties it all together and keeps the flavor focused on chocolate and peanut butter — the classic duo.
This post walks you through the exact ingredients, step-by-step instructions, and practical tips I use in my kitchen. No fuss, no weird pantry items. Just clear guidance so you get consistent results every time.
Ingredients at a Glance
- 1 cup pitted/packed medjool dates — the primary sweetener and binder; soft, sticky dates help the mixture hold together.
- ¼ cup natural peanut butter — provides nutty richness and helps with cohesion; choose a natural style with oil separated or already stirred.
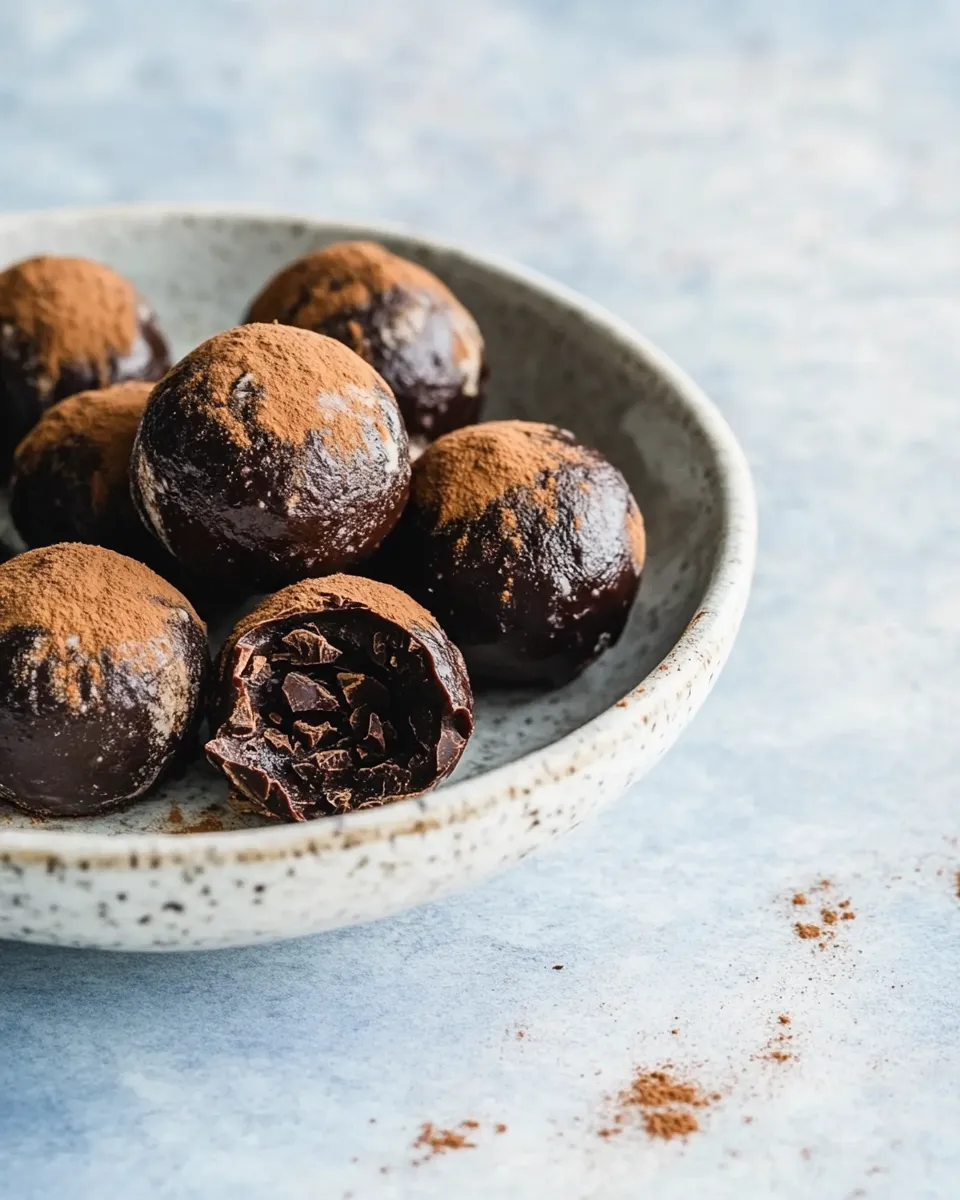
- ¼ cup roasted peanuts — adds crunch and texture contrast to the chewy base.
- 3 tablespoons unsweetened coconut flakes — contributes a light, dry texture and a subtle coconut note.
- 2 tablespoons hemp seeds — boosts protein and adds a mild, nutty background flavor.
- 2 tablespoons cocoa powder — gives chocolate flavor throughout the mixture.
- ¼ teaspoon salt (see note) — enhances all flavors; adjust slightly if using salted peanuts or salted peanut butter.
- Cocoa powder (for rolling) — for coating the outside so the bites look finished and to reduce stickiness.
Chocolate Peanut Butter Bites in Steps
- Add 1 cup pitted/packed medjool dates, ¼ cup natural peanut butter, ¼ cup roasted peanuts, 3 tablespoons unsweetened coconut flakes, 2 tablespoons hemp seeds, 2 tablespoons cocoa powder, and ¼ teaspoon salt to a food processor. Pulse until the mixture breaks down, stopping to scrape down the sides as needed.
- Continue pulsing until the mixture clumps together and holds when pressed between your fingers. If the mixture is too dry and won’t come together, add a splash or two of water and pulse again until it just holds.
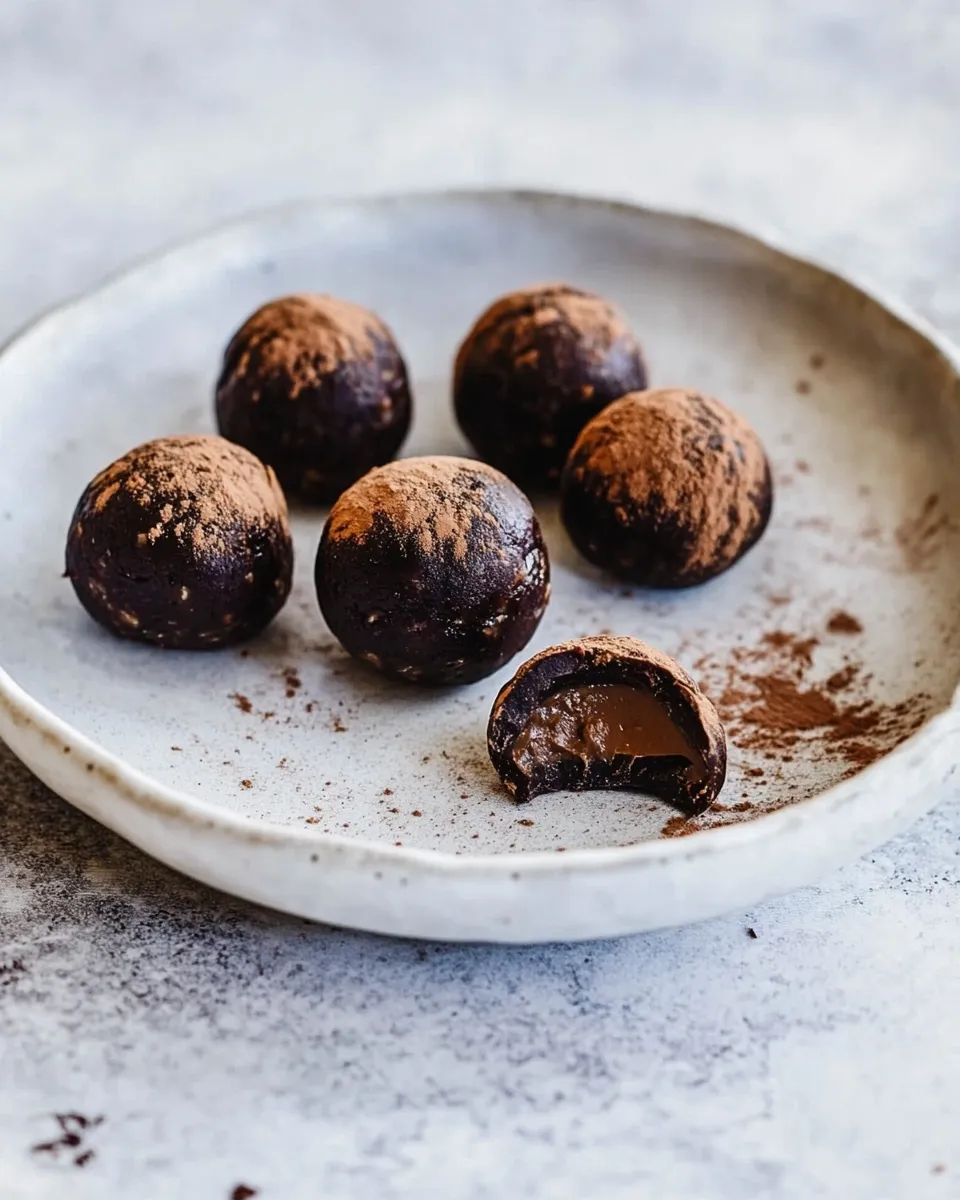
- Scoop roughly 2 tablespoons of mixture for each portion and roll between your palms into balls. Continue until you have 12 balls.
- Put a couple tablespoons of cocoa powder on a plate and roll each ball in the cocoa powder to coat.
- Place the coated balls in a single layer in an airtight container or on a tray and refrigerate until firm (about 30 minutes). Store in an airtight container in the refrigerator for up to a week.
Why It Works Every Time
There are three simple mechanics at play: moisture, fat, and friction. Dates supply the sticky moisture that binds. Peanut butter and roasted peanuts add fat and structure, which keeps the bites from crumbling. Cocoa powder and coconut flakes absorb small amounts of surface moisture, delivering a firm, sliceable texture after chilling.
The food processor is crucial. Short pulses break the peanuts down without turning everything into paste. Then, sustained pulsing brings the components together into a cohesive dough. The splash of water rule exists for a reason: dates vary in moisture, so that tiny adjustment lets you control stickiness without diluting flavor.
Rolling in cocoa powder does more than look pretty. It creates a dry exterior that prevents sticking and gives you a clean, chocolatey first bite. Chilling is the final step; it firms the fats and sets the shape so the bites hold up when handled or packed.
Vegan & Vegetarian Swaps
This recipe is vegetarian and vegan as written, provided your natural peanut butter contains no animal-derived additives. The ingredients listed are plant-based: dates, peanut butter, roasted peanuts, coconut flakes, hemp seeds, cocoa powder, and salt. No animal products are required for these bites.
If you have specific dietary constraints not covered here, test small batches. Because the recipe relies on the texture of dates and nut butter for structure, any substitute for those items will need similar moisture and fat balance to work the same way.
Toolbox for This Recipe
- Food processor — necessary for breaking down dates and nuts and bringing the mixture together.
- Measuring cups and spoons — to keep the ratios consistent.
- Scooper or tablespoon — to portion uniformly (about 2 tablespoons per bite).
- Plate for rolling in cocoa — a shallow plate works best so the bites pick up an even coating.
- Small bowl or tray and an airtight container — for chilling and storing.
- Optional: bench scraper or silicone spatula — helpful for scraping the food processor bowl clean.
Troubleshooting Tips
Mixture Too Dry
If the mixture won’t clump, add a splash or two of water as the instructions note, then pulse again. Add water sparingly; a little goes a long way. If you add too much, the mixture becomes sticky and overly soft.
Mixture Too Sticky
If the mixture is too sticky to handle, dust your hands with a bit of cocoa powder before rolling. Chilling the mixture in the processor bowl for 10–15 minutes can also firm it up and make rolling easier.
Dates Are Too Firm
If your medjool dates are dry or hard, soak them in warm water for 10 minutes, drain well, then proceed. Overly wet dates will require less (or no) extra water, so pulse cautiously.
Rolls Aren’t Holding Shape
Make sure you pulse until the mixture holds when pressed between fingers. If it still crumbles, process a little longer. If it becomes paste-like and greasy, stop — chances are you processed the peanuts too much. Re-chill the bowl and try forming balls with slightly wetter fingers or a small amount of water added to the mixture.
Holiday & Seasonal Touches
These bites are great for gifting and holiday trays because they travel well and stay tidy in containers. For seasonal presentation, place bites in small paper cups or a shallow box layered with parchment. A light dusting of extra cocoa on top makes them look festive without changing flavor.
Because the recipe doesn’t demand unusual ingredients, it’s easy to scale: make several batches and arrange them in a single-layer tray for a dessert table. The neutral palette of chocolate and peanut butter sits nicely next to brighter cookies or spiced confections during holidays.
Behind-the-Scenes Notes
I developed this version because I wanted a snack that felt like a treat but used pantry staples. Dates are the backbone — they keep the bites naturally sweet and eliminate the need for added sugar. The combination of whole roasted peanuts and a creamy peanut butter gives a satisfying contrast in texture that I prefer over using only one form of peanut.
Hemp seeds are a quiet inclusion: they up the nutrition profile with extra protein and a delicate nutty note without interfering with the primary flavors. Coconut flakes bring just enough dryness and subtle flavor to balance the dates and peanut butter.
In testing, I found that rolling in cocoa powder was the most reliable way to reduce tackiness and give the bites a finished look. It also adds a hit of chocolate that layers nicely with the cocoa already in the base.
How to Store & Reheat
Store the bites in an airtight container in the refrigerator for up to a week, as noted in the instructions. Arrange them in a single layer or separate layers with parchment to prevent sticking. If you need to stack many, use small squares of parchment between layers.
These are best served cool or at room temperature. If you prefer a slightly softer center, remove a few from the fridge and let them sit at room temperature for 10–15 minutes before serving. The bites do not require reheating; warm them gently in your hands if you want them softer, but avoid microwaving directly — it can make them oily or too soft.
Your Top Questions
Can I freeze these?
Yes. Freeze in a single layer on a tray until firm, then transfer to an airtight container or freezer bag. They will keep well for a month or two. Thaw in the refrigerator or at room temperature before serving.
How much does one ball yield in calories?
I don’t track calories for this recipe in this post. If you need nutritional information, you can plug the exact ingredient quantities into a nutrition calculator to get per-bite estimates (divide the total by 12).
Can I make them larger or smaller?
Yes. The recipe specifies roughly 2 tablespoons per bite to make about 12. If you make them smaller, reduce the portion size and increase the number of bites accordingly. Remember that smaller bites will firm up faster in the fridge.
Do I need to peel the roasted peanuts?
No. The recipe uses roasted peanuts with their skins intact. They are processed down in the food processor and contribute texture. If you prefer skinless peanuts, you may use them, but the texture and color might be slightly different.
What if I don’t have hemp seeds or coconut flakes?
Both ingredients add texture and subtle flavor, but the recipe will still work without them. Keep the ratios of dates, peanut butter, and peanuts consistent. You may notice a slightly different mouthfeel if you omit either item.
Can I use a blender instead of a food processor?
A high-powered blender may work, but a food processor is preferred for maintaining texture. Blenders tend to overwork peanuts into a paste more quickly. If you use a blender, pulse carefully and watch the texture closely.
The Takeaway
These Chocolate Peanut Butter Bites are straightforward, reliable, and pantry-friendly. They require no baking, use a short list of ingredients, and scale easily. Follow the step-by-step pulses, adjust moisture with tiny splashes of water if needed, and chill for a clean, firm finish. They make a great everyday snack and an uncomplicated addition to any holiday tray.
Chocolate Peanut Butter Bites
Ingredients
Equipment
Method
- Add 1 cup pitted/packed medjool dates, ¼ cup natural peanut butter, ¼ cup roasted peanuts, 3 tablespoons unsweetened coconut flakes, 2 tablespoons hemp seeds, 2 tablespoons cocoa powder, and ¼ teaspoon salt to a food processor. Pulse until the mixture breaks down, stopping to scrape down the sides as needed.
- Continue pulsing until the mixture clumps together and holds when pressed between your fingers. If the mixture is too dry and won’t come together, add a splash or two of water and pulse again until it just holds.
- Scoop roughly 2 tablespoons of mixture for each portion and roll between your palms into balls. Continue until you have 12 balls.
- Put a couple tablespoons of cocoa powder on a plate and roll each ball in the cocoa powder to coat.
- Place the coated balls in a single layer in an airtight container or on a tray and refrigerate until firm (about 30 minutes). Store in an airtight container in the refrigerator for up to a week.
Notes
Tips & Tricks
: Taste your mixture first before adding salt. I’ve found that peanut butter that has added salt will change the amount needed for extra salt.
Stock up
: get the pantry ingredients you will need:
dates
,
peanuts/hemp seeds
Link:
Recipe lightly adapted from Sarah Waldman's cookbook,
Feeding a Family.