Dill Pickle Cheese Ball
I make this Dill Pickle Cheese Ball any time I want something that disappears fast at a party. It balances creamy, tangy, and a little savory bite from the Worcestershire and ranch seasoning. It’s the kind of recipe that looks special, but is genuinely easy to pull together in less than 10 minutes of hands-on time.
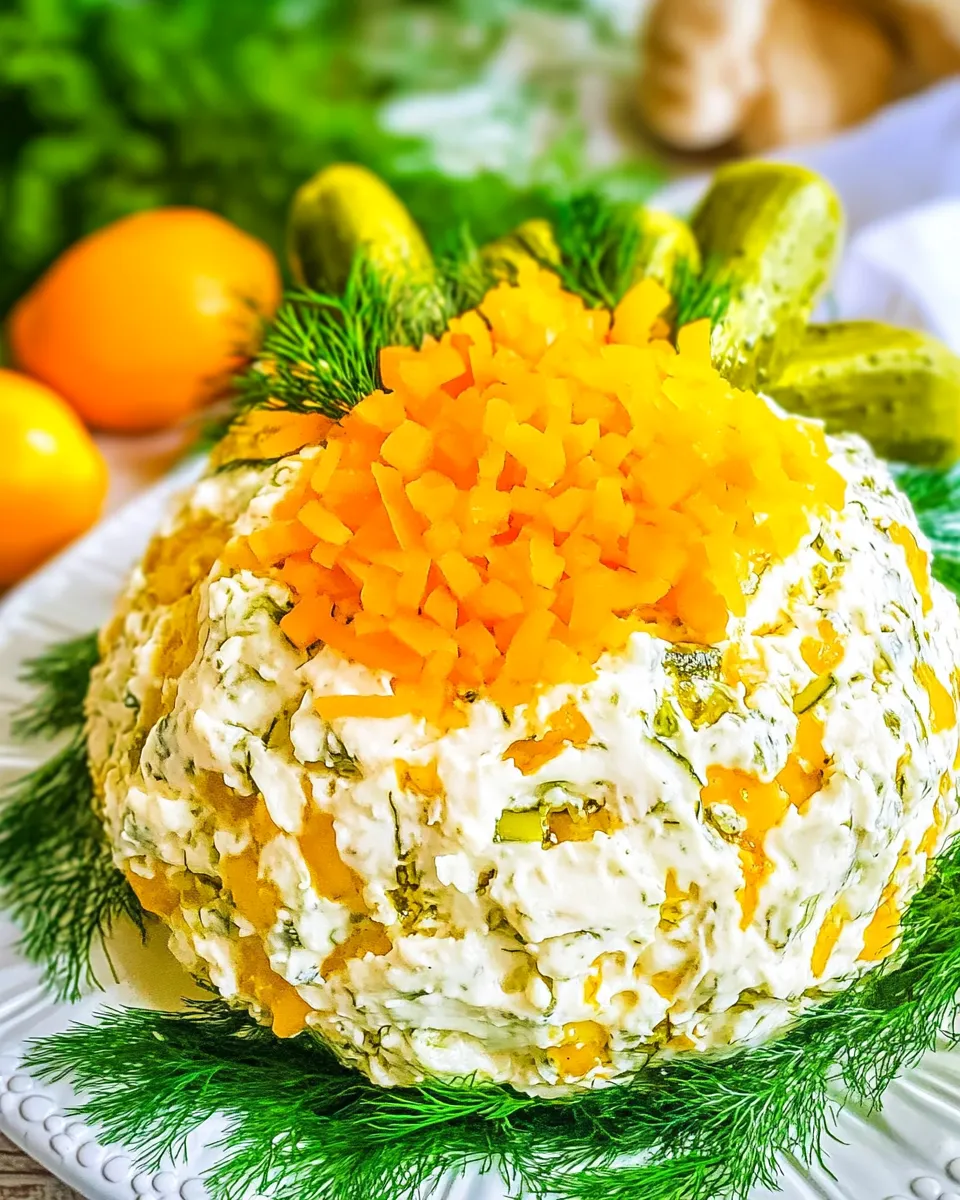
Two things I love about this recipe: it’s forgiving and it rewards patience. Soften the cream cheese fully, chill the shaped ball, and that short wait transforms a loose mix into a sliceable, scoopable centerpiece. Roll it in the dill–Colby Jack coating right before guests arrive for the brightest flavor and cleanest presentation.
Shopping List
- two 8-ounce packages cream cheese — softened to room temperature (use full-fat cream cheese and not anything labeled as lite, fat free, or spreadable)
- 2 tablespoons sour cream
- 1 cup shredded cheddar cheese
- 1 cup dill pickles, diced or chopped small
- ¼ cup dill pickle relish
- 3 tablespoons fresh dill, finely minced; divided
- 1 tablespoon dill-flavored ranch seasoning mix
- 1 teaspoon Worcestershire sauce
- ½ cup shredded Colby Jack cheese
Ingredients
- two 8-ounce packages cream cheese, softened to room temp (use full fat cream cheese and not anything labeled as lite, fat free, or spreadable) — the creamy base; full fat gives the best texture and flavor.
- 2 tablespoons sour cream — adds a touch of tang and loosens the texture for easy mixing.
- 1 cup shredded cheddar cheese, or a similar cheese or shredded cheese blend — contributes sharpness and structure to the ball.
- 1 cup dill pickles, diced or chopped small — crunchy, tangy mix-ins; dice small so they distribute evenly and don’t make the ball too wet.
- ¼ cup dill pickle relish — concentrated pickle flavor and a bit of sweetness for balance.
- 3 tablespoons fresh dill, finely minced; divided — fresh herb brightness; use 2 tablespoons in the mix and reserve 1 tablespoon for coating.
- 1 tablespoon dill flavored ranch seasoning mix, or original ranch seasoning mix* — seasoning backbone; dill-flavored amplifies the pickle theme.
- 1 teaspoon Worcestershire sauce — deepens savory flavor and adds umami.
- ½ cup shredded Colby Jack cheese — used for the final coating with reserved dill; provides mild, creamy exterior texture.
Dill Pickle Cheese Ball: From Prep to Plate
- Ensure both 8-ounce cream cheese packages (total 16 oz) are softened to room temperature (use full-fat cream cheese). Place them in a large bowl with 2 tablespoons sour cream. Beat with a handheld electric mixer or mix with a sturdy wooden spoon or rubber spatula until very smooth and no lumps remain.
- Add 1 cup shredded cheddar cheese, 1 cup diced dill pickles, 1/4 cup dill pickle relish, 2 tablespoons of the minced fresh dill (reserve the remaining 1 tablespoon for coating), 1 tablespoon dill-flavored (or original) ranch seasoning mix, and 1 teaspoon Worcestershire sauce. Stir until all ingredients are evenly distributed.
- Lay a large sheet of plastic wrap on a clean work surface. Scrape the cheese mixture onto the center of the plastic wrap. Gather the plastic wrap up around the mixture, twist the wrap to tighten, and use your hands (on the outside of the plastic) to shape the mixture into a smooth ball. If needed, use the spatula to press and smooth the surface before tightening the wrap.
- Place the wrapped cheese ball on a plate or small tray and refrigerate, wrapped, for at least 1 hour (up to 24 hours) to firm and meld the flavors. Do not skip chilling.
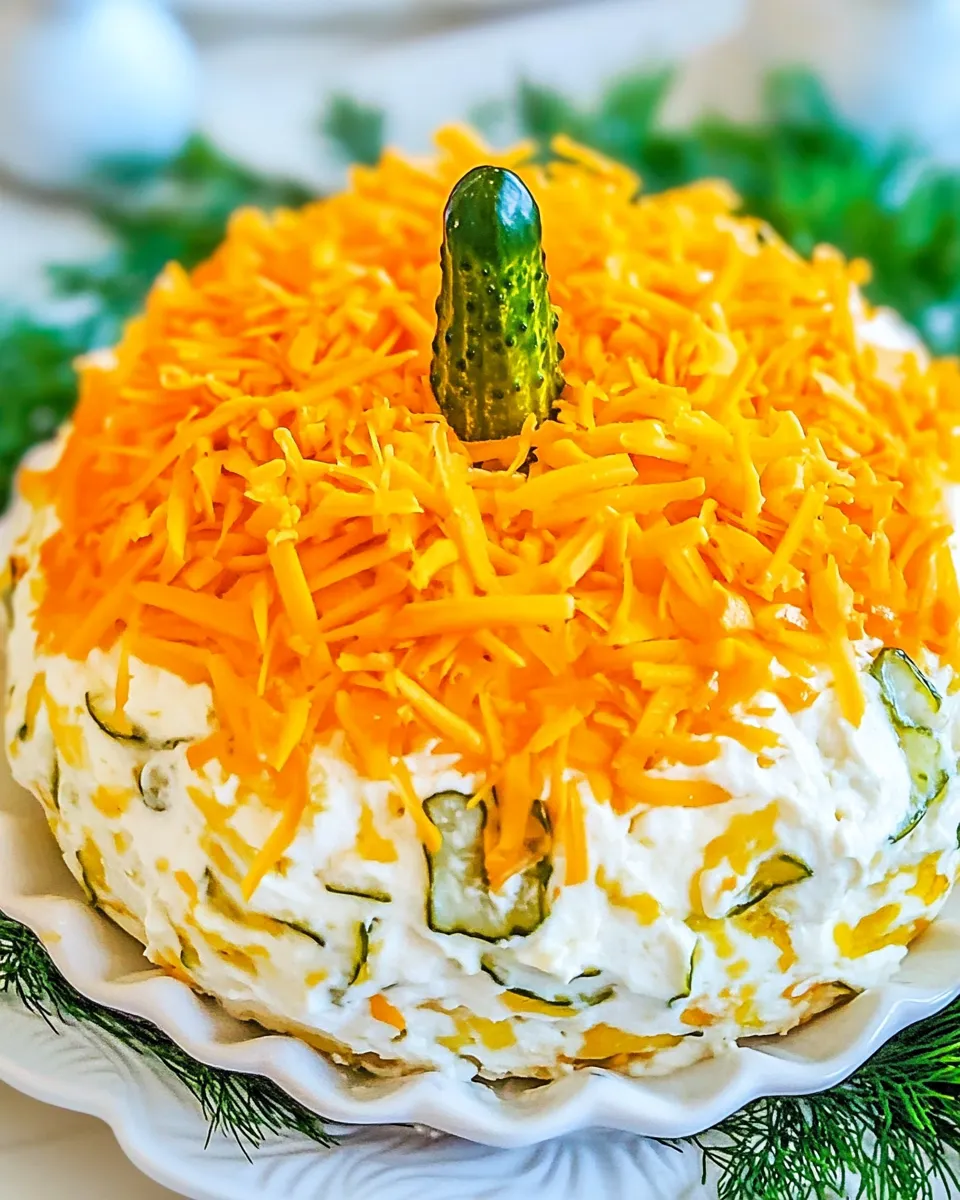
- Before serving, in a large shallow bowl combine 1/2 cup shredded Colby Jack cheese and the reserved 1 tablespoon minced fresh dill. Unwrap the chilled cheese ball and roll it in the Colby Jack–dill mixture until evenly coated.
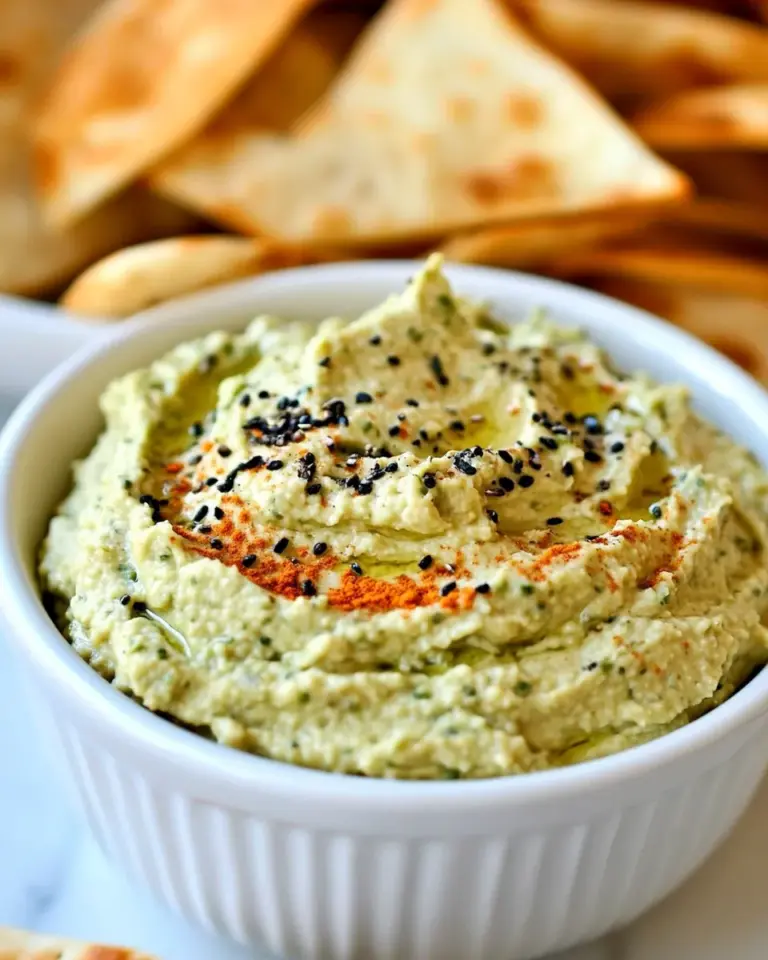
- Transfer to a serving plate and serve with crackers, pita chips, toasted bread, or other dippers of your choice.
- Store any leftovers airtight in the refrigerator for up to 5 days. Freezing is not recommended.
Top Reasons to Make Dill Pickle Cheese Ball
- Quick hands-on time — most of the work is mixing; chilling does the heavy lifting.
- Crowd-pleaser — the contrast of creamy cheese and tangy pickles appeals to many palates.
- Make-ahead friendly — chilling for up to 24 hours deepens the flavors and eases party prep.
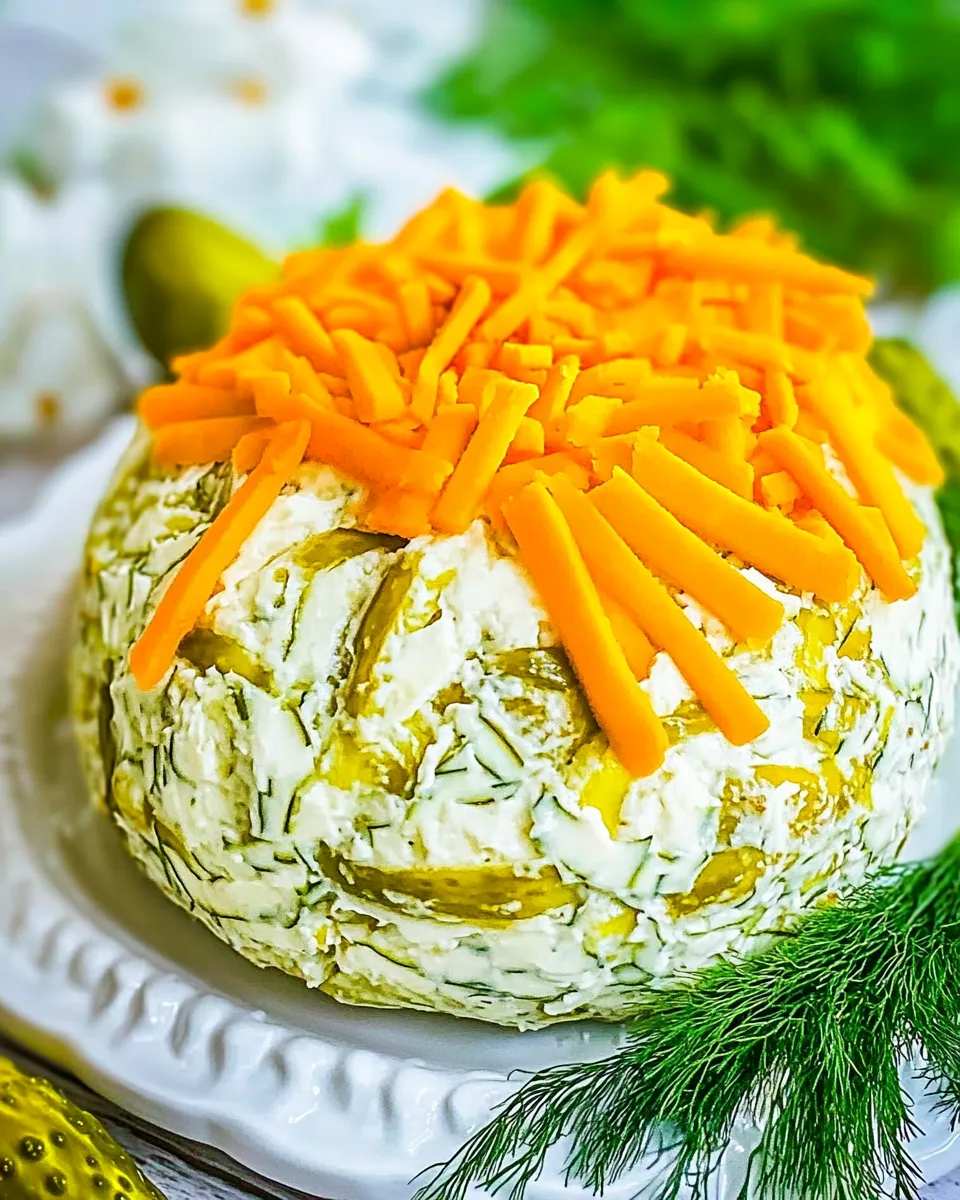
- Visually impressive with little effort — the dill–Colby Jack coating looks professional.
- Highly adaptable — you can tweak the seasoning intensity or swap similar shredded cheeses if needed.
Easy Ingredient Swaps

- Swap the 1 cup shredded cheddar cheese with a similar shredded cheese or a mixed shredded cheese blend when you want a milder or creamier profile.
- If you can’t find dill-flavored ranch seasoning, use original ranch seasoning mix — the recipe accounts for either option.
- Use the suggested 1/2 cup shredded Colby Jack for the outer coating; if you prefer a different mild shredded cheese for coating, choose a comparable, melty-style shredded cheese.
- Keep the cream cheese full-fat as instructed. Don’t use spreadable or labeled “lite” versions; they change texture and performance.
Prep & Cook Tools
- Large mixing bowl — for combining the cream cheese and mix-ins.
- Handheld electric mixer, sturdy wooden spoon, or rubber spatula — any will work; mixer is fastest for smooth cream cheese.
- Plastic wrap — to shape and chill the ball without mess.
- Plate or small tray — to hold the wrapped ball in the refrigerator.
- Large shallow bowl — for combining the Colby Jack and reserved dill for coating.
- Serving plate and dippers — crackers, pita chips, toasted bread, or other choices.
Pitfalls & How to Prevent Them
- Cold, lumpy cream cheese — prevent this by softening both 8-ounce packages to room temperature before mixing. If you miss this step, microwave in 5–7 second bursts and stir between until softened.
- Runny cheese ball from wet pickles — dice pickles small and drain excess brine, or pat them dry before adding so the mixture doesn’t become watery.
- Underseasoned mix — taste as you go. The ranch seasoning and Worcestershire are small but critical; mix thoroughly so flavors distribute evenly.
- Messy shaping — use plastic wrap and press from the outside to form a smooth ball without getting your hands covered in the mix.
- Skipping the chill — chilling for at least 1 hour is essential. The ball will be loose and hard to coat or serve if you don’t chill it long enough.
Nutrition-Minded Tweaks
- Lower sodium option — choose lower-sodium dill pickles or a reduced-sodium pickle relish to cut overall sodium without changing the technique.
- Portion control — serve smaller scoops alongside plenty of fresh vegetable dippers to stretch the serving and reduce per-person calories.
- Coating choices — use less of the Colby Jack coating or press it on lightly to lower the total cheese per serving while keeping the attractive exterior.
- Be mindful of extras — the cheese ball itself stores well, but dippers (crackers, chips) are where extra calories add up; opt for whole-grain or veggie dippers if you’re watching intake.
Cook’s Commentary
This is one of those party recipes I turn to when I want an easy crowd starter with personality. It’s bold without being aggressive — the dill and pickle bite sings, but the cream cheese and Colby Jack mellow and carry the flavors. The Worcestershire here is a small but important secret: it adds depth and keeps the mix from feeling one-note.
I like to make the mixture the day before a gathering and keep it wrapped in the fridge. On the event day I unwrap it, let it sit 10 minutes at room temperature if it’s very firm, then roll it in the Colby Jack and dill for the best textural contrast. It’s simple, but those finishing moments make a difference in presentation and mouthfeel.
Leftovers & Meal Prep
Wrap leftovers airtight and refrigerate for up to 5 days as the recipe directs. The texture firms as it sits, so give it a few minutes at room temperature before serving again for easier spreading or scooping. Freezing is not recommended — the texture becomes grainy and watery after thawing because of the high moisture and dairy content.
Frequently Asked Questions
- Can I make this ahead? Yes. Follow the directions to shape and wrap the ball, then refrigerate for at least 1 hour and up to 24 hours before coating and serving.
- Can I freeze the cheese ball? Freezing is not recommended. The texture and separation after thawing will be disappointing.
- What if my cream cheese has lumps? Beat longer with a handheld mixer or mix vigorously with a sturdy spoon. Fully softened cream cheese is the simplest way to avoid lumps.
- Can I use store-bought pickle relish only? The recipe already uses 1/4 cup dill pickle relish in addition to diced pickles for texture. You can adjust the ratio, but keep both textures in mind: relish adds concentrated flavor, diced pickles add crunch.
- Is it OK to use original ranch if I don’t have dill-flavored? Yes. The directions note dill-flavored or original ranch seasoning mix — both work, offering slightly different flavor profiles.
Serve & Enjoy
Transfer the finished Dill Pickle Cheese Ball to a serving plate and arrange your dippers around it. Crackers, pita chips, toasted bread, or fresh vegetable sticks all pair well. Slice or scoop and encourage guests to take small amounts at first — the flavor is concentrated and a little goes a long way.
Keep a small knife or spreader nearby so people can portion neatly. This cheese ball makes a lively addition to holiday spreads, game-day tables, and casual get-togethers. Enjoy — and expect requests for the recipe.
Dill Pickle Cheese Ball
Ingredients
Equipment
Method
- Ensure both 8-ounce cream cheese packages (total 16 oz) are softened to room temperature (use full-fat cream cheese). Place them in a large bowl with 2 tablespoons sour cream. Beat with a handheld electric mixer or mix with a sturdy wooden spoon or rubber spatula until very smooth and no lumps remain.
- Add 1 cup shredded cheddar cheese, 1 cup diced dill pickles, 1/4 cup dill pickle relish, 2 tablespoons of the minced fresh dill (reserve the remaining 1 tablespoon for coating), 1 tablespoon dill-flavored (or original) ranch seasoning mix, and 1 teaspoon Worcestershire sauce. Stir until all ingredients are evenly distributed.
- Lay a large sheet of plastic wrap on a clean work surface. Scrape the cheese mixture onto the center of the plastic wrap. Gather the plastic wrap up around the mixture, twist the wrap to tighten, and use your hands (on the outside of the plastic) to shape the mixture into a smooth ball. If needed, use the spatula to press and smooth the surface before tightening the wrap.
- Place the wrapped cheese ball on a plate or small tray and refrigerate, wrapped, for at least 1 hour (up to 24 hours) to firm and meld the flavors. Do not skip chilling.
- Before serving, in a large shallow bowl combine 1/2 cup shredded Colby Jack cheese and the reserved 1 tablespoon minced fresh dill. Unwrap the chilled cheese ball and roll it in the Colby Jack–dill mixture until evenly coated.
- Transfer to a serving plate and serve with crackers, pita chips, toasted bread, or other dippers of your choice.
- Store any leftovers airtight in the refrigerator for up to 5 days. Freezing is not recommended.
Notes
*If you can’t find the
dill flavored option
of classic ranch seasoning, don’t worry.
Regular ranch seasoning mix
is just fine. This will tone down the overall dill flavor of the cheese ball a bit, but there are still three other ingredients with dill in them so don’t worry.
Make sure you are selecting dry, powdered seasoning mix and not actual ranch dressing.
If you live in an area where you can’t find any type of dry powdered ranch seasoning, you can make a mixture of it with garlic and onion powders, and salt. I suggest do an online search for how to make it yourself. You are only using a tablespoon anyway.