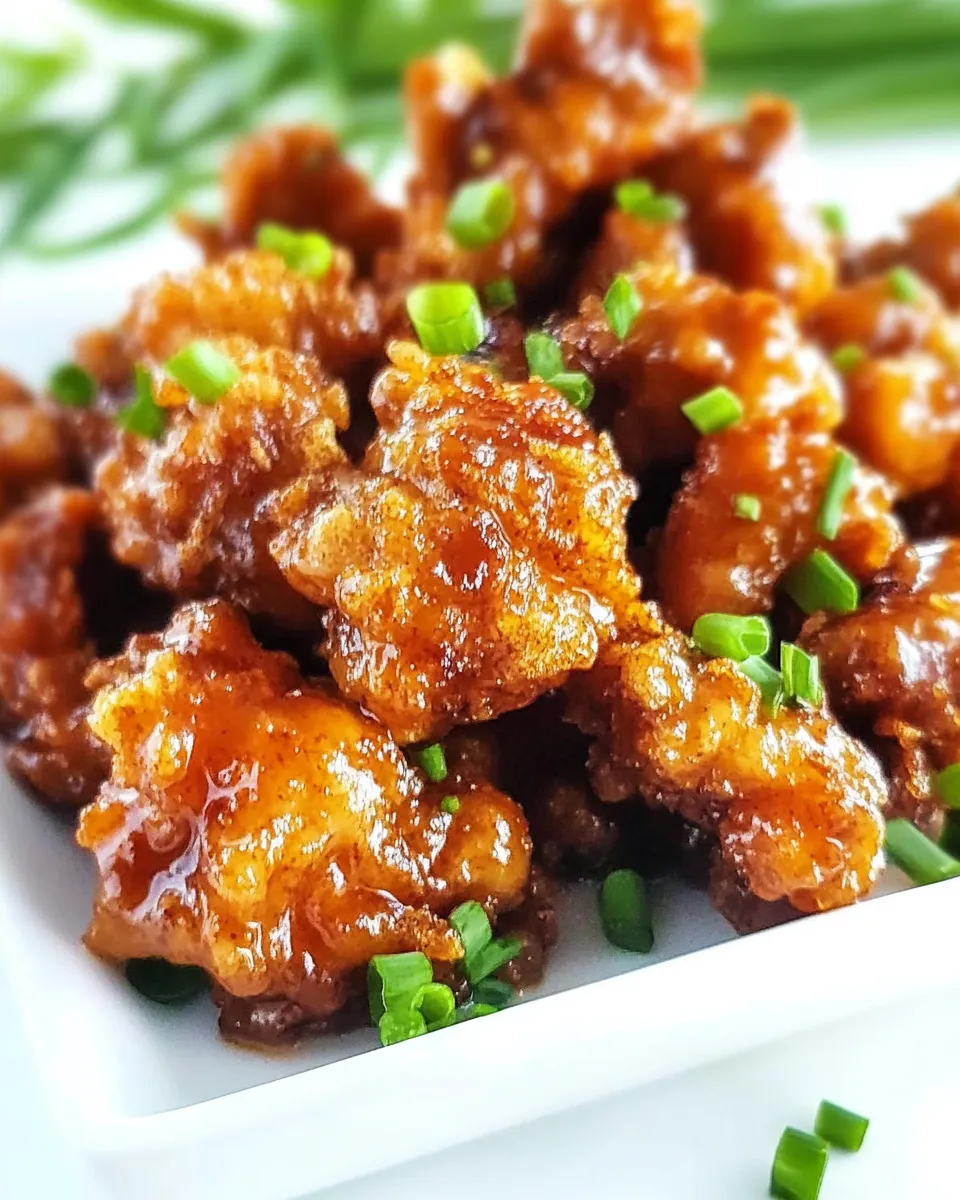
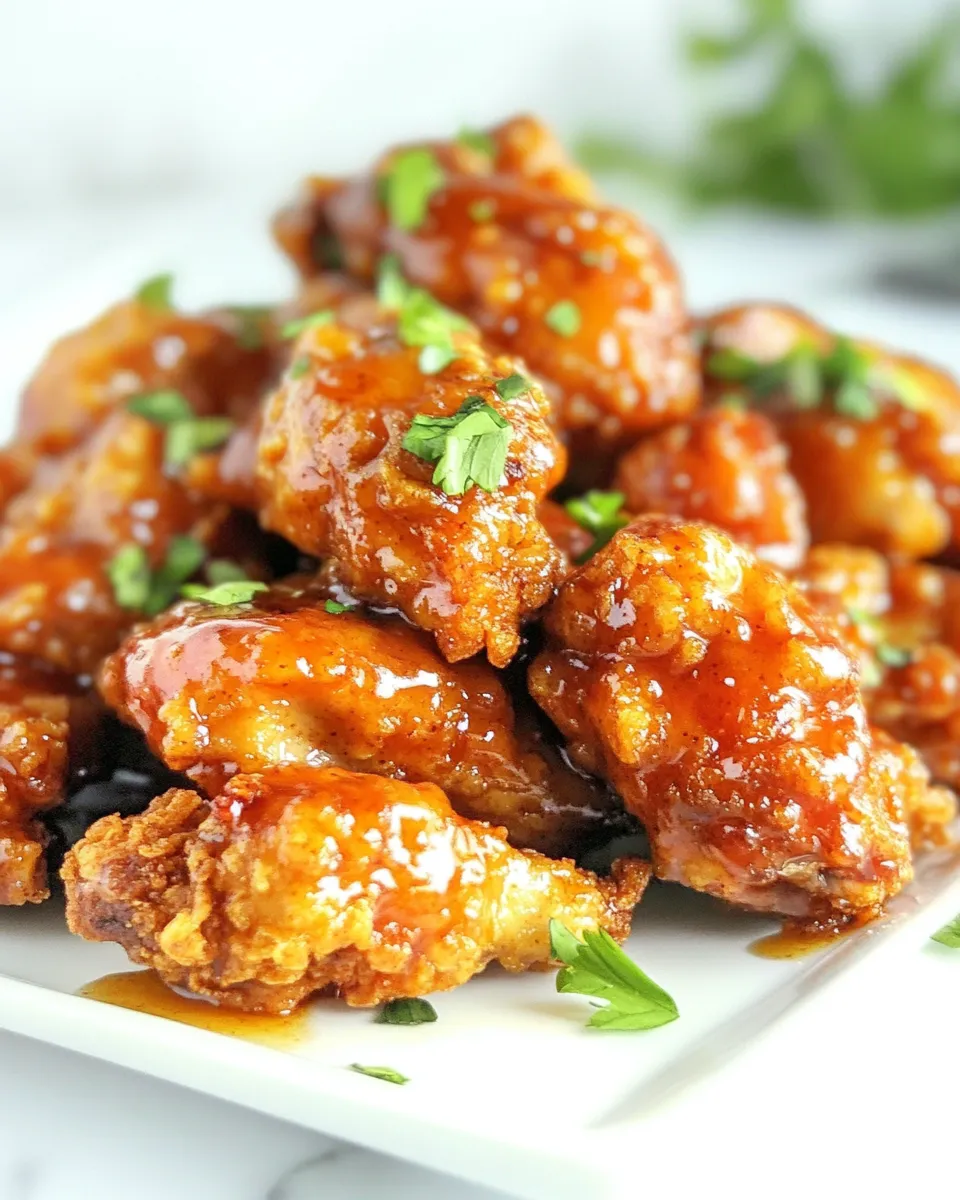
Honey Buttered Fried Chicken
This recipe is one of those rare things that manages to be both comforting and a little bit showy. It’s crisp on the outside, tender and juicy inside, and finished with a glossy honey-butter glaze that clings to every bite. I make this when friends are coming over and when I want something that feels like a treat without hiding behind complicated steps.
There’s a rhythm to the process: a quick batter, careful frying in batches, then a short, sweet sauce that pulls everything together. None of it is fancy. Most of the work is keeping an eye on oil temperature and making sure the chicken cooks through. That’s manageable, and the payoff is worth it.
Below you’ll find the exact ingredients and step-by-step directions I follow. I’ve added practical tips for substitutions, equipment notes, storage advice, and troubleshooting—everything that helps you get the best result the first time.
Ingredient List
- 4 boneless, skinless chicken thighs, cut into 1″ cubes — dark meat stays moist and fries up tender; cutting into 1″ pieces ensures even cooking.
- ½ cup all purpose flour — builds structure in the batter for a crisp exterior.
- ½ cup cornstarch — lightens the crust and helps it crisp without getting heavy.
- ½ tsp baking soda — a little lift in the batter for a delicate crunch.
- ½ cup ice cold water — keeps the batter cold so it clings and crisps when it hits hot oil.
- vegetable oil — enough for frying, about 2″ depth in a skillet works well; neutral oils handle high heat without interfering with flavor.
- fresh parsley — optional garnish that adds a fresh color contrast and brightness.
- 4 tbsp butter — builds the rich, buttery base of the sauce; use real butter for best flavor.
- 2 tbsp white sugar — rounds the sauce and balances the soy and butter.
- 2 tbsp soy — brings savory saltiness; listed as “soy” in the recipe source, so keep it on hand as given.
- 2 tbsp honey — the signature sweet element that gives the glaze its name and sticky finish.
Honey Buttered Fried Chicken, Made Easy
- In a large bowl, whisk together ½ cup all purpose flour, ½ cup cornstarch, and ½ tsp baking soda. Gradually add ½ cup ice cold water and stir until a smooth batter forms. Add the 4 boneless, skinless chicken thighs cut into 1″ cubes and toss until all pieces are evenly coated.
- Pour about 2″ of vegetable oil into a large skillet and heat over medium-high heat until hot and shimmering (test by carefully dropping a small bit of batter into the oil—it should sizzle).
- Working in a single layer and in batches (do not overcrowd the skillet), carefully add coated chicken pieces to the hot oil. Fry for about 8–10 minutes total, turning halfway through, until the exterior is golden brown and crispy and the internal temperature reaches 165°F.
- Use a slotted spoon or tongs to transfer fried chicken to a plate lined with paper towels to drain. Keep the cooked batches warm while you finish frying the rest.
- In a separate skillet over medium heat, add 4 tbsp butter, 2 tbsp white sugar, 2 tbsp soy, and 2 tbsp honey. Stir frequently until the butter melts and the mixture comes to a gentle bubble.
- Let the sauce bubble for 1 minute, then remove the skillet from the heat.
- Add the drained fried chicken to the skillet with the sauce (or pour the sauce over the chicken in a large bowl) and stir or toss until all pieces are evenly coated.
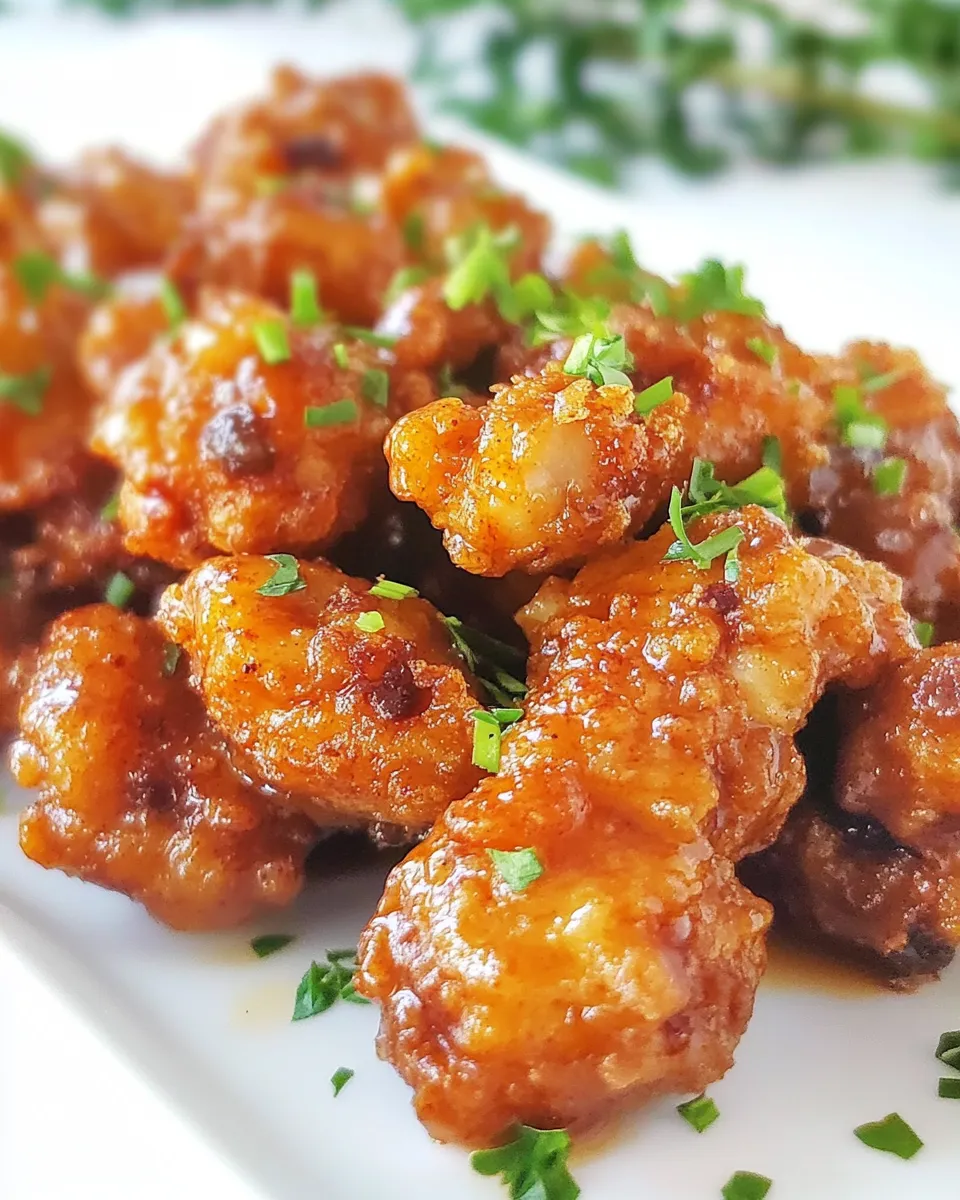
- Garnish with fresh parsley if using, and serve the honey buttered fried chicken immediately.
Why It’s Crowd-Pleasing
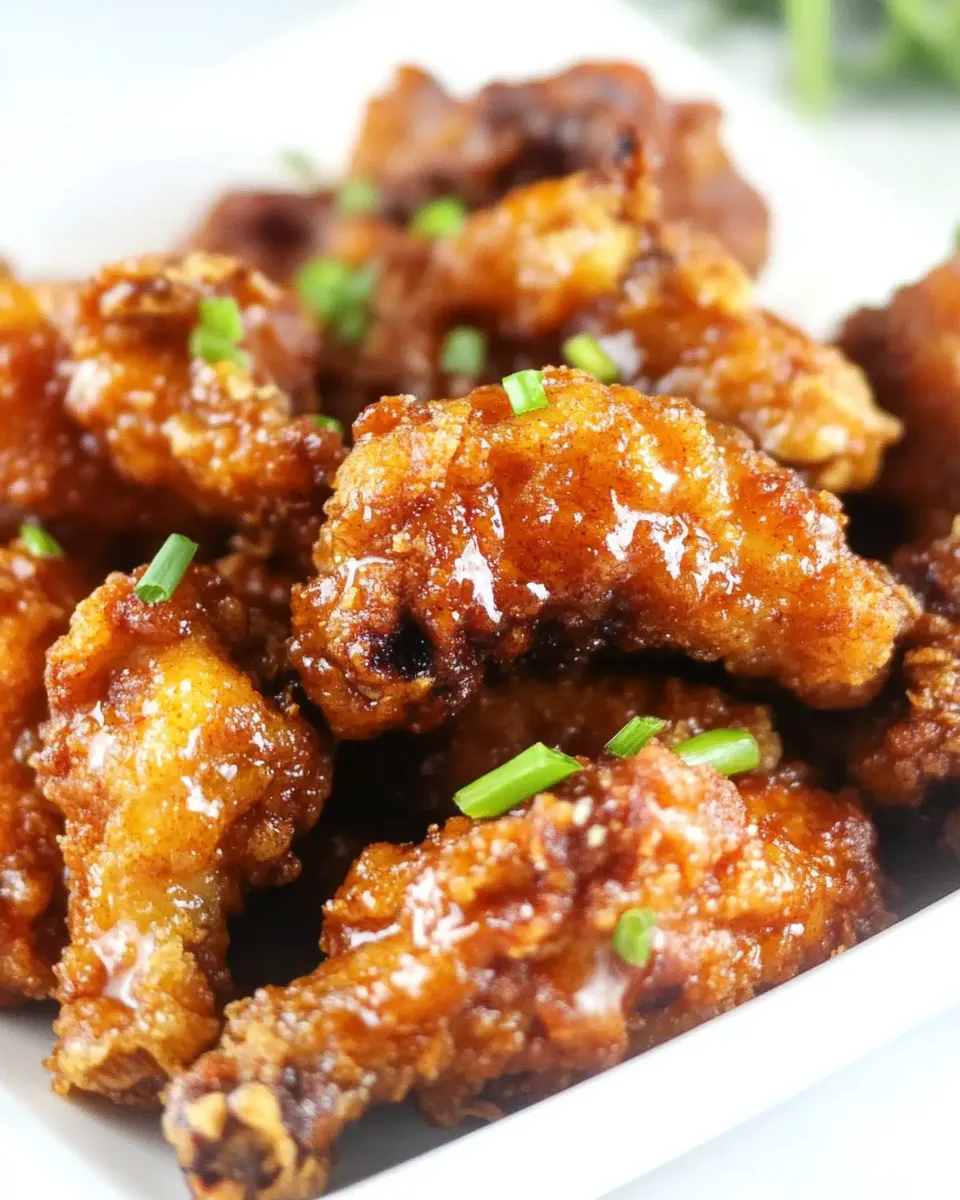
This dish hits familiar, satisfying notes: a crunchy exterior and juicy interior that everyone loves, and a sauce that balances sweet and savory. The honey-butter glaze gives the chicken a sticky, slightly glossy finish that feels indulgent without being cloying. It’s easy to eat with your hands and easy to share, which makes it great for gatherings.
The flavor profile is broad enough to appeal to different tastes. The soy in the sauce provides umami to counteract the sugar and honey, so you don’t end up with a one-dimensional sweetness. Texturally, the cornstarch-and-flour batter creates a delicate crust that isn’t heavy or greasy when fried correctly.
Finally, this recipe scales well. You can increase quantities and fry in batches, or keep a smaller skillet going for intimate dinners. Most people respond to fried chicken with excitement—this version feels a little special because of the honey-butter finish.
Quick Replacement Ideas
- Chicken breasts — use the same method but cut into similar-sized pieces; watch the cooking time closely so the lean meat doesn’t dry out.
- Margarine or oil instead of butter — for a dairy-free option, swap the butter for a neutral oil or dairy-free butter, though the flavor will be different.
- Brown sugar for white sugar — gives a deeper caramel note in the sauce without altering quantities.
- Maple syrup for honey — if you prefer a different sweetness profile, use an equal amount of maple syrup; the character changes but the technique is the same.
- Sesame seeds or chives instead of parsley — alternate garnishes add texture or aroma if parsley isn’t available.
Must-Have Equipment
You don’t need a lot of fancy gear, but a few tools make the work safer and more consistent. A heavy-bottomed skillet (cast iron or stainless) holds heat well and gives a steady frying temperature. A deep-fry thermometer is extremely helpful—aim for a steady medium-high so the batter crisps without burning.
Other useful items: a slotted spoon or tongs for turning and removing pieces, a wire rack set over a baking sheet to keep fried chicken crisp while you finish batches, and heatproof bowls for tossing pieces in the sauce. Paper towels help with initial draining, but I prefer the wire rack because it keeps the crust from getting soggy.
Steer Clear of These
Don’t overcrowd the skillet. Crowding drops the oil temperature and creates soggy, greasy chicken rather than crisp pieces. Fry in single layers and give each piece space to brown properly.
Avoid high heat that smokes the oil and burns the batter. If the outside is dark while the inside is still undercooked, lower the heat and cook a little longer. Use a thermometer to confirm 165°F internal temperature for safety.
Don’t over-sweeten the sauce. The recipe balances sugar, honey, and soy; adding extra sweeteners can overwhelm the savory notes and make the sauce sticky in an unpleasant way.
Make It Your Way
Flavor tweaks
- Add a pinch of cayenne to the batter or the sauce if you like heat. Start small—a little goes a long way—and taste as you go.
- Mince garlic and add it to the sauce for an aromatic boost; add it early with the butter so it softens but doesn’t burn.
- Stir in a squeeze of lemon after removing the sauce from heat to brighten the glaze if it feels too rich.
Presentation ideas
- Serve on a platter with lemon wedges and extra parsley for color. The acidity from lemon cuts the richness.
- Offer a simple dipping sauce on the side—plain yogurt with a pinch of salt and lemon, or a soy-mayo blended dip.
Testing Timeline
Run through this plan the first time so you know what to expect. Prep your chicken pieces and have the batter ready just before frying—cold batter hits hot oil best. Allow about 20–30 minutes for initial prep (cutting, mixing batter), then 20–30 minutes for frying depending on your batch size. Making the sauce takes just a few minutes while you keep the last batch warm.
Helpful checkpoints: test the oil with a small drop of batter—if it sizzles, you’re ready. Check chicken pieces after 4–5 minutes to gauge browning, and rely on a thermometer to confirm 165°F inside. Time the sauce so it’s finished right as your final batch comes out; you want the chicken crisp when it meets the glaze.
Meal Prep & Storage Notes
Leftovers keep well but lose some crispness. Store cooled chicken in an airtight container in the fridge for up to 3 days. To reheat and regain crispness, place pieces on a wire rack over a baking sheet and bake at 375°F for 8–10 minutes, or until heated through; finish under the broiler briefly if you want extra color. Reheat the sauce gently on the stove and toss or drizzle before serving.
For make-ahead hosting, you can fry the chicken ahead of time and keep it warm in a low oven (about 200°F) on a wire rack. Make the sauce just before serving and glaze the chicken right before it hits the table. That keeps the crust crisp and the glaze fresh-tasting.
Your Top Questions
Q: Can I use skin-on chicken? A: You can, but cooking time and technique will change. Skin-on pieces may crisp differently and need longer to cook through. The recipe specifically uses boneless, skinless thighs cut into 1″ cubes for even, quick frying.
Q: How do I know the oil is ready? A: Drop a small bit of batter into the oil—it should sizzle immediately. If it browns too fast, lower the heat; if it barely bubbles, raise the heat slightly and wait until the oil shimmers.
Q: Is the sugar necessary in the sauce? A: It helps balance flavors and gives a more rounded sweetness than honey alone. If you prefer less sugar, reduce it a little and taste; the soy provides salty balance.
Q: My chicken turned out greasy—what went wrong? A: Most likely the oil was too cool or the pieces were overcrowded. Maintain temperature and fry in small batches. Drain on a rack rather than directly on paper towels to avoid steam softening the crust.
The Takeaway
This recipe is straightforward and forgiving when you keep a few basics in mind: cold batter, steady oil temperature, and frying in batches. The honey-butter glaze is quick but transformative—one minute bubbling and a gentle toss later, the chicken comes alive. It’s a great recipe for a casual dinner or a small party when you want something that looks and tastes special without a lot of fuss.
Make it once exactly as written to learn the rhythm. After that, tweak small details—add a pinch of spice, swap sweeteners, or try different garnishes—to make it yours. Most importantly, enjoy the process and the inevitable smiles when people take that first sticky, crunchy bite.
Honey Buttered Fried Chicken
Ingredients
Equipment
Method
- In a large bowl, whisk together ½ cup all purpose flour, ½ cup cornstarch, and ½ tsp baking soda. Gradually add ½ cup ice cold water and stir until a smooth batter forms. Add the 4 boneless, skinless chicken thighs cut into 1" cubes and toss until all pieces are evenly coated.
- Pour about 2" of vegetable oil into a large skillet and heat over medium-high heat until hot and shimmering (test by carefully dropping a small bit of batter into the oil—it should sizzle).
- Working in a single layer and in batches (do not overcrowd the skillet), carefully add coated chicken pieces to the hot oil. Fry for about 8–10 minutes total, turning halfway through, until the exterior is golden brown and crispy and the internal temperature reaches 165°F.
- Use a slotted spoon or tongs to transfer fried chicken to a plate lined with paper towels to drain. Keep the cooked batches warm while you finish frying the rest.
- In a separate skillet over medium heat, add 4 tbsp butter, 2 tbsp white sugar, 2 tbsp soy, and 2 tbsp honey. Stir frequently until the butter melts and the mixture comes to a gentle bubble.
- Let the sauce bubble for 1 minute, then remove the skillet from the heat.
- Add the drained fried chicken to the skillet with the sauce (or pour the sauce over the chicken in a large bowl) and stir or toss until all pieces are evenly coated.
- Garnish with fresh parsley if using, and serve the honey buttered fried chicken immediately.
Notes
Expert Chicken Batter Tip
Tip on the batter: The ice-cold water in the TikTok video had ice in it. So I filled the cup with 1/2 cup of water and then added ice. I tossed it all into the bowl. The mixture should be similar to pudding. Smooth and not lumpy. You might need to add a little more water.
Where is the Seasoning?
After watching the viral video you may be asking yourself where the salt, black pepper, cloves garlic, or pepper flakes are. While seasoning is always a personal option and choice you can make while prepping a piece of chicken, the truth is that we believe the original recipe is great on its own.