Instant Pot Deviled Eggs
These Instant Pot deviled eggs are my go-to when I need a reliable, hands-off method that delivers creamy filling and shells that peel cleanly. Pressure cooking the eggs shortens active time and makes the process predictable, which matters when you’re prepping for a party or a quick weeknight snack. No steam, no guessing — just a consistent result.
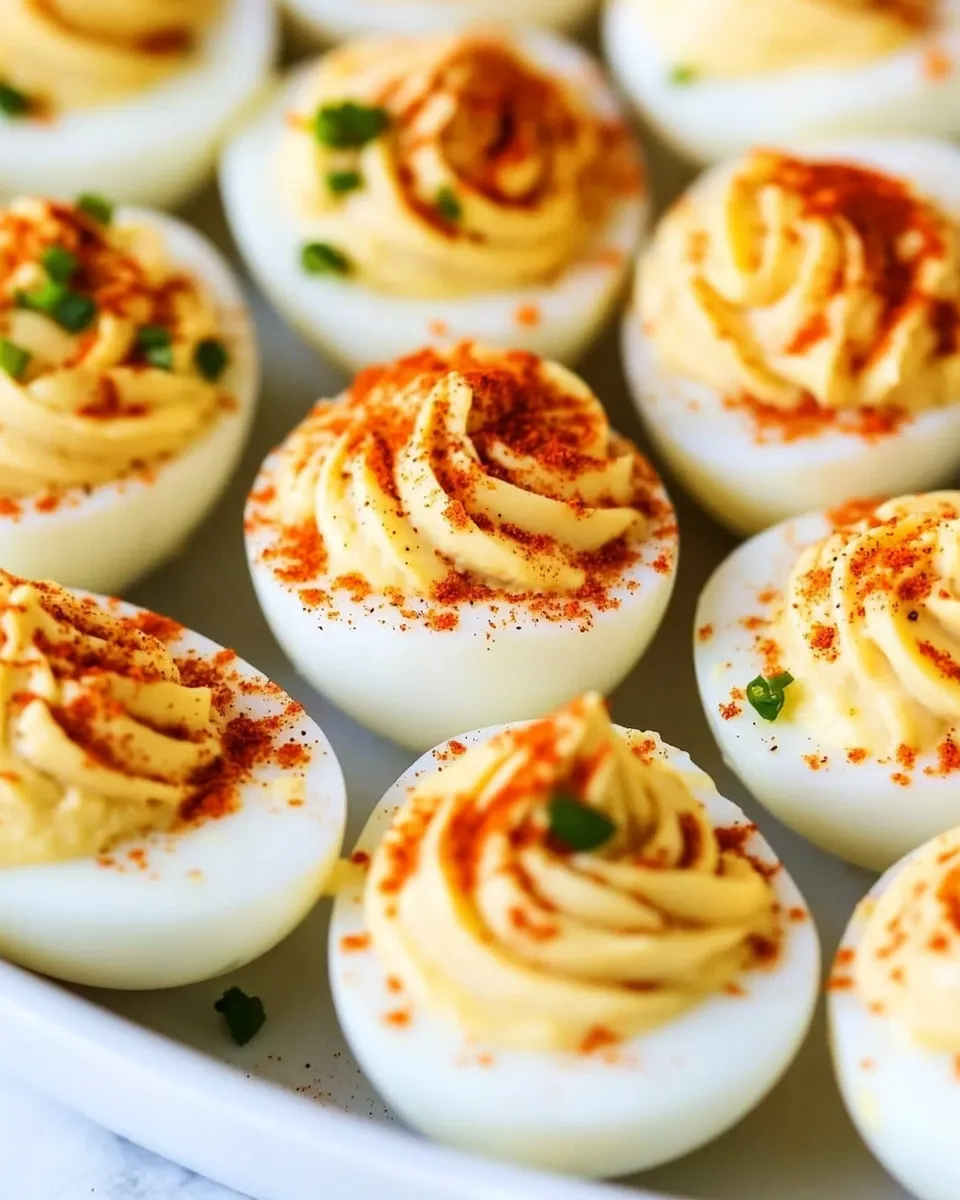
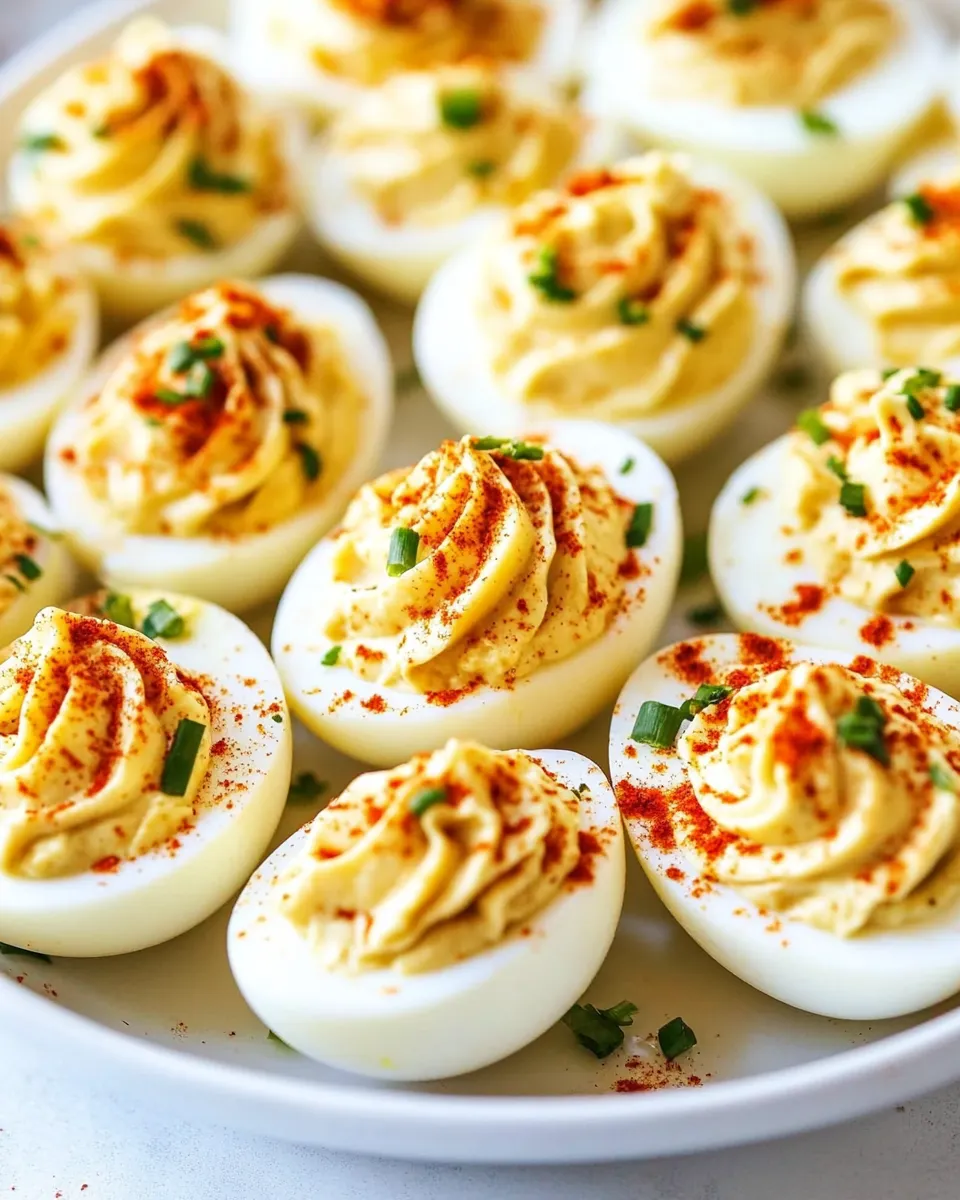
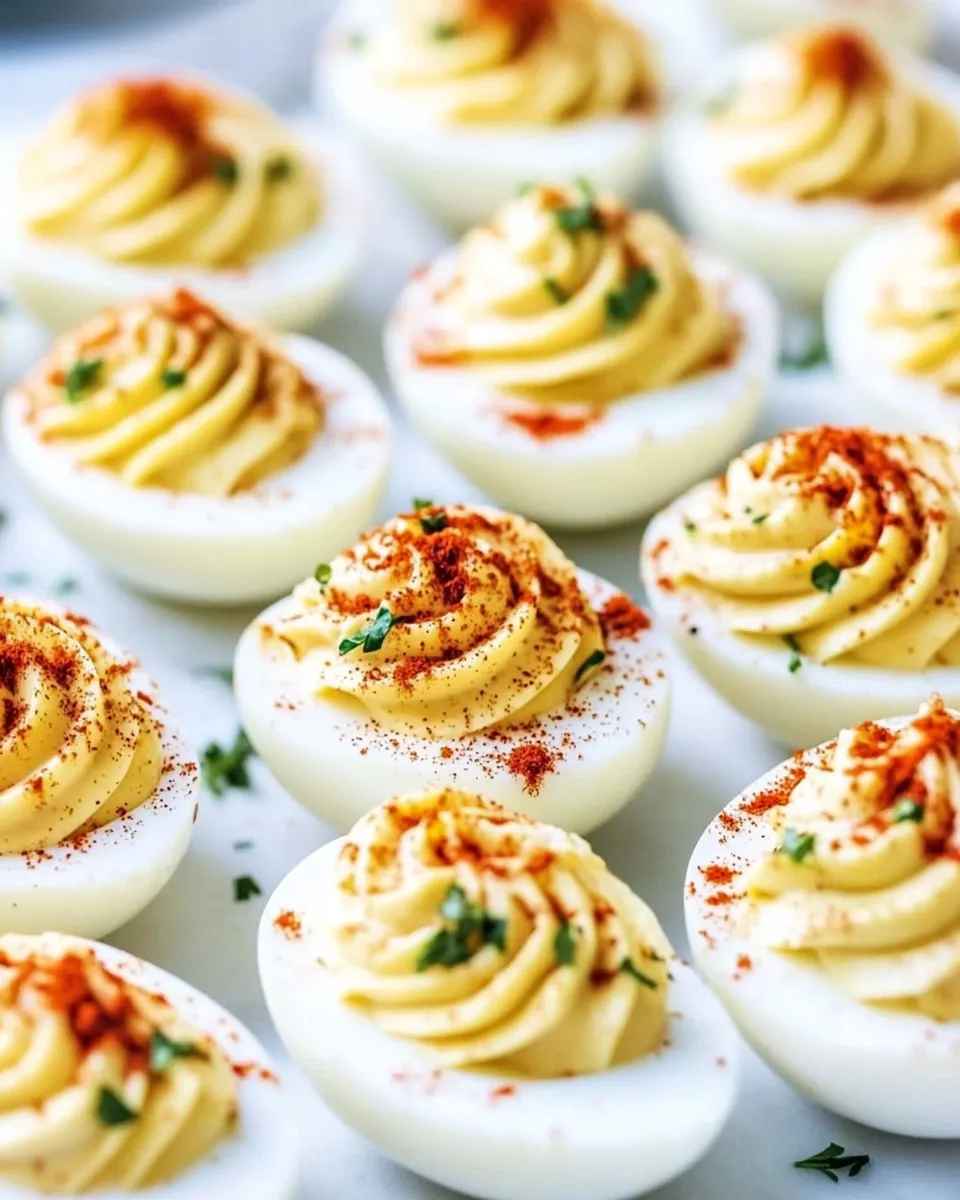
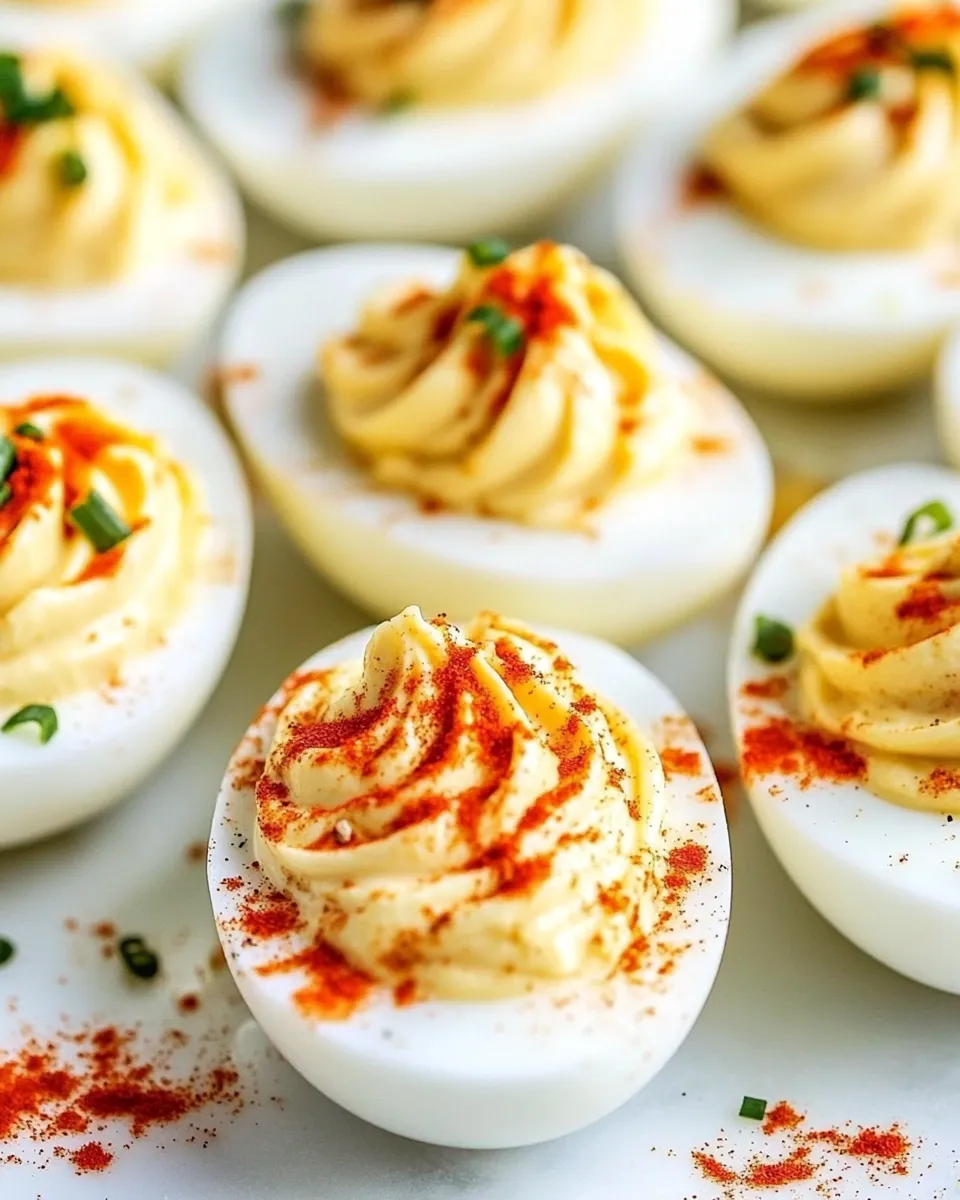
I like these for how quickly they come together and how forgiving the method is. The yolk filling here is simple: mayo, a splash of 2% milk, dill pickle juice for brightness, salt, and black pepper. A dusting of paprika and a sprig of fresh dill finish the plates with a familiar, comforting look and a little herbal lift.
Read on for a compact shopping guide, the exact step-by-step Instant Pot process, quick swaps using the ingredients listed, troubleshooting, and sensible storage tips. This is written for home cooks who want practical instructions and a few tested tips to make perfect deviled eggs every time.
Your Shopping Guide
When you shop for this recipe, focus on freshness and simplicity. Eggs are the star: choose the freshest large eggs you can find but not ultra-fresh—eggs a few days old peel more cleanly after pressure cooking than eggs laid that morning. Buy a container of mayo you enjoy, and pick fresh dill rather than dried if you can; the color and aroma are worth it.
One cup of water is all you need for the Instant Pot, and the metal trivet or rack that came with your unit is essential for keeping the eggs out of the water. If you haven’t kept your Instant Pot paperwork, the small rack often nests in the bottom or came with the accessory set. Finally, have measuring spoons and a medium bowl ready for the yolk-mixing stage.
Ingredients
- 6 large eggs — the main ingredient; large size matches the cooking time and yields six deviled halves.
- 1 cup water — creates the steam needed for pressure cooking; measure precisely for consistent pressure.
- rack that comes with the Instant Pot — keeps eggs out of the water for even cooking and easy removal.
- 2 tablespoons mayonnaise — binds and smooths the yolk filling; adjust slightly for preferred creaminess.
- 1 tablespoon 2% milk — loosens the filling so it’s spoonable; stick to the amount for proper texture.
- 1 teaspoon dill pickle juice — adds bright acidity and savory tang to the yolk mixture.
- 1/8 teaspoon salt — seasons the filling; add cautiously and taste before adding more.
- fresh black pepper, to taste — adds a background bite; grind fresh for best flavor.
- paprika for sprinkling — traditional garnish that adds color and a hint of smokiness.
- fresh dill, for garnish — herbal finish that lifts the richness.
Cooking (Instant Pot Deviled Eggs): The Process
- Place the rack that comes with the Instant Pot in the bottom of the pot. Pour 1 cup water into the pot. Arrange 6 large eggs in a single layer on the rack.
- Close the lid and set the steam release valve to SEALING. Select Manual (High Pressure) and set the time for 5 minutes.
- When the cook time ends, let the pressure release naturally for 5 minutes. After 5 minutes, carefully move the valve to VENTING to perform a quick release. Open the lid away from your face.
- Immediately transfer the eggs to the sink and run them under cold running water until they are cool enough to handle.
- Peel the eggs. Slice each egg in half lengthwise and remove the yolks, placing the yolks in a medium-sized bowl. Arrange the egg white halves on a plate for filling.
- Add 2 tablespoons mayonnaise, 1 tablespoon 2% milk, 1 teaspoon dill pickle juice, 1/8 teaspoon salt, and fresh black pepper to taste to the bowl with the yolks. Use a fork to mash and mix until the filling is smooth.
- Spoon the yolk filling into each egg white half, dividing the filling evenly among the halves.
- Sprinkle the filled eggs with paprika and garnish with fresh dill. Serve.
Why It’s Crowd-Pleasing
Deviled eggs are a universal appetizer: finger-food friendly, familiar, and easy to eat while mingling. These Instant Pot deviled eggs hit three important notes — texture, flavor, and appearance. The pressure-cooked white is tender and easy to peel, while the yolk filling is creamy and bright thanks to the dill pickle juice.
They travel well to potlucks and plate up neatly for a buffet. The paprika and fresh dill give them that classic look people recognize and reach for first. They also deliver on nostalgia without being stale: a tiny tweak like the pickle juice keeps the taste modern and balanced.
Quick Replacement Ideas
Stick to the ingredient set in this recipe and adjust amounts or omit items depending on preference.
- If you want a lighter filling, slightly reduce the 2 tablespoons mayonnaise and compensate with a touch more 2% milk (up to the listed tablespoon) to keep the filling spoonable.
- If you prefer less tang, reduce the 1 teaspoon dill pickle juice by half; for more tang, add the full teaspoon as written.
- To change garnish without adding new ingredients, skip the fresh dill or paprika — the eggs are still perfectly seasoned from the filling.
Prep & Cook Tools
Minimal tools get this recipe done fast. You need the Instant Pot and its rack, a medium bowl for the yolk mash, measuring spoons, a fork, a sharp knife for halving the eggs, and a plate for arranging the whites. A wire rack or slotted spoon helps lift eggs if you prefer not to handle them directly after cooking.
Mistakes That Ruin (Instant Pot Deviled Eggs)
- Overcooking by increasing pressure-cook time — the recipe calls for 5 minutes on Manual (High Pressure). Longer times can yield a green ring around the yolk and a sulfurous taste.
- Skipping the 5-minute natural release — releasing pressure instantly without the short natural release can alter texture. Follow the step: 5 minutes natural, then quick release.
- Not cooling the eggs immediately — if you don’t transfer them to cold running water right away, peeling becomes difficult and eggs can continue to cook from residual heat.
- Poor peeling technique — peeling under a thin stream of water and starting at the wider end where the air pocket is makes peeling far easier.
- Over-salting the filling — the recipe includes 1/8 teaspoon salt; adding more before tasting can overpower the delicate balance of mayo and pickle juice.
Seasonal Adaptations
Deviled eggs are inherently seasonal because they sit comfortably on summer picnic spreads and cozy winter appetizer trays. Use the same base recipe and adjust presentation to the season.
- Spring and summer: Emphasize the fresh dill garnish. Keep the filling light (stick to the specified 1 tablespoon milk) so the eggs feel refreshing alongside other summer dishes.
- Fall and winter: Present them with a heavier sprinkle of paprika for color and warmth. Serving slightly chilled keeps them rich and satisfying next to heartier mains.
Testing Timeline
When I tested this method, I stuck to one primary time/temperature: 5 minutes at high pressure, 5 minutes natural release, then quick release. That combination produced consistently set whites and fully cooked but not overcooked yolks. A few quick notes from trial runs:
- Eggs straight from the fridge cooked well with the same timing; no pre-warming required.
- Cooling under running water for a solid minute or two made peeling almost foolproof for most eggs. A brief cold shock stops carryover cooking and separates the membrane from the shell.
- Texture of the filling is sensitive to the mayo-to-milk ratio. The amounts in the recipe give a creamy, slightly spoonable consistency that is easy to fill by spoon.
Meal Prep & Storage Notes
These deviled eggs hold up well for short-term storage. Keep the filled eggs in a covered container in the refrigerator for up to 48 hours. If you’re prepping ahead for an event, I recommend cooking and peeling the eggs up to 48 hours in advance, storing the whites and the yolk mixture separately, then filling within a few hours of serving to preserve texture and appearance.
For travel, arrange filled halves on a shallow tray lined with a paper towel in a cooler bag. Avoid stacking to prevent squashing. If you need to refrigerate after plating at an event, cover lightly with plastic wrap or use a sealable container to keep them from absorbing other flavors.
Troubleshooting Q&A
Q: Some shells stuck and peeled poorly. What did I do wrong?
A: Either the eggs were too fresh or they didn’t cool quickly enough. For pressure-cooked eggs, the shock of cold running water immediately after quick release is the critical step. Also, starting the peel at the wider end where the air pocket is speeds things up.
Q: My yolk filling is grainy. How do I make it smoother?
A: Ensure the yolks are fully mashed with a fork and that you add the full 2 tablespoons of mayonnaise and 1 tablespoon milk as written. If the yolks were slightly overcooked, they can be drier and benefit from the specified amounts to smooth them out. Mash and mix until homogenous.
Q: The eggs taste a bit flat. Any fixes?
A: The dill pickle juice provides acidity and brightness; make sure you used the 1 teaspoon called for. Also, check your salt measurement — 1/8 teaspoon is small but effective; add a tiny pinch more if needed, then taste.
Q: How do I keep the filling from sliding out during transport?
A: Keep the filling slightly thicker by adhering to the mayo amount and not over-thinning with milk. Transport in a single layer and minimize movement. If necessary, fill the eggs right before serving.
Final Bite
This Instant Pot approach makes deviled eggs reliably easy. Follow the precise pressure cooking and cooling steps and the result is tender whites, creamy yolk filling, and predictable peeling. The recipe is compact, portable, and lends itself to quick tweaks without losing what makes deviled eggs a perennial favorite.
Make a batch, test the filling once for seasoning, and you’ll be surprised how often these become the first thing to disappear from a party tray. Enjoy — and remember: quick cooling and measured seasoning are your best friends here.
Instant Pot Deviled Eggs
Ingredients
Equipment
Method
- Place the rack that comes with the Instant Pot in the bottom of the pot. Pour 1 cup water into the pot. Arrange 6 large eggs in a single layer on the rack.
- Close the lid and set the steam release valve to SEALING. Select Manual (High Pressure) and set the time for 5 minutes.
- When the cook time ends, let the pressure release naturally for 5 minutes. After 5 minutes, carefully move the valve to VENTING to perform a quick release. Open the lid away from your face.
- Immediately transfer the eggs to the sink and run them under cold running water until they are cool enough to handle.
- Peel the eggs. Slice each egg in half lengthwise and remove the yolks, placing the yolks in a medium-sized bowl. Arrange the egg white halves on a plate for filling.
- Add 2 tablespoons mayonnaise, 1 tablespoon 2% milk, 1 teaspoon dill pickle juice, 1/8 teaspoon salt, and fresh black pepper to taste to the bowl with the yolks. Use a fork to mash and mix until the filling is smooth.
- Spoon the yolk filling into each egg white half, dividing the filling evenly among the halves.
- Sprinkle the filled eggs with paprika and garnish with fresh dill. Serve.