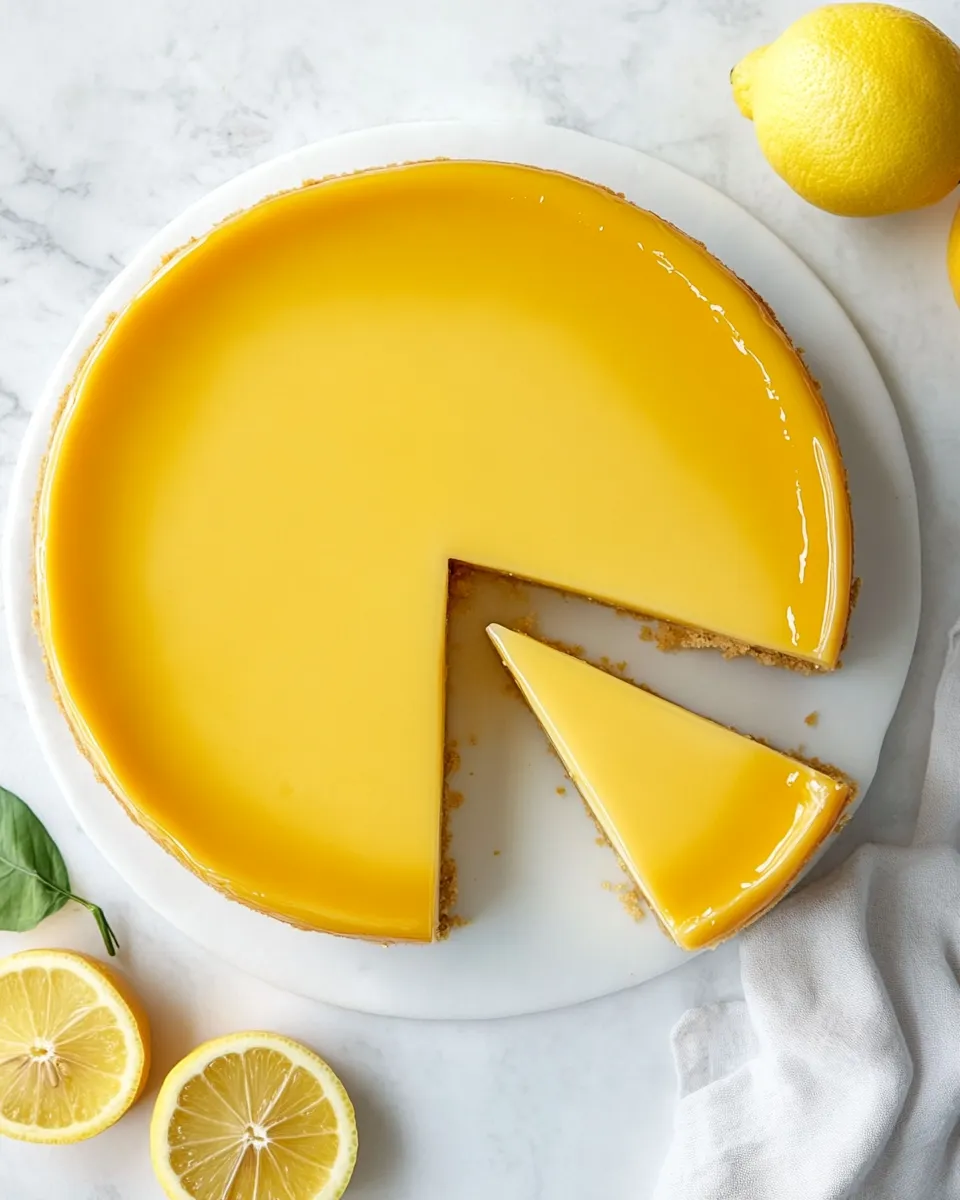
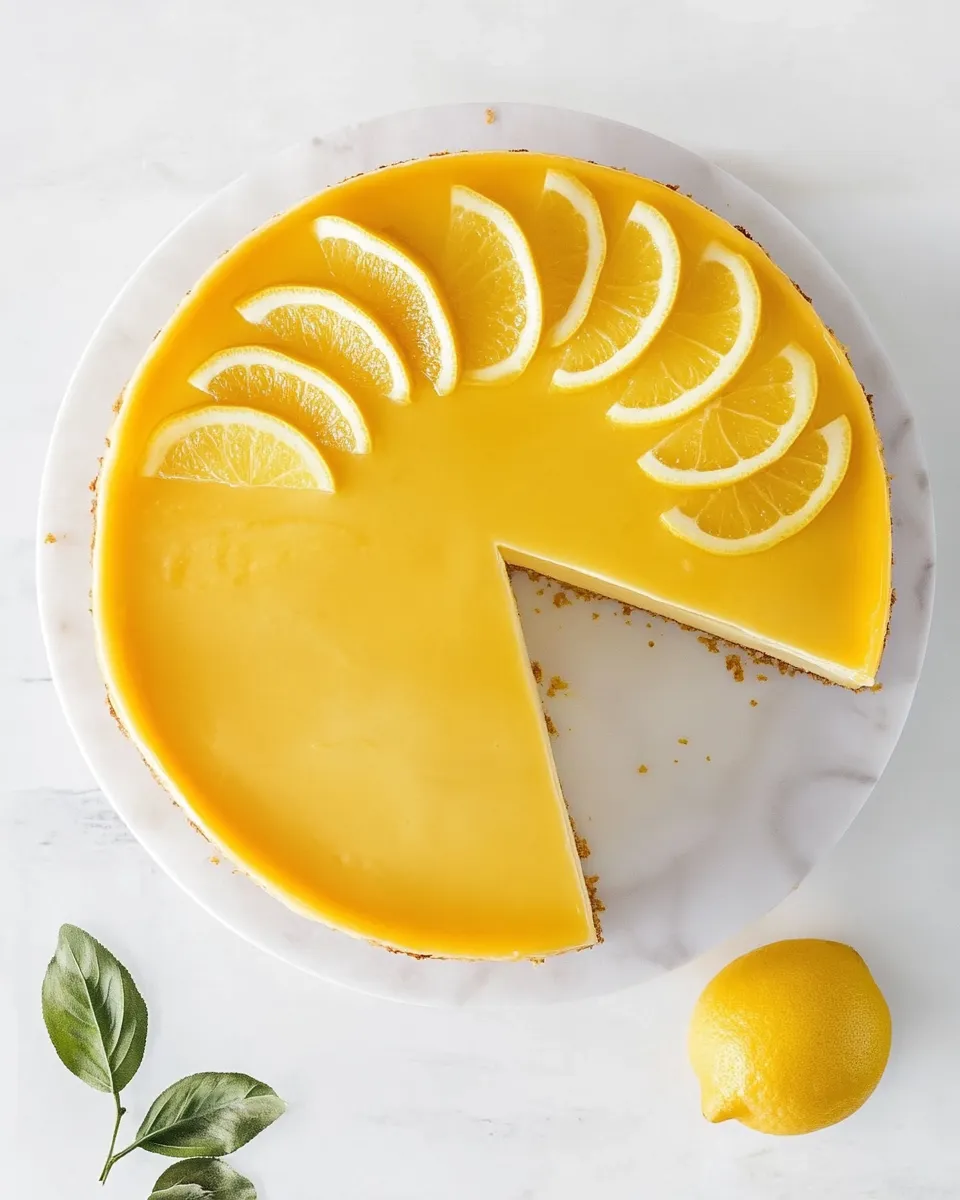
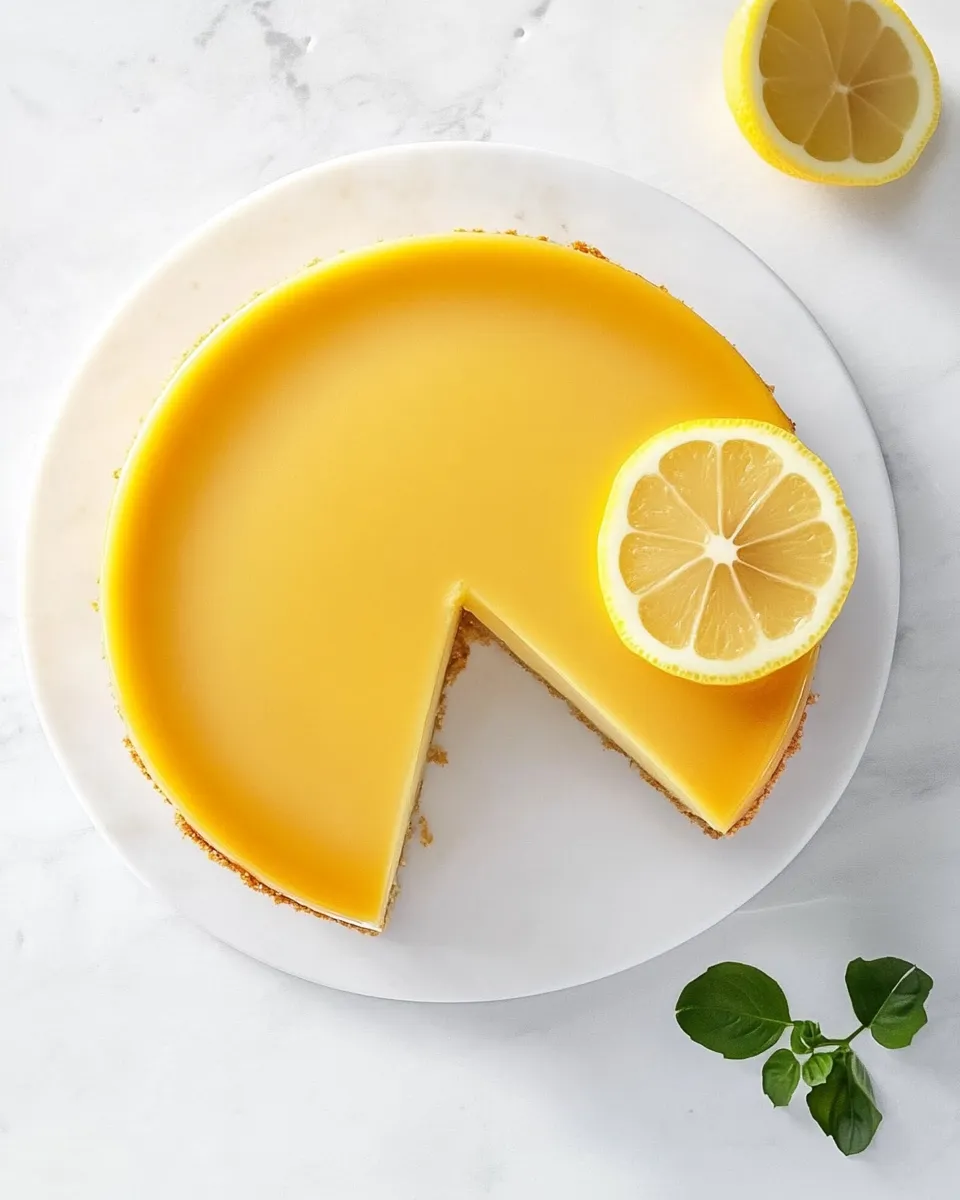
Lemon Cheesecake Recipe
I make this Lemon Cheesecake whenever I want something bright, rich, and reliably impressive. It’s the kind of dessert that looks like it took all day but really rewards careful, steady work. The lemon adds a lift to the classic dense, creamy texture of a baked cheesecake—fresh and not too sweet.
What I love about this recipe is how predictable it is when you follow the steps: a warm, baked crust, a smooth cream cheese filling, and a glossy lemon curd finish with whipped cream rosettes. You’ll need a little patience for the water bath and the long chill, but those steps are the secret to a crack-free, silky center.
Below I’ll give a straightforward shopping list, a clear ingredient rundown, and the exact method to follow. I include practical substitutions, troubleshooting tips, and storage advice so you can bake this confidently and adapt it to what you have on hand.
Shopping List
- Graham crackers (or graham cracker crumbs)
- Unsalted butter
- Granulated sugar
- Cream cheese (4 packages / 2 lb total)
- Large eggs
- Sour cream
- Fresh lemons (for zest and juice)
- Vanilla extract
- Lemon curd (homemade or storebought)
- Heavy whipping cream
- Powdered sugar
- Parchment paper
- Heavy-duty foil (extra-wide)
- Optional: additional lemons or decorative items for serving
Ingredients
- 1 ¾ cups graham cracker crumbs, from 14 whole crackers* — the base texture for the crust; pressing firm gives a crisp foundation.
- 6 Tbsp unsalted butter, melted — binds the crumbs and adds flavor; use fully melted so the crumbs moisten evenly.
- 2 Tbsp granulated sugar — sweetens and helps the crust set.
- 2 lb cream cheese, room temperature (4 packages, 8 ounces each) — the primary structure and richness; room temperature is essential for a lump-free batter.
- 1 cup granulated sugar — sweetens the filling; dissolves into the cream cheese during mixing.
- 5 large eggs, room temperature — provide structure and silkiness; add one at a time for stability.
- 2 Tbsp sour cream — lightens the texture and adds tang; fold in gently.
- 1 Tbsp lemon zest, from 2 lemons — concentrated citrus aroma; grate only the yellow part.
- 2 Tbsp lemon juice — fresh juice brightens the flavor; don’t substitute bottled if you can avoid it.
- ½ Tbsp vanilla extract — rounds the flavors; a little goes a long way.
- ½ cup Lemon Curd, homemade or storebought — glossy topping and extra lemon punch; spread after the cake is set.
- 1 cup heavy whipping cream — whipped for decoration and contrast to the dense cake.
- 3 Tbsp powdered sugar — stabilizes and sweetens the whipped cream.
- ½ tsp vanilla extract — added to the whipped cream for flavor depth.
How to Prepare Lemon Cheesecake
- Preheat the oven to 350°F. Grease the bottom of a 9-inch springform pan with butter and line the bottom with a circle of parchment paper.
- In a medium bowl, combine 1 ¾ cups graham cracker crumbs and 2 tablespoons granulated sugar. Stir in 6 tablespoons melted unsalted butter until the crumbs are evenly moistened.
- Press the crumb mixture firmly and evenly into the bottom of the prepared springform pan and slightly up the sides to form a crust. Bake the crust on the center rack for 8 minutes. Remove from the oven and let the crust cool to room temperature on a wire rack.
- Increase the oven temperature to 450°F. Prepare a water bath: place two sheets of extra-wide heavy-duty foil on the counter, set the springform pan in the center, and wrap the foil up the sides of the pan, sealing carefully with no rips. Leave the rim of the pan mostly clear (fan the foil out at the top) so the cake can rise and to reduce splashing into the pan.
- In the bowl of a stand mixer fitted with the paddle attachment (or using an electric hand mixer), beat 2 lb cream cheese and 1 cup granulated sugar on medium-high speed for about 5 minutes, stopping to scrape down the bowl once or twice, until completely smooth and lump-free. (Use room-temperature cream cheese as listed.)
- Reduce the mixer speed to medium. Add the 5 large eggs one at a time, mixing until each egg is incorporated before adding the next. Scrape down the bowl as needed.
- Reduce mixer speed to low. Add 2 tablespoons sour cream, 1 tablespoon lemon zest, 2 tablespoons lemon juice, and ½ tablespoon vanilla extract. Mix just until the ingredients are incorporated and the batter is smooth. Do not overmix.
- Pour the cheesecake batter over the cooled crust in the foil-wrapped springform pan and smooth the top.
- Place the foil-wrapped springform pan in a deep roasting pan. Boil a kettle of water and pour the hot water into the roasting pan around the springform pan until the water reaches about 1 inch up the sides of the springform pan (taking care not to splash water into the cake). Use more hot water than you think you’ll need so you can fill the pan without reboiling.
- Carefully transfer the roasting pan with the cheesecake to the center oven rack. Bake at 450°F for 15 minutes. Without opening the oven door, reduce the oven temperature to 225°F and bake an additional 60–65 minutes, or until the center of the cheesecake still has a slight wobble when you gently jostle the pan.
- When baking is complete, remove the roasting pan from the oven and let the cheesecake sit in the water bath (still in the roasting pan) at room temperature for 45 minutes to cool gradually. After 45 minutes, remove the springform pan from the water bath, discard the foil, and place the springform pan on a wire rack to cool completely.
- Cover the cooled cheesecake (still in the springform pan) and chill in the refrigerator for at least 8 hours or overnight to fully set.
- After chilling, in a large mixing bowl beat 1 cup heavy whipping cream, 3 tablespoons powdered sugar, and ½ teaspoon vanilla extract on medium-high speed until stiff peaks form. Transfer the whipped cream to a piping bag fitted with your preferred tip, or keep it chilled in the refrigerator until ready to use.
- Run a thin knife or spatula around the inside edge of the springform pan to loosen the cheesecake. Release and remove the springform ring and transfer the cheesecake (and parchment, if still in place) to a serving platter. Remove the parchment paper if desired.
- Spread ½ cup lemon curd evenly over the top surface of the cheesecake. Pipe or dollop the whipped cream around the edge or decorate the top as you prefer.
- Refrigerate the assembled cheesecake until ready to serve. Keep refrigerated and consume within a few days.
Why This Recipe Belongs in Your Rotation
This Lemon Cheesecake hits the sweet spot between show-stopping and practical. It’s a classic dessert with a bright citrus lift—perfect for celebrations and dinner parties because it can be mostly made ahead. The long chill time is actually your friend: it sets the texture and lets flavors marry, so the day-of work is minimal.
The technique is reliable. A short crust bake stabilizes the base. The water bath and initial high heat help the center set without cracking. These deliberate steps create a dense, creamy cake that slices cleanly and holds up for plates and forks. If you want a dessert that looks elegant with little last-minute effort, this one’s a keeper.
Substitutions by Category
Dairy
If you need to lighten the filling, look for lower-fat cream cheese options—note they may change the texture slightly and could need extra chilling time. Sour cream can be substituted with an equal amount of full-fat plain yogurt if you prefer a tang with a slightly lighter mouthfeel.
Crust
Graham cracker crumbs are traditional and give that classic flavor. If you don’t have graham crackers, a plain digestive biscuit or similar neutral cookie crushed to crumbs works in the same amount. Increase or decrease butter slightly if your crumbs are finer or coarser to get the same pressed, set crust.
Citrus and Flavor
Fresh lemon zest and juice are central here. If you must, bottled lemon juice will work, but zest is still important for aroma. A touch more lemon curd on top can compensate for milder juice.
Decorative Whipped Cream
If you prefer a lighter topping, a stabilized whipped cream using a small pinch of gelatin or a commercial stabilizer works and keeps shapes longer. Alternatively, serve each slice with a dollop of crème fraîche for tang.
Tools of the Trade
- 9-inch springform pan — essential for easy removal.
- Stand mixer with paddle or electric hand mixer — for smooth, lump-free batter.
- Wire rack — for cooling the crust and cake.
- Deep roasting pan — to hold the water bath in the oven.
- Extra-wide heavy-duty foil — to wrap the springform pan and keep water out.
- Parchment paper — for a clean release from the pan bottom.
- Mixing bowls and spatula — for folding and scraping.
- Kettle or pot to boil water — so you can pour hot water quickly for the bath.
Troubleshooting Tips
Cracks on top: Overmixing or too-hot oven extremes can cause cracks. Follow the mixing speeds in the method and bake at the temperatures given. The water bath and gradual cooling minimize cracking.
Soggy crust: Press the crumbs firmly and bake the crust before adding the filling. Let it cool fully on a rack. If moisture still collects, bake the crust a couple minutes longer until it feels set.
Runny center after baking: The center should have a slight wobble when finished. If it’s very liquid, it needs more time at the low temperature. Resist the temptation to open the oven early. Also allow the gradual cooling in the water bath—removing it too quickly can cause collapse.
Grainy texture: This usually means the cream cheese wasn’t soft enough. Bring block cream cheese to room temperature before mixing, and beat until smooth before adding eggs.
Variations by Season
Spring: Keep it classic with lemon curd and light whipped cream. Add thin lemon slices or edible flowers for a fresh look.
Summer: Top individual slices with macerated berries (strawberries or raspberries) for color and contrast. A berry compote spooned at serving time keeps the cake from getting soggy in advance.
Fall/Winter: Add a thin strip of candied citrus peel around the top or swap part of the lemon curd for a marmalade with spice notes. A short drizzle of caramel at the plate can be interesting with lemon’s acidity.
Method to the Madness
Why the initial high heat? The 450°F blast helps set the outer structure quickly so the cake rises evenly. Dropping to 225°F completes the bake gently without overcooking the edges. The water bath moderates oven temperature and provides steam—this is what keeps the texture even and prevents cracks.
Beating the cream cheese and sugar thoroughly before adding eggs eliminates lumps. Adding eggs one at a time and scraping the bowl keeps the batter uniform and stable. Low-speed mixing with the final wet ingredients ensures you don’t whip excess air into the batter; too much air equals cracking and sinking.
The long chill is practical: it firms the filling so you can slice cleanly, and it lets flavors meld. Don’t skip the overnight rest if you want neat slices and the best texture.
Best Ways to Store
Keep the cheesecake refrigerated, covered, for up to 3 days. For longer storage, you can freeze individual slices wrapped tightly in plastic wrap and placed in an airtight container for up to 1 month. Thaw in the refrigerator overnight. Avoid freezing when the lemon curd is on top; freeze the base and add curd when thawed.
Helpful Q&A
Q: Can I use a different pan size? A: The recipe is written for a 9-inch springform. A slightly larger pan will yield a thinner cake and may reduce bake time; a smaller pan will be taller and may require more time. I recommend sticking with 9-inch for predictable timing.
Q: Do I have to use a water bath? A: The water bath is the key to an even, crack-free texture. It’s worth the few extra minutes of prep for consistently smooth results.
Q: Why did my crust separate from the cheesecake? A: If the crust baked too long or was pressed too thin, it can separate. Also cooling too quickly can cause a slight gap. Press the crust firmly and cool gradually on a rack before adding the batter.
Q: Can I make the lemon curd myself? A: Yes. Homemade lemon curd tastes fresh and bright. If you make it ahead, let it cool completely before spreading over chilled cheesecake.
In Closing
This Lemon Cheesecake is dependable, bright, and elegant. Follow the exact ingredient list and the method above, take your time with the water bath and chilling, and you’ll be rewarded with a silky, citrus-forward dessert that slices beautifully and tastes like celebration. It’s a recipe I keep in constant rotation—simple in steps, stunning on the table.
Lemon Cheesecake Recipe
Ingredients
Equipment
Method
- Preheat the oven to 350°F. Grease the bottom of a 9-inch springform pan with butter and line the bottom with a circle of parchment paper.
- In a medium bowl, combine 1 ¾ cups graham cracker crumbs and 2 tablespoons granulated sugar. Stir in 6 tablespoons melted unsalted butter until the crumbs are evenly moistened.
- Press the crumb mixture firmly and evenly into the bottom of the prepared springform pan and slightly up the sides to form a crust. Bake the crust on the center rack for 8 minutes. Remove from the oven and let the crust cool to room temperature on a wire rack.
- Increase the oven temperature to 450°F. Prepare a water bath: place two sheets of extra-wide heavy-duty foil on the counter, set the springform pan in the center, and wrap the foil up the sides of the pan, sealing carefully with no rips. Leave the rim of the pan mostly clear (fan the foil out at the top) so the cake can rise and to reduce splashing into the pan.
- In the bowl of a stand mixer fitted with the paddle attachment (or using an electric hand mixer), beat 2 lb cream cheese and 1 cup granulated sugar on medium-high speed for about 5 minutes, stopping to scrape down the bowl once or twice, until completely smooth and lump-free. (Use room-temperature cream cheese as listed.)
- Reduce the mixer speed to medium. Add the 5 large eggs one at a time, mixing until each egg is incorporated before adding the next. Scrape down the bowl as needed.
- Reduce mixer speed to low. Add 2 tablespoons sour cream, 1 tablespoon lemon zest, 2 tablespoons lemon juice, and ½ tablespoon vanilla extract. Mix just until the ingredients are incorporated and the batter is smooth. Do not overmix.
- Pour the cheesecake batter over the cooled crust in the foil-wrapped springform pan and smooth the top.
- Place the foil-wrapped springform pan in a deep roasting pan. Boil a kettle of water and pour the hot water into the roasting pan around the springform pan until the water reaches about 1 inch up the sides of the springform pan (taking care not to splash water into the cake). Use more hot water than you think you’ll need so you can fill the pan without reboiling.
- Carefully transfer the roasting pan with the cheesecake to the center oven rack. Bake at 450°F for 15 minutes. Without opening the oven door, reduce the oven temperature to 225°F and bake an additional 60–65 minutes, or until the center of the cheesecake still has a slight wobble when you gently jostle the pan.
- When baking is complete, remove the roasting pan from the oven and let the cheesecake sit in the water bath (still in the roasting pan) at room temperature for 45 minutes to cool gradually. After 45 minutes, remove the springform pan from the water bath, discard the foil, and place the springform pan on a wire rack to cool completely.
- Cover the cooled cheesecake (still in the springform pan) and chill in the refrigerator for at least 8 hours or overnight to fully set.
- After chilling, in a large mixing bowl beat 1 cup heavy whipping cream, 3 tablespoons powdered sugar, and ½ teaspoon vanilla extract on medium-high speed until stiff peaks form. Transfer the whipped cream to a piping bag fitted with your preferred tip, or keep it chilled in the refrigerator until ready to use.
- Run a thin knife or spatula around the inside edge of the springform pan to loosen the cheesecake. Release and remove the springform ring and transfer the cheesecake (and parchment, if still in place) to a serving platter. Remove the parchment paper if desired.
- Spread ½ cup lemon curd evenly over the top surface of the cheesecake. Pipe or dollop the whipped cream around the edge or decorate the top as you prefer.
- Refrigerate the assembled cheesecake until ready to serve. Keep refrigerated and consume within a few days.
Notes
Roasting Pan:If your roasting pan is unstable or not designed to carry hot water safely, it’s best to pour the hot water into the pan after it’s placed on the oven rack. I recommend using a kettle for this step to avoid splashing hot water on yourself or the hot oven door.
Baking Times: For the best results, always fully preheat your oven and bake in a conventional oven (not convection). We highly recommend using anin-oven thermometerto ensure accurate temperature.