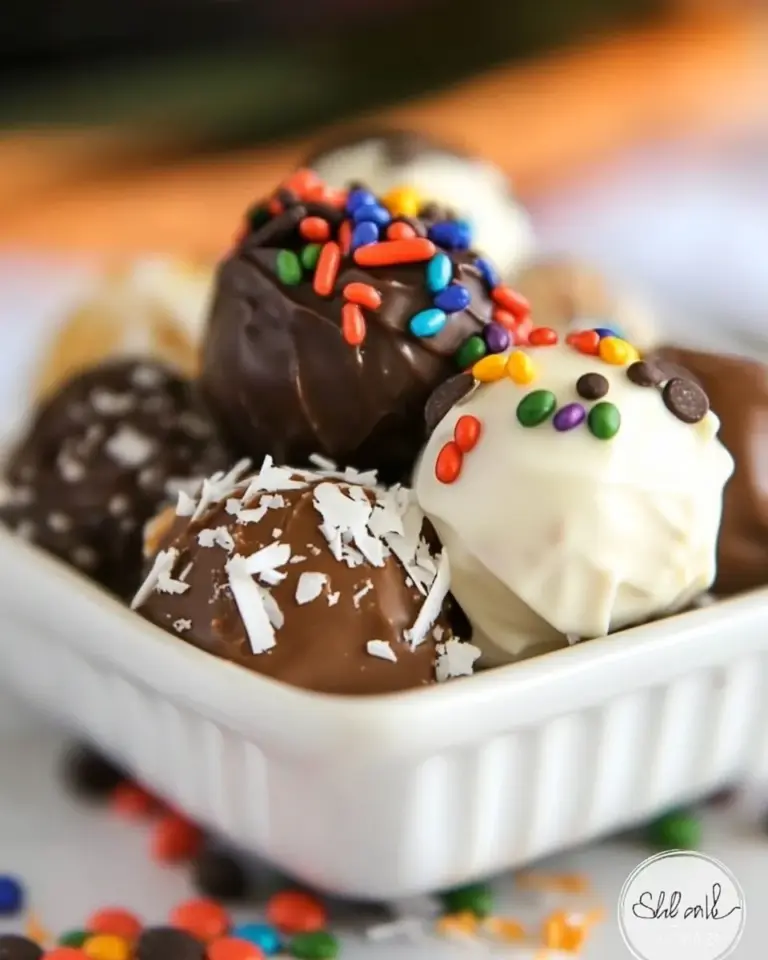
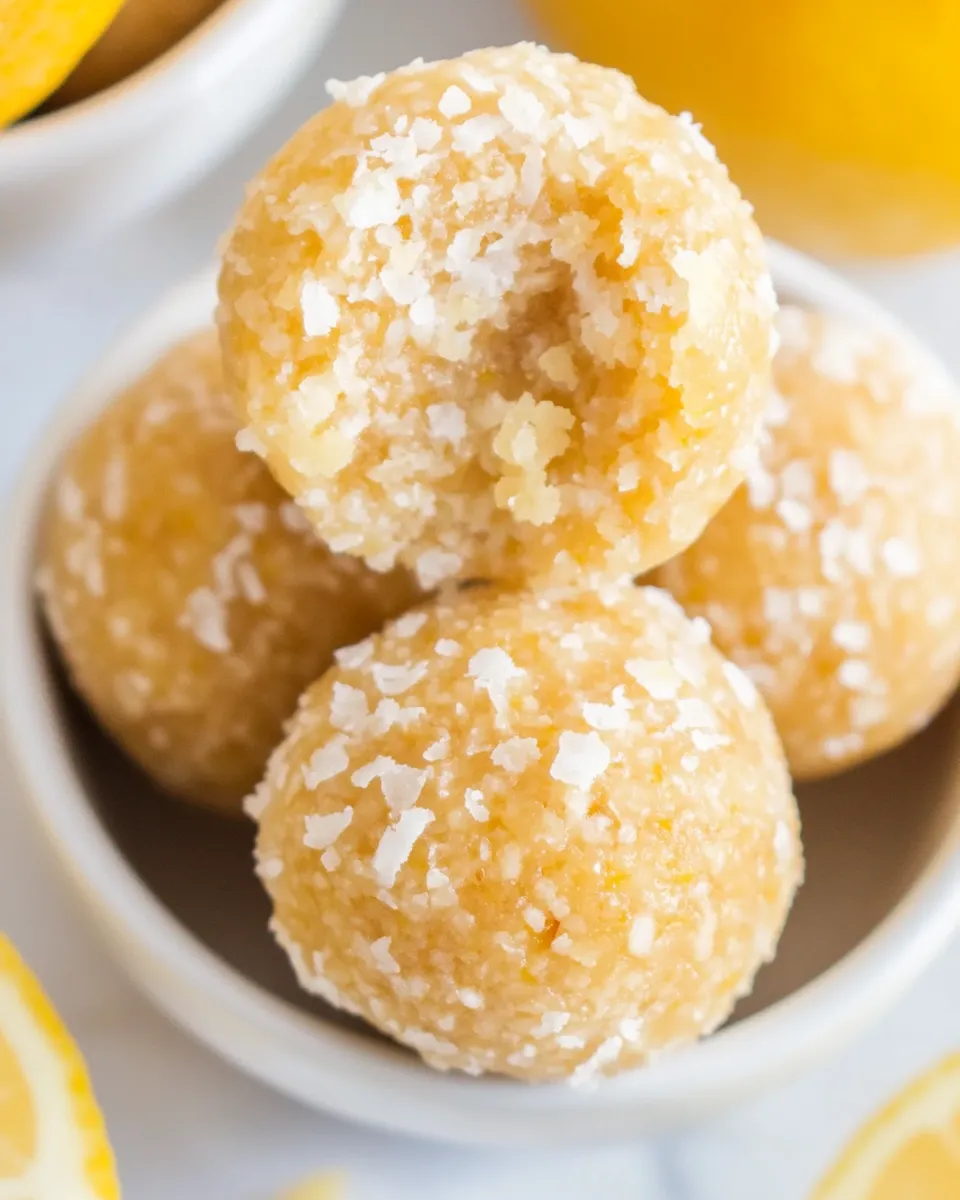
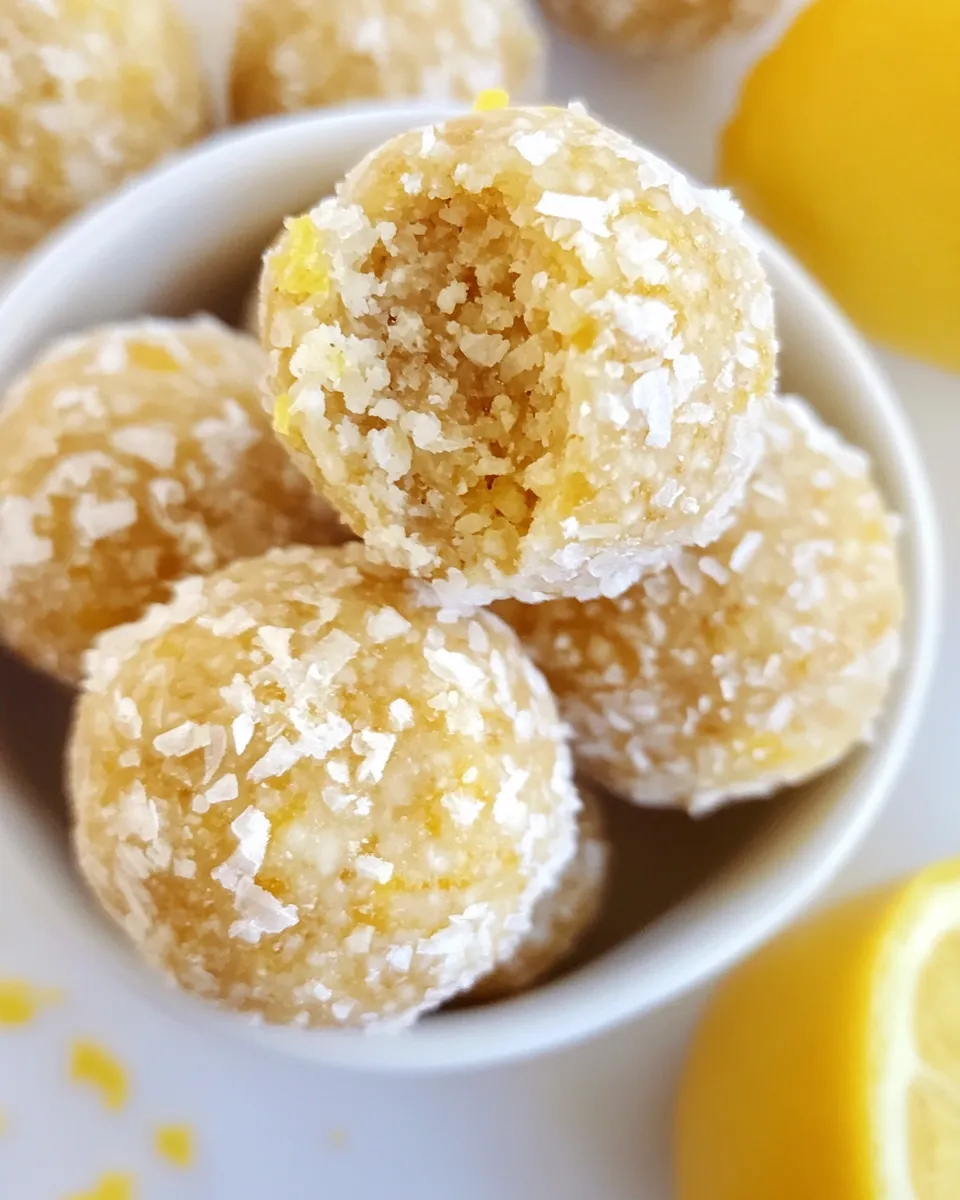
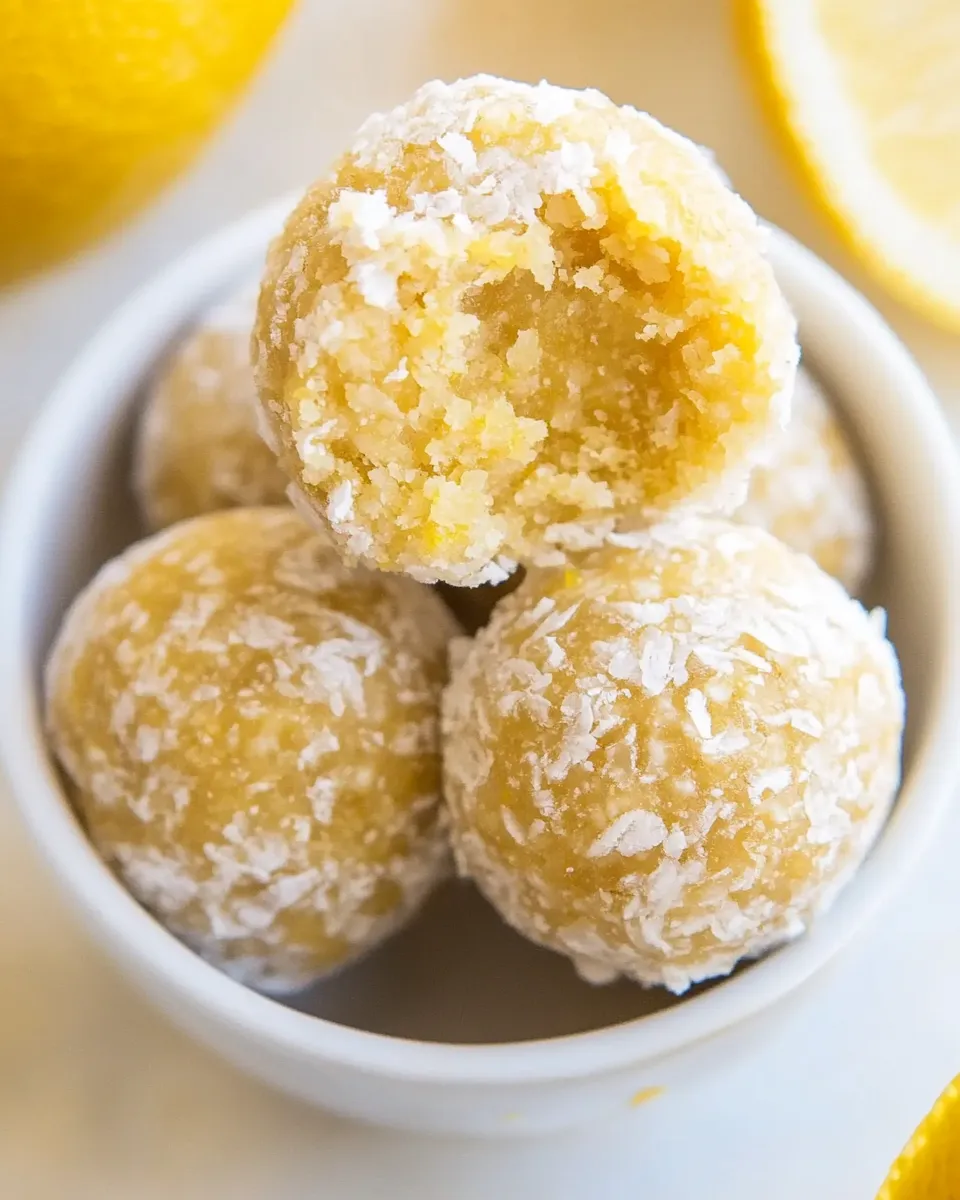
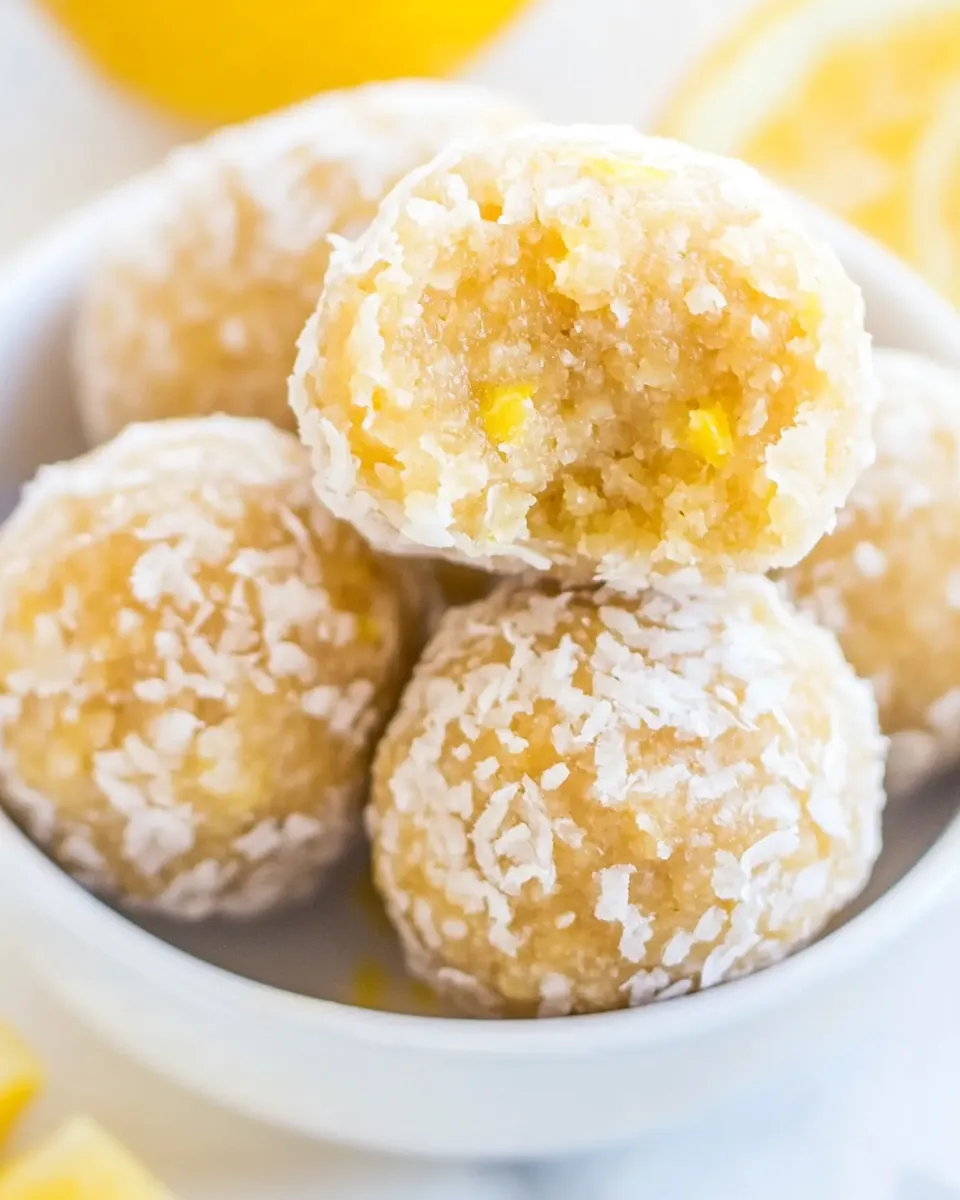
Lemon Energy Balls
Bright, chewy, and ready in a few focused minutes, these Lemon Energy Balls are the kind of snack I reach for when I want something beyond plain fruit or a granola bar. They’re coconut-forward, zingy from fresh lemon zest, and sweetened just enough to keep you going. No baking, no complicated steps—just a food processor and a little patience while they firm up in the fridge.
I test snacks obsessively at home, and what I like about this recipe is how forgiving it is: if the mix feels a touch dry, a brief chill or a few firm presses fixes it. If you prefer them coated, reserve a little coconut at the start and roll the finished balls in it. They travel well, freeze cleanly, and make a reliable breakfast bite or afternoon pick-me-up.
This post covers what to buy, the exact steps to build these Lemon Energy Balls, storage, common mistakes, and smart substitutions for different diets. Keep the ingredients on hand and bookmark this—these are the snack I make when I want something portable, fresh, and simple.
What to Buy
Buy the essentials and a couple of small extras to make assembly smooth. Fresh lemons for zest are worth it—bottled zest won’t give the same brightness. Measure ingredients in grams or tablespoons if that’s how you cook; accuracy keeps the texture right. If you want a coconut coating, pick a finely shredded unsweetened coconut so it clings evenly.
Quick shopping checklist: unsweetened shredded coconut, vanilla protein powder, your preferred sweetener (honey, agave, or sugar-free syrup), coconut oil, and lemons for zest. No obscure pantry items required.
Ingredients
- 1 1/2 cups unsweetened shredded coconut (105 g) — base and texture; reserve a small portion if you want a coconut coating.
- 3 tbsp vanilla protein powder (21 g) — adds protein and sweetness; use a vanilla-flavored powder you like for flavor balance.
- 3 tbsp honey or agave or sugar free syrup (45 g) — binder and sweetener; pick the option that fits your diet and desired sweetness level.
- 3 tbsp coconut oil (36 g) — adds fat and helps the mix bind when melted; gently melt if solid.
- 2 tsp lemon zest (7 g) — brightens the whole recipe; zest only the yellow skin, avoiding the white pith.
Build Lemon Energy Balls Step by Step
- If you want a coconut coating, set aside a small portion of the shredded coconut before you start.
- If the coconut oil is solid, gently melt it until liquid (short bursts in the microwave or warm in a small saucepan); do not overheat.
- Add the shredded coconut, vanilla protein powder, honey/agave/sugar-free syrup, melted coconut oil, and lemon zest to a blender or food processor.
- Pulse or blend until the mixture holds together when pressed between your fingers — it should be sticky and cohesive (scrape down the sides as needed).
- Use a tablespoon or your hands to press and roll the mixture into balls or shapes of your choice. If the mixture is crumbly, press firmly or refrigerate a few minutes and try again.
- If you reserved shredded coconut, roll the finished balls in it to coat.
- Place the balls in a single layer on a plate or tray and refrigerate at least 30 minutes to firm. Store in a covered container in the refrigerator for up to 1 week or freeze for up to 3 months.
Why Lemon Energy Balls is Worth Your Time
These are fast to make, require no baking, and deliver a reliable hit of energy from coconut and protein powder. The lemon zest keeps them tasting fresh, so they don’t feel heavy like some nut- or chocolate-forward snacks.
They’re versatile: make a batch on Sunday and you’ve got breakfasts, snacks for hikes, or a quick treat for kids packed and portioned. They’re also forgiving—small texture issues have straightforward fixes, so you get predictable results even if you’re not a precision baker.
If You’re Out Of…
If you discover you’re missing one item at assembly, use these quick swaps to keep going:
- Missing coconut oil: a neutral oil like light olive oil or melted butter can work in a pinch, though coconut oil gives a cleaner coconut taste and firms when chilled.
- No fresh lemon: a tiny splash (1/4–1/2 tsp) of bottled lemon juice will add acidity, but zest is preferable for aroma and texture.
- No sweetener: if you’re out of honey/agave, a couple of tablespoons of maple syrup or a comparable sugar-free syrup will bind and sweeten. Measure by eye and adjust to taste.
- No protein powder: you can make a coconut-lemon snack without it, but expect looser texture and less protein. Add a touch more coconut oil or a tablespoon of nut butter to bind if needed.
Appliances & Accessories
- Blender or food processor — essential for pulsing the mix to a cohesive texture.
- Microplane or fine grater — for zesting the lemon without the white pith.
- Measuring cups and spoons — for accurate proportions.
- Tablespoon or small cookie scoop — for portioning uniform balls.
- Plate or tray — to chill balls in a single layer.
- Covered container or airtight jar — for refrigerator or freezer storage.
Easy-to-Miss Gotchas
Small missteps are the most common reason a batch goes off. Watch out for these:
- Not reserving coconut before blending: If you want a coating, set it aside first. Once everything is blended it’s harder to get a fine, even outer layer.
- Overheating the coconut oil: Melt only until liquid. Overheating can give the mix a greasy mouthfeel and diminish the delicate lemon aroma.
- Using too coarse coconut: Very chunky coconut can prevent the mix from holding. Finely shredded coconut makes for smoother, better-binding balls.
- Under-zesting the lemon: Measure zest. Two teaspoons is bright but not overpowering; skimp and they’ll taste flat, overdo and they turn bitter if pith is included.
- Expecting immediate firmness: They need at least 30 minutes in the fridge to set. Skip chilling and they’ll be too soft and sticky.
Substitutions by Diet
Dietary needs are common—here are safe swaps that keep texture and flavor balanced without inventing complex replacements.
- Vegan: Use agave or a certified vegan sugar-free syrup in place of honey. Use a plant-based vanilla protein powder.
- Lower sugar / Keto-friendly: Choose a sugar-free syrup and a low-carb protein powder. Be aware that texture can change slightly; chilling helps firm more with less sugar.
- Paleo: Use honey or maple syrup (if that fits your version of paleo) and a paleo-friendly protein powder or omit the protein powder and add a tablespoon of almond or cashew butter to help bind.
- Nut-free: This recipe is naturally nut-free as written. If you add nut butter as a binder, skip it for nut-free households.
Little Things that Matter
These details make the difference between a so-so ball and one you’ll make again:
- Zest, don’t squeeze: Zest the lemon before juicing it. The essential oils in the rind are what bring the bright lemon note.
- Scrape the bowl: During pulsing, pause and scrape down the sides so everything gets evenly incorporated.
- Press before rolling: If the mix is crumbly, press it into a compact mass before scooping and rolling. A little pressure helps it hold together.
- Uniform sizing: Use a tablespoon or small scoop for consistent portions. They chill and thaw more evenly this way.
- Label containers: If freezing, label with the date so you use older batches first—the texture is best within three months.
Best Ways to Store
Storage is straightforward and keeps these snackable for days or months.
- Refrigerator: Place the chilled balls in a single layer or separated by parchment in an airtight container. They’ll keep well for up to 1 week.
- Freezer: For longer storage, freeze in a single layer on a tray until solid, then transfer to a sealed freezer bag or container. Freeze up to 3 months. Thaw in the fridge or at room temperature for 10–20 minutes before eating.
- Traveling: Pack in a small cooler or insulated lunchbox with an ice pack for longer outings to prevent softening.
Ask & Learn
Common questions I get when I share these:
- Can I make them nut-butter free? Yes—this recipe is already nut-free; don’t add nut butter unless you want a different texture.
- Why did mine turn greasy? Likely the coconut oil got too hot or too much was used relative to dry ingredients. Chill the mix and add more shredded coconut if needed.
- Can I change the shape? Absolutely—flatten into bars, press into a small pan and chill, or use a small cookie cutter for fun shapes. Adjust chilling time for larger shapes.
- How do I intensify lemon flavor? Add a little more zest (careful to avoid pith) or a drop of lemon extract—but a squeeze of fresh lemon juice will alter texture slightly.
In Closing
These Lemon Energy Balls are one of my go-to snacks for a reason: they’re fast, portable, and refreshingly bright. The recipe requires minimal tools and minimal fuss, and the result is a chewy, citrusy bite that keeps well in the fridge or freezer. Keep the ingredients simple and follow the steps in order—reserve coconut for coating if you want it, melt the coconut oil gently, pulse until the mix holds, roll, and chill. You’ll have a batch ready for breakfasts, hikes, or an afternoon refuel.
Make a double batch when you have time—you’ll thank yourself midweek. If you try them, tell me whether you kept them classic or changed the shape. Small swaps are fine, but the fundamentals—coconut, lemon zest, melt-and-bind—are what make these reliably tasty.
Lemon Energy Balls
Ingredients
Equipment
Method
- If you want a coconut coating, set aside a small portion of the shredded coconut before you start.
- If the coconut oil is solid, gently melt it until liquid (short bursts in the microwave or warm in a small saucepan); do not overheat.
- Add the shredded coconut, vanilla protein powder, honey/agave/sugar-free syrup, melted coconut oil, and lemon zest to a blender or food processor.
- Pulse or blend until the mixture holds together when pressed between your fingers — it should be sticky and cohesive (scrape down the sides as needed).
- Use a tablespoon or your hands to press and roll the mixture into balls or shapes of your choice. If the mixture is crumbly, press firmly or refrigerate a few minutes and try again.
- If you reserved shredded coconut, roll the finished balls in it to coat.
- Place the balls in a single layer on a plate or tray and refrigerate at least 30 minutes to firm. Store in a covered container in the refrigerator for up to 1 week or freeze for up to 3 months.
Notes
Want more lemon? Make
Lemon Frozen Yogurt
or
Lemon Mousse
.