Lemon Oreo Dessert
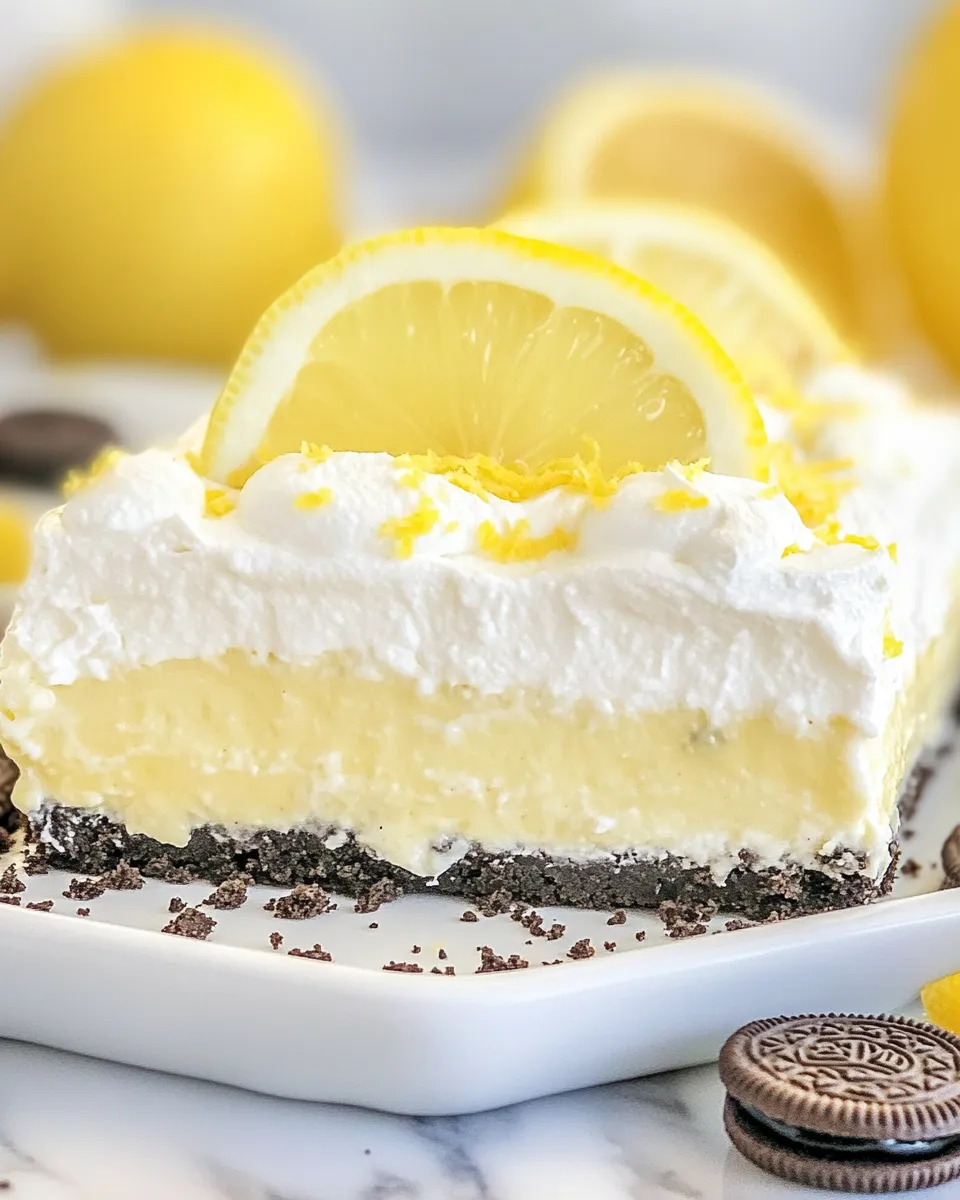
This Lemon Oreo Dessert is the kind of no-fuss, layered treat I turn to when I want something bright, creamy, and crowd-friendly. It comes together with a few pantry staples and a small amount of hands-on time, then it rests in the fridge while the flavors settle. The contrast of lemon curd, cool pudding, and crunchy Golden Oreos makes every spoonful sing.
I test desserts at home with a busy schedule in mind: quick prep, predictable results, and forgiving techniques. This recipe delivers on all three. You’ll crush cookies in a bag, whisk instant pudding, fold in whipped topping, and assemble in a 9×9 pan. No baking, no temperamental steps, and it’s very easy to scale up or down.
Follow the steps below exactly for the best texture and layering, then read on for swaps, gear, and storage tips. I’ll point out the common stumbles and how to avoid them so your Lemon Oreo Dessert looks as good as it tastes.
The Essentials
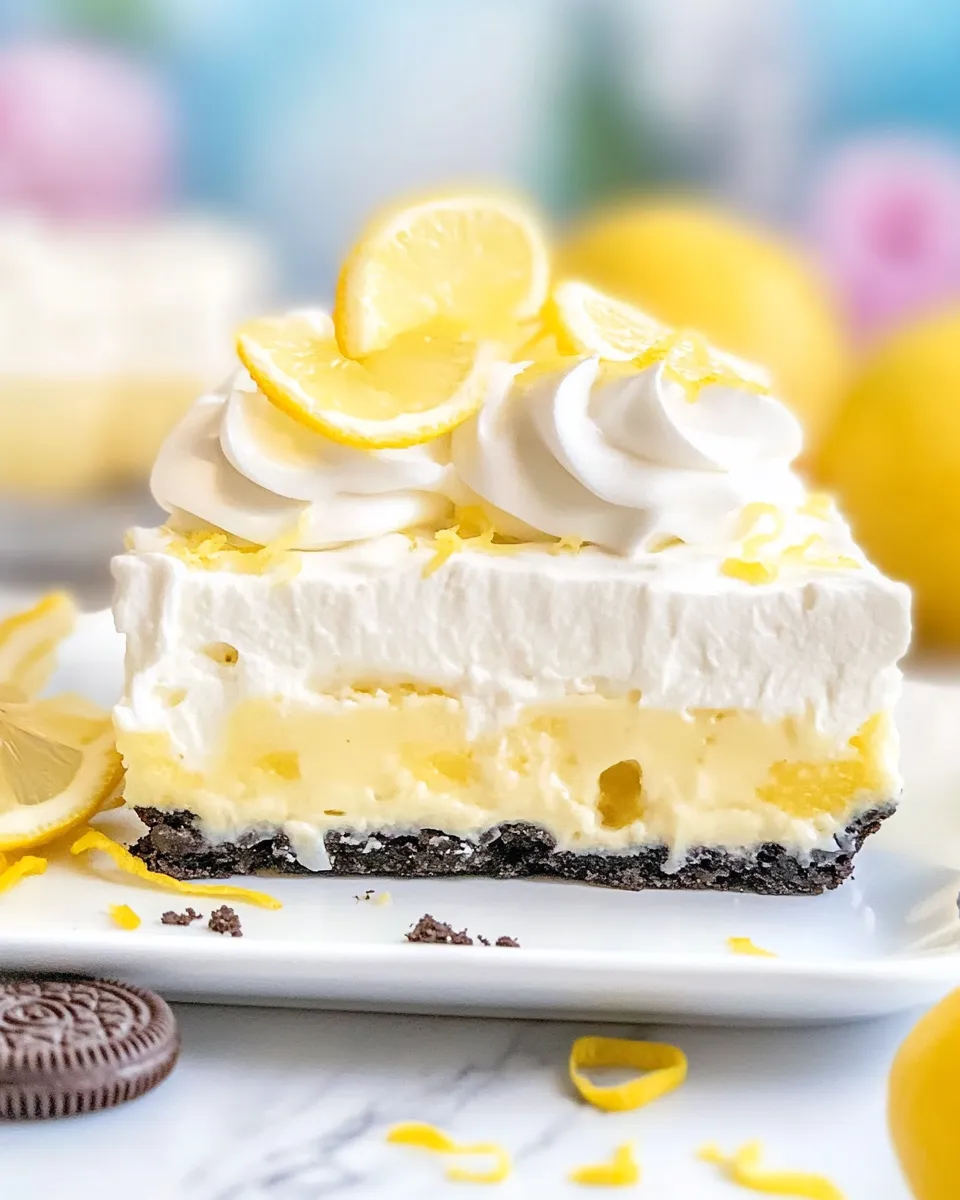
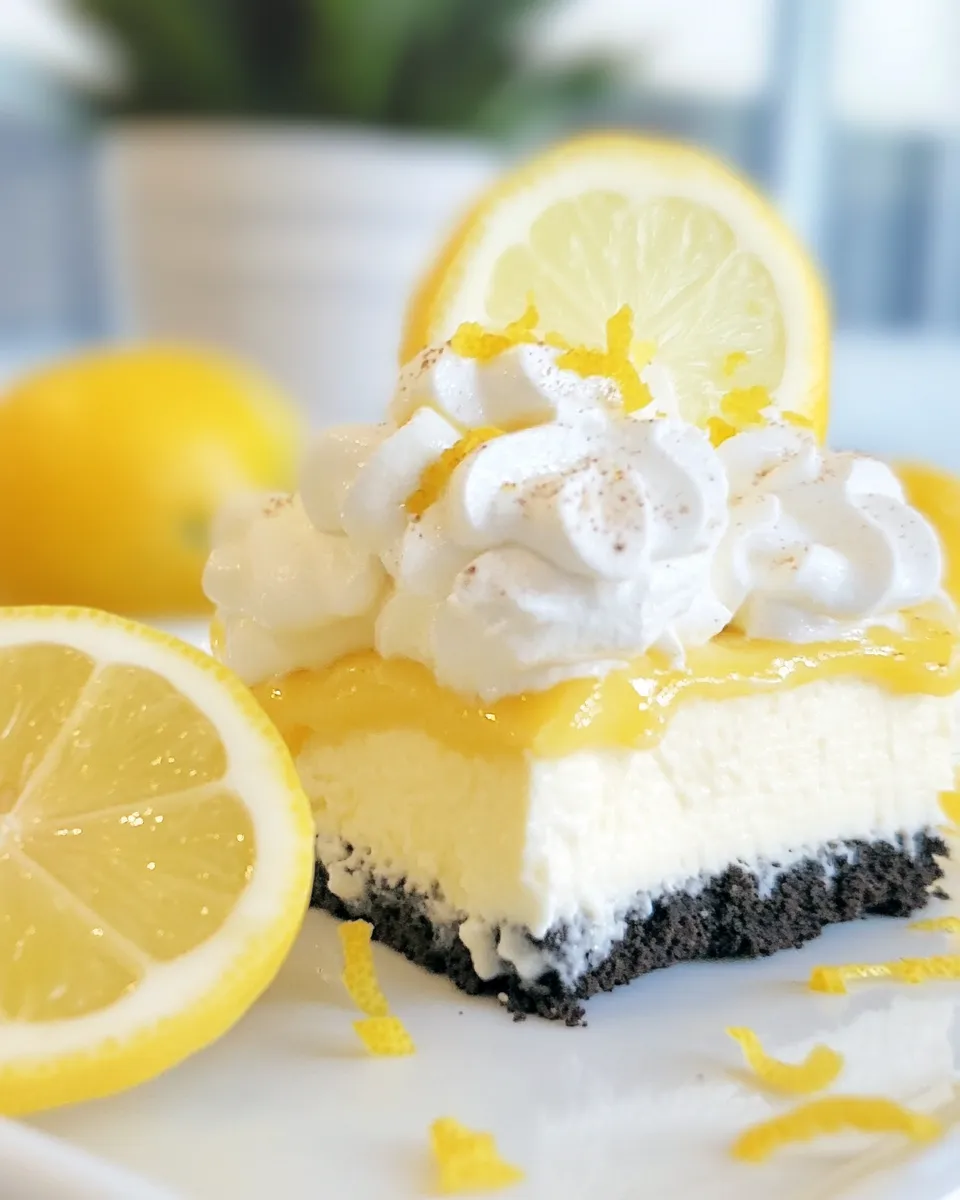
What this is: a layered, no-bake 9×9 pan dessert built from crushed Golden Oreos, instant pudding folded with whipped topping, lemon curd, and more whipped topping, finished with cookie crumbs.
Time: about 20 minutes active prep, plus at least 2 hours chilling. Equipment is minimal. The recipe uses a 9×9-inch pan (called for in the directions) and common kitchen tools.
Why it works: instant pudding gives structure quickly, whipped topping lightens the texture, and the lemon curd adds brightness and snap. The cookie layers provide crunch and flavor contrast without needing to bake a crust.
How to Prepare Lemon Oreo Dessert
- Place 20 Golden Oreos in a gallon-sized zip-top bag. Seal the bag leaving one corner open to let air escape. Crush the cookies coarsely with a rolling pin. Add the 3 tablespoons melted unsalted butter to the bag and massage the bag so the butter is evenly distributed through the crumbs. Pour the crumb mixture into the bottom of a 9×9-inch pan and spread evenly (do not press into a compact crust).
- In a medium bowl, whisk together the entire 13.4-ounce box instant pudding mix and 1 cup nonfat milk until smooth. Let the pudding sit for 2 minutes to thicken.
- Divide the 12 ounces whipped topping into three equal portions. Fold one of the three equal portions of whipped topping into the pudding until uniform.
- Spread the pudding mixture evenly over the cookie layer in the pan.
- Place the remaining 16 Golden Oreos in a new gallon-sized zip-top bag and crush them. Sprinkle half of these crushed cookies (8 cookies’ worth) evenly over the pudding layer. Reserve the other half for the final topping.
- In a small bowl, gently mix the 1 cup lemon curd with the second portion of the whipped topping (the second one of the three equal portions) until smooth. Spread this lemon curd mixture evenly over the pudding and cookie-crumb layer.
- Spread the remaining portion of whipped topping (the third portion) evenly over the lemon curd layer.
- Sprinkle the reserved crushed cookies evenly over the top. Cover the pan with plastic wrap and refrigerate for at least 2 hours before serving.
Why You’ll Keep Making It
This recipe is forgiving. The assembly is straightforward and the ingredients are shelf-stable enough to keep on hand: instant pudding, jarred lemon curd, and boxed Oreos. It’s fast to build and can be prepped the night before for a party or potluck.
The flavors are balanced: lemon curd cuts through the sweetness and whipped topping keeps the pudding silky. Golden Oreos bring a vanilla/cookie flavor that pairs particularly well with lemon. Guests consistently love the texture contrasts—soft pudding, creamy curd, and crunchy cookie crumbs.
Finally, it’s easy to scale. Bakeware aside, you can double the quantities for a 9×13 pan or halve them for a smaller dish. Because there’s no baking, you don’t need to worry about oven space or temperature control.
Swap Guide
Want to tweak it? Here are safe swaps that keep the structure intact:
- Instant pudding flavor — swap for coconut, cheesecake, or vanilla instant pudding (the box mentions those options). Each will change the background flavor: coconut adds tropical notes; cheesecake makes it richer; vanilla keeps it neutral.
- Whipped topping — you can use real whipped cream for a fresher flavor, but it will be softer and less stable over several days. Stabilize whipped cream with a small amount of powdered sugar or gelatin if you need it to hold longer.
- Lemon curd — jarred or homemade both work. Lemon pie filling can substitute in a pinch, but it’s sweeter and less tangy.
- Oreos — Golden Oreos are called for here. Chocolate Oreos will drastically change the profile but will still work if you prefer chocolate.
- Milk — the recipe uses 1 cup nonfat milk; any milk (including reduced-fat or whole) will work; whole milk gives a slightly richer pudding.
What You’ll Need (Gear)
- 9×9-inch pan — the assembly and chilling are sized for this pan.
- Gallon-sized zip-top bags — for crushing the Oreos without extra bowls.
- Rolling pin — to crush cookies; a heavy pan or jar works too.
- Mixing bowls — a medium bowl for pudding, a small bowl for lemon curd mixing.
- Whisk and spatula — whisk for the pudding; spatula for folding and spreading.
- Measuring cups and spoons — for milk and melted butter.
- Plastic wrap — to cover the pan while chilling.
Don’t Do This
Avoid these common mistakes.
- Do not press the cookie crumbs into a compact crust. The recipe explicitly says to spread evenly but not press; pressing will make the base too dense and change the texture balance.
- Don’t skip the 2-minute rest after whisking the instant pudding. It needs that time to thicken. Skipping it will make folding in the whipped topping messy and thin the layers.
- Don’t substitute hot or warm ingredients into the whipped topping. Warm ingredients will deflate it and make the layers runny.
- Avoid over-crushing the cookies for the base. The base benefits from coarse crumbs mixed with butter; overly fine crumbs make it gummy when combined with butter.
- Don’t skip chilling. Chill for at least 2 hours so the layers set and slice cleanly.
In-Season Swaps
When lemons are at peak season, consider making your own lemon curd for maximum brightness—it’s more vibrant than jarred. If citrus is out of season, jarred lemon curd or lemon pie filling is a reliable standby.
Seasonal fruit: top the dessert with thin slices of fresh strawberries or a scattering of raspberries during summer for a color and flavor lift. Add them just before serving so they stay fresh.
Behind-the-Scenes Notes
I tested this a few times to find the best cookie distribution. Using 20 Oreos for the base and 16 for layering keeps the crunch consistent without overpowering the creamy layers. Crushing the second set of Oreos and splitting them ensures a textural middle layer and a final crisp topping.
When folding whipped topping into pudding, do it gently and stop when the mixture looks uniform. Over-folding breaks down the air and changes the mouthfeel. For lemon curd and whipped topping, a gentle mix keeps the curd bright but still fluffy.
If you want cleaner slices, chill overnight. Shorter chilling still works for scoops or spoon-servings, but for pretty slices, longer is better.
Storing Tips & Timelines
Refrigerator
Cover the pan tightly with plastic wrap and keep it refrigerated. Best quality is within 2–3 days. The dessert is safe a little longer thanks to the chilled ingredients, but whipped topping loses structure over time and the cookie crumbs will slowly soften.
Freezing
I don’t recommend freezing the assembled dessert. Freezing changes the texture of whipped topping and lemon curd, and the layers can separate. If you need to freeze, remove individual slices to airtight containers and expect a textural shift after thawing.
Make-ahead
Assemble up to 24 hours in advance for parties. Longer than that, the top may soften and the cookies will lose crunch. If you must prepare earlier, hold off on sprinkling the final cookie crumbs until right before serving.
Reader Q&A
Q: Can I use homemade pudding instead of instant?
A: Instant pudding is recommended because it sets quickly and holds up when folded with whipped topping. Homemade pudding can work, but it tends to be softer and may not hold the same texture. If you use homemade, chill it completely before folding in whipped topping.
Q: Can I substitute real whipped cream for whipped topping?
A: Yes. Fresh whipped cream tastes great, but it’s less stable. For a more stable whipped cream, chill your bowl and beaters, use cold heavy cream, and optionally stabilize with a teaspoon of cornstarch, a tablespoon of powdered sugar, or a small amount of gelatin.
Q: The recipe calls for nonfat milk—can I use another milk?
A: You can use whole, 2%, or non-dairy milks. Whole milk will make the pudding slightly richer. Non-dairy milks may change set time a bit but generally work with instant pudding.
Q: How do I get clean slices?
A: Chill for at least 2 hours, ideally overnight. Use a thin, sharp knife warmed under hot water and wiped dry between cuts. Clean the knife with a towel between slices for the neatest presentation.
Bring It Home
This Lemon Oreo Dessert is a reliable weeknight or party option: fast to assemble, bright in flavor, and crowd-pleasing in texture. Follow the steps in order, respect the chilling time, and you’ll have a dessert that looks intentional without a lot of fuss. Make it the night before to simplify the day-of, and save the last sprinkle of crumbs until serving for the best presentation.
If you try it, leave a note about swaps that worked for you—did you use real whipped cream, try a different pudding flavor, or add fruit on top? I love hearing what readers change and what becomes their new favorite version.
Ingredients
- 36 Golden Oreos, divided — divided into 20 for the base and 16 for layers/topping; you’ll crush them in bags.
- 3 tablespoons unsalted butter, melted — binds the cookie crumbs for the base without making a compact crust.
- 13.4 ounce box INSTANT lemon, coconut, cheesecake or vanilla pudding — instant pudding sets quickly; choose one of the listed flavors.
- 1 cup nonfat milk — used to whisk with the instant pudding mix; provides the pudding liquid.
- 12 ounces whipped topping (approximately 1 ½ 8-ounce containers) — folded into pudding and mixed with lemon curd in thirds to create layers.
- 1 cup lemon curd jarred or homemade or you can use lemon pie filling — adds bright lemon flavor; jarred curd or pie filling are both acceptable options.

Lemon Oreo Dessert
Ingredients
Equipment
Method
- Place 20 Golden Oreos in a gallon-sized zip-top bag. Seal the bag leaving one corner open to let air escape. Crush the cookies coarsely with a rolling pin. Add the 3 tablespoons melted unsalted butter to the bag and massage the bag so the butter is evenly distributed through the crumbs. Pour the crumb mixture into the bottom of a 9×9-inch pan and spread evenly (do not press into a compact crust).
- In a medium bowl, whisk together the entire 13.4-ounce box instant pudding mix and 1 cup nonfat milk until smooth. Let the pudding sit for 2 minutes to thicken.
- Divide the 12 ounces whipped topping into three equal portions. Fold one of the three equal portions of whipped topping into the pudding until uniform.
- Spread the pudding mixture evenly over the cookie layer in the pan.
- Place the remaining 16 Golden Oreos in a new gallon-sized zip-top bag and crush them. Sprinkle half of these crushed cookies (8 cookies' worth) evenly over the pudding layer. Reserve the other half for the final topping.
- In a small bowl, gently mix the 1 cup lemon curd with the second portion of the whipped topping (the second one of the three equal portions) until smooth. Spread this lemon curd mixture evenly over the pudding and cookie-crumb layer.
- Spread the remaining portion of whipped topping (the third portion) evenly over the lemon curd layer.
- Sprinkle the reserved crushed cookies evenly over the top. Cover the pan with plastic wrap and refrigerate for at least 2 hours before serving.
Notes
Be sure to use instant pudding (any flavor works).