Lemon Wafer Cookies
Bright, buttery, and unfussy—these Lemon Wafer Cookies are the kind of small-batch cookie that belongs on a weekday counter and on a holiday platter. They crisp at the edges, remain tender in the middle, and carry a clear lemon note without being aggressively tart. Once you get the method down, they come together fast and reward you with consistent results.
I’ve tested this formula for shape, bake time, and handling so the dimpleless, thin wafer finish is reliable. There’s no rolling pin, no chilling marathon, and no tricky piping—just a little creaming, a scoop, and a light press before a quick bake. That makes these perfect when you want fresh cookies in under an hour from start to finish.
Below I’ll walk you through essentials, the exact step-by-step directions, smart swaps that keep texture intact, common pitfalls, and storage notes so you get the same pleasant snap and softness every time.
The Essentials
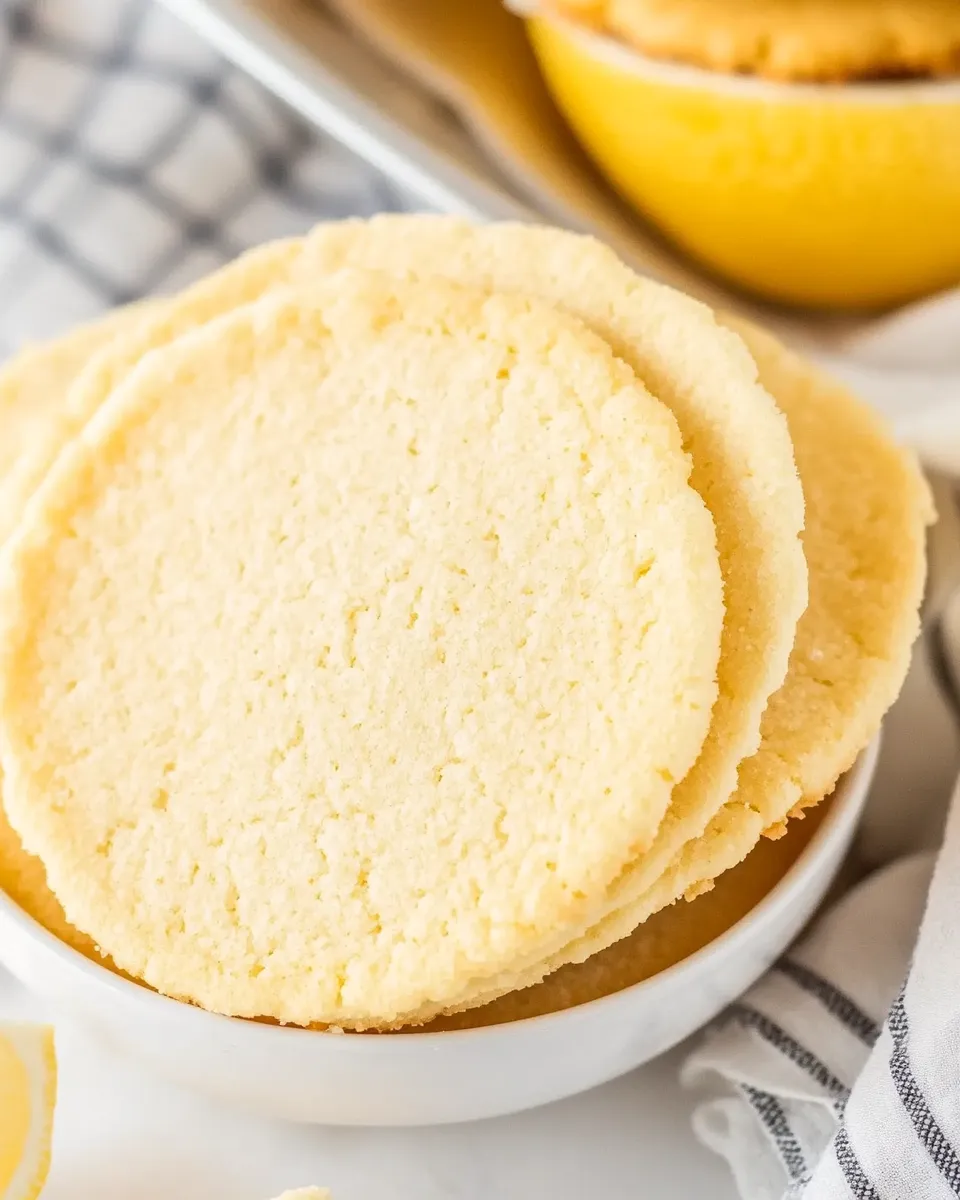
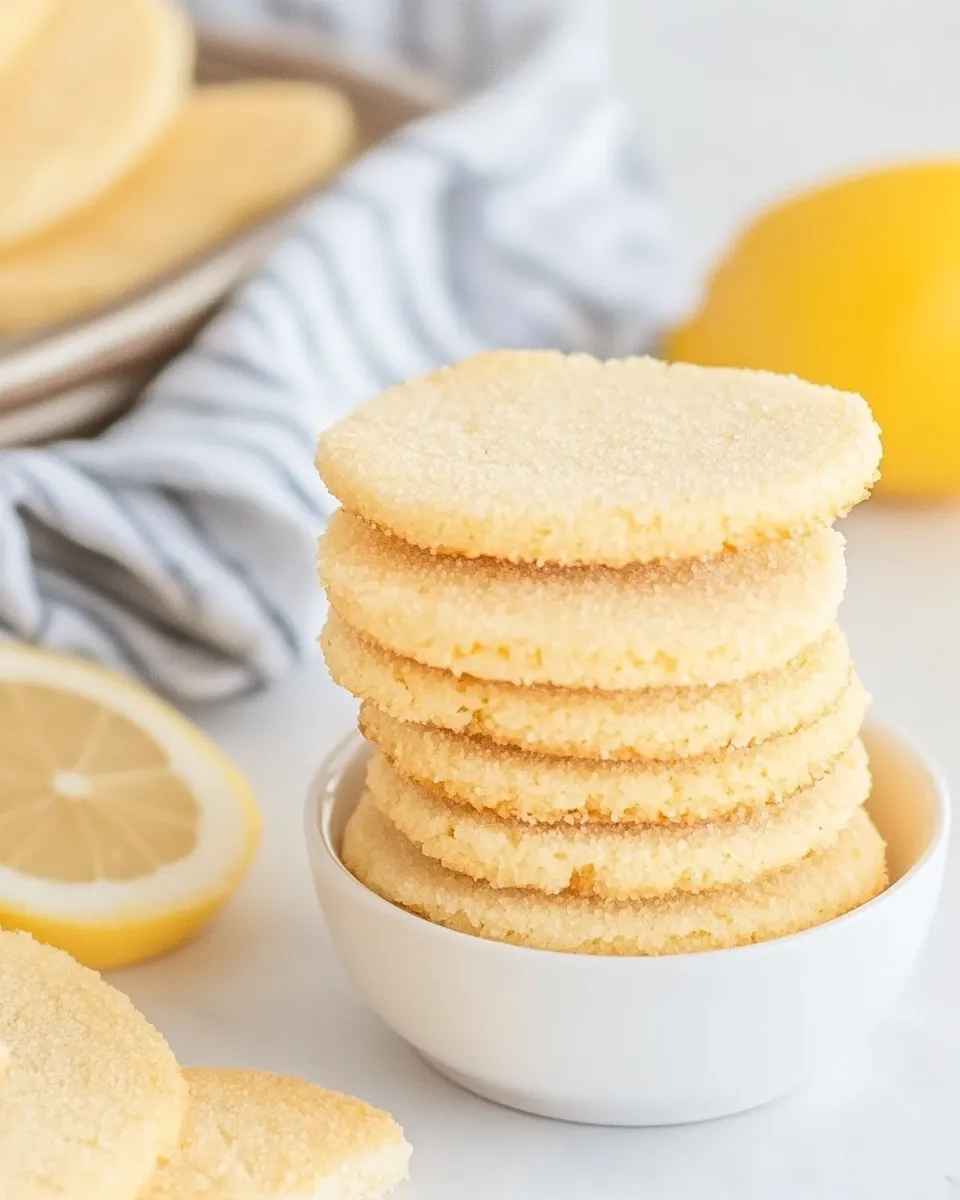
These Lemon Wafer Cookies are a simple butter-cookie base brightened with lemon zest, juice, and a touch of lemon extract. The dough is soft and scoopable; flattening the balls to a quarter-inch produces that classic wafer thinness while keeping the centers slightly tender.
Key moments to watch: cream the butter and sugar until airy, add the wet ingredients evenly, and avoid overmixing when you add flour. Quick bakes at a moderate temperature produce light golden edges while leaving centers slightly soft, which is exactly what you want.
Ingredients
- 8 tablespoons salted butter (see note 1) — provides the cookie’s base flavor and crisping at the edges; room temperature for easy creaming.
- ¾ cup granulated sugar — sweetener and helps with light browning and structure.
- 1 zest of a lemon — fresh zest gives the brightest citrus aroma; zest before juicing.
- 1½ cup AP flour (see note 2) — all-purpose flour is the structural backbone; measure by spooning into the cup and leveling for accuracy.
- ¼ teaspoon baking soda — a small lift agent to prevent the wafers from becoming too dense.
- 1¼ teaspoon lemon extract — concentrates lemon flavor; adds clarity beyond zest and juice.
- 1 tablespoon lemon juice — adds acidity and fresh lemon brightness; use freshly squeezed for best flavor.
- 1 egg (see note 3) — binds and contributes to a slightly tender interior; use room temperature for even mixing.
From Start to Finish: Lemon Wafer Cookies
- Preheat the oven to 350°F (175°C). Line two baking sheets with parchment paper.
- In a stand mixer or large bowl with a hand mixer, cream the salted butter, granulated sugar, and lemon zest together until light and fluffy, about 2–3 minutes.
- In a separate bowl, whisk the all-purpose flour and baking soda together until combined.
- Add the egg to the creamed butter mixture and mix until incorporated.
- Add the lemon juice and lemon extract to the butter mixture and mix until evenly combined.
- Gradually add the flour mixture to the wet ingredients in 2–3 additions, mixing on low speed (or folding by hand) until the dough just comes together. Do not overmix.
- Use a tablespoon to scoop portions of dough. Roll each portion between your palms to form neat balls.
- Place the dough balls on the prepared baking sheets about 2 inches apart. Flatten each ball to about 1/4 inch thickness using the bottom of a glass or the back of a spoon.
- Bake for 8–10 minutes, until the edges are light golden and the centers are still slightly soft.
- Let the cookies cool on the baking sheet for 5 minutes, then transfer them to a wire rack to cool completely.
Why This Recipe Belongs in Your Rotation

These cookies are effortless to scale up for a crowd or scale down for a small household because the technique is forgiving. They’re quick to make and store well, so you can bake a sheet for immediate enjoyment and another for later. The lemon is present but balanced; the combination of zest, juice, and extract gives a rounded citrus note that works for casual snacking, tea time, or as a bright counterpoint on dessert plates.
They’re also adaptable: once you’re comfortable with the dough’s feel and how it spreads, you can experiment with small additions (chopped nuts, thin candied peel) without losing the wafer characteristic. The basic method is a good template for many thin, crisp cookie variations.
Texture-Safe Substitutions
Texture matters with wafer cookies, so swaps should preserve the dough’s spread and the final crisp-tender balance.
- Butter: If you need to use unsalted butter, add a pinch (about 1/8 teaspoon) of salt to maintain flavor balance.
- Flour: Stick with all-purpose flour. Using cake flour will make cookies too soft and prone to spreading oddly; bread flour will make them chewier.
- Sugar: Granulated sugar contributes to crispness. Replacing it with an equal amount of light brown sugar will yield softer, chewier wafers because of its moisture.
- Egg: If you must replace the egg, choose an egg substitute that behaves like a binder (commercial egg replacer) but expect changes in texture; results will likely be softer.
Before You Start: Equipment
- Stand mixer or electric hand mixer — for creaming butter and sugar until light.
- Mixing bowls — one for wet, one for dry.
- Measuring cups and spoons — accurate measures keep the dough consistent.
- Baking sheets and parchment paper — parchment prevents sticking and promotes even bottoms.
- Tablespoon scoop or small cookie scoop — for uniform balls.
- Bottom of a glass or back of a spoon — for flattening to the right 1/4″ thickness.
- Wire rack — for finishing the cool-down so cookies firm up properly.
Easy-to-Miss Gotchas
Two minutes of attention at the right steps makes the difference between a flat greasy cookie and a crisp, bright wafer.
Room temperature butter and egg: If the butter is too cold, it won’t cream properly and the texture will be dense. If the egg is too cold it can cause the butter to seize when mixed in; bring it to room temperature for even incorporation.
Do not overmix once you add the flour: overworking develops gluten and makes wafers tough. Mix until the dough just comes together. It will look slightly shaggy but cohesive.
Flatten consistently: Aim for about 1/4 inch thickness when pressing. Thicker cookies will stay cakey; thinner ones may overbrown too quickly. Consistent spacing on the sheet ensures even air flow and uniform browning.
In-Season Swaps
When lemons are at their best, keep it simple: extra zest or a thin strip of zest on each cookie before baking amps aroma without altering texture. In cooler months, try a gentle switch to orange zest and 1/2 teaspoon orange extract for a sweeter citrus character.
If you want a floral note in spring, a drop of culinary lavender infused into the sugar (strained) pairs well with lemon, but use sparingly so it doesn’t overpower the cookie.
What Could Go Wrong

Cookies spread too much: Check flour measurement—too little flour equals more spread. Also verify that the butter wasn’t overly soft or melted; softened but still slightly cool butter is ideal. Chilling the dough briefly (10–15 minutes) can help, but adjust bake time accordingly.
Cookies are dry and crumbly: This usually means overbaking or too much flour. Pull them from the oven when centers look slightly soft; carryover heat finishes them on the sheet. If the dough seemed dry, double-check your measurements and the freshness of the egg.
Bitter or metallic lemon flavor: That can come from zesting pith or using concentrated extracts in excess. Use just the thin outer yellow zest and measure extracts carefully; the recipe’s 1¼ teaspoon lemon extract works with the fresh juice and zest in this formula.
Storing, Freezing & Reheating
Room temperature storage: Keep cooled cookies in an airtight container at room temperature for several days. Use parchment between layers to prevent sticking.
Freezing dough balls: Scoop and roll portions of dough, place them on a tray to freeze solid, then transfer to a labeled freezer bag. Bake from frozen, adding a minute or two to the bake time and watching closely for the same edge color cues.
Baking then freezing: Fully baked cookies freeze well in an airtight container. Thaw at room temperature. To refresh crispness, warm in a 300°F (150°C) oven for 5–7 minutes, watching so they don’t brown further.
Your Questions, Answered
Can I make the dough ahead?
Yes. Prepared dough balls can be frozen and baked later. If you chill the dough in the refrigerator for a day, let it sit at room temperature a few minutes before shaping so it’s easy to roll.
Why both lemon juice and lemon extract?
Fresh lemon juice gives bright, natural acidity. Lemon extract intensifies the lemon flavor without adding extra liquid and helps the citrus note hold up through baking.
Can I reduce sugar?
You can reduce sugar slightly, but it will change texture and browning. The granulated sugar here contributes to crisp edges; reduce cautiously and expect softer, paler cookies.
How do I know when they’re done?
Edges should be light golden and the centers still slightly soft. They firm up as they cool on the sheet. If you wait until centers are fully set in the oven, they’ll likely be overbaked.
Time to Try It
These Lemon Wafer Cookies are a reliable, small-batch winner—bright, simple, and quick. Follow the steps above, pay attention to creaming and timing, and you’ll have even, delicate wafers that taste of fresh lemon and butter.
Make one sheet for today and freeze half the dough for another afternoon. Then come back and tell me how they turned out: did you go classic lemon or try a seasonal twist? I love hearing small technique wins and flavor experiments.
Lemon Wafer Cookies
Ingredients
Equipment
Method
- Preheat the oven to 350°F (175°C). Line two baking sheets with parchment paper.
- In a stand mixer or large bowl with a hand mixer, cream the salted butter, granulated sugar, and lemon zest together until light and fluffy, about 2–3 minutes.
- In a separate bowl, whisk the all-purpose flour and baking soda together until combined.
- Add the egg to the creamed butter mixture and mix until incorporated.
- Add the lemon juice and lemon extract to the butter mixture and mix until evenly combined.
- Gradually add the flour mixture to the wet ingredients in 2–3 additions, mixing on low speed (or folding by hand) until the dough just comes together. Do not overmix.
- Use a tablespoon to scoop portions of dough. Roll each portion between your palms to form neat balls.
- Place the dough balls on the prepared baking sheets about 2 inches apart. Flatten each ball to about 1/4 inch thickness using the bottom of a glass or the back of a spoon.
- Bake for 8–10 minutes, until the edges are light golden and the centers are still slightly soft.
- Let the cookies cool on the baking sheet for 5 minutes, then transfer them to a wire rack to cool completely.
Notes
All-purpose flour is plain flour for those not in the US.
I use a large room temperature egg.
The oven temperature is for a conventional oven on the bake setting. If using a fan oven, reduce the temperature by 70ºF/20ºC.