Magic Cake
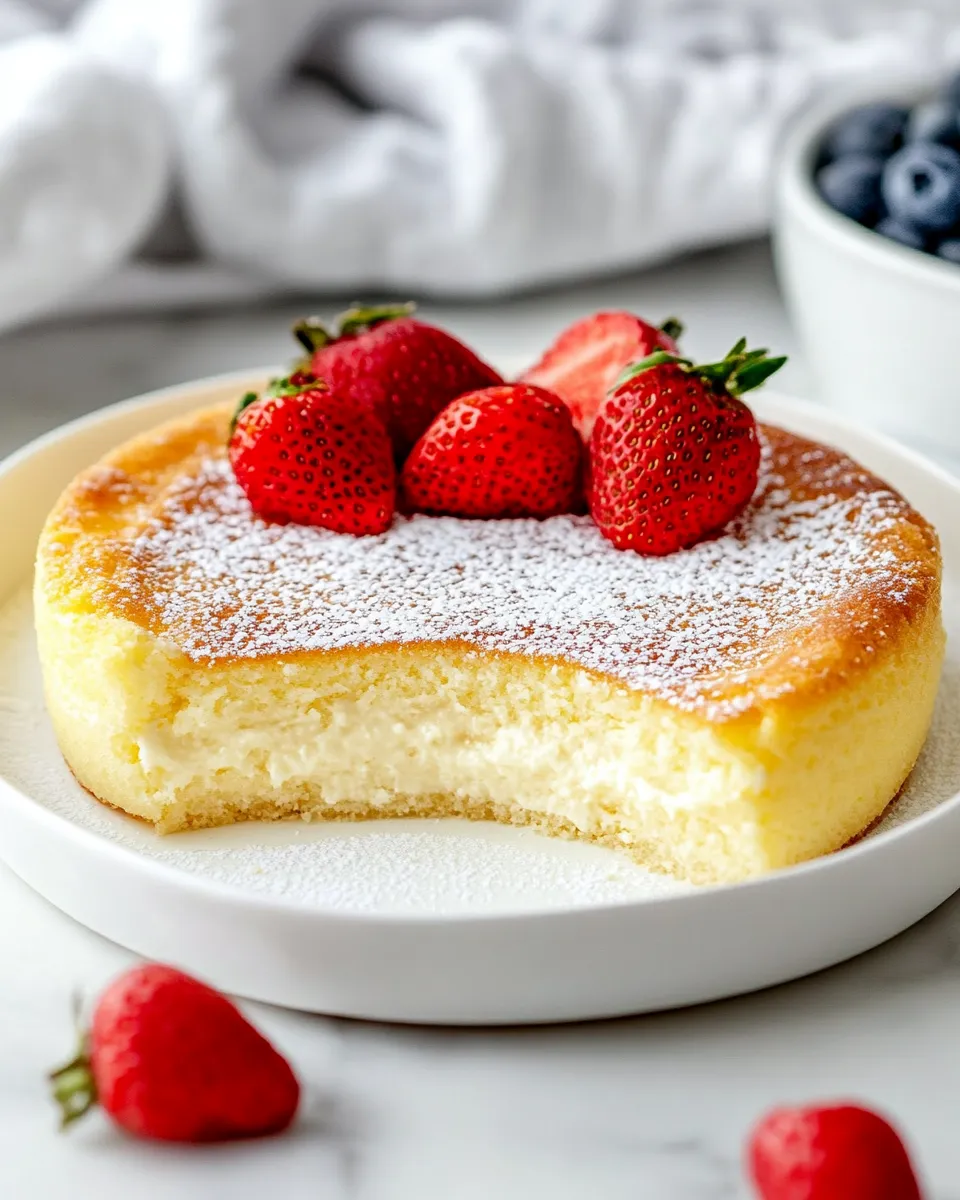
Magic Cake is one of those deceptively simple desserts that rewards careful technique. It bakes into a tender, custardy interior with a light top — almost like two textures in one pan. The method is straightforward: separate the eggs, build a silky batter, fold in whipped whites, and bake gently until set.
I test this version often because it’s forgiving but precise where it matters. Timing, temperature, and gentle folding are the small details that change the outcome. Read through the steps once, gather your ingredients, and work steadily — the result is worth the attention.
What You’ll Need
- 4 eggs (at room temperature) — separating whites and yolks is the backbone of the texture: yolks enrich the batter, whites give lift.
- ¾ cup sugar — sweetens and helps with structure when beaten with the yolks.
- 8 tablespoons butter (unsalted and melted) — adds richness; melted butter blends smoothly into the batter.
- 1 teaspoon vanilla extract — flavor anchor; adds warmth without overpowering.
- ¾ cup all-purpose flour — the main dry structure; sift or measure carefully for consistent results.
- 2 cups milk (lukewarm *) — thins the batter and creates the custardy layer; lukewarm helps integrate without shocking the eggs.
- powdered sugar (for dusting) — optional finish that adds a light sweetness and looks pretty on top.
Magic Cake: How It’s Done
- Preheat the oven to 325°F (160°C). Grease an 8-inch x 8-inch baking dish or line it with parchment paper.
- Separate 4 eggs, placing the yolks in a large mixing bowl and the whites in a clean, dry bowl.
- Add 3/4 cup sugar to the egg yolks. Beat the yolks and sugar until light and fluffy (about 2–3 minutes).
- Pour in 8 tablespoons melted butter and 1 teaspoon vanilla extract. Beat until fully incorporated.
- Add 3/4 cup all-purpose flour and mix until the batter is smooth and uniform.
- Slowly add 2 cups lukewarm milk in a few additions, mixing after each addition until the batter is smooth and combined.
- In the reserved bowl, beat the egg whites until stiff peaks form.
- Fold the beaten egg whites into the batter in 2–3 additions using a rubber spatula: gently cut down through the center, lift and turn the batter, and rotate the bowl. Stop folding when the mixture is mostly uniform with some small air pockets remaining—do not overmix.
- Pour the batter into the prepared baking dish and smooth the top.
- Bake in the preheated oven. Start checking at 40 minutes; continue baking as needed up to about 70 minutes until the top is lightly golden and a toothpick inserted into the center comes out with a few moist crumbs (not wet batter).
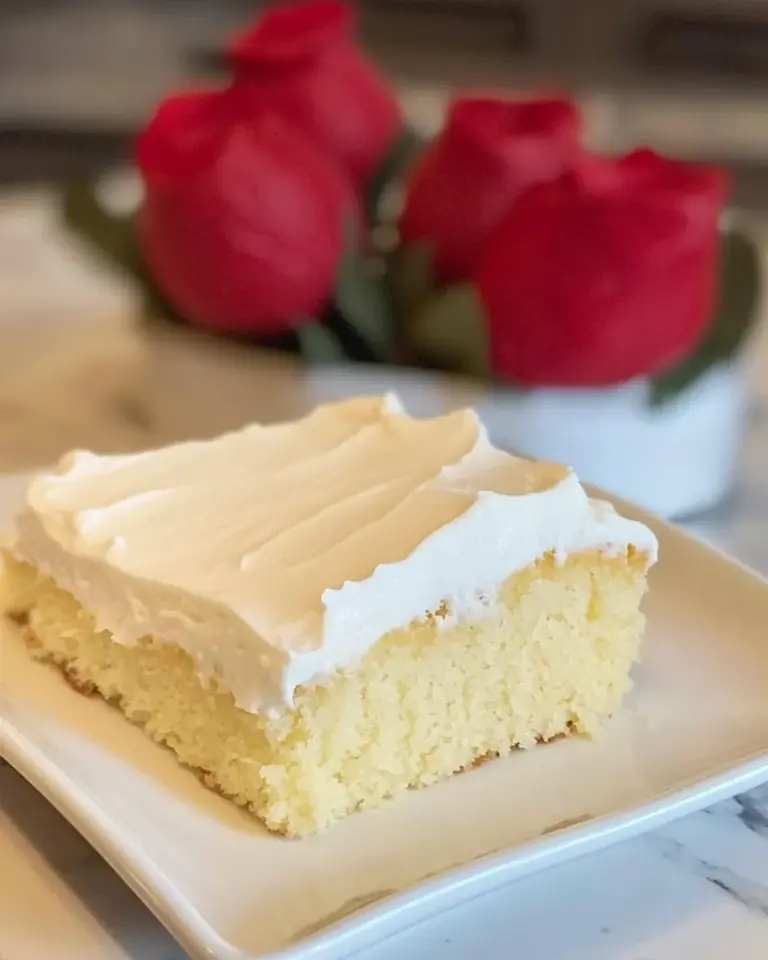
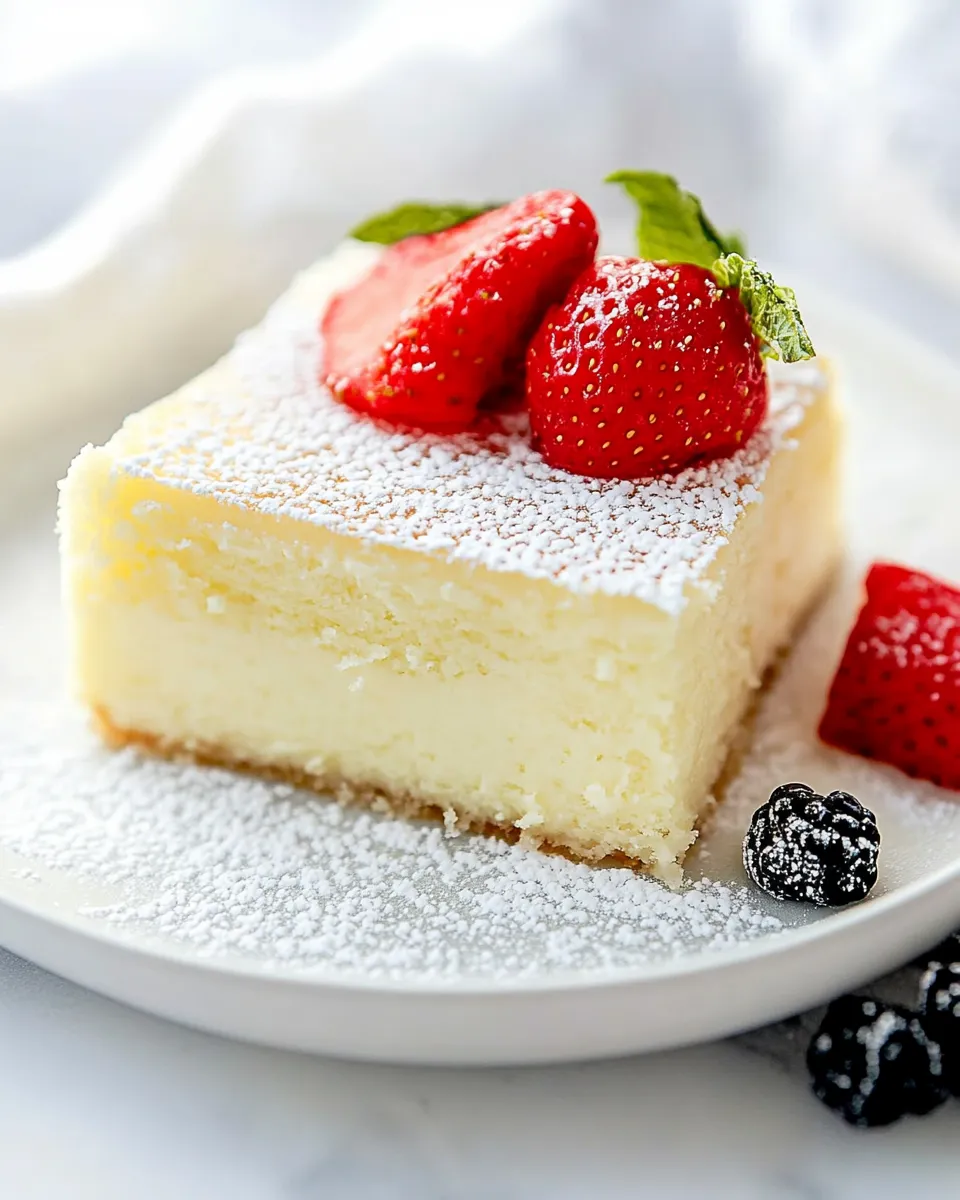
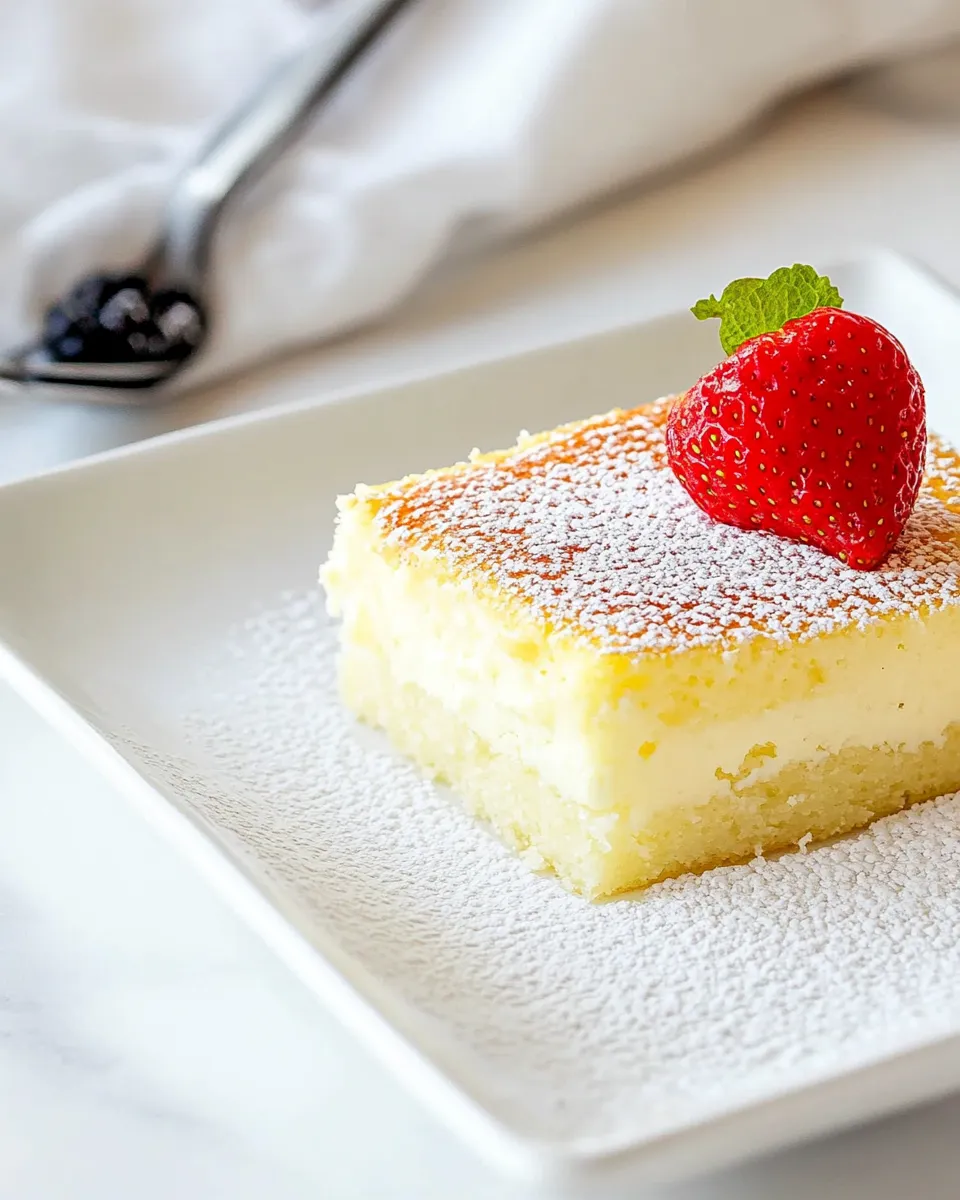
- Remove the cake from the oven and let it cool in the pan until warm or at room temperature. Dust with powdered sugar, cut into squares, and serve.
Why This Recipe Is Reliable
This recipe is reliable because it relies on technique rather than complicated ingredients. The separation of eggs and the whipping of whites create a dual texture: the yolk-enriched batter bakes into a creamy base while the whipped whites add lift and air. The temperature — a moderate 325°F (160°C) — encourages even setting without over-browning, so the center reaches that custardy stage.
The ingredient list is short and predictable. There are few variables to manage: room-temperature eggs for volume, lukewarm milk for smooth integration, and gentle folding to preserve air. If you follow those cues, you get consistent results: a cake that’s tender, slightly custardy, and lightly golden on top.
Swap Guide
Swaps are useful when you’re missing something, but make them deliberately so the cake keeps its texture.
- Milk alternatives: Use whole milk substitute first. If you use a lower-fat milk or a plant-based milk (unsweetened), expect a slightly less rich crumb; reduce added thinning liquids elsewhere if the batter seems too loose.
- Butter swap: Ghee or clarified butter will work for flavor and texture because the recipe uses melted butter. If you substitute oil, keep in mind oil yields slightly denser, moister results.
- Vanilla: If you don’t have vanilla extract, a small pinch of finely grated citrus zest (lemon or orange) can brighten without adding extra liquid.
- Sugar alternatives: Granulated sugar is standard here. Using a granular substitute (like a 1:1 sugar replacement) may change browning and structure; proceed with caution and test a small batch first.
Kitchen Gear Checklist
- 8-inch x 8-inch baking dish — the recipe is scaled to this size for correct depth and cook time.
- Bowl for yolks and a clean, dry bowl for whites — separating in two bowls prevents cross-contamination that blocks volume.
- Electric mixer or whisk — brisk whisking of the yolks and especially the egg whites is easier with a mixer; a clean balloon whisk works if you have the armpower.
- Rubber spatula — gentle folding needs a flexible spatula to lift and turn the batter without deflating it.
- Measuring cups and spoons — accurate measures matter, especially with flour and sugar.
- Toothpick or cake tester — to check doneness without overbaking.
Mistakes That Ruin Magic Cake
Small errors cause big differences with this cake. Watch for these common pitfalls.
- Using cold eggs. Cold yolks mix less smoothly and cold whites whip more slowly and to a lower volume. Bring eggs to room temperature first.
- Under- or over-beating yolks and whites. Underbeaten yolks won’t create the light base; underbeaten whites won’t hold air. Overbeaten whites become dry and will deflate during folding. Aim for stiff, glossy peaks for the whites.
- Rough folding. Scrape, fold, and rotate gently. Vigorous stirring collapses air and yields a dense, flat cake.
- Wrong pan size. A larger or smaller pan changes depth and bake time; stick to 8″x8″ or adjust time and check earlier/later.
- Baking at too high a temperature. High heat can set the top before the center is done, causing cracks or a raw center. 325°F (160°C) is deliberate for even, slow setting.
- Removing too soon. The center should come out with a few moist crumbs, not wet batter. If it’s wobbly and raw, it needs more time.
Seasonal Ingredient Swaps
Seasonal touches can dress this cake without changing the base method. Use additions sparingly so you don’t upset the balance of moisture and structure.
- Spring: Fold in a tablespoon of finely grated lemon zest to the batter for brightness. Top with a light dusting of powdered sugar and a few sliced strawberries when serving.
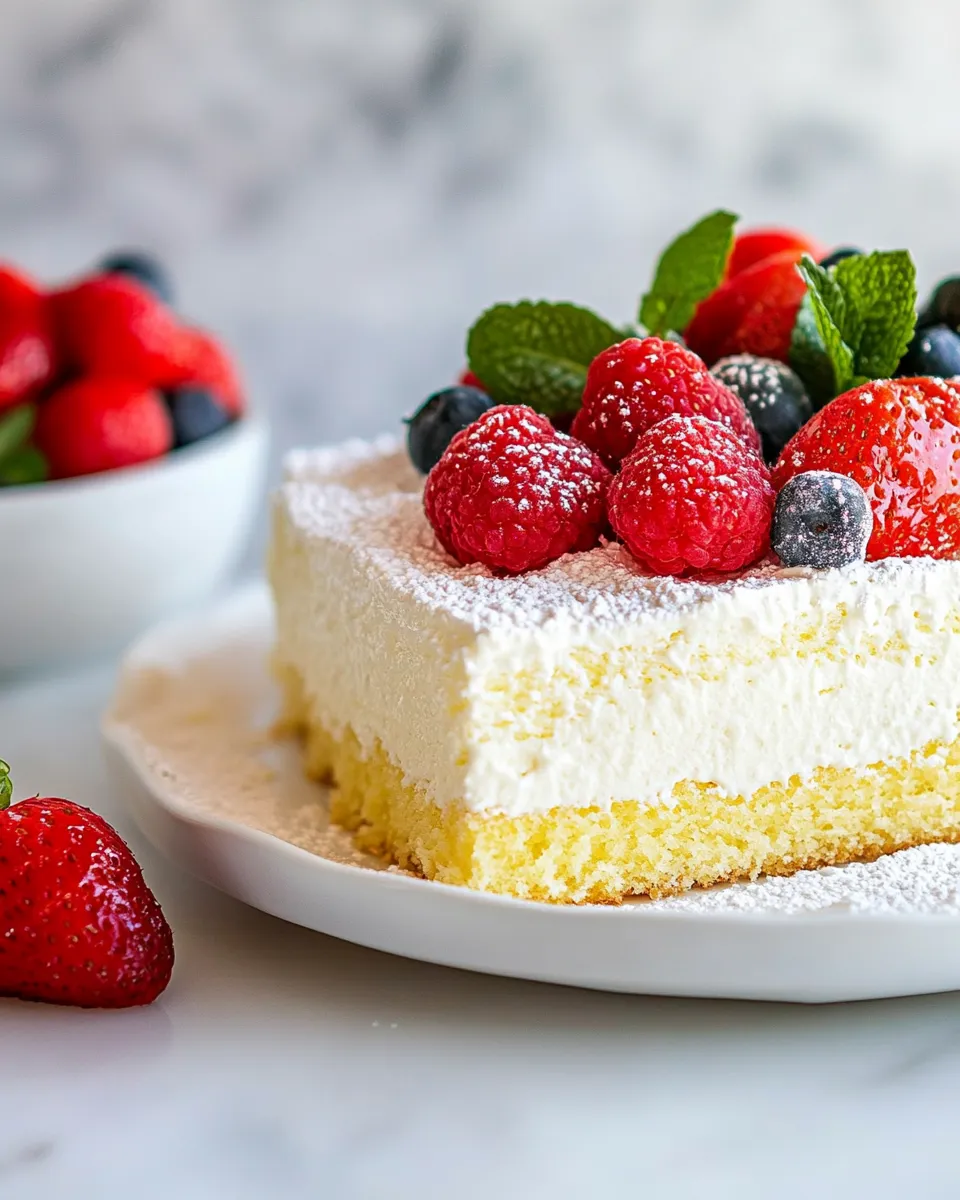
- Summer: Serve with fresh berries and a spoonful of softly whipped cream. A light drizzle of berry compote works too, but keep portions small so the cake remains the star.
- Autumn: Add 1/4 to 1/2 teaspoon cinnamon or a pinch of nutmeg to the batter for warmth. A thin layer of spiced apple slices on top before baking can create a rustic variation.
- Winter: Substitute a teaspoon of orange extract for some of the vanilla or add a tablespoon of finely grated orange zest for a festive lift.
Notes from the Test Kitchen
When I scale this recipe, I keep two things constant: the ratio of liquid to flour and the gentle folding technique. A couple of practical notes from multiple runs:
- Whip the yolks and sugar until they’re noticeably paler — that step builds the base structure and helps dissolve the sugar.
- Warm the milk slightly (lukewarm) so it blends smoothly. Cold milk can cause tiny lumps or demand more mixing, which risks deflating the whites.
- If the top is browning too quickly but the center isn’t set, tent the dish loosely with foil for the final 10–15 minutes of baking.
- Let it cool in the pan. This cake finishes setting as it cools; cutting it too hot can lead to a slumped or gummy center.
Storing Tips & Timelines
Because this cake has a custard-like element, store it properly for best texture and safety.
- Room temperature: Keep covered and eat within 1 day if your kitchen is cool. If the room is warm, move it to the refrigerator after a few hours.
- Refrigerator: Store in an airtight container or wrapped tightly for up to 3–4 days. Bring to room temperature before serving for a softer bite.
- Freezing: You can freeze individual squares wrapped tightly in plastic and foil for up to 2 months. Thaw overnight in the fridge and then bring to room temperature before eating.
Common Qs About Magic Cake
Here are the questions I see most often, with straightforward answers.
Why did my cake sink in the middle?
Sinking usually means underbaking or opening the oven door too early. Also check that the whites were properly whipped and folding was gentle — collapsed air can’t support the structure.
Can I use a different pan size?
You can, but cook time will change. A deeper pan needs more time and a shallower one less. Stick with 8″x8″ when possible for predictable results.
Do I have to separate the eggs?
Yes. Separation is essential here because the whipped whites create the cake’s lift and airy texture; you can’t achieve the same result by beating whole eggs.
Is this the same as a custard cake?
It’s similar in principle. This recipe sits between a cake and a custard because of its liquid-to-flour ratio and the whipped whites. That’s why texture is soft and slightly set in the center.
How do I know when it’s done?
Start checking at 40 minutes. The top should be lightly golden. A toothpick should come out with a few moist crumbs — not wet batter. If it’s very jiggly in the center, it needs more time.
Wrap-Up
Magic Cake is straightforward if you respect the key steps: room-temperature eggs, proper whipping, gentle folding, and slow baking. The payoff is a delicate cake with two complementary textures that looks elegant with minimal effort.
Once you’ve made it a couple of times, you’ll learn how your oven behaves and which seasonal finishes you prefer. Dust with powdered sugar, serve warm or at room temperature, and enjoy the simple magic of technique over fuss.
Magic Cake
Ingredients
Equipment
Method
- Preheat the oven to 325°F (160°C). Grease an 8-inch x 8-inch baking dish or line it with parchment paper.
- Separate 4 eggs, placing the yolks in a large mixing bowl and the whites in a clean, dry bowl.
- Add 3/4 cup sugar to the egg yolks. Beat the yolks and sugar until light and fluffy (about 2–3 minutes).
- Pour in 8 tablespoons melted butter and 1 teaspoon vanilla extract. Beat until fully incorporated.
- Add 3/4 cup all-purpose flour and mix until the batter is smooth and uniform.
- Slowly add 2 cups lukewarm milk in a few additions, mixing after each addition until the batter is smooth and combined.
- In the reserved bowl, beat the egg whites until stiff peaks form.
- Fold the beaten egg whites into the batter in 2–3 additions using a rubber spatula: gently cut down through the center, lift and turn the batter, and rotate the bowl. Stop folding when the mixture is mostly uniform with some small air pockets remaining—do not overmix.
- Pour the batter into the prepared baking dish and smooth the top.
- Bake in the preheated oven. Start checking at 40 minutes; continue baking as needed up to about 70 minutes until the top is lightly golden and a toothpick inserted into the center comes out with a few moist crumbs (not wet batter).
- Remove the cake from the oven and let it cool in the pan until warm or at room temperature. Dust with powdered sugar, cut into squares, and serve.
Notes
The baking time can vary greatly for this cake. I’ve baked this cake in 3 different ovens and I’ve always needed different times which were from 40 to 70 minutes. The oven I have right now only requires about 45 minutes to get a nice golden color on the cake, whereas other ovens I’ve used required the full 70 minutes. Test if after 40 minutes to see what it looks like. The cake is done when it only jiggles slightly but feels firm to touch.
General guidelines for baking at high altitude (not all may apply to this recipe):If baking at altitudes of 5000 feet or higher, keep this in mind:Use a sturdy baking pan:The lower air pressure at high altitudes can cause cakes to rise and collapse more easily, so it’s important to use a sturdy baking pan that can support the weight of the batter. A heavier or thicker pan can help the cake bake more evenly and reduce the risk of collapse.Increase the liquid and leavening agents:At high altitudes, the air is drier and ingredients can evaporate more quickly, which can affect the texture and moisture of the cake. To compensate for this, you may need to increase the liquid in the recipe by a few tablespoons and add a bit more baking powder or baking soda to help the cake rise.Reduce the sugar.As a general rule decrease sugar by 1 tablespoon per cup.Adjust the baking time and temperature:At higher altitudes, the air pressure is lower and the boiling point of water is lower, which can affect the baking time and temperature of the cake. As a general rule, increase the oven temperature 15 to 25°F and decrease the time to 5 to 8 minutes less per 30 minutes of baking time.
Use a sturdy baking pan:The lower air pressure at high altitudes can cause cakes to rise and collapse more easily, so it’s important to use a sturdy baking pan that can support the weight of the batter. A heavier or thicker pan can help the cake bake more evenly and reduce the risk of collapse.
Increase the liquid and leavening agents:At high altitudes, the air is drier and ingredients can evaporate more quickly, which can affect the texture and moisture of the cake. To compensate for this, you may need to increase the liquid in the recipe by a few tablespoons and add a bit more baking powder or baking soda to help the cake rise.
Reduce the sugar.As a general rule decrease sugar by 1 tablespoon per cup.
Adjust the baking time and temperature:At higher altitudes, the air pressure is lower and the boiling point of water is lower, which can affect the baking time and temperature of the cake. As a general rule, increase the oven temperature 15 to 25°F and decrease the time to 5 to 8 minutes less per 30 minutes of baking time.