Perfect Cheesecake
There are two kinds of people in this kitchen: those who think cheesecake is intimidating, and those who’ve learned the simple, steady steps that make a silky, crack-free cheesecake every time. I promise you, with a little patience and a tried-and-true method, you’ll be in the second camp after one bake.
This recipe balances a buttery graham crust with a luxuriously smooth cream-cheese filling. The technique uses a water bath and a controlled cool-down to prevent cracks and ensure a dense, creamy texture. Read the steps through once, gather your tools, and follow the sequence—there’s no trickery, just reliable technique.
I’ll walk you through ingredients, step-by-step baking, swaps if you need them, common mistakes to avoid, and how to store and serve the cheesecake so it looks as good as it tastes. Let’s get started.
The Ingredient Lineup

Ingredients
- 1 ½ cups finely crushed graham crackers — forms the base; press firmly for a sturdy crust.
- 1 Tablespoon granulated sugar — adds a touch of sweetness to the crust and helps it brown slightly.
- ½ cup unsalted butter (melted) — binds the crumbs and keeps the crust rich without extra salt.
- 24 oz cream cheese (softened) — the centerpiece of the filling; bring to room temperature for a lump-free batter.
- 1 cup granulated sugar — sweetens the filling while keeping the texture smooth.
- 2 tablespoons all-purpose flour — stabilizes the filling so it sets without becoming rubbery.
- ½ cup sour cream — adds tang and creaminess; helps the filling stay tender.
- 1 teaspoon vanilla extract — simple flavoring that complements, not overpowers.
- 1 tablespoon milk — loosens the batter slightly for a silky finish.
- 3 large eggs (well beaten) — provide structure; add them slowly and do not overmix.
From Start to Finish: Perfect Cheesecake
- Preheat oven to 325°F. Wrap an 8″ springform pan tightly in aluminum foil (bottom and sides) and set the wrapped pan inside a large roasting pan.
- Place 1 ½ cups finely crushed graham crackers, 1 Tablespoon granulated sugar, and ½ cup unsalted butter (melted) in a food processor. Process on low until the crumbs are evenly moistened and hold together when pinched.
- Press the graham-cracker mixture evenly into the bottom of the prepared springform pan to form the crust. Bake the crust in the preheated oven for 7 minutes. Remove from oven and set the roasting pan aside.
- While the crust bakes, bring about 2 cups of water to a boil and set it aside (you will use hot water for a water bath).
- In a large bowl, place 24 oz cream cheese (softened). Beat with a hand mixer on medium for about 30 seconds until smooth.
- Add 1 cup granulated sugar to the cream cheese and mix until combined and smooth.
- Add 2 Tablespoons all-purpose flour, ½ cup sour cream, 1 teaspoon vanilla extract, and 1 Tablespoon milk. Mix on low/medium until the batter is smooth and uniform.
- Add 3 large eggs (well beaten) to the batter and mix on low speed just until the eggs are completely incorporated. Do not overmix.
- Pour the cheesecake batter over the pre-baked crust. Gently tap the roasting pan on the counter a few times to release large air bubbles; poke stubborn bubbles with a toothpick if necessary.
- Place the roasting pan with the wrapped springform pan back in the oven. Carefully pour the hot water into the roasting pan around the springform pan until the water comes about 1 inch up the sides of the springform pan but does not run over the foil.
- Bake the cheesecake for a total of 1 hour and 20 minutes. After the first 50 minutes of baking, carefully remove the roasting pan briefly and replace or top up the water so the bath is still about 1 inch deep, then return the roasting pan to the oven to finish baking.
- When baking time is complete, turn off the oven. Insert a wooden spoon (or similar heatproof object) in the oven door to leave it slightly ajar, and leave the cheesecake undisturbed inside the oven for 1 hour.
- After the hour, run a thin knife around the inside edge of the springform pan to loosen the cheesecake. Do not unlatch or remove the sides yet. Let the cheesecake cool completely at room temperature.
- Once cooled, refrigerate the cheesecake (still in the springform pan) for at least 4 hours, preferably overnight.
- When chilled, unlatch and remove the springform ring, then top the cheesecake with desired toppings before serving.
Why It Deserves a Spot
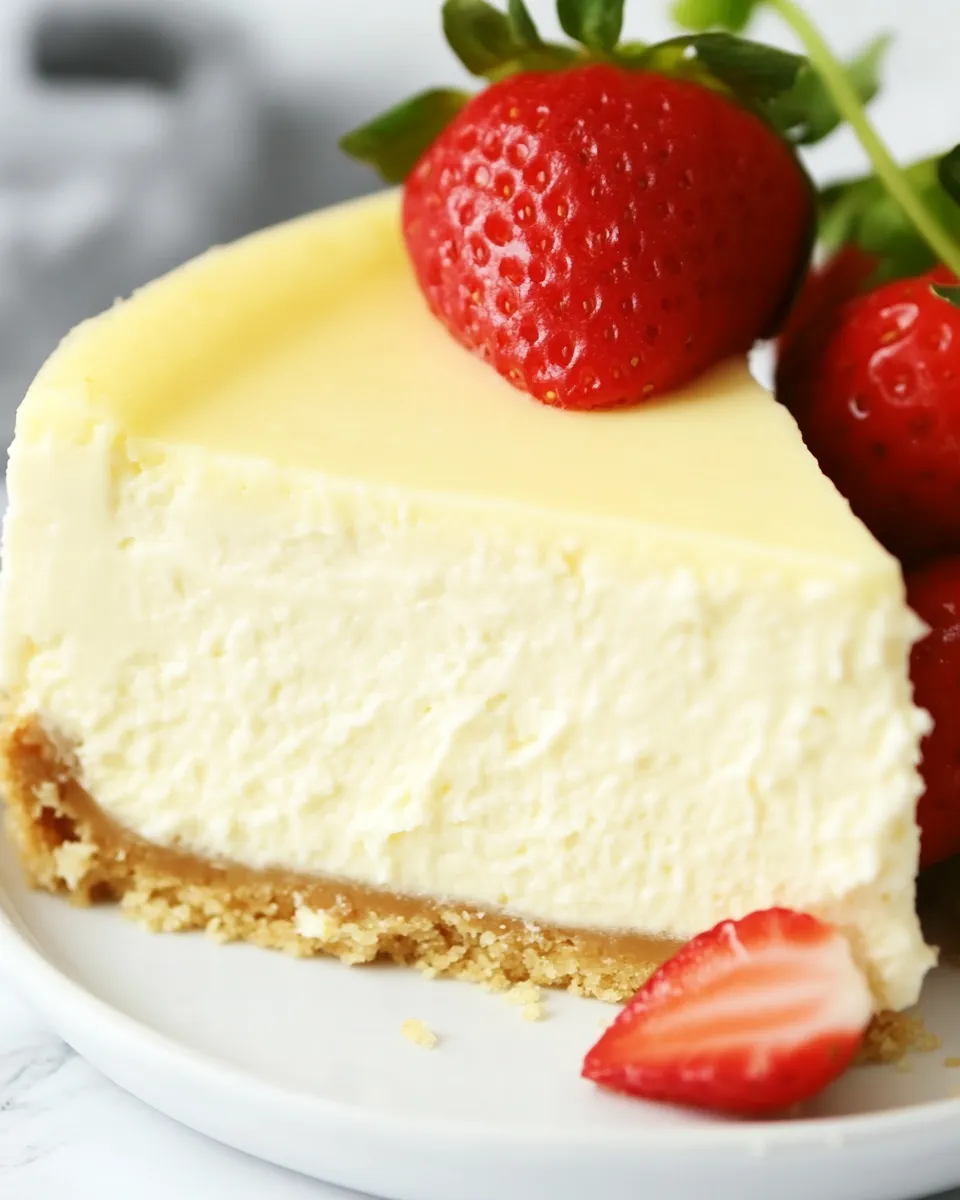
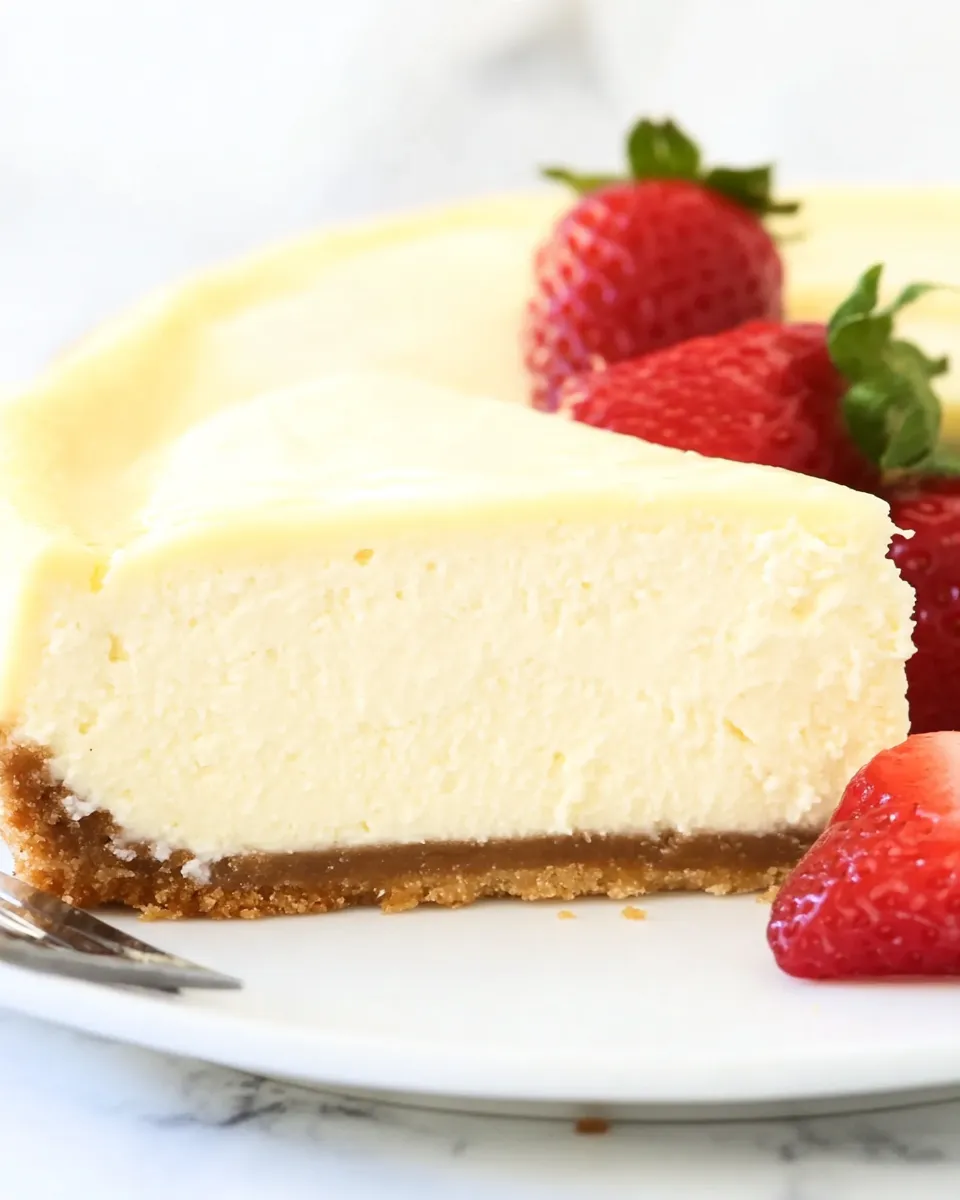
This cheesecake hits three goals at once: a crisp, buttery crust; a dense, creamy filling; and a crack-free top. The water bath and the gentle cool-down inside the oven keep the temperature steady so the surface doesn’t overcook and split. The flour and sour cream stabilize and tenderize the filling so you get an indulgent texture without the chewiness that comes from overbeating.
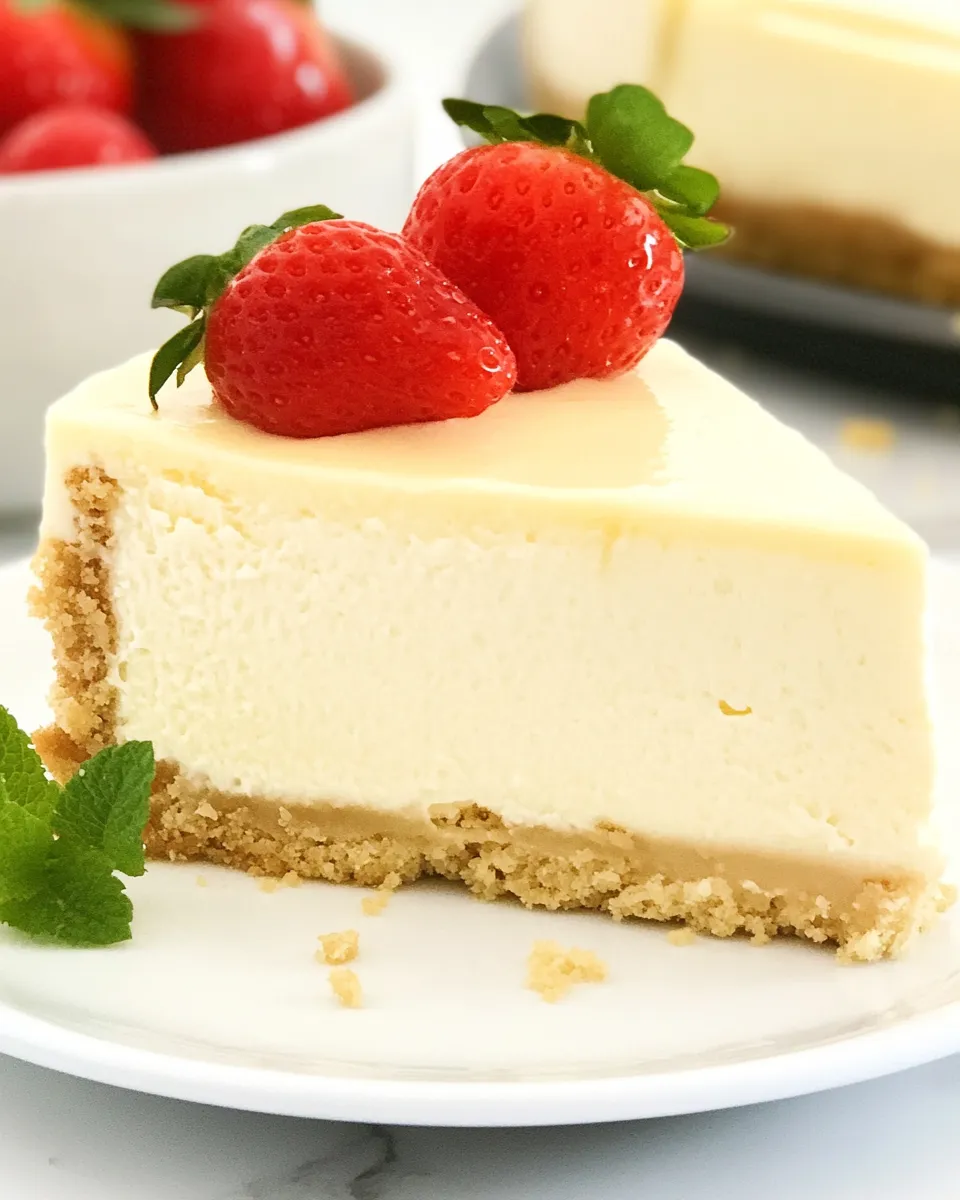
It’s versatile. Serve it plain, dusted with powdered sugar, or with fresh berries, a fruit compote, or a drizzle of caramel or chocolate. It’s impressive enough for guests and forgiving enough for a weekday dessert.
Ingredient Swaps & Substitutions
Want to tweak flavors or accommodate what’s in your pantry? These swaps keep results reliable.
- Crust: Substitute graham crackers with digestive biscuits or crushed vanilla wafers. Press and bake the same way.
- Butter: Unsalted butter is preferred for control. If using salted butter, skip any added salt elsewhere.
- Cream cheese: Use full-fat blocks only. Low-fat or whipped varieties contain more water and will affect texture.
- Sour cream: You can swap Greek yogurt for sour cream 1:1, but expect a slightly tangier finish.
- Vanilla: Pure vanilla extract is recommended. If you only have vanilla bean, scrape in the seeds for a speckled top and stronger aroma.
Hardware & Gadgets
These tools make the process simpler and more consistent.
- 8″ springform pan: Required for easy removal and clean edges.
- Large roasting pan: For the water bath. It should hold the wrapped springform snugly.
- Aluminum foil: Wrap the springform tightly to prevent water seeping in.
- Food processor: For uniformly crushed graham crumbs. A zip-top bag and rolling pin works in a pinch.
- Hand mixer: Fast and controlled; a stand mixer works too but avoid overbeating.
- Instant-read thermometer (optional): Useful if you like to check internal temp; target around 150–155°F when the center is just set but still slightly jiggly.
Errors to Dodge
These are the most common missteps and how to avoid them.
- Cold cream cheese: Working with cold blocks leads to lumps. Soften to room temperature before mixing.
- Overbeating: Adds air, which causes the cake to rise and crack. Mix just until ingredients are uniform, especially after adding eggs.
- Skipping the water bath or foil wrap: Dry heat makes the top crack and become dense. A secure foil wrap keeps water out and steady moisture in.
- Removing from the oven too quickly: Rapid cooling encourages cracks. Leave it in the slightly open oven for the hour and then cool slowly at room temperature.
- Rushing the chill: Cutting too soon leads to a soft center and messy slices. Chill at least 4 hours; overnight is best.
Better-for-You Options
If you want lighter or cleaner labels, these options help, but expect differences in texture:
- Lower-fat cream cheese: Use sparingly; the filling may be looser. Increase chilling time before serving.
- Greek yogurt swap: Replace sour cream with an equal amount of full-fat Greek yogurt for more protein and tang.
- Reduced-sugar: You can decrease the 1 cup granulated sugar slightly, but sugar affects texture as well as sweetness; cut no more than 20% without testing.
- Gluten-free crust: Use gluten-free graham-style crumbs or a nut-based crust. Press firmly and bake the same 7 minutes to set.
Insider Tips
Mixing and texture
Beat the cream cheese until smooth and just barely fluffy—about 30 seconds at medium speed is enough. Add sugar and beat until smooth again, then mix in the remaining ingredients on low to avoid aeration. When you add the well-beaten eggs, do it slowly and stop as soon as the color evens out.
Water bath setup
Wrap the pan twice if your foil is thin, and make sure the bottom is covered completely. When pouring hot water into the roasting pan, use a measuring cup for control. Keep the water about 1 inch up the sides and avoid splashes on the foil seal.
Cooling strategy
Leave the cake in the turned-off oven with the door cracked for an hour. That gentle cooldown is the single best thing you can do to prevent cracks.
Storage & Reheat Guide
Cheesecake keeps well and actually tastes better after a day or two as flavors meld.
- Refrigerator: Store the whole cheesecake, covered, up to 5 days. Slices keep well in an airtight container for 3–4 days.
- Freezer: Wrap individual slices or the whole cake (remove the springform sides first) tightly in plastic wrap and foil, then freeze up to 2 months. Thaw overnight in the refrigerator before serving.
- Reheating: Cheesecake is best served cold or room temperature. If you prefer it slightly warm, remove a slice from the fridge 30 minutes before serving or give it a 10–15 second zap in the microwave at low power—watch carefully to avoid melting.
Your Top Questions
Here are answers to questions readers ask most often.
- Why did my cheesecake crack? Usually overmixing or sudden temperature changes. Use the water bath, don’t overbeat, and cool slowly in the oven.
- How do I know it’s done? The edges should be set and the center slightly jiggly—like gelatin. If using a thermometer, aim for about 150–155°F in the center.
- Can I make it ahead? Yes. Made a day ahead is ideal. It slices cleaner and flavors settle.
- Can I use a different pan size? This recipe is for an 8″ springform. A larger pan will yield a thinner cheesecake and shorten baking time; a smaller pan will make it taller and require longer baking—stick to the recommended pan when possible.
Let’s Eat
When you’re ready to serve, run a thin knife along the chilled cheesecake’s edge just before unlatching the springform for the cleanest release. Slice with a sharp knife dipped in hot water and wiped dry between cuts for neat portions.
Top simply with fresh berries or a fruit compote for brightness, or go indulgent with caramel or chocolate sauce. Serve each slice slightly chilled for perfect texture. This cheesecake keeps well, travels well, and always impresses—so save that recipe card and make it again.
Perfect Cheesecake
Ingredients
Equipment
Method
- Preheat oven to 325°F. Wrap an 8" springform pan tightly in aluminum foil (bottom and sides) and set the wrapped pan inside a large roasting pan.
- Place 1 ½ cups finely crushed graham crackers, 1 Tablespoon granulated sugar, and ½ cup unsalted butter (melted) in a food processor. Process on low until the crumbs are evenly moistened and hold together when pinched.
- Press the graham-cracker mixture evenly into the bottom of the prepared springform pan to form the crust. Bake the crust in the preheated oven for 7 minutes. Remove from oven and set the roasting pan aside.
- While the crust bakes, bring about 2 cups of water to a boil and set it aside (you will use hot water for a water bath).
- In a large bowl, place 24 oz cream cheese (softened). Beat with a hand mixer on medium for about 30 seconds until smooth.
- Add 1 cup granulated sugar to the cream cheese and mix until combined and smooth.
- Add 2 Tablespoons all-purpose flour, ½ cup sour cream, 1 teaspoon vanilla extract, and 1 Tablespoon milk. Mix on low/medium until the batter is smooth and uniform.
- Add 3 large eggs (well beaten) to the batter and mix on low speed just until the eggs are completely incorporated. Do not overmix.
- Pour the cheesecake batter over the pre-baked crust. Gently tap the roasting pan on the counter a few times to release large air bubbles; poke stubborn bubbles with a toothpick if necessary.
- Place the roasting pan with the wrapped springform pan back in the oven. Carefully pour the hot water into the roasting pan around the springform pan until the water comes about 1 inch up the sides of the springform pan but does not run over the foil.
- Bake the cheesecake for a total of 1 hour and 20 minutes. After the first 50 minutes of baking, carefully remove the roasting pan briefly and replace or top up the water so the bath is still about 1 inch deep, then return the roasting pan to the oven to finish baking.
- When baking time is complete, turn off the oven. Insert a wooden spoon (or similar heatproof object) in the oven door to leave it slightly ajar, and leave the cheesecake undisturbed inside the oven for 1 hour.
- After the hour, run a thin knife around the inside edge of the springform pan to loosen the cheesecake. Do not unlatch or remove the sides yet. Let the cheesecake cool completely at room temperature.
- Once cooled, refrigerate the cheesecake (still in the springform pan) for at least 4 hours, preferably overnight.
- When chilled, unlatch and remove the springform ring, then top the cheesecake with desired toppings before serving.
Notes
Refrigerate any leftovers for up to 5 days in a closed container.
Please note, that the nutrition value can vary depending on what product you use. The information below is an estimate.
![Homemade Poppy Chow [Chocolate & Peanut Butter-Covered Popcorn] photo](https://oventoasted.com/wp-content/uploads/2025/12/Poppy_Chow_Chocolate__Peanut_Butter-Covered_Popcorn-1-768x960.webp)