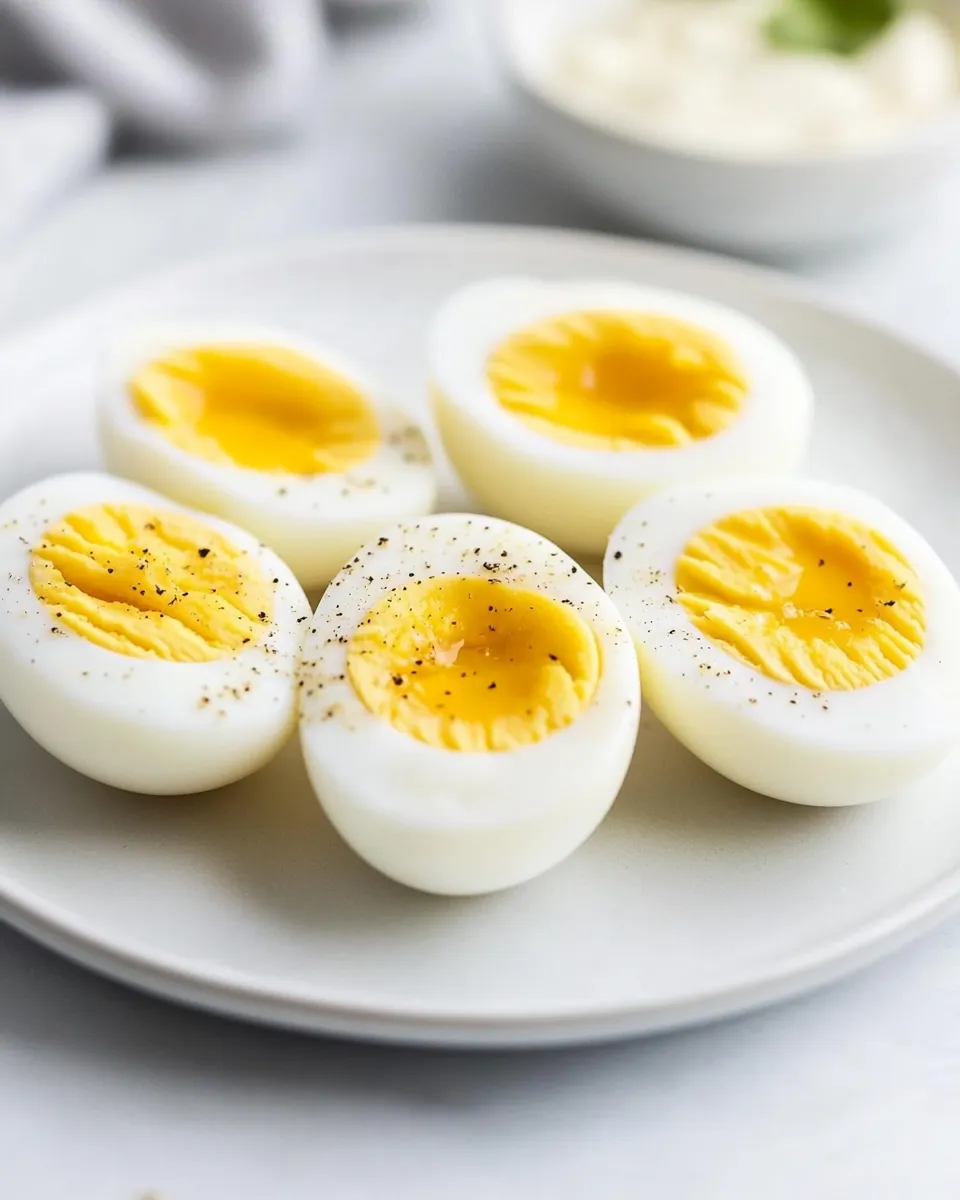
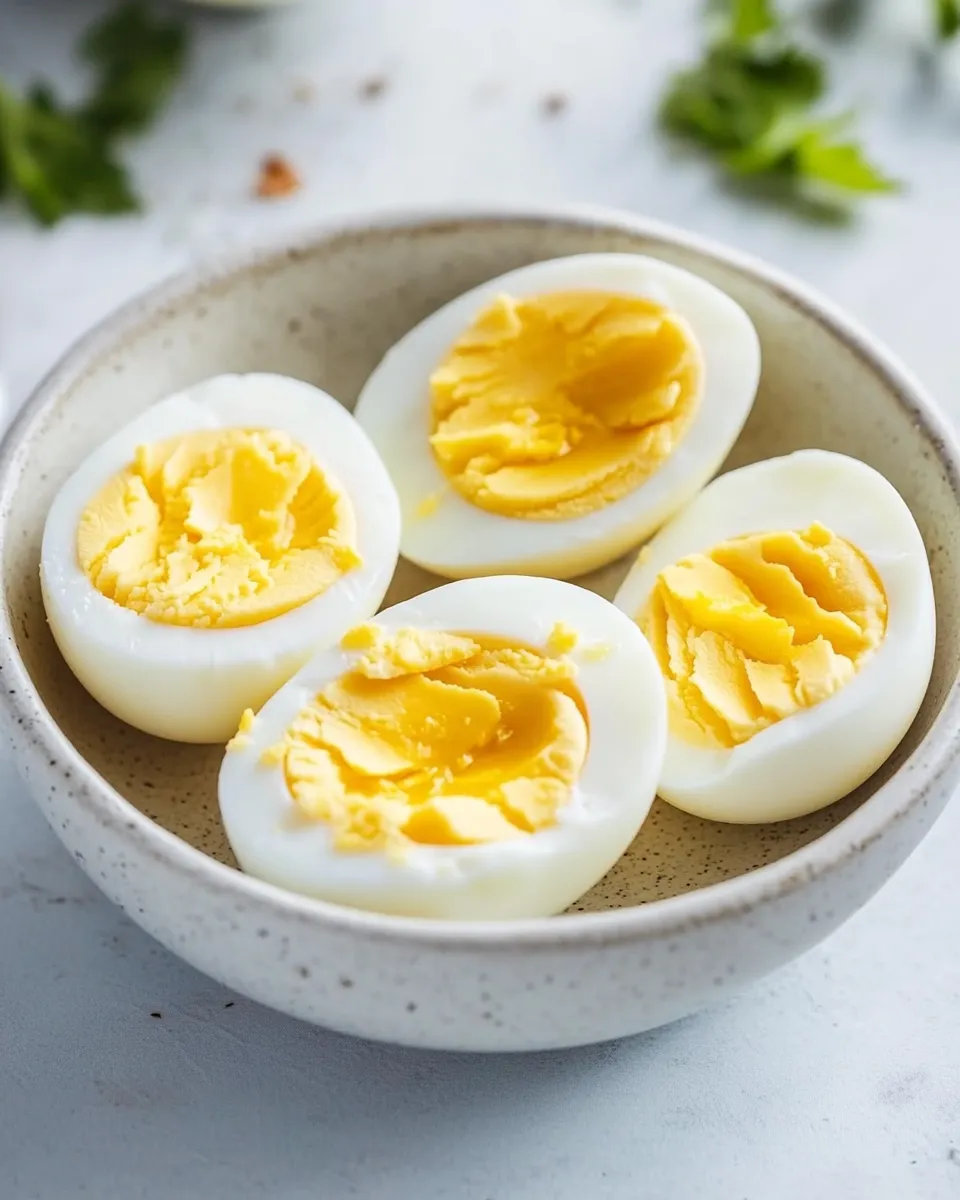
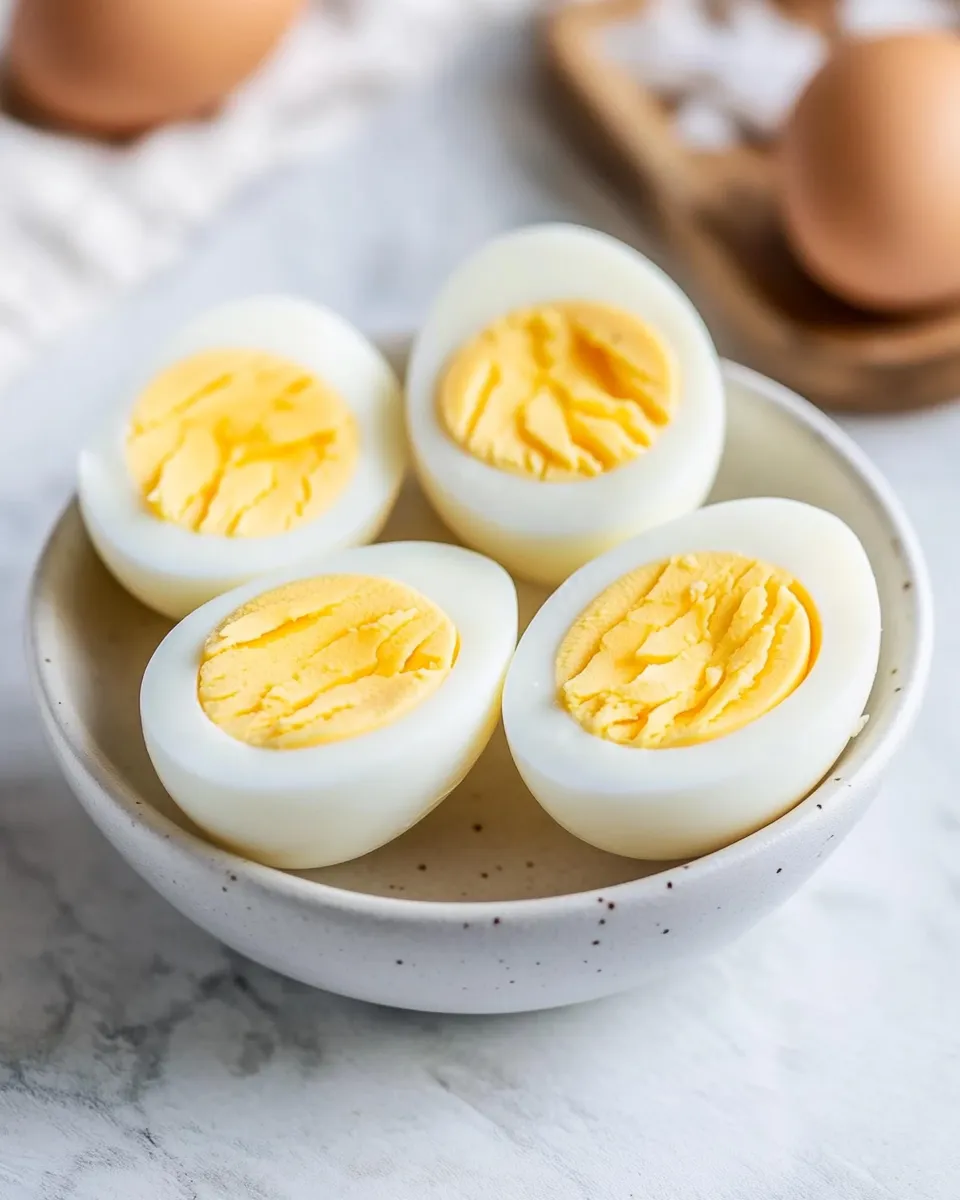
Perfect Hard Boiled Eggs: Directions, Tips, and More!
Hard boiled eggs are one of those kitchen basics that feel small until you need them. Done well, they’re quick protein, a reliable salad topper, and the backbone of a great egg salad or weekday snack. Done poorly, you get a sulfurous yolk, a cracked mess, or eggs that won’t peel for love nor money.
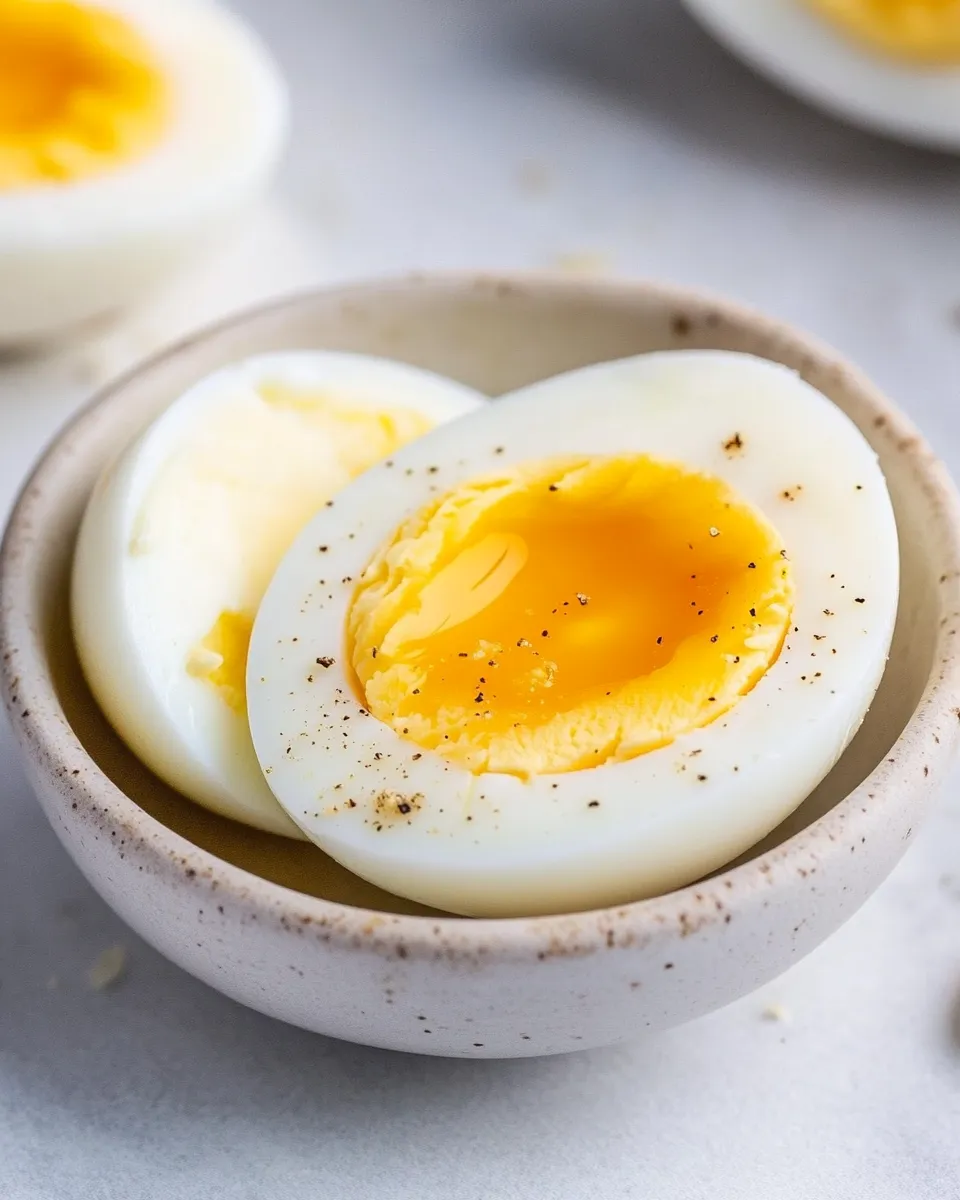
This method is practical, repeatable, and built around steam—gentle, consistent heat that gives predictable yolks and makes peeling easier. I use it when I want six reliably cooked eggs for lunches, a picnic, or a last-minute recipe. It’s not a trick; it’s just attention to a few sensible details.
Below you’ll find the exact ingredient list and step-by-step directions I follow every time, plus troubleshooting tips, useful gear, storage advice, and serving ideas so your hard boiled eggs turn out perfect whether it’s your first time or your fiftieth.
What You’ll Need
- 6 eggs — the main ingredient; see Note 1 below about age and peeling.
- water — for boiling and the ice bath; you’ll need about 2 cups to create ~1 inch of water in the pan and additional cold water plus ice for cooling.
How to Prepare Perfect Hard Boiled Eggs
- Fill a medium saucepan with about 1 inch of water (about 2 cups) and bring it to a rolling boil over high heat.
- Place the 6 eggs in a steamer basket in a single layer.
- When the water is boiling, lower the steamer basket with the eggs into the saucepan.
- Cover the saucepan, reduce heat to medium-low, and cook the eggs for 13 minutes.
- While the eggs cook, prepare an ice bath by filling a large bowl with ice and cold water.
- When the 13 minutes are up, use tongs or a slotted spoon to transfer the eggs from the hot pan into the ice bath. Submerge them and cool for about 5 minutes.
Reasons to Love Perfect Hard Boiled Eggs
They’re fast. From start to finish, this method gives you reliably cooked eggs without babysitting the stove. The steam method delivers even heat around each egg, which means yolks that aren’t rubbery and whites that aren’t overcooked.
They’re versatile. Once you’ve got six perfect eggs, breakfast is sorted, lunches are packed, and you can whip up deviled eggs or a quick egg salad in minutes. They’re also a great make-ahead protein for busy weeks.
They’re forgiving. Even if your eggs vary a bit in size or freshness, the gentle steam approach reduces the risk of cracking and overcooking, and the ice bath stops carryover cooking quickly so yolks stay bright and clean.
Vegan & Vegetarian Swaps
For vegetarian diets that exclude eggs, focus on plant-based proteins that mimic the texture and convenience: firm tofu cubes, roasted chickpeas, or marinated tempeh work well in salads and bowls. For vegan “egg” salads, mashed chickpeas with a touch of mustard and plant-based mayo is a satisfying, shelf-stable option.
If you’re replacing eggs for visual or texture reasons in sandwiches or salads, lightly pressed tempeh can provide a similar bite, while firm tofu can be cubed or crumbled and seasoned to taste.
Gear Up: What to Grab
- Medium saucepan — large enough to hold a steamer basket and about 1 inch of water comfortably.
- Steamer basket — keeps eggs off the hot bottom and lets steam surround them evenly.
- Large bowl — for the ice bath to stop cooking immediately.
- Tongs or slotted spoon — remove eggs safely from the hot pan to the ice bath.
- Kitchen timer — 13 minutes is precise; use a timer you hear.
- Ice — essential to bring eggs to temperature quickly for clean yolks and easier peeling.
Problems & Prevention
Cracked shells
Problem: Eggs crack in the pan and leak white into the water.
Prevention: Start with eggs at room temperature when possible, or lower the steamer basket gently into boiling water rather than dropping eggs from height. A steamer basket prevents eggs from rattling against the pot. If you only have cold eggs, reduce shock with a gentler placement and a slightly slower lowering motion.
Green or gray yolk ring
Problem: A greenish ring forms around the yolk, indicating overcooking and a chemical reaction between sulfur in the white and iron in the yolk.
Prevention: Stop carryover cooking immediately with the ice bath. Follow the 13 minutes in the covered pan, then move to ice for the cooling step. The ice bath is the single most effective fix.
Eggs that won’t peel
Problem: Whites cling to the shell in jagged pieces and peeling becomes a chore.
Prevention: Slightly older eggs usually peel easier because the pH of the white changes over time. If eggs are extremely fresh, they can be harder to peel. Use the steam method and the ice bath—both reduce the bond between shell membrane and white. Cracking the shell gently and peeling under a little running water or in the ice bath can also help.
Undercooked centers
Problem: Whites or yolks are still runny after cooking.
Prevention: Check that the water reached a rolling boil before lowering the basket and that you timed exactly 13 minutes after covering and reducing heat. Adjustments might be needed for very large eggs, very small eggs, or at high altitude (see Behind-the-Scenes Notes).
Seasonal Spins
Spring: Halve these eggs and toss them into a salad with tender greens, radishes, and a light lemon vinaigrette. Fresh herbs like chives or dill are a natural complement.
Summer: Chill eggs thoroughly and pack them for picnics with crisp cucumber, tomatoes, and vinegar-forward sides. They’re great on cold grain salads.
Fall/Winter: Use them in warm bowls—think roasted root vegetables, a scoop of grains, and sliced eggs on top for a comforting, protein-forward meal.
Holiday season: Turn them into deviled eggs with a classic filling and a sprinkle of smoked paprika, or use slices as an elegant garnish on canapés.
Behind-the-Scenes Notes
Note 1 (egg age): The ingredient list references “see note 1.” Freshness affects peeling. Very fresh eggs (straight from the farm or bought within a few days) have lower pH and the white tends to adhere strongly to the inner shell membrane, making peeling harder. If you can, buy eggs a week ahead of when you plan to hard boil them; they’ll peel more cleanly.
Altitude: At higher elevations, water boils at a lower temperature, so you may need to increase cook time slightly. Start by adding 1–2 minutes and test until you get the desired yolk texture.
Egg sizes: The instructions are written for standard large eggs. Extra-large or jumbo eggs may need an extra minute; small eggs may need a minute less. If you change timing, always use the ice bath to stop carryover cooking and lock in your results.
Carryover cooking: Remember that even after removing from heat, eggs stay hot inside. The ice bath is non-negotiable if you want creamy yolks and no gray ring.
Leftovers & Meal Prep
Storage: Once cooled and dried, store whole hard boiled eggs in the refrigerator in a covered container for up to one week. If peeled, keep them submerged in cold water in a covered container and change the water daily, or store them dry in a sealed container and use within five days.
Meal prep ideas: Make a batch on Sunday and use them all week. Slice on salads, mash for quick egg salad sandwiches, halve for snacks, or serve with crunchy raw veg and a sprinkle of salt. They keep well and speed up weekday meals.
Reheating: If you prefer warm boiled eggs, reheat gently in warm (not boiling) water for a few minutes. Avoid microwaving whole eggs—pressure can build and cause them to explode.
Ask & Learn
FAQ
- Can I steam more than six eggs at once? — Yes. As long as the eggs are in a single layer and the steamer basket fits comfortably in the pan, increase the pan size or cook in two batches if necessary.
- What if my yolks are still soft after 13 minutes? — Ensure the pan was covered and heat reduced to medium-low; timing starts once you’ve lowered the basket and covered. If needed, add 1–2 minutes for larger eggs or high altitude.
- Can I peel them right away? — You can peel after cooling for about 5 minutes in the ice bath, but if you have time, chilling a bit longer (10–15 minutes) can make peeling even easier.
- Is it safe to eat the green ringed yolk? — Yes, it’s safe but not aesthetically pleasing. The green ring is a sign of overcooking; the flavor may be slightly sulfurous.
Let’s Eat
Slice and salt. Add a smack of freshly ground black pepper or a few flakes of flaky sea salt. A quick sprinkle of chopped chives or a swipe of mustard makes a star sandwich. Quarter them into grain bowls for texture and protein. Or halve and serve with a drizzle of good olive oil and a splash of sherry or cider vinegar.
The beauty of these eggs is their quiet reliability. Once you make them this way a couple times, you’ll know what 13 minutes feels like in your kitchen, what your eggs look like after the ice bath, and how to tailor the timing for size and altitude. Keep a jar of peeled eggs in the fridge and you’ll find yourself reaching for them more often than you expect—salads, snacks, and simple dinners suddenly get a lovely, effortless upgrade.
Happy cooking—steady steam, a short chill in ice, and you’ll have perfect hard boiled eggs whenever you need them.
Perfect Hard Boiled Eggs: Directions, Tips, and More!
Ingredients
Equipment
Method
- Fill a medium saucepan with about 1 inch of water (about 2 cups) and bring it to a rolling boil over high heat.
- Place the 6 eggs in a steamer basket in a single layer.
- When the water is boiling, lower the steamer basket with the eggs into the saucepan.
- Cover the saucepan, reduce heat to medium-low, and cook the eggs for 13 minutes.
- While the eggs cook, prepare an ice bath by filling a large bowl with ice and cold water.
- When the 13 minutes are up, use tongs or a slotted spoon to transfer the eggs from the hot pan into the ice bath. Submerge them and cool for about 5 minutes.
Notes
Yield:This recipe makes 6 eggs but can easily be doubled or tripled.
Storage:Store cooked eggs unpeeled in a covered container in the refrigerator for up to 1 week.
Make ahead:Unlike omelets or scrambled eggs, you can absolutely whip these up in advance. Boiled eggs are your best bet if you’re seeking a make-ahead egg recipe.