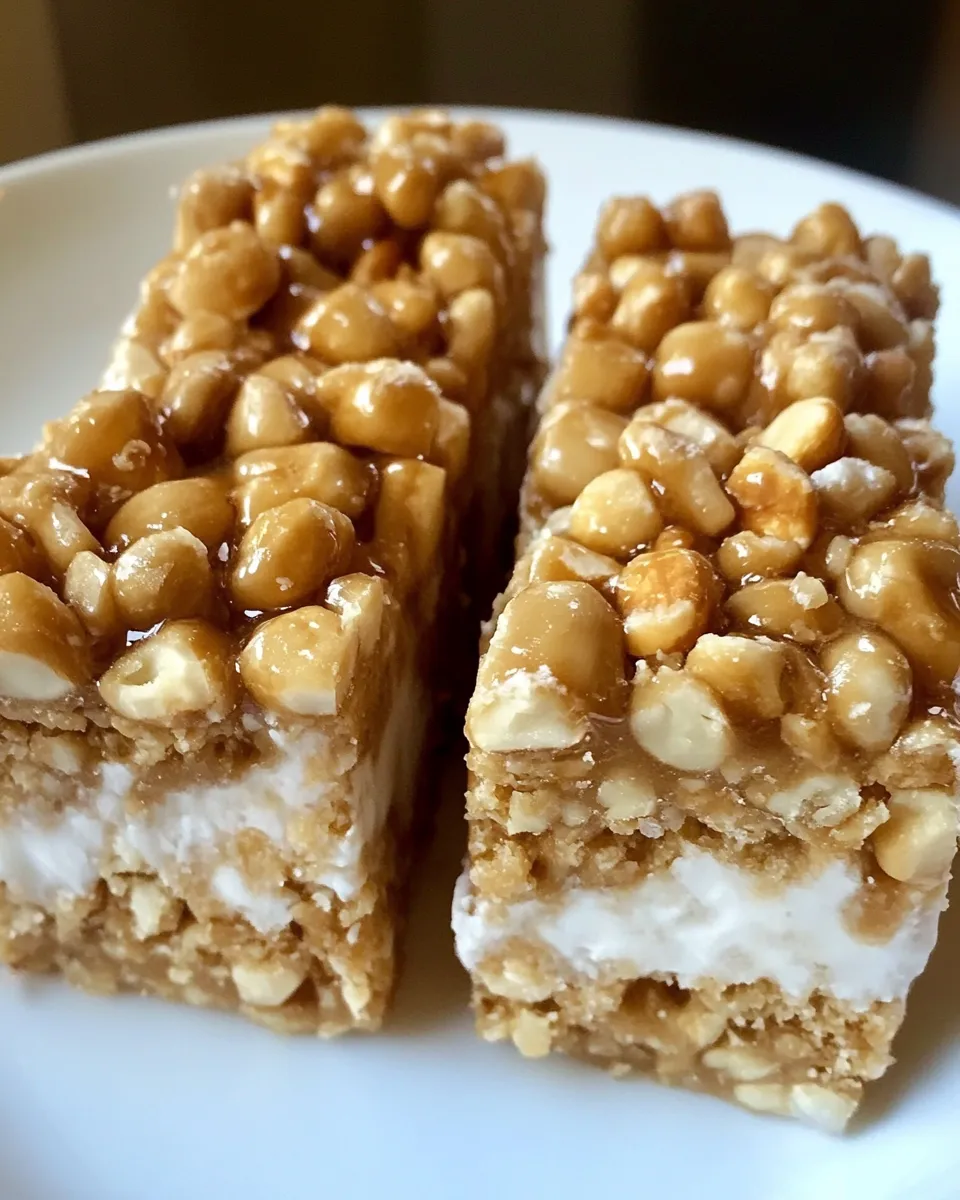
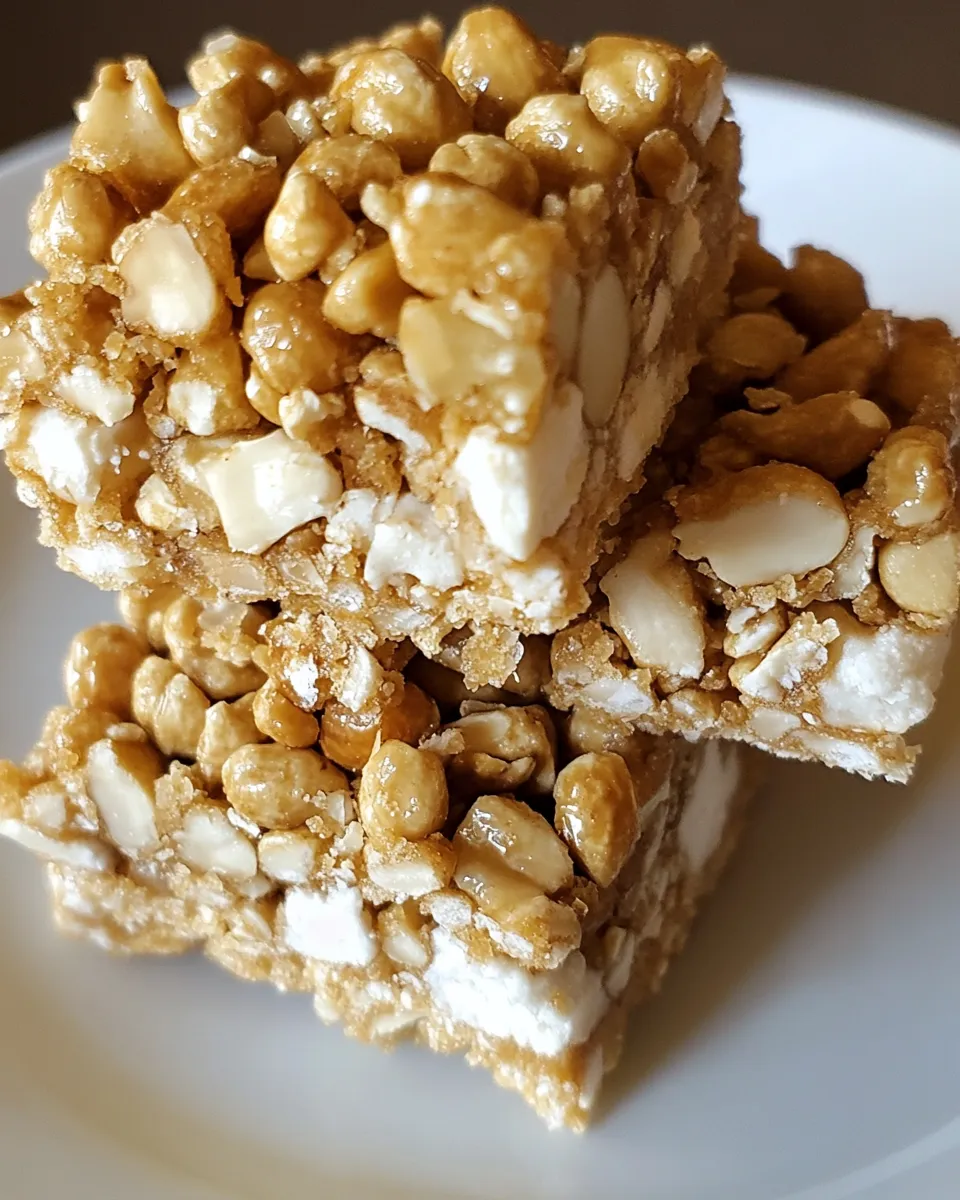
Salted Nut Roll Bars
These bars are the kind of treat you bring when you want something nostalgic and a little wild: chewy marshmallow, a salty crunchy peanut layer, and a cookie crumb crust that holds everything together. They borrow the spirit of the classic candy bar and make it big enough to share; a 9×13 pan gives you slabs you can cut into what you need — snack squares for the kids, generous dessert portions for adults.
I like this recipe because it’s straightforward and forgiving. The steps have clear checkpoints: a baked, golden crust; a warm, spreadable peanut layer; a quick marshmallow puff; and a final scatter of nuts and crisp cereal that get bound by melted chips and corn syrup. If you keep the order and watch the marshmallows while they’re in the oven, you’ll end up with tidy bars every time.
No need to fuss with tempering chocolate or complicated folding techniques. Most of the work happens on the stovetop and in the oven for short bursts. I’ll walk you through the ingredients, the exact method, sensible swaps, troubleshooting, and how to store the bars so they stay crisp and chewy for as long as possible.
The Essentials
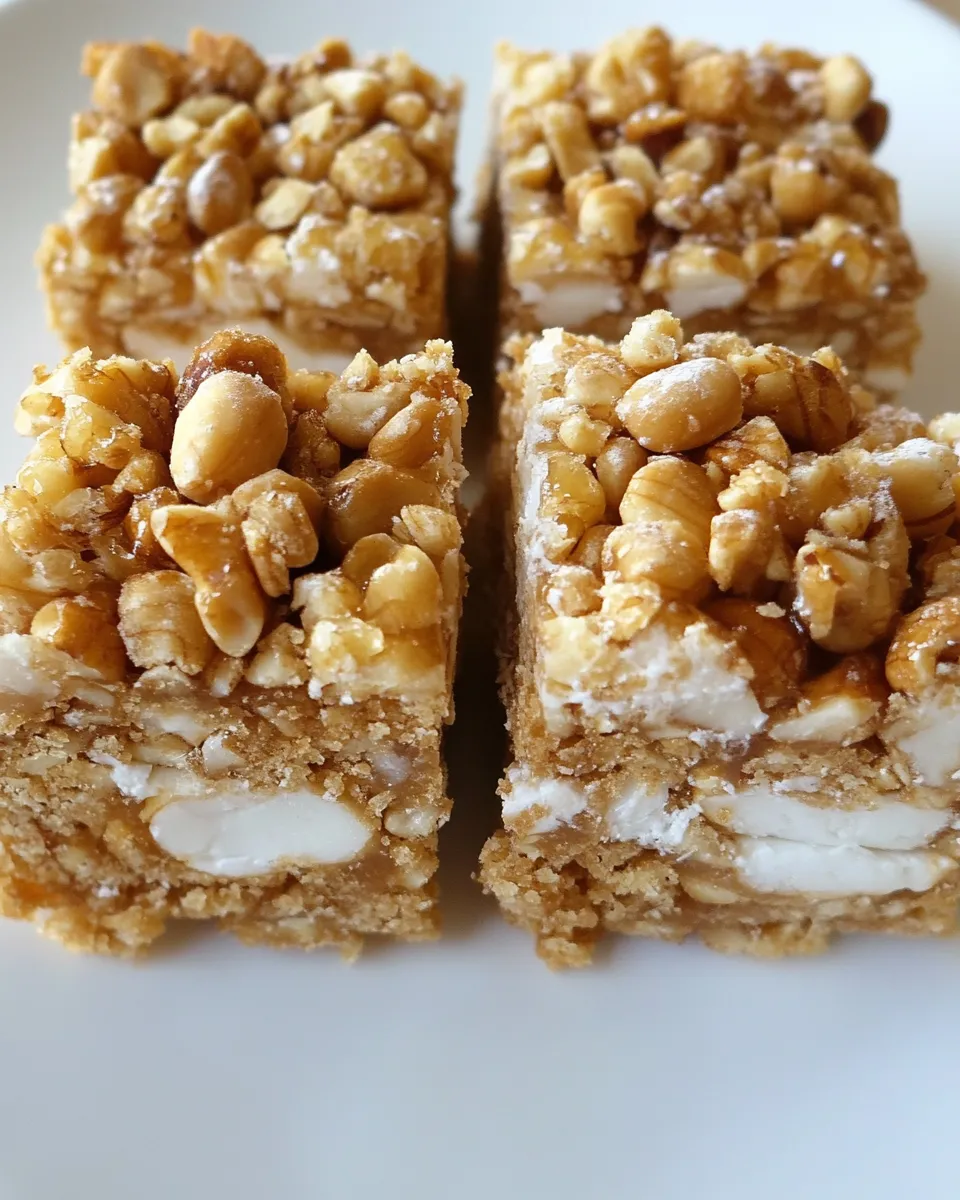
Salted Nut Roll Bars are built on three textures: a cookie crumb crust, a gooey peanut-marshmallow middle, and a crunchy top layer. The recipe is written for a 9×13-inch pan and uses readily available components — peanut butter sandwich cookies for the crust, peanut butter chips and corn syrup to create the sticky binder, and a mix of dry-roasted peanuts and crisp rice cereal for the signature crunch.
Timing is short. The crust bakes 15 minutes; marshmallows need just 1–2 minutes to puff; the stovetop melt takes about 5 minutes. Most of the time is cooling. Have your parchment ready and a non-stick spatula or lightly oiled offset spatula on hand for smoothing the top layer.
These bars travel well and are great for potlucks and lunchboxes. If you prefer sweeter or saltier, small adjustments to the toppings or a light sprinkle of flaky sea salt right before the bars set will let you tailor them without changing the method.
Ingredients
- 16 ounces peanut butter sandwich cookies, Nutter Butters — forms the base crust when pulsed into fine crumbs.
- ½ cup unsalted butter, melted — binds the cookie crumbs and helps the crust set when baked.
- 2 cups peanut butter chips — melts into the binder for the top layers and adds peanut flavor.
- ⅔ cup light corn syrup — provides stretch and stickiness; helps set the peanut/peanut-butter-chip mixture.
- 4 tablespoons unsalted butter — added to the melted peanut-chip mixture for sheen and ease of spreading.
- 1 teaspoon vanilla extract — brightens and rounds the peanut flavor in the warm mixture.
- 2 cups miniature marshmallows — puff and act as a gooey layer between the crust and the crunchy topping.
- 2 cups dry roasted peanuts — provide toasted peanut crunch throughout the bar.
- 2 cups crisp rice cereal, Rice Krispies — adds light, airy crunch that keeps the bars from being too dense.
Stepwise Method: (Salted Nut Roll Bars)
- Preheat oven to 350°F. Line a 9×13-inch baking pan with parchment paper and spray the parchment lightly with non-stick cooking spray.
- Place the 16 ounces peanut butter sandwich cookies in a food processor and pulse until they become fine crumbs.
- Add the ½ cup melted unsalted butter to the cookie crumbs and process until the crumbs are evenly moistened and hold together when pressed.
- Press the crumb mixture firmly and evenly into the bottom of the prepared 9×13 pan. Bake for 15 minutes, or until the crust is lightly golden. Remove from oven and set aside.
- In a medium saucepan over medium–low heat, combine the 2 cups peanut butter chips, ⅔ cup light corn syrup, 4 tablespoons unsalted butter, and 1 teaspoon vanilla extract. Stir constantly until the mixture is fully melted and smooth, about 5 minutes. Remove from heat.
- Spoon and spread ½ cup of the melted peanut mixture evenly over the hot baked crust.
- Evenly sprinkle the 2 cups miniature marshmallows over the peanut layer. Return the pan to the oven and bake just until the marshmallows puff, about 1–2 minutes. Watch closely so the marshmallows do not brown. Remove from oven.
- Add the 2 cups dry roasted peanuts and 2 cups crisp rice cereal to the remaining warm peanut mixture in the saucepan and stir until the peanuts and cereal are evenly coated. If the mixture becomes too thick to stir or spread, warm it briefly over very low heat just until loose again.
- Drop spoonfuls of the peanut/peanut-butter-chip-coated peanut–cereal mixture over the marshmallow layer, then carefully spread and smooth with a non-stick spatula to cover the marshmallows as evenly as possible. If the mixture sticks to the spatula, spray the spatula lightly with non-stick cooking spray.
- Let the bars cool completely at room temperature until set. Use the parchment to lift the slab from the pan and cut into bars.
The Upside of Salted Nut Roll Bars
These bars deliver big flavor with minimal fuss. The combination of a baked cookie crust and a stovetop peanut mixture means you get both a tender base and a shiny, cohesive top layer without complicated cooling or tempering steps. They slice cleanly once cooled and travel well to picnics or parties.
They’re also adaptable. The structure tolerates small variations in the crunchy mix and keeps its character even if you tweak a single component. Because the marshmallows are only puffed briefly, they stay soft and contribute chew rather than becoming a brittle layer.
Swap Guide
- Cookie crust: If you can’t find peanut butter sandwich cookies, any sturdy sandwich cookie will work — graham crumbs can work too, but texture will differ.
- Peanut butter chips: Use milk or semi-sweet chocolate chips for a chocolate twist; they’ll change the flavor profile but behave similarly when melted with corn syrup and butter.
- Corn syrup: Light corn syrup creates the right stretch. If you avoid corn syrup, try a small amount of a neutral honey or golden syrup in experiments, but expect a slightly different set and flavor.
- Peanuts: Substitute chopped mixed nuts if you want variety (almonds, cashews) but note the dominant flavor will change.
- Crisp cereal: Any crisped rice cereal works; if you need gluten-free, choose a certified gluten-free rice cereal.
Equipment at a Glance
- 9×13-inch baking pan — the recipe is scaled for this size; a different pan will affect thickness and bake time.
- Parchment paper and non-stick spray — for easy removal and cleaner cuts.
- Food processor — for fine cookie crumbs; you can use a heavy-duty zip bag and rolling pin in a pinch.
- Medium saucepan — for melting chips with corn syrup and butter.
- Non-stick spatula or offset spatula — for smoothing the top layer without tearing marshmallows.
- Measuring cups and spoons — accurate measurements matter for the binder balance.
Problems & Prevention
Crust won’t hold together
If your crust is crumbly after baking, it usually means not enough butter was incorporated into the crumbs or it wasn’t pressed firmly. Press the crumbs firmly and evenly before baking; the warmth of the oven helps set the fats. If crumbs remain loose after cooling, press them again while warm and let cool thoroughly.
Peanut mixture too thick to spread
The recipe anticipates this: if the peanut/peanut-butter-chip-coated cereal mix stiffens, warm it very briefly over very low heat to loosen. Stir constantly and remove as soon as it’s spreadable — overheating can make it oily.
Marshmallows brown or burn
Marshmallows puff quickly. Bake only until they puff and then remove immediately. Use the oven light and watch them from the opening; they can go from puffed to browned in less than a minute.
Customize for Your Needs
Want to tone down the sweetness? Use a slightly less sweet cookie for the crust or add a pinch of flaky sea salt over the top right after spreading the final layer. Need to avoid peanuts? Swap in roasted sunflower kernels and sunflower butter chips where relevant; texture will be similar though the flavor shifts.
If you prefer a chewier bar, press the final peanut–cereal layer a bit more firmly before it sets. For a more pedal-to-the-metal sugary bar, sprinkle a few extra peanut butter chips on top while the mixture is still warm so they melt slightly into the surface.
Method to the Madness
Why bake the crust first? Baking sets the crumbs so they don’t become soggy under the marshmallow layer. The initial spoon of the melted peanut mixture on the hot crust acts like glue — it soaks in, adds flavor, and gives a warm surface for the marshmallows to adhere to.
Melting peanut butter chips with corn syrup and butter creates a glossy, semi-stable binder. Corn syrup prevents crystallization and keeps the binder flexible as it cools; butter adds richness and helps with spreadability. The cereal and peanuts are coated with this warm mixture so they stick together in clumps that can be spread over the marshmallows.
Keep It Fresh: Storage Guide
Store bars in an airtight container at room temperature for up to 3 days for best texture. If you prefer a firmer bar, refrigerate for up to 7 days; bring to room temperature for 20–30 minutes before serving so the marshmallow and binder soften. For longer keeping, freeze individual bars wrapped tightly in plastic wrap and stored in a freezer-safe container for up to 2 months — thaw overnight in the fridge or at room temperature.
Avoid high humidity storage; moisture can soften the crisp rice cereal and make the top layer lose its crunch.
Frequently Asked Questions
- Can I use a different cookie for the crust? Yes. Any sandwich cookie that makes fine crumbs will work; expect slight texture differences with alternatives.
- Can I substitute natural peanut butter for the peanut butter chips? The chips are formulated to melt cleanly. If you experiment with peanut butter, you’ll need to adjust the fat balance and it may alter the set. I recommend sticking with the chips or using suitable melting wafers.
- Do I need to cool the bars before cutting? Yes. Cooling fully ensures clean cuts and lets the binder firm up. Use the parchment to lift the slab and slice with a sharp knife.
- Why does the recipe use corn syrup? Corn syrup helps keep the binder smooth and pliable as it cools, reducing graininess and preventing crystallization.
- Can I make these gluten-free? Use a certified gluten-free sandwich cookie or substitute with gluten-free graham crumbs and confirm the cereal is gluten-free.
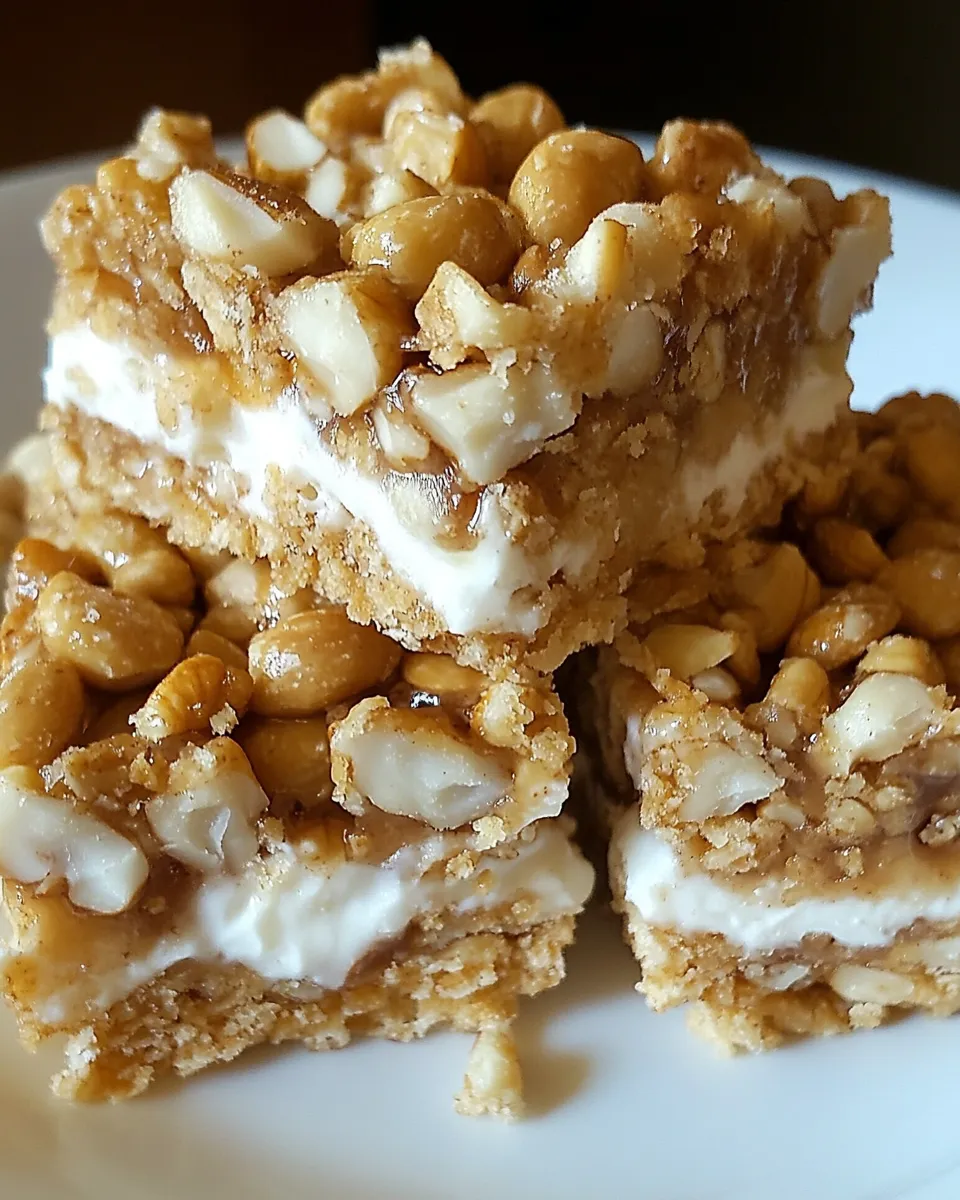
Serve & Enjoy
Cut the slab into bars once fully cooled and set. For a casual crowd, rough squares are fine; for a gift or party, use a warm, sharp knife and wipe between cuts for neat edges. A light sprinkle of flaky sea salt on top of each bar just before the binder sets gives a nice contrast to the sweetness.
Serve at room temperature alongside coffee or ice-cold milk. They hold up well on dessert platters and are sturdy enough to pack in a picnic basket. Leftovers (if there are any) keep their character when wrapped tightly — though they rarely last long in my kitchen.
Salted Nut Roll Bars
Ingredients
Equipment
Method
- Preheat oven to 350°F. Line a 9×13-inch baking pan with parchment paper and spray the parchment lightly with non-stick cooking spray.
- Place the 16 ounces peanut butter sandwich cookies in a food processor and pulse until they become fine crumbs.
- Add the ½ cup melted unsalted butter to the cookie crumbs and process until the crumbs are evenly moistened and hold together when pressed.
- Press the crumb mixture firmly and evenly into the bottom of the prepared 9×13 pan. Bake for 15 minutes, or until the crust is lightly golden. Remove from oven and set aside.
- In a medium saucepan over medium–low heat, combine the 2 cups peanut butter chips, ⅔ cup light corn syrup, 4 tablespoons unsalted butter, and 1 teaspoon vanilla extract. Stir constantly until the mixture is fully melted and smooth, about 5 minutes. Remove from heat.
- Spoon and spread ½ cup of the melted peanut mixture evenly over the hot baked crust.
- Evenly sprinkle the 2 cups miniature marshmallows over the peanut layer. Return the pan to the oven and bake just until the marshmallows puff, about 1–2 minutes. Watch closely so the marshmallows do not brown. Remove from oven.
- Add the 2 cups dry roasted peanuts and 2 cups crisp rice cereal to the remaining warm peanut mixture in the saucepan and stir until the peanuts and cereal are evenly coated. If the mixture becomes too thick to stir or spread, warm it briefly over very low heat just until loose again.
- Drop spoonfuls of the peanut/peanut-butter-chip-coated peanut–cereal mixture over the marshmallow layer, then carefully spread and smooth with a non-stick spatula to cover the marshmallows as evenly as possible. If the mixture sticks to the spatula, spray the spatula lightly with non-stick cooking spray.
- Let the bars cool completely at room temperature until set. Use the parchment to lift the slab from the pan and cut into bars.