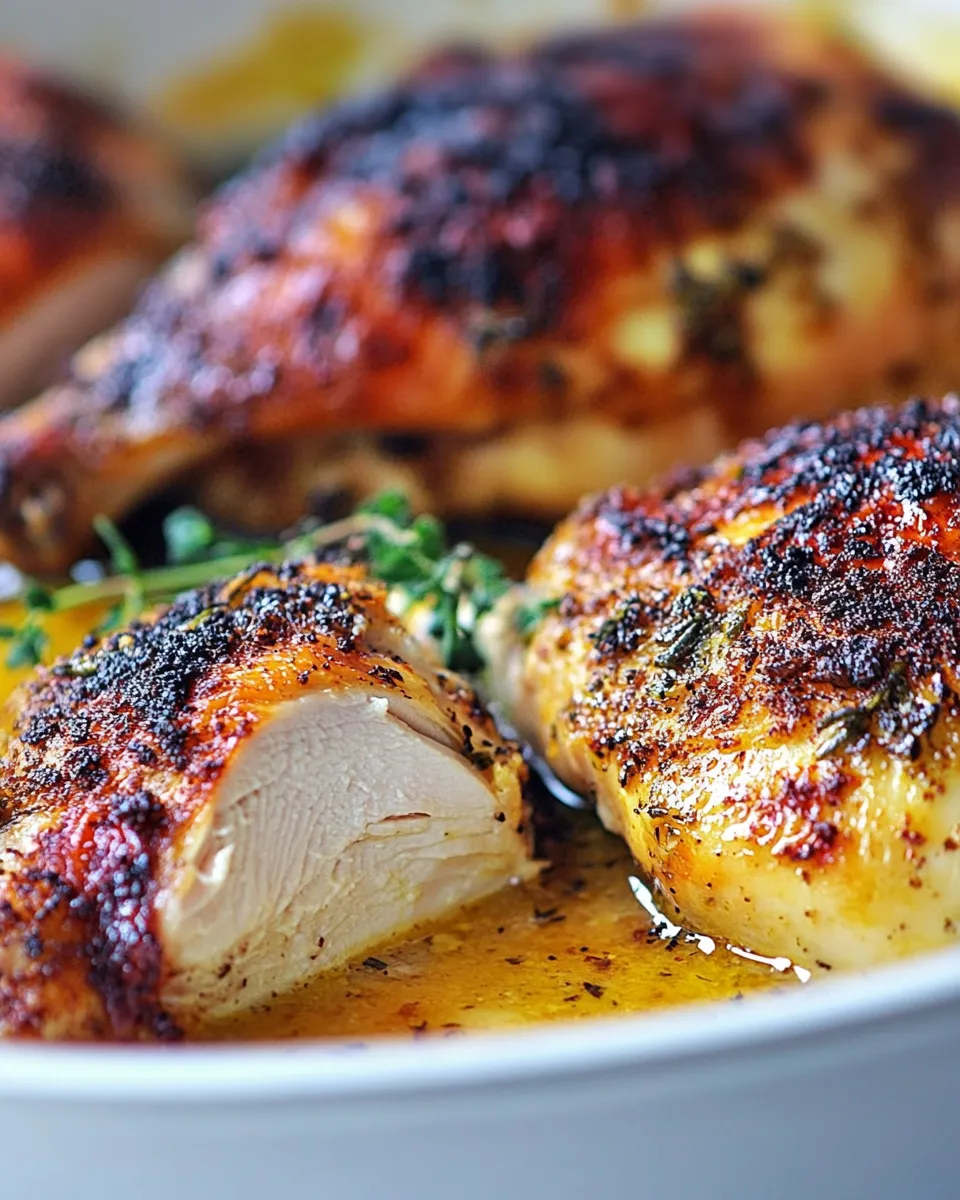
Skillet Roasted Chicken Recipe
This skillet roasted chicken is the kind of recipe I turn to when I want dinner to feel thoughtful but not complicated. Crisp skin, juicy meat, and a quick pan-to-oven method mean you do most of the work in the first 15 minutes, then let the oven finish it. It calls for a handful of pantry staples and gives you a hearty, confident meal every time.
I like it because the technique is forgiving. Browning the thighs in a hot skillet builds flavor and texture. Nestling whole garlic cloves and fresh thyme into the pan adds aroma without fuss. The timing is straightforward: sear, lower the heat to render fat, finish in a hot oven, and rest.
Read on for the ingredient list, step-by-step instructions, troubleshooting tips, simple swaps, and storage advice. I keep notes from test runs here so you can avoid the little mistakes I learned from—efficient, direct, and useful.
Gather These Ingredients
Ingredients
- 1–2 tablespoons olive oil — helps achieve a golden, nonstick sear on the chicken skin.
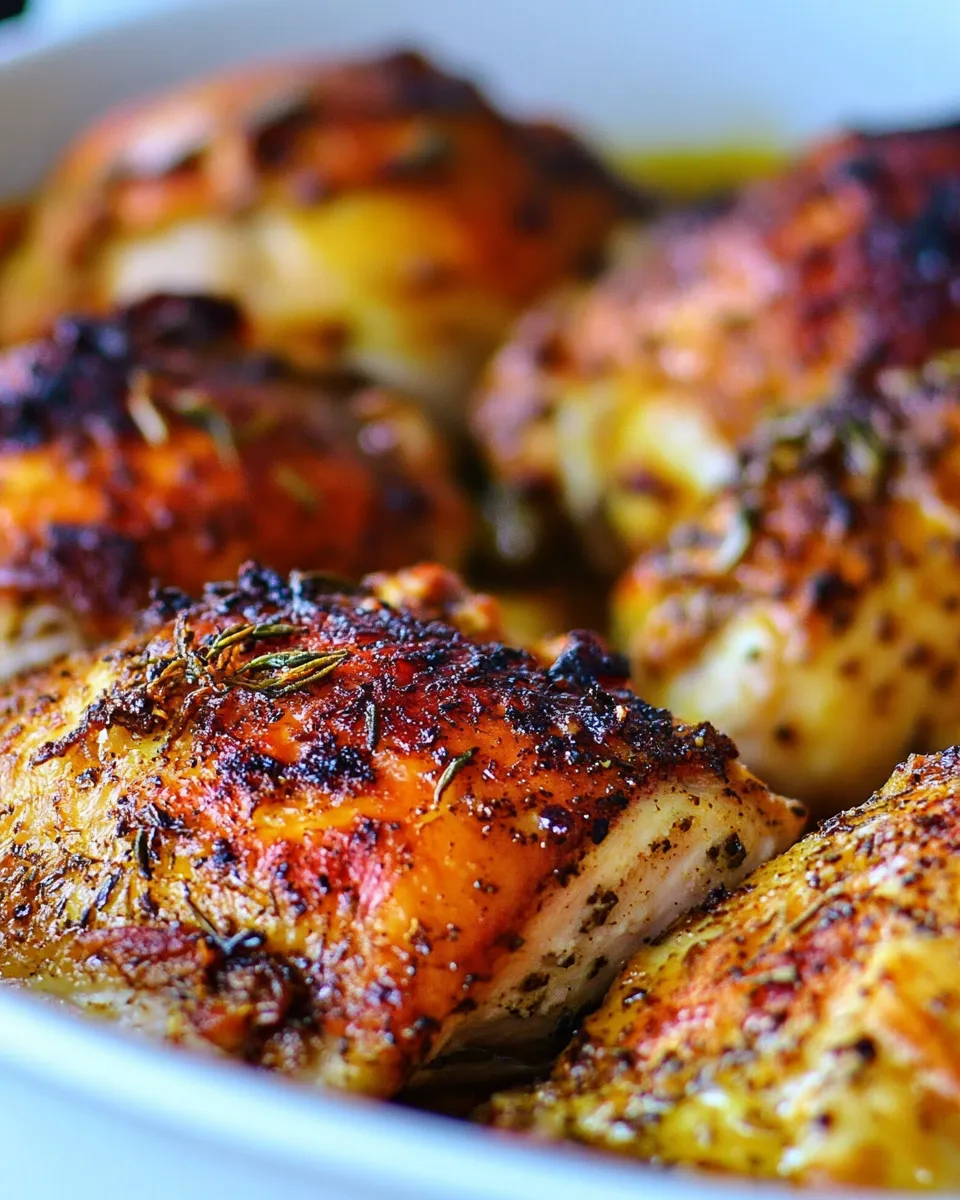
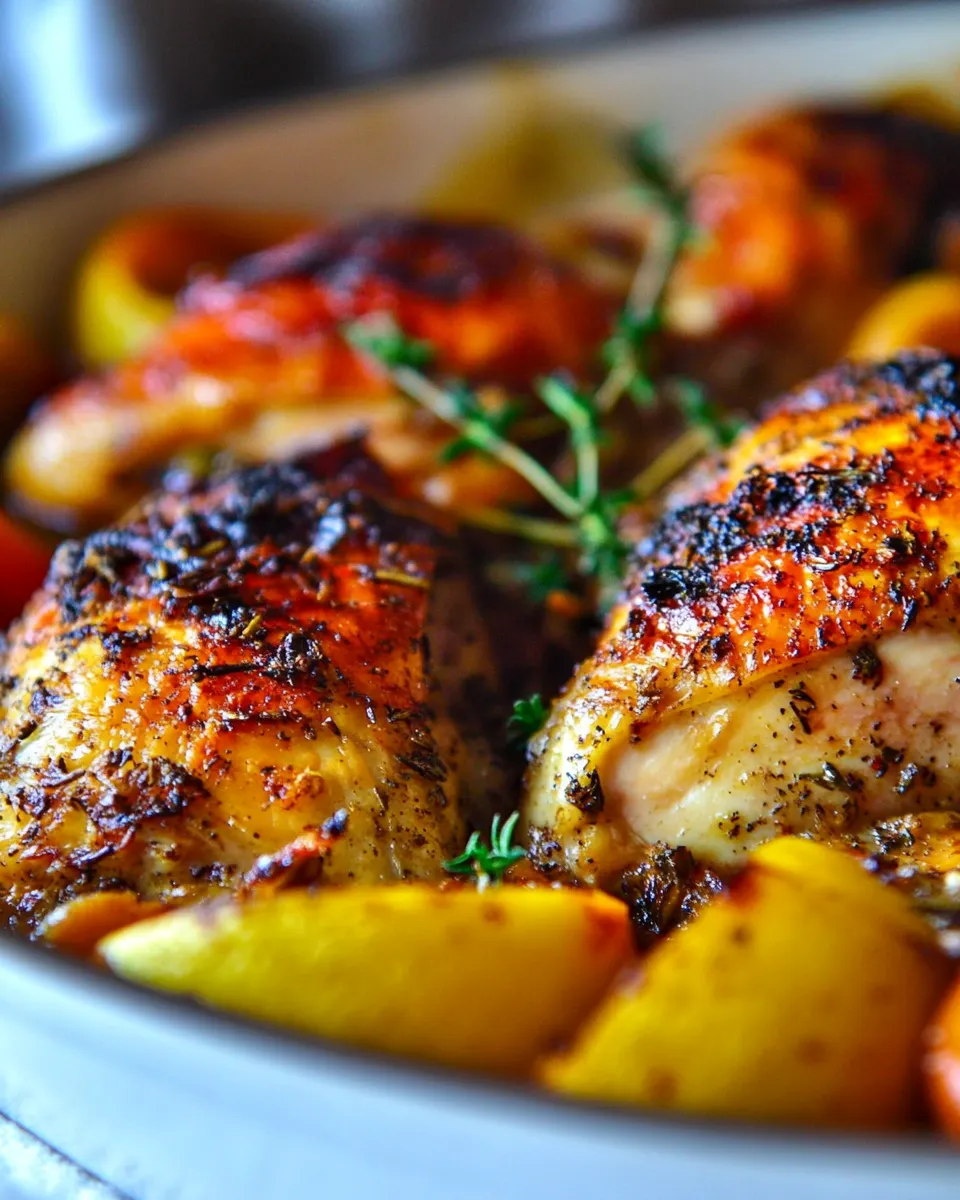
- 6–8 chicken thighs, skin on — the workhorse of the recipe; skin-on thighs give the best flavor and texture.
- salt and pepper — simple seasoning that brings out the chicken’s natural flavor; season both sides.
- 1 teaspoon paprika — adds color and a subtle, warm note to the crust.
- 6 whole garlic cloves, peeled — mellow as they roast; they perfume the pan and can be spread on the meat.
- fresh thyme — aromatic herb that complements roasted garlic and chicken; nestle sprigs in the skillet.
Skillet Roasted Chicken in Steps
- Preheat the oven to 475°F.
- Pat 6–8 chicken thighs dry with paper towels. Season both sides of the thighs with salt and pepper.
- Place a 12-inch cast-iron skillet on the stove over medium-high heat. Add 1–2 tablespoons olive oil and heat until the oil is shimmering but not smoking.
- Arrange the chicken thighs in the skillet skin-side down in a single layer. Cook about 2 minutes, or until the skin is browned.
- Flip the thighs, reduce the heat to medium, and cook about 10–12 minutes more, until some fat has rendered.
- Sprinkle 1 teaspoon paprika evenly over the chicken. Nestle 6 peeled whole garlic cloves among the thighs and top with fresh thyme sprigs.
- Transfer the skillet to the preheated oven and roast until an internal temperature probe inserted into the thickest part of a thigh reads 160°F, about 12–13 minutes.
- Remove the skillet from the oven and let the chicken rest for about 5 minutes before serving.
Why It Deserves a Spot
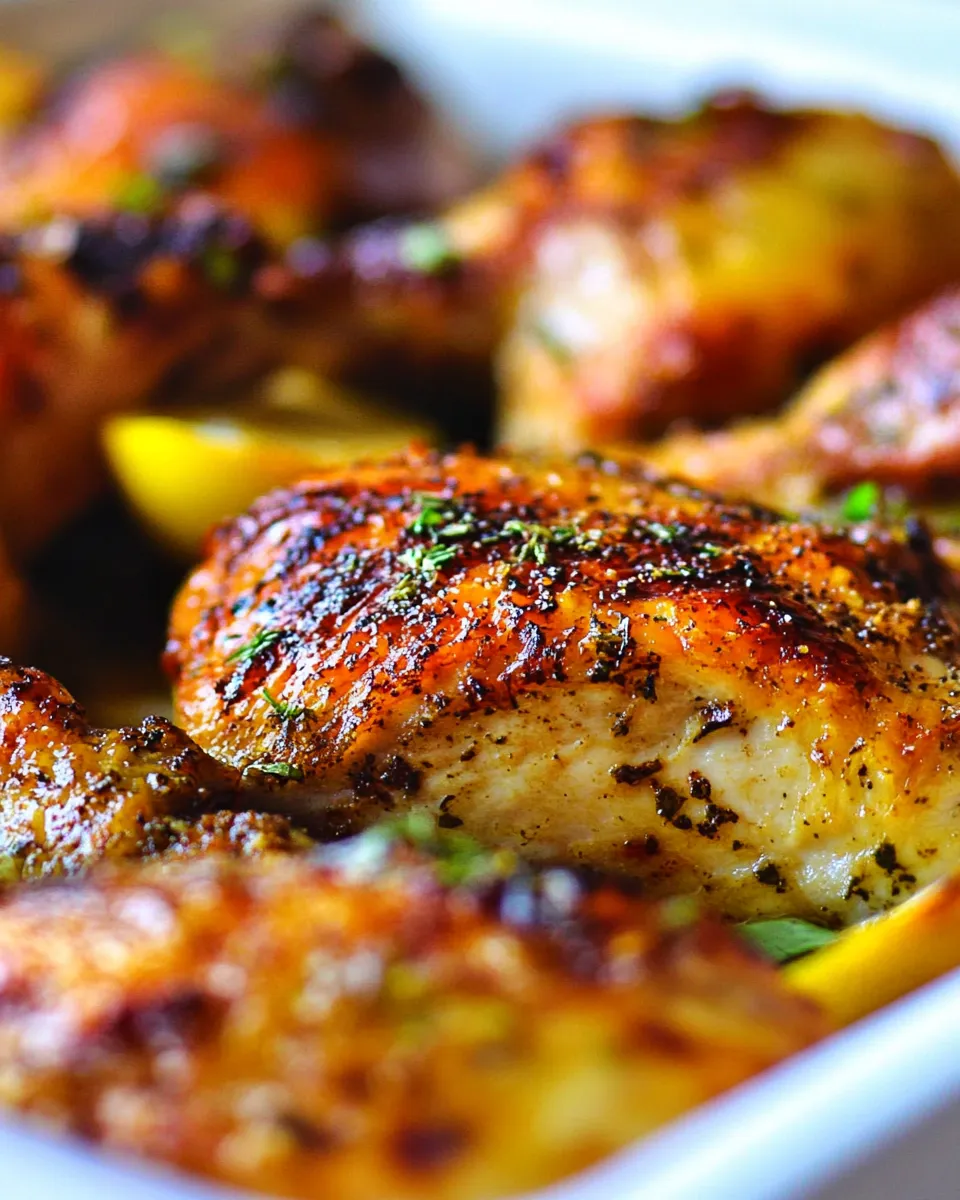
This recipe earns a regular place in weeknight rotation because it does three critical things well: it crisps skin fast, it renders fat without drying the meat, and it finishes reliably in the oven. The initial sear gets you texture; the oven brings even, consistent heat. When you follow the steps, results are repeatable.
It’s also efficient. A single 12-inch skillet takes you from stovetop to oven without a transfer. That keeps juices and aromatics in the pan, so you don’t waste flavor. The whole garlic cloves and thyme need no chopping or measuring beyond dropping them into the skillet, which keeps the prep simple but the taste layered.
Finally, the method is forgiving. The high oven temperature shortens roast time and minimizes drying. Resting for 5 minutes lets the juices redistribute so the thighs stay juicy. If you value texture, simplicity, and a short active cook time, this one is for you.
Quick Replacement Ideas
- Oil: If you don’t have olive oil, any neutral cooking oil will work to get the pan hot and prevent sticking. Use the same amount called for.
- Thighs: If you prefer fewer pieces, cook fewer thighs and maintain spacing so they’re in a single layer; adjust oven time as needed and check temperature.
- Garlic: If whole cloves aren’t your thing, you can lightly smash them so they release more flavor into the pan, but keep them peeled to avoid bitter char.
- Thyme: If fresh thyme isn’t available, use a small handful of other fresh herbs you have on hand, using the same basic approach of nestling sprigs into the skillet.
- Paprika: If you want more smokiness, a smoked variety can replace regular paprika; use the same teaspoon called for and taste after roasting for future adjustments.
Setup & Equipment
- 12-inch cast-iron skillet — the recipe calls for this size; it holds the thighs in a single layer and moves from stovetop to oven.
- Oven set to 475°F — a high oven temperature shortens roast time and helps finish the skin.
- Instant-read or internal temperature probe — invaluable for hitting that target 160°F in the thickest part of the thigh.
- Tongs or a spatula — for safely flipping the thighs during the sear and while they render fat.
- Paper towels — for patting the chicken dry so the skin browns quickly and cleanly.
Problems & Prevention
Common Problems & Fixes
- Skin won’t crisp: Make sure the thighs are thoroughly patted dry. Moisture on the skin steams instead of browns. Heat the oil until it shimmers before adding the chicken.
- Too much smoke: If the skillet or oil gets smoking, reduce the heat slightly before adding chicken. Use an oil with a higher smoke point if your stove runs hot.
- Undercooked center: Rely on an internal temperature probe rather than time alone. Transfer to the oven only after the pan work is done and roast until the probe reads 160°F.
- Dry meat: Overcooking will dry thighs. Remember the carryover cooking during the 5-minute rest. Pull the pan when the probe hits 160°F, not higher.
- Uneven browning: Arrange thighs skin-side down in a single layer without crowding. If the pan is overcrowded, do multiple batches or use a larger surface.
Seasonal Flavor Boosts
Small additions can make the dish sing in different seasons without complicating the method. In spring or summer, tuck in extra fresh herb sprigs and finish with a quick squeeze of something bright right before serving. In fall and winter, add a pinch more paprika for warmth and let roasted garlic become a spread for slices of the meat.
Think of these boosts as finishing touches rather than changes to the technique. They should enhance the base flavors you’ve developed by searing and roasting, not overpower them. Use what’s in season and keep the approach minimal: let the chicken remain the star.
Behind-the-Scenes Notes
High initial heat sets the stage for a well-browned skin. That Maillard reaction happens quickly; two minutes skin-side down forms a beautiful crust. Reducing the heat after flipping lets fat render slowly so the meat cooks through without burning the skin. The oven step at 475°F is intentionally brief and hot to finish the thighs without prolonged exposure.
The internal temperature target of 160°F accounts for carryover cooking. As the chicken rests, its internal temperature will rise a few degrees to safe and juicy doneness. The whole garlic cloves soften and sweeten, adding a gentle roasted garlic flavor to the pan; you can mash them into the meat after resting for an extra layer of taste.
Keep-It-Fresh Plan
Store leftovers in an airtight container in the refrigerator for up to 3–4 days. To reheat without losing the skin’s texture, reheat gently in a moderate oven (about 350°F) until warm, 8–12 minutes depending on portion size. If you need to reheat quickly, a skillet over medium-low heat will warm through while helping the skin re-crisp.
For longer storage, freeze cooled pieces wrapped tightly or in a freezer-safe container for up to 2–3 months. Thaw in the refrigerator overnight before reheating gently to preserve moisture. Avoid microwaving if you want to maintain skin texture; microwaving will make the skin soft.
Ask & Learn
Q: How do I know when to flip the thighs during the sear? A: Look for clear, deep-brown color where the skin touched the pan and a natural release from the surface. If the thighs stick, they likely need another 15–30 seconds; if they release easily, you can flip.
Q: Can I make this for more people? A: Yes. Use two skillets or work in batches to keep thighs in a single layer. Crowding reduces browning and increases cooking time.
Q: Is the 160°F final temperature safe? A: The instructions specify removing the thighs when an internal probe reads 160°F. Because of carryover, the temperature will rise slightly during resting and reach a safe and juicy final temperature.
Before You Go
This skillet roasted chicken is one of those practical, dependable recipes that rewards attention to technique more than ingredient complexity. Brown the skin well, render the fat patiently, use the oven to finish, and give the thighs a short rest. You’ll get crisp skin and tender meat every time.
Try it once as written, then tweak small details—paprika amount, extra herbs, or longer resting time—to make it your go-to. If you liked this walk-through, save it, pin it, and come back when you want to adapt the method for different cuts or flavors. Happy cooking—and enjoy the crisp, juicy results.
Skillet Roasted Chicken Recipe
Ingredients
Equipment
Method
- Preheat the oven to 475°F.
- Pat 6–8 chicken thighs dry with paper towels. Season both sides of the thighs with salt and pepper.
- Place a 12-inch cast-iron skillet on the stove over medium-high heat. Add 1–2 tablespoons olive oil and heat until the oil is shimmering but not smoking.
- Arrange the chicken thighs in the skillet skin-side down in a single layer. Cook about 2 minutes, or until the skin is browned.
- Flip the thighs, reduce the heat to medium, and cook about 10–12 minutes more, until some fat has rendered.
- Sprinkle 1 teaspoon paprika evenly over the chicken. Nestle 6 peeled whole garlic cloves among the thighs and top with fresh thyme sprigs.
- Transfer the skillet to the preheated oven and roast until an internal temperature probe inserted into the thickest part of a thigh reads 160°F, about 12–13 minutes.
- Remove the skillet from the oven and let the chicken rest for about 5 minutes before serving.