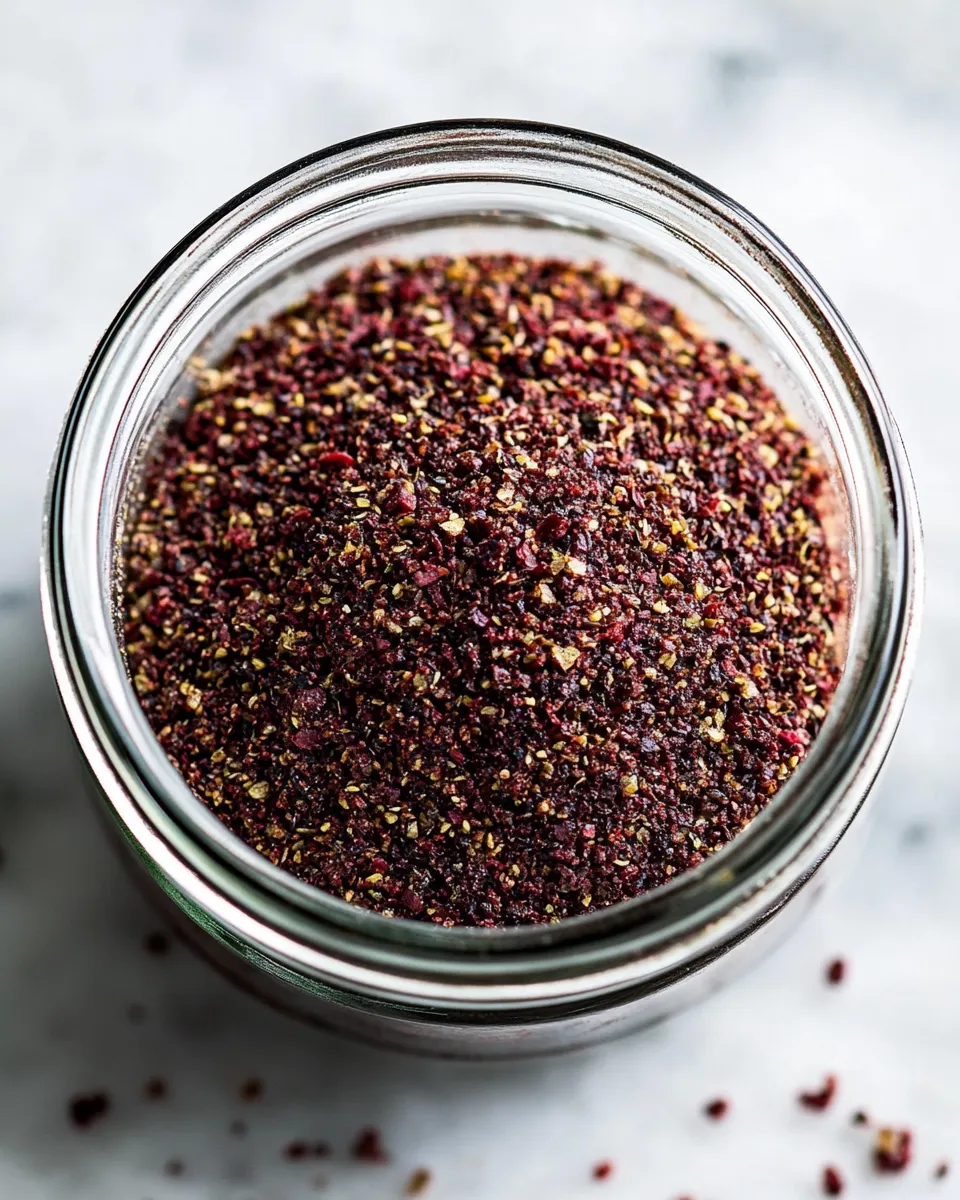
Sumac Dry Rub for Chicken
If you want a quick way to lift plain chicken into something bright, fragrant, and a little exotic, this sumac dry rub is your new go-to. It’s simple to make, stores well, and brings that lemony, tart edge that pairs beautifully with grilled, roasted, or pan-seared chicken. I keep a jar in my cabinet at all times because it solves weeknight dinner dilemmas fast.
This rub is focused — only five ingredients, each with a job: ground sumac for tang, cumin for earthiness, oregano for depth, garlic powder for savory, and a touch of salt to tie everything together. Mix it once and you’ll see how easy it is to season chicken evenly without overcomplicating things.
In the post that follows I walk you through what’s in the jar, exactly how to make it (step-by-step from the recipe card), why it works, small swaps for different diets, common pitfalls and how to avoid them, and practical serving and storage tips. No fluff, just usable advice so you can get dinner on the table and actually enjoy it.
The Ingredient Lineup
- ¼ cup ground sumac — the star. Adds citrusy, tart brightness and a rosy color to the rub.
- 1 ½ teaspoons ground cumin — warms and grounds the mix with a toasty, earthy note.
- ½ teaspoon salt — enhances flavors and prevents the rub from tasting flat; adjust to taste.
- ¾ teaspoon dried oregano — brings herbal, slightly bitter lift that plays well with sumac.
- ¾ teaspoon garlic powder — delivers savory depth without added moisture.
Sumac Dry Rub for Chicken in Steps
- Measure 1/4 cup ground sumac, 1 1/2 teaspoons ground cumin, 1/2 teaspoon salt, 3/4 teaspoon dried oregano, and 3/4 teaspoon garlic powder.
- Place all measured ingredients in a small, dry bowl (or measure them directly into a clean, dry airtight container if you prefer).
- Stir the spices together with a small whisk or spoon for 20–30 seconds, or until the mixture looks evenly blended and there are no large clumps.
- If you mixed in a bowl, transfer the rub into a clean, dry airtight container (for example, a glass jar) using a funnel or spoon.
- Close the container tightly and wipe any spills from the rim.
- Label the container with the name and the date, then store it in a cool, dry, dark place such as a kitchen cabinet away from direct heat and sunlight.
The Upside of Sumac Dry Rub for Chicken
This rub gives you lively flavor with almost no effort. A few reasons to love it:
- Speed: Mix it in minutes. No chopping, toasting, or waiting.
- Versatility: Use it on thighs, breasts, drumsticks, wings, or even vegetables and fish if you like. It plays well with many cooking methods.
- Bright flavor profile: The sumac adds citrusy acidity without acidity from lemon juice — which helps if you want flavor but not extra moisture.
- Long shelf life: Dried spices keep well, so a jar will season many meals.
It’s also forgiving. If you salt the chicken before cooking, you can cut back on the rub’s salt. Want more heat? Add a pinch of chili flakes when you mix. Those are optional and obvious choices; I focus on the base recipe here so you have a reliable foundation.
Low-Carb/Keto Alternatives
The rub itself is already keto-friendly: it’s purely spices and salt, with no sugars or starches. If you’re building a full meal around it, here are practical low-carb pairing ideas:
- Roasted or grilled chicken thighs with the rub, served over a bed of wilted spinach or a crisp cucumber-tomato salad.
- Use the rub on a whole spatchcock chicken and roast — pair with cauliflower rice or roasted Brussels sprouts.
- For a higher-fat keto plate, finish the cooked chicken with a drizzle of olive oil or ghee and serve alongside roasted asparagus.
All provide satisfying texture and keep carbs low while letting the rub shine.
Toolbox for This Recipe
Essential
- Measuring spoons and a 1/4-cup measure — accurate quantities matter for balance.
- Small, dry bowl or directly into a jar — mixing vessel; it must be dry so the powder stays free-flowing.
- Spoon or small whisk — to blend evenly and break up clumps.
- Clean, dry airtight container — a small glass jar with a tight lid works best for storage.
Nice-to-have
- Funnel — speeds jar transfer and keeps rims clean.
- Label or marker — note name and date for rotation.
- Small spice funnel or shaker lid — convenient for sprinkling on chicken.
Problems & Prevention
Even simple mixes can go wrong. Here are common issues and how to prevent them.
- Clumping: Moisture causes clumps. Always mix and store in dry tools and containers. If clumps form, pass the rub through a fine sieve before using.
- Fading flavor: Ground spices lose aroma over time. Label with the date and use within 6–12 months for best flavor. Keep the jar in a dark cabinet away from heat.
- Too salty: If you accidentally over-salt the rub, dilute with more sumac and cumin in the same ratio, making a larger batch to keep balance.
- Harsh sumac: A low-quality or very old sumac can taste bitter. If your mix tastes off, try a fresh, good-quality ground sumac — it makes the biggest difference.
Warm & Cool Weather Spins
Season and cook to suit the weather. In warm months I want bright, quick-cook methods. In cool months I favor slow-roasted comfort.
- Warm weather: Rub the chicken, then grill or pan-sear. Serve with a cool yogurt-tahini sauce or cucumber salad to complement the tartness.
- Cool weather: Use the rub on bone-in pieces and roast at 425°F until caramelized. Toss roasted root vegetables in a little of the rub before roasting them alongside the chicken for a cohesive plate.
- Indoor grill or broiler: If you can’t get outside, broil for crisp skin and finish on a lower rack to cook through without burning the rub.
Cook’s Commentary
I make a fresh jar roughly every six weeks and keep one labeled “Sumac Rub” in a cool cabinet. The rub’s magic is its ability to deliver citrus brightness without liquid. That’s crucial when you want a crispy exterior on the chicken; marinades add extra moisture and can soften skin. With this dry rub, you get a flavorful crust.
When applying, pat the chicken dry first. A thin, even coating works better than a thick paste. If you plan to roast or grill, apply the rub 15–30 minutes before cooking for a little time to settle. You can also season right before it hits the heat — both approaches work, depending on how much prep time you have.
Storing, Freezing & Reheating
Store the rub in a clean, dry airtight container at room temperature in a dark cabinet. Lids should be tight; exposure to air accelerates flavor loss. Label with the date; aim to use within 6–12 months for best results.
Do not freeze the rub. Freezing introduces condensation when it thaws, which can ruin the texture and encourage clumping. The shelf-stable nature of dried spices means freezing adds no benefit and can cause problems.
For chicken seasoned with this rub, refrigerate cooked leftovers in an airtight container for up to 3–4 days. Reheat gently in a 325°F oven until warm to preserve texture; avoid high heat that can further dry the meat. A quick stovetop reheat in a skillet with a splash of oil works well for sliced pieces.
Reader Q&A
- Q: Can I use whole sumac berries?
A: Whole sumac berries need to be ground and strained; the recipe calls for ground sumac, so use that for even mixing. Pre-ground is the most convenient and consistent option. - Q: Is this rub spicy?
A: No. There’s no chili or black pepper in this mix. It’s tangy and savory. Add chili flakes or cayenne if you want heat. - Q: Can I double the recipe?
A: Yes. If you want a larger jar, double all ingredients while keeping proportions the same. Mixing straight into the storage jar works fine if it’s dry and clean. - Q: How much rub should I use on a pound of chicken?
A: It depends on personal taste. A tablespoon per pound is a good starting point; adjust up or down. For bone-in pieces you may want a little extra for the surface area. - Q: Will the rub burn on high-heat grills?
A: The ingredients are dried spices and salt; they generally don’t burn quickly, but sugars burn fastest — this mix has none. Still, avoid excessive direct high heat for long periods; sear briefly and finish over indirect heat if needed. - Q: Any recommended finishing touches?
A: A quick squeeze of lemon over the chicken off the heat amplifies the sumac’s citrus notes, but it’s optional. A drizzle of olive oil or a sprinkle of fresh herbs right before serving brightens the plate.
In Closing
This Sumac Dry Rub for Chicken is one of those pantry wins that pays off every time. It’s fast to make, forgiving in use, and gives chicken an appealing lemony lift without adding liquid. Keep the jar in a cool, dark place and use it as an easy shortcut to flavorful dinners. If you try it, use a little less salt at first if you tend to brine or pre-salt your poultry — you can always add more on the next batch.
Make a small jar, stick a label on it, and you’ll have a versatile seasoning ready for weeknights, weekend grills, and everything in between.
Sumac Dry Rub for Chicken
Ingredients
Equipment
Method
- Measure 1/4 cup ground sumac, 1 1/2 teaspoons ground cumin, 1/2 teaspoon salt, 3/4 teaspoon dried oregano, and 3/4 teaspoon garlic powder.
- Place all measured ingredients in a small, dry bowl (or measure them directly into a clean, dry airtight container if you prefer).
- Stir the spices together with a small whisk or spoon for 20–30 seconds, or until the mixture looks evenly blended and there are no large clumps.
- If you mixed in a bowl, transfer the rub into a clean, dry airtight container (for example, a glass jar) using a funnel or spoon.
- Close the container tightly and wipe any spills from the rim.
- Label the container with the name and the date, then store it in a cool, dry, dark place such as a kitchen cabinet away from direct heat and sunlight.
Notes
How to use it:
Pat boneless, skinless chicken breast dry with paper towels, then rub with a mild olive oil. Sprinkle with the dry rub on both sides. Bake in a hot cast iron pan in the oven at 400 degrees F.