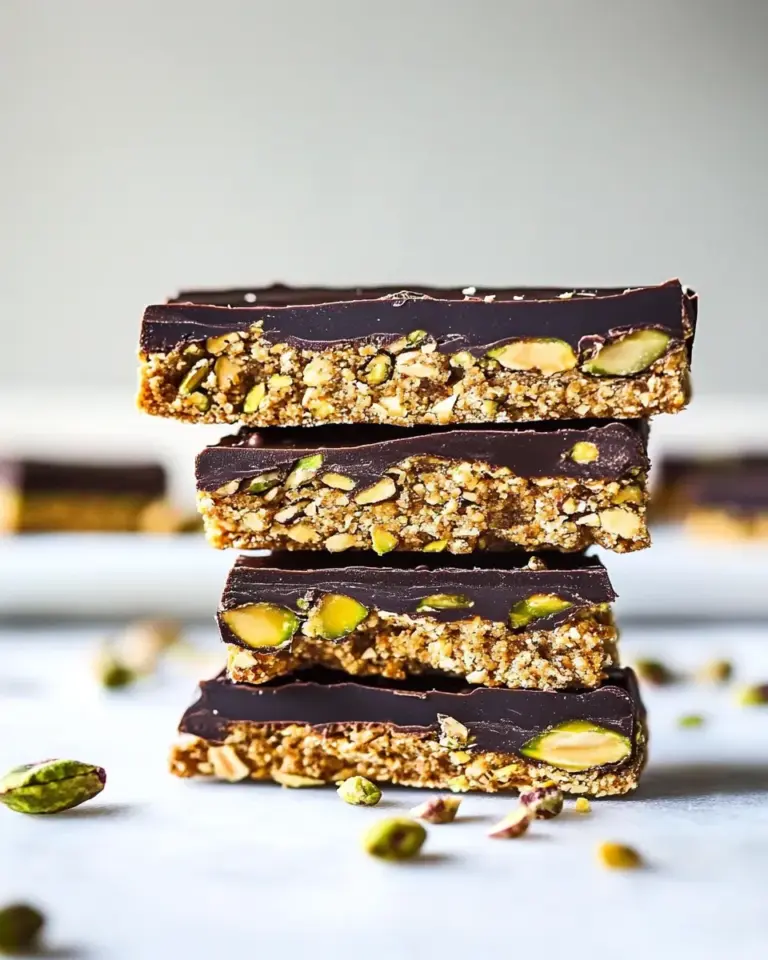
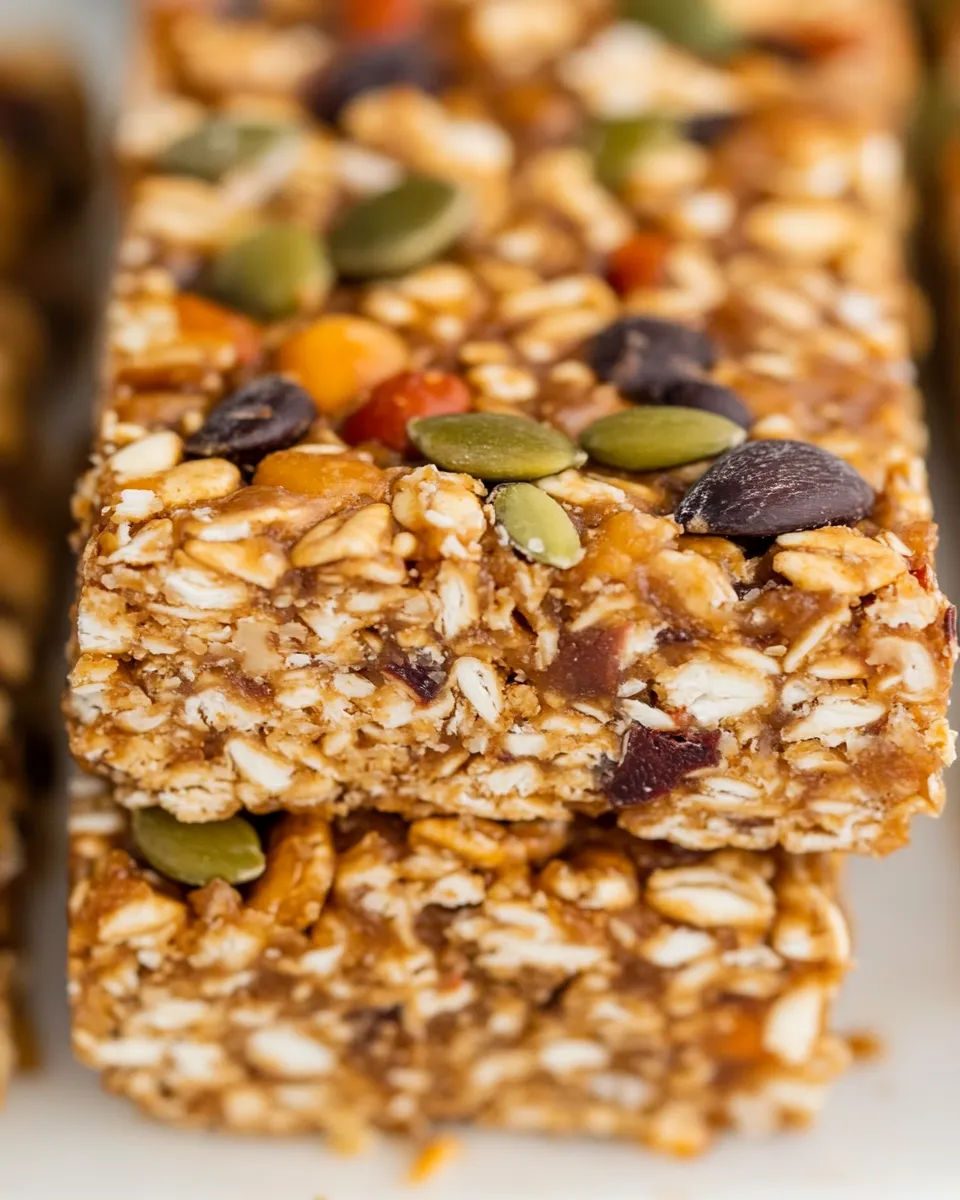
Trail Mix Bars
These Trail Mix Bars are my go-to when I need something that travels well, stores easily, and actually tastes like a treat instead of a compromise. They strike that lovely balance between chewy and crunchy, with dates as the natural sweetener and peanut butter for richness. No baking required, which means they’re fast, forgiving, and perfect for a busy afternoon when snack prep needs to be done in one go.
I keep the formula consistent but flexible: swap nuts, tweak the dried fruit, or add chocolate chips depending on what’s in the pantry. They satisfy lunchbox cravings, afternoon energy slumps, and last-minute picnic plans. You can make them softer or firmer, sweeter or more nut-forward, with tiny adjustments that take seconds.
If you’ve made energy balls before, these feel like the bar version — sturdier to pack, easier to slice, and more polite to eat on the move. In this post I’ll walk you through exactly what to use, how to assemble them step by step, and all the practical tips I rely on when I’m making a double batch for the week.
What We’re Using
Ingredients
- 2 cups quick oats — Provides structure and chew; quick oats bind more easily than old-fashioned.
- ½ cup plus 2 T peanut butter — Adds fat and flavor; helps hold the bars together. Use a neutral, spreadable nut butter if preferred.
- 15 pitted Medjool dates (soaked in warm water) — The natural sweetener and glue. Soaking softens them for a smooth paste.
- 1 cup chopped nuts or seeds — Crunch and toasty flavor; walnuts, almonds, pecans, pumpkin seeds all work.
- 3/4 cup dried fruit and/or chocolate chips — Sweet bursts and texture contrast; raisins, cranberries, or chips are all fair game.
- 1 tsp vanilla — Lifts the flavors and cuts any date-heavy earthiness.
- 1 tsp cinnamon (optional) — Adds warmth; use if you want a cozy spice note.
- 3 – 4 T 100% pure maple syrup — Extra sweetness and moisture; the recipe uses 3 T, with an extra tablespoon reserved if needed.
- ½ tsp sea salt — Balances sweetness and enhances peanut butter notes.
Trail Mix Bars — Do This Next
- Place 15 pitted Medjool dates in a small bowl, cover with warm water, and soak 10–15 minutes until softened. Drain well and pat the dates dry.
- Put the drained dates into a food processor and process until a sticky, smooth paste forms (it may pull into a ball). If the paste seems too dry to come together, add 1 tablespoon maple syrup (from the 3–4 T) and process again.
- In a large mixing bowl, combine the date paste, ½ cup plus 2 tablespoons peanut butter, 3 tablespoons maple syrup (reserve up to 1 tablespoon for adjustment), 1 teaspoon vanilla, and ½ teaspoon sea salt. Stir or scrape with a spatula until evenly combined.
- Add 2 cups quick oats to the bowl and mix thoroughly until the oats are evenly incorporated into the wet mixture. If the mixture still seems too dry, add up to the reserved 1 tablespoon maple syrup.
- Stir in 1 cup chopped nuts or seeds, ¾ cup dried fruit and/or chocolate chips, and 1 teaspoon cinnamon (optional) until evenly distributed.
- Line an 8×8-inch baking pan with parchment paper (leaving an overhang). Transfer the mixture to the pan and press firmly and evenly into the pan (use the bottom of a measuring cup or a spatula to compact).
- Refrigerate the pan for about 30 minutes to firm. Lift the mixture from the pan using the parchment overhang and cut into bars.
Why It’s My Go-To
First, these bars require no baking and almost no fuss. That matters when I want a reliable snack without staging a full kitchen production. Dates do the heavy lifting: they sweeten and bind so we can avoid refined sugar and still get that chewy, satisfying texture.
Second, the formula is forgiving. If the mixture is a touch dry you add a tablespoon of maple syrup; if it’s sticky, a little extra oat absorbs moisture. That give-and-take makes this recipe approachable for beginners and a quick shortcut for experienced cooks who want good results fast.
Finally, they’re portable and versatile. You can adapt the mix-ins to match dietary needs — use gluten-free oats or swap almond butter for peanut — and still end up with bars that hold together, slice cleanly, and pack well for school, hikes, or work.
International Equivalents
Different cultures have similar snack concepts that use local pantry staples. Think of these as cousins to granola bars, energy bites, and date squares.
In the UK, similar treats are often called flapjacks — oat-based bars bound with golden syrup or honey and usually baked for a different texture. In Canada, date squares (or matrimonial squares) use a date paste sandwiched between oat crumb layers; the flavor profile is familiar because dates provide sweetness and density.
Commercial options like Larabar or other fruit-and-nut energy bars mirror this simple ingredient list — a fruit base plus nuts and sometimes oats. The method here mirrors those classics but keeps everything homemade and adjustable.
Cook’s Kit
Minimal gear gets the job done. Here’s what I reach for every time:
- Food processor — Essential for turning soaked dates into a smooth paste quickly.
- Large mixing bowl — For combining the paste with oats and peanut butter.
- Measuring cups and spoons — Accurate amounts matter for texture and balance.
- 8×8-inch baking pan — Standard size for uniform bars.
- Parchment paper — Leaves an overhang so you can lift the slab out easily.
- Spatula or the bottom of a measuring cup — For pressing the mixture evenly into the pan.
- Refrigerator space — The chill step firms the bars so they slice cleanly.
Easy-to-Miss Gotchas
These small mistakes will change your results, and they’re easy to avoid once you know them.
1) Dates not drained well — If you skip patting the soaked dates dry, the paste can be overly wet and the bars will be sticky and soft. Drain and pat dry thoroughly before processing.
2) Under-processing the dates — You want a smooth, sticky paste. If it’s still chunky, the mixture won’t bind as well. Process until it pulls together and forms a mass.
3) Using the wrong oats — Quick oats are specified because they absorb liquid faster and bind more readily. Old-fashioned rolled oats will work but give a chewier, looser texture; adjust by pulsing a few seconds in the processor if you prefer a finer crumb.
4) Not pressing firmly — Compacting the mixture is critical. If you’re light-handed, the bars crumble. Use the bottom of a measuring cup and press until the surface is flat and dense.
Seasonal Spins
Small seasonal swaps keep this recipe feeling fresh all year.
Spring/Summer: Use dried cherries and toasted almonds for a bright, nutty mix. Add a handful of sunflower seeds for extra summer crunch.
Fall: Stir in chopped dried apples or pears and a pinch more cinnamon. Toasted pecans or walnuts add warmth and complement the spice.
Winter: Swap regular oats for oats with a dash of nutmeg, and fold in some chopped candied ginger for a festive bite. A few dark chocolate chips make these feel decadent without over-sweetening.
What Could Go Wrong
If the bars are too crumbly: likely not compacted enough or the dates weren’t smooth. Re-process the date paste, press the mixture more firmly, and consider a splash more maple syrup to help bind.
If they’re too sticky: you may have left excess moisture from the soaked dates. Refrigerate longer to help firm them, or add an extra half cup of oats and press again if needed (note: adding oats will change the overall texture).
If the flavor is flat: small tweaks help. Add an extra pinch of sea salt, a splash more vanilla, or a teaspoon more cinnamon. Salt brightens all the flavors, but use it sparingly — start small and taste.
Make Ahead Like a Pro
These bars are a dream for batch cooking. After cooling and cutting, place them in an airtight container separated with parchment paper to prevent sticking. Stored in the refrigerator they keep well for about one week.
For longer storage, freeze the bars in a single layer on a tray until firm, then stack them with parchment in between in a freezer-safe container. They thaw quickly at room temperature and remain a convenient grab-and-go snack for weeks.
To serve from frozen, let them sit at room temperature for 10–20 minutes; they soften but maintain structure, which is perfect for hiking packs or school lunches.
Quick Questions
- Can I use other nut butters? — Yes. Almond or cashew butter will work, but textures vary; some nut butters are runnier, so you may need a touch more oats.
- Are Medjool dates necessary? — They’re preferred for their softness and caramel flavor, but any soft pitted date will work after proper soaking.
- Can I make them nut-free? — Yes. Replace nuts with seeds (pumpkin, sunflower) and ensure your nut butter substitute is safe for your needs.
- How big are the bars? — The 8×8 slab yields whatever size you cut. I usually cut into 12 bars for a balanced snack portion.
See You at the Table
These Trail Mix Bars are simple to make, endlessly adaptable, and reliably satisfying. They travel well, pack easy, and are forgiving enough to improvise when the pantry is slim. Try the base as written once, then start swapping nuts, fruits, and spices until you find your favorite combo.
Make a batch on Sunday and you’ll have snacks that hold up to busy weekdays. If you try a seasonal variation, tell me which one you loved — I’m always swapping ideas and tasting suggestions with friends and readers. Happy pressing and slicing, and see you at the table.
Trail Mix Bars
Ingredients
Equipment
Method
- Place 15 pitted Medjool dates in a small bowl, cover with warm water, and soak 10–15 minutes until softened. Drain well and pat the dates dry.
- Put the drained dates into a food processor and process until a sticky, smooth paste forms (it may pull into a ball). If the paste seems too dry to come together, add 1 tablespoon maple syrup (from the 3–4 T) and process again.
- In a large mixing bowl, combine the date paste, ½ cup plus 2 tablespoons peanut butter, 3 tablespoons maple syrup (reserve up to 1 tablespoon for adjustment), 1 teaspoon vanilla, and ½ teaspoon sea salt. Stir or scrape with a spatula until evenly combined.
- Add 2 cups quick oats to the bowl and mix thoroughly until the oats are evenly incorporated into the wet mixture. If the mixture still seems too dry, add up to the reserved 1 tablespoon maple syrup.
- Stir in 1 cup chopped nuts or seeds, ¾ cup dried fruit and/or chocolate chips, and 1 teaspoon cinnamon (optional) until evenly distributed.
- Line an 8x8-inch baking pan with parchment paper (leaving an overhang). Transfer the mixture to the pan and press firmly and evenly into the pan (use the bottom of a measuring cup or a spatula to compact).
- Refrigerate the pan for about 30 minutes to firm. Lift the mixture from the pan using the parchment overhang and cut into bars.
Notes
I prefer natural creamy peanut butter that is nice and drippy for this recipe. It stirs much more easily than a typical Jif peanut butter does.
I keep the cinnamon optional. Sometimes I add it, other times I don’t. It typically depends on what I am adding in and if it makes sense with those flavors.