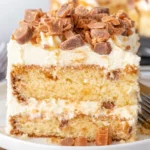
Butterfinger Cake
This no-bake Butterfinger Cake combines chocolate, caramel, and peanut butter flavors for a rich and decadent dessert that everyone will love.
Servings: 12 servings
Equipment
- Mixing Bowl
- 9x13 inch Baking Dish
- Fork
Ingredients
Cake Ingredients
- 1 box yellow cake mix 15.25 ounces
- 1 can sweetened condensed milk 14 ounces
- 1 jar caramel sauce 12.25 ounces
- 1 tub Cool Whip 8 ounces, thawed (or 3 cups homemade whipped cream)
- 4 bars Butterfinger candy bars full-size
Instructions
- Step 1: Preheat your oven to 350°F (175°C). Grease and flour a 9×13 inch baking dish. In a large mixing bowl, prepare the yellow cake mix according to the package instructions. Pour the prepared batter into the greased baking dish and spread it evenly.
- Step 2: Bake your cake in the preheated oven for 25 to 30 minutes, or until a toothpick inserted into the center comes out clean. Once baked, remove it from the oven and allow it to cool for about 10 minutes.
- Step 3: While your cake is still warm, take a fork and poke holes all over the surface.
- Step 4: Slowly pour the sweetened condensed milk over the warm cake, ensuring that it seeps into the holes you’ve made.
- Step 5: Drizzle the caramel sauce over the top of the cake, spreading it evenly. Allow the cake to absorb the flavors as it cools completely, approximately 30 minutes more.
- Step 6: Once the cake has cooled, take your Cool Whip and gently spread it over the top.
- Step 7: Chop the Butterfinger candy bars into small pieces and sprinkle them generously over the top of the Cool Whip layer.
- Step 8: Refrigerate the Butterfinger Cake for at least 2 hours before serving.
Notes
For an even richer flavor, use a chocolate cake mix instead of yellow. Don’t skip the chilling step; it helps the flavors to meld beautifully.