Baked Chicken Katsu
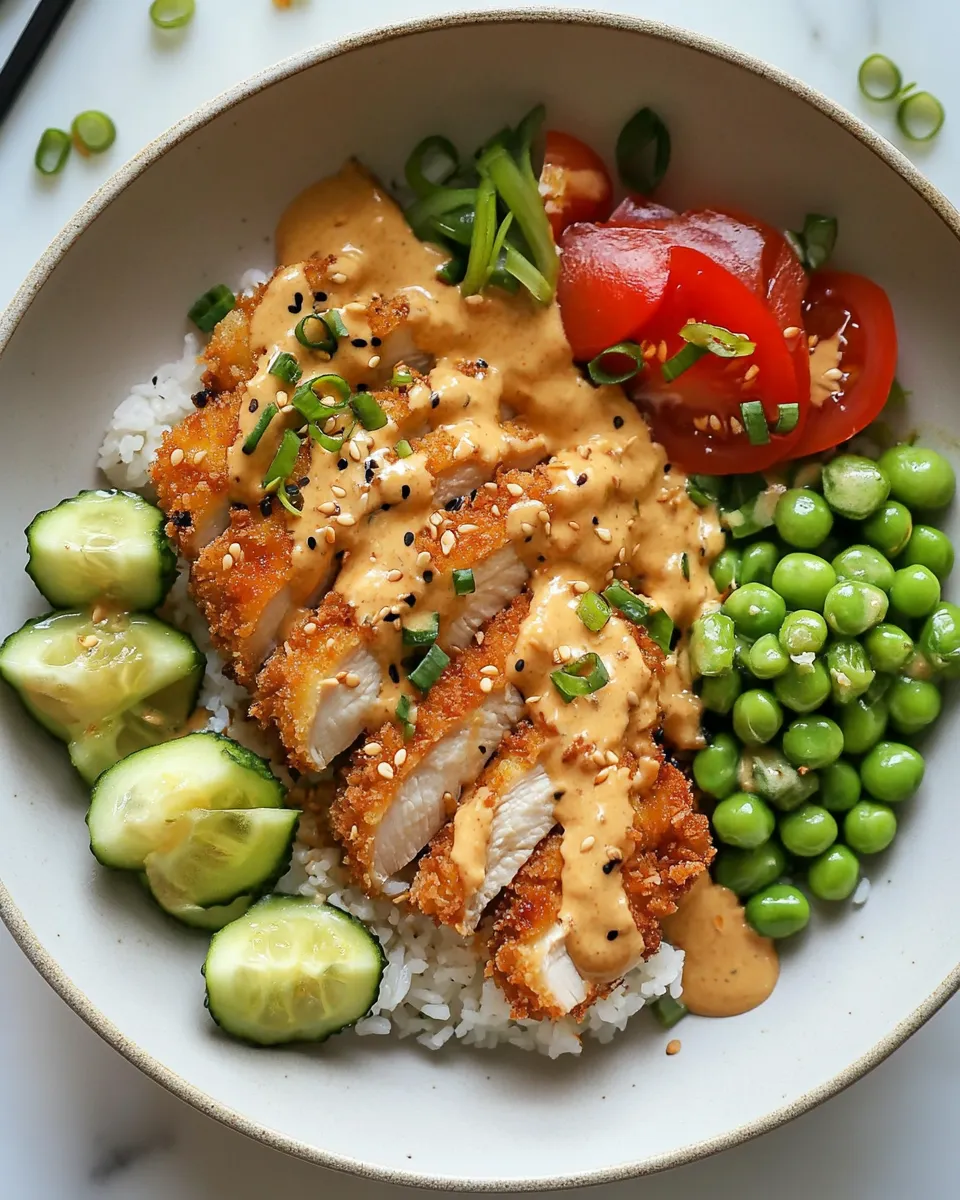
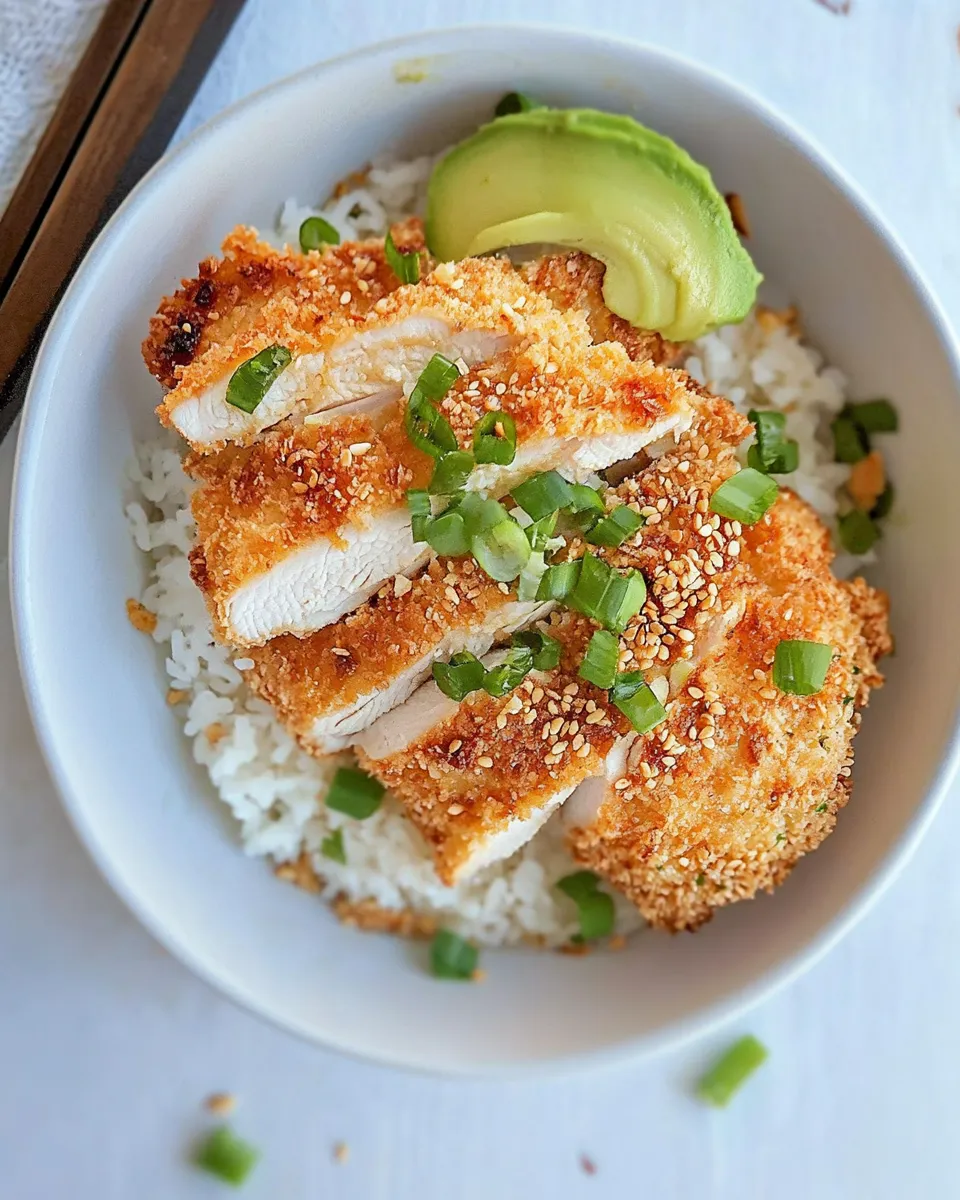
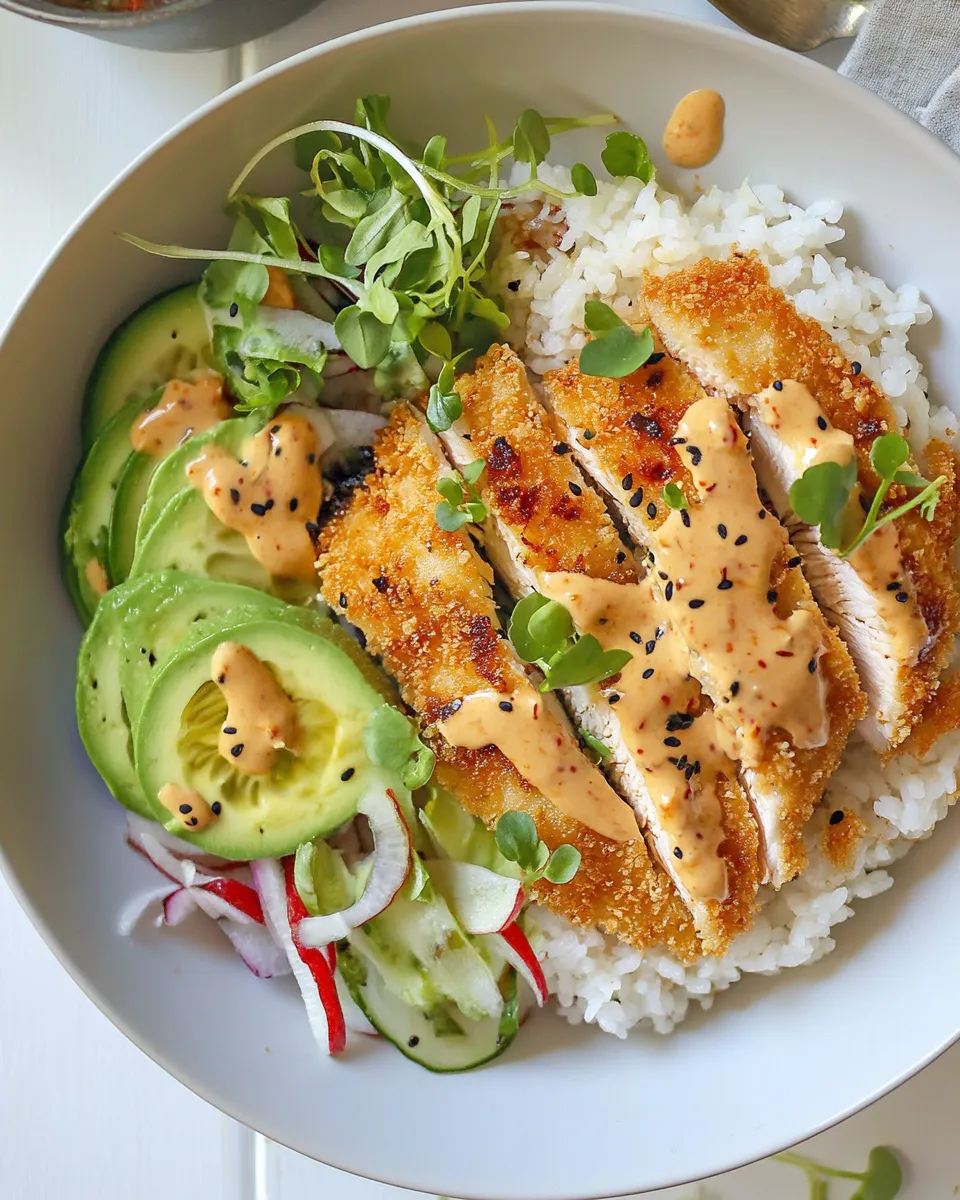
This Baked Chicken Katsu is a weeknight hero: crunchy, golden cutlets without the fuss of deep-frying, a tangy-sweet sauce that clings to every bite, and simple sides that make the whole meal feel like a takeout favorite you made at home. The method keeps things straightforward—flour, egg wash, and panko for an ultra-crisp exterior—and the sauce is balanced with ketchup, Worcestershire, molasses, and warm aromatics. Serve with steamed rice, an iceberg or cabbage slaw, and a scattering of green onion for color and bite.
Why you’ll love this recipe
- Lightened-up crisp: Baked rather than fried, but still satisfyingly crunchy thanks to panko and a quick spray of oil.
- Quick midweek meal: From prep to table in about 30–35 minutes.
- Flavor-forward sauce: Sweet, tangy, and slightly savory—perfect for dunking or drizzling.
- Flexible plating: Serve over steamed rice with shredded cabbage and sliced green onions for a classic presentation.
Ingredients
For the sauce:
- 3 tablespoons ketchup
- 3 tablespoons Worcestershire sauce
- 1 tablespoon molasses
- 1 teaspoon low-sodium soy sauce
- ½ teaspoon garlic powder
- ⅛ teaspoon peeled, grated fresh ginger root
For the chicken katsu:
- 2 (8 oz) boneless, skinless chicken breasts, or 4 chicken cutlets
- Kosher salt + black pepper, to taste
- 1 teaspoon garlic powder, divided
- ½ cup all-purpose flour
- 2 large eggs, beaten
- 1 tablespoon water
- 1½ cups panko bread crumbs
- Cooking spray for baking
To serve:
- Steamed rice
- Finely shredded cabbage
- Green onions
Notes before you start
Use chicken breasts that are evenly sized. If your breasts are thick, slice them horizontally into cutlets or pound them to an even thickness to ensure even cooking. Measure the panko and flour accurately; the coating relies on the correct proportions to get that perfect crunch. Preheat the oven so the breading begins to set immediately when the chicken goes in.
Equipment
- Baking sheet and wire rack (recommended for even airflow)
- Three shallow bowls or pie plates for dredging station
- Measuring spoons and cups
- Microplane or fine grater for ginger
- Tongs or a fork for handling coated chicken
Step-by-step instructions
- Make the sauce: In a small bowl, whisk together 3 tablespoons ketchup, 3 tablespoons Worcestershire sauce, 1 tablespoon molasses, 1 teaspoon low-sodium soy sauce, ½ teaspoon garlic powder, and ⅛ teaspoon freshly grated ginger. Taste and adjust if needed—set the sauce aside at room temperature so the flavors meld while you prepare the chicken.
- Prep the chicken: Pat the 2 (8 oz) boneless, skinless chicken breasts dry with paper towels. If using whole breasts and they are thick, slice each breast horizontally into two cutlets or place between plastic wrap and gently pound to about ½-inch thickness for consistent cooking. Season both sides of the chicken with kosher salt and black pepper to taste and sprinkle ½ teaspoon of the 1 teaspoon garlic powder evenly over both sides.
- Set up the dredging station: Place ½ cup all-purpose flour in the first shallow bowl. In the second bowl, whisk together 2 large eggs and 1 tablespoon water until combined. Put 1½ cups panko bread crumbs in the third bowl. Set these three bowls in a row to create an efficient assembly line for coating.
- Coat the chicken: Working one piece at a time, dredge a chicken cutlet in the flour, shaking off any excess. Dip it into the beaten egg mixture, allowing excess to drip back into the bowl. Press the chicken firmly into the panko, coating both sides well and pressing the crumbs onto the surface so they adhere. Transfer the coated cutlet to a wire rack set over a baking sheet. Repeat with the remaining cutlets. If you like extra seasoning, sprinkle the remaining ½ teaspoon garlic powder lightly over the panko-coated cutlets for an additional flavor boost.
- Prepare to bake: Position a rack in the center of the oven and preheat to 425°F (220°C). If you don’t have a wire rack, place the breaded chicken directly on a baking sheet lined with foil or parchment, but flip the cutlets halfway through baking for even browning. Lightly spray the top of each panko-coated cutlet with cooking spray; this helps the crumbs turn golden and crisp in the oven.
- Bake the cutlets: Place the baking sheet with the wire rack in the preheated oven. Bake for about 10–12 minutes, then carefully flip each cutlet, spray the other side lightly with cooking spray, and continue baking for an additional 6–8 minutes, or until the chicken reaches an internal temperature of 165°F (74°C) and the panko is deeply golden. Total bake time will depend on thickness, so use an instant-read thermometer for accuracy.
- Rest the chicken: Remove the cutlets from the oven and let them rest on the wire rack or a plate for 3–5 minutes. Resting allows the juices to redistribute, keeping the meat juicy and tender.
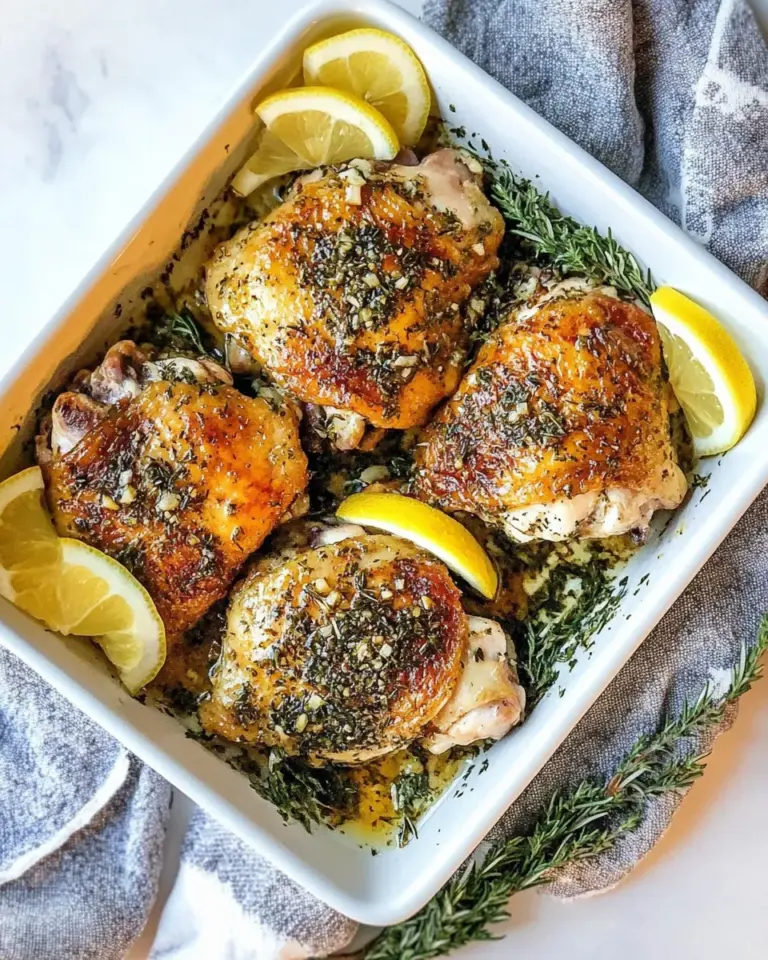
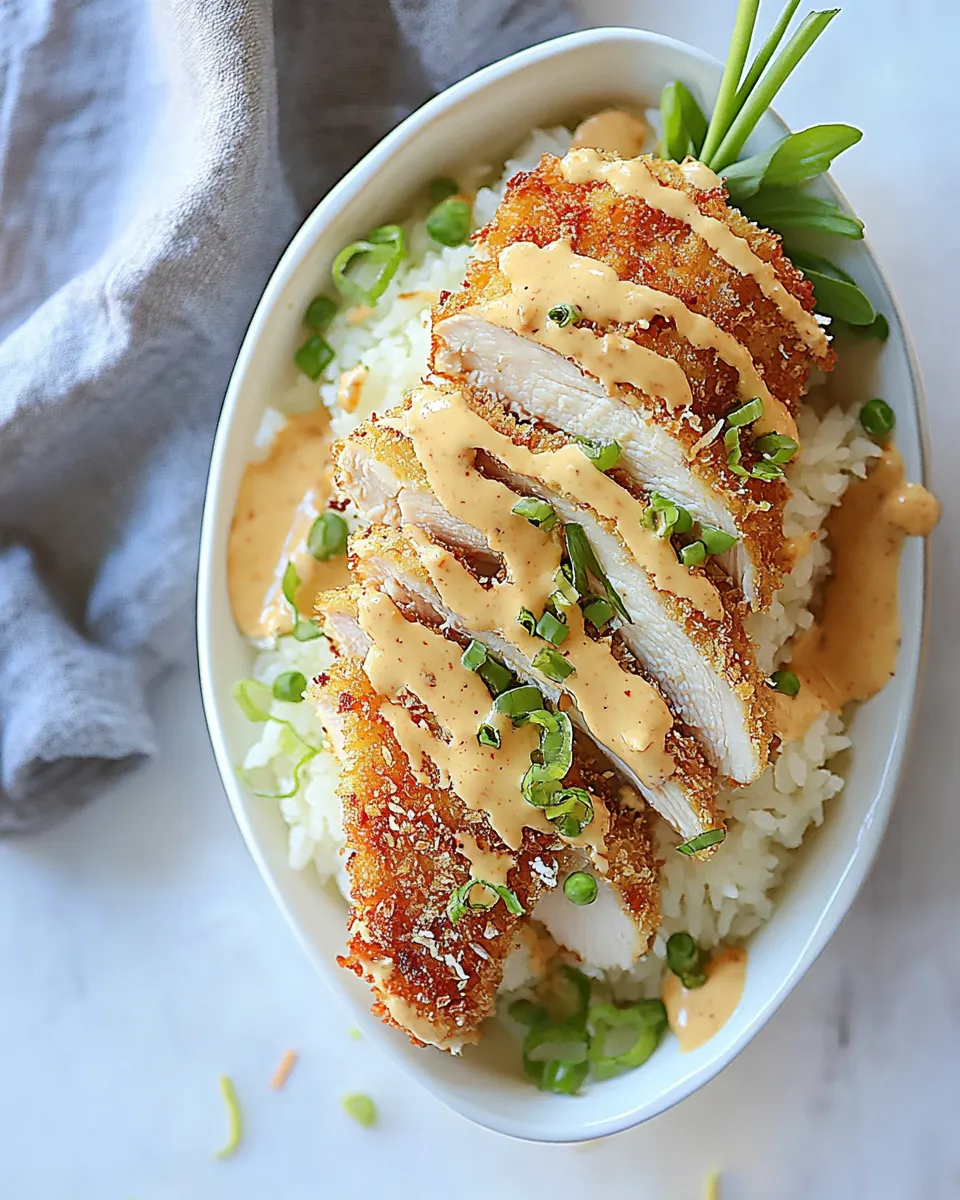
- Slice and plate: Slice the baked chicken katsu into strips across the grain for easy dipping and pretty presentation. Arrange over a bed of steamed rice alongside a pile of finely shredded cabbage. Drizzle the prepared sauce over the cutlets or serve it in a small bowl for dipping. Scatter sliced green onions on top for freshness and color.
Serving suggestions
Serve this Baked Chicken Katsu with steamed rice and shredded cabbage for a classic plate. Add a simple cucumber salad or pickled vegetables for acidity. A lemon wedge on the side is also lovely if you want a bright counterpoint to the sauce. Leftovers make an excellent sandwich filling the next day—layer slices between soft rolls with cabbage and a touch more sauce.
Tips for success
- Even thickness matters: Pound or slice breasts to uniform thickness so each cutlet cooks at the same rate.
- Don’t skip the spray: A quick mist of cooking spray on both sides helps the panko brown in the oven like it would in a shallow fry.
- Use fresh panko if possible: Fresh, dry panko gives the best crunch. If your panko is a bit stale, toast it briefly in a dry skillet to refresh it before coating.
- Check temperature: An instant-read thermometer takes out the guesswork—aim for 165°F (74°C).
- Make the sauce ahead: The sauce can be mixed and refrigerated a day in advance; bring to room temperature before serving for the best texture and flavor.
Variations
- Spicy katsu: Add ½–1 teaspoon chili paste or Sriracha to the sauce for heat.
- Herbed panko: Stir 1–2 tablespoons finely chopped fresh parsley or cilantro into the panko for a green herb lift.
- Gluten-free option: Substitute rice flour for all-purpose flour and gluten-free panko for the breadcrumbs.
How to store and reheat
Store leftover cutlets in an airtight container in the refrigerator for up to 3 days. To keep the crust as crisp as possible, reheat in a 375°F (190°C) oven on a wire rack for 8–10 minutes, or until warmed through. The microwave will make the panko soggy, so use it only if speed is more important than texture.
Final notes
This Baked Chicken Katsu balances easy prep with maximum satisfaction. The sweet-savory sauce is a crowd-pleaser, the panko gives you the crunch you crave, and baking keeps cleanup simple. It’s comfort food with a lighter footprint and an approachable flavor profile that becomes a fast family favorite.
Printable recipe
Prep time: 10 minutes • Cook time: 20 minutes • Serves: 2–4
Ingredients recap:
- 3 tablespoons ketchup
- 3 tablespoons Worcestershire sauce
- 1 tablespoon molasses
- 1 teaspoon low-sodium soy sauce
- ½ teaspoon garlic powder
- ⅛ teaspoon peeled, grated fresh ginger root
- 2 (8 oz) boneless, skinless chicken breasts, or 4 chicken cutlets
- Kosher salt + black pepper, to taste
- 1 teaspoon garlic powder, divided
- ½ cup all-purpose flour
- 2 large eggs, beaten
- 1 tablespoon water
- 1½ cups panko bread crumbs
- Cooking spray for baking
- Steamed rice, finely shredded cabbage, green onions for serving
Instructions recap:
- Whisk sauce ingredients together and set aside.
- Dry and pound or slice chicken to even thickness. Season with salt, pepper, and ½ teaspoon garlic powder.
- Set up flour, egg + water, and panko in three shallow bowls.
- Dredge chicken in flour, dip in egg, and press into panko. Sprinkle remaining garlic powder over coated cutlets, if desired.
- Preheat oven to 425°F (220°C). Arrange cutlets on a wire rack over a baking sheet and spray tops with cooking spray.
- Bake 10–12 minutes, flip, spray the other side, and bake another 6–8 minutes until internal temperature reaches 165°F (74°C) and panko is golden.
- Rest 3–5 minutes, slice, and serve over steamed rice with shredded cabbage, green onions, and the prepared sauce.
Enjoy a plate of warm, crunchy Baked Chicken Katsu with rice, cabbage, and sauce—comfort food made simple and reliably delicious.
Baked Chicken Katsu
Ingredients
Equipment
Method
- In a small bowl, whisk together the ketchup, Worcestershire sauce, molasses, soy sauce, 1/2 teaspoon garlic powder, and grated fresh ginger; cover and refrigerate until ready to serve.
- Preheat the oven to 425°F (215°C). Place an oven-safe rack on a rimmed baking sheet and lightly spray the rack with nonstick spray.
- Trim any excess fat from the chicken breasts; if using whole breasts, cut each crosswise into two cutlets. Place a cutlet between plastic wrap and pound with a meat mallet or rolling pin until 1/4 to 1/2 inch thick.
- Season both sides of the pounded chicken with kosher salt and black pepper (about 1/2 teaspoon salt and 1/2 teaspoon pepper per side, or to taste).
- Prepare three shallow dishes: mix the flour with 1/2 teaspoon salt and 1 teaspoon garlic powder in the first; whisk the eggs with 1/2 teaspoon salt and 1 tablespoon water in the second; place the panko in the third.
- Working one cutlet at a time, dredge the chicken in the flour, shaking off excess; dip into the egg mixture, let excess drip off, then press firmly into the panko to coat evenly. Transfer breaded cutlets to the prepared rack.
- Spray the tops of the breaded cutlets generously with cooking spray so the crumbs glisten. Bake for 15–18 minutes until golden and the internal temperature reaches 165°F (74°C).
- Slice the cutlets into thick strips. Serve over steamed rice with shredded cabbage and green onions, and drizzle or serve the chilled sauce on the side.
Notes
- Leftover tonkatsu sauce keeps up to 7 days refrigerated in an airtight container.
- For the crispiest chicken, serve immediately after baking.
- Leftover chicken can be stored in the refrigerator up to 3 days in an airtight container.
- Reheat in a skillet or under the broiler for best texture.
- Use panko breadcrumbs for the proper light, crispy texture.