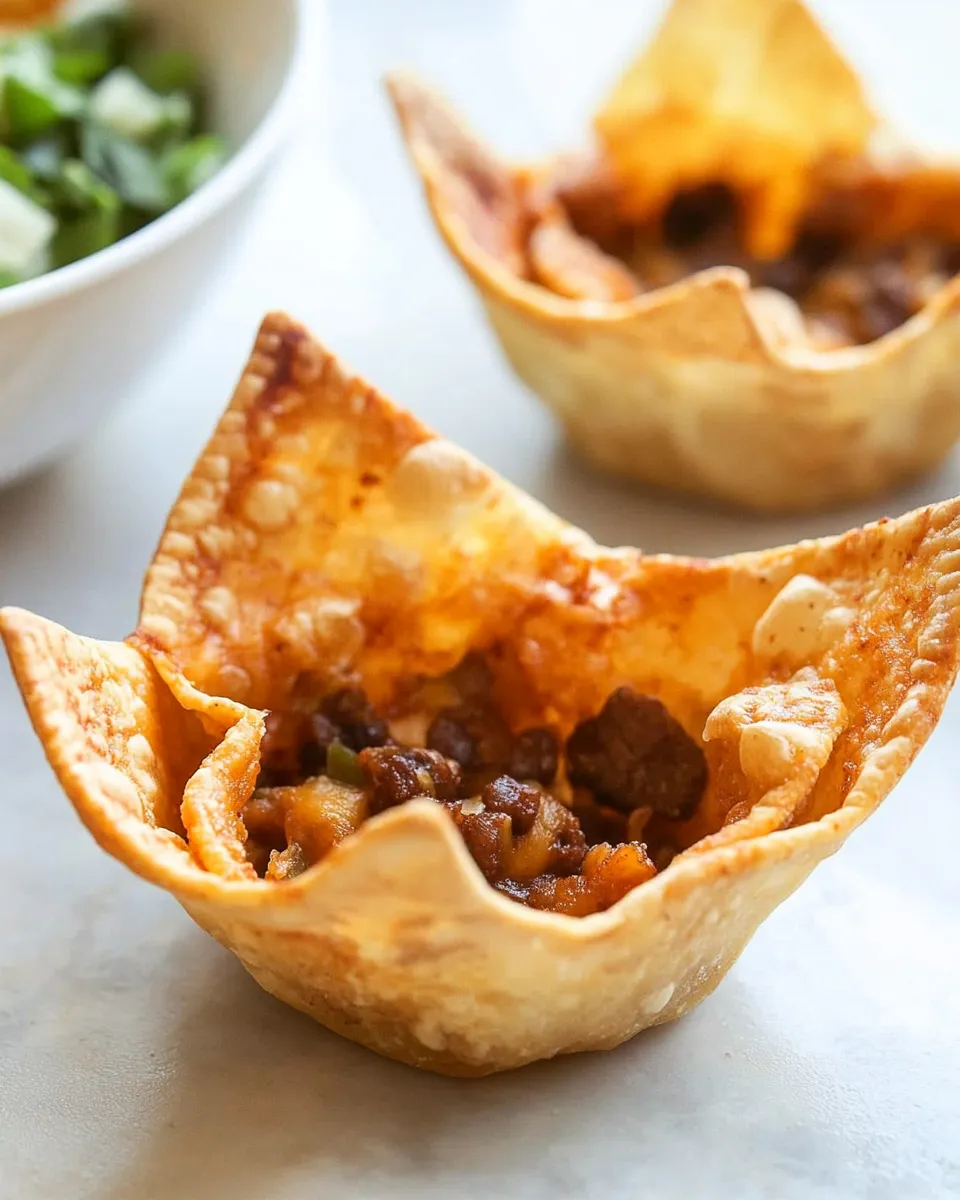
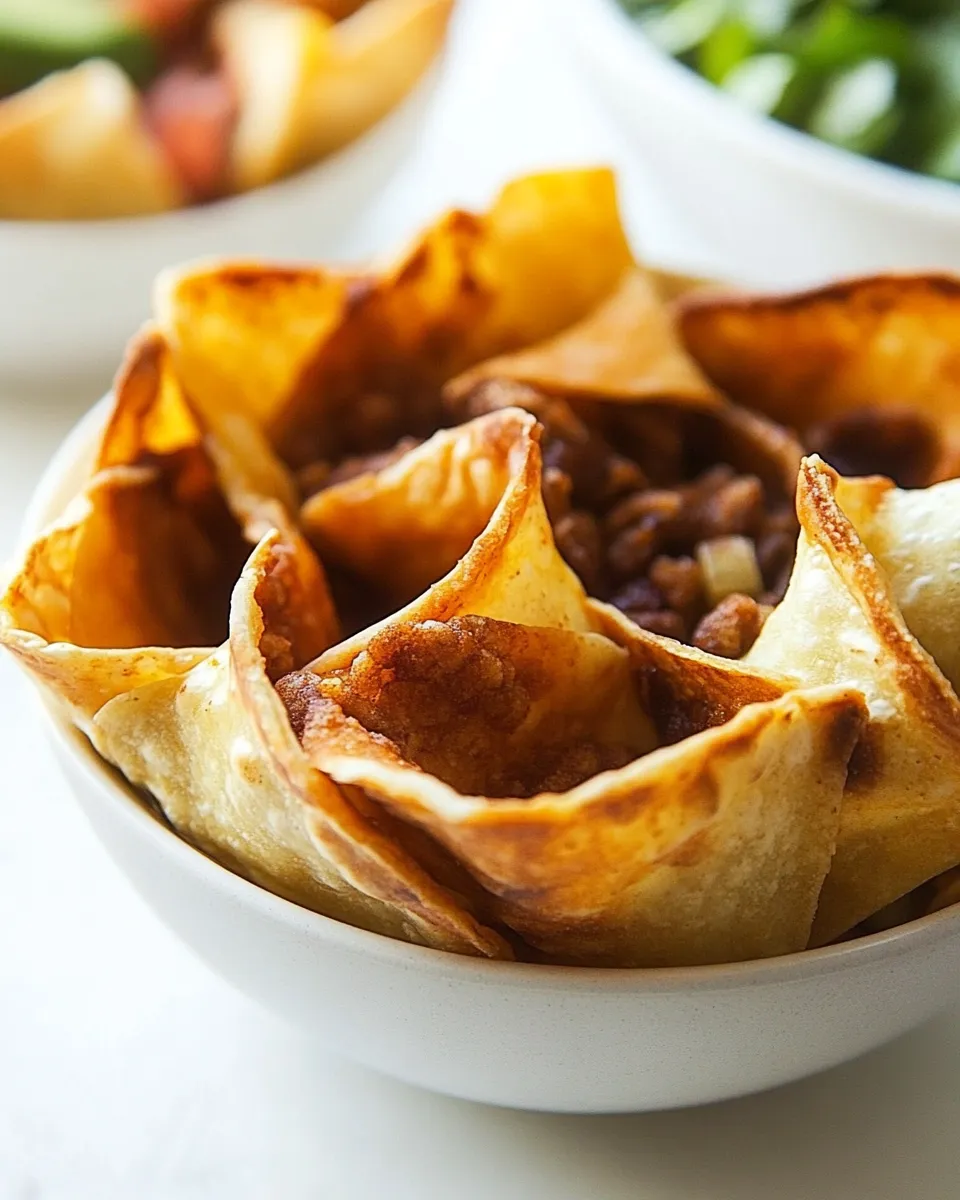
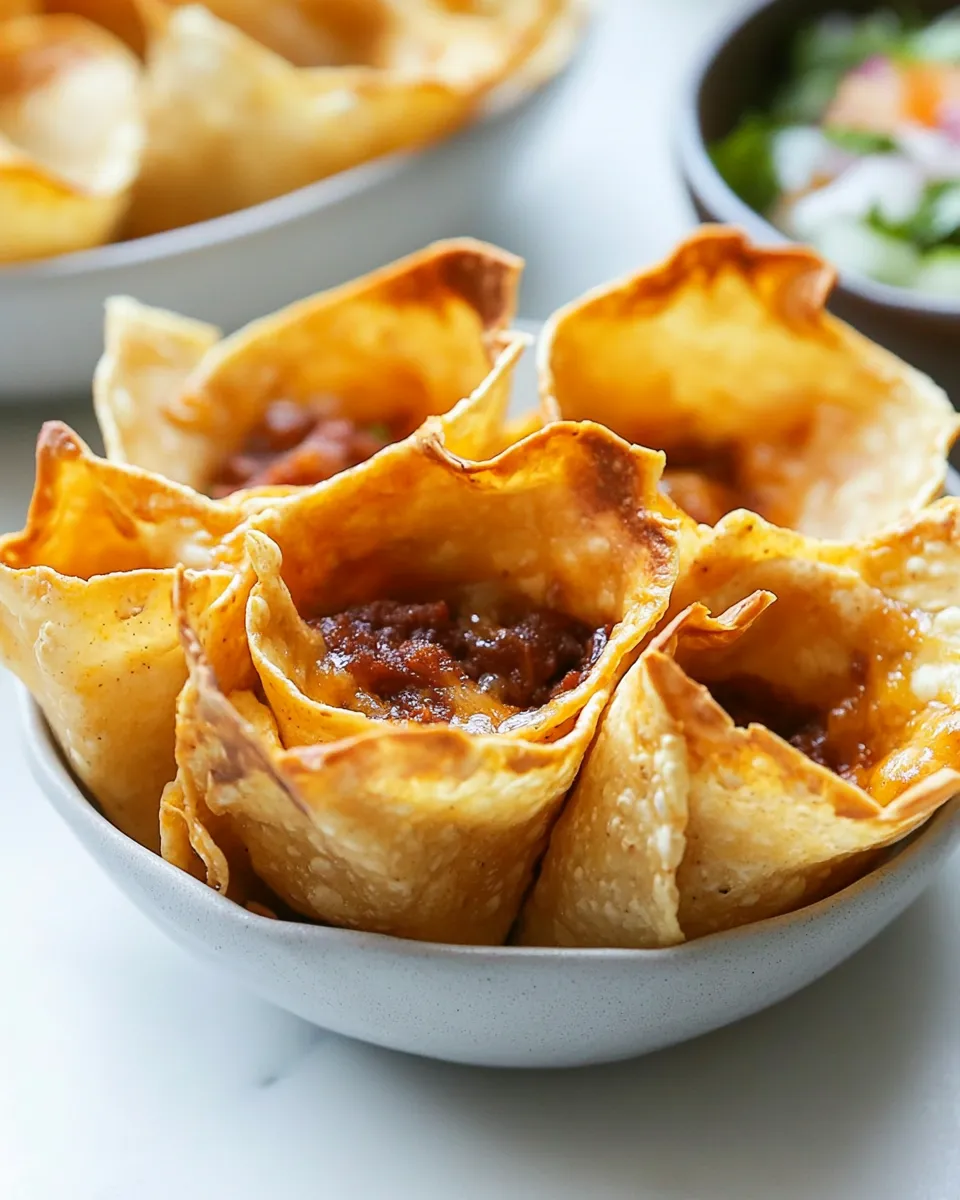
Crispy Taco Salad Shells
There’s something deeply satisfying about a crunchy forkful of greens scooped into a crisp, warm shell that holds together without collapsing. These Crispy Taco Salad Shells are simple, quick, and endlessly customizable—perfect for weeknight dinners or casual weekend gatherings. Using large 10-inch flour tortillas, a little high-heat oil, and a sprinkle of salt, you can transform plain wraps into restaurant-style bowls in minutes.
This recipe keeps things approachable: no special equipment beyond a large skillet and an oven-safe bowl or similar form. The tortillas become golden, blistered, and sturdy enough to pile high with salad, seasoned ground meat, beans, rice, or a mix of vegetables. Because the method is fast, you’ll get a fresh, crisp shell every time, and you can scale up or down depending on how many people you’re feeding.
Why these shells work
Two things make these shells a winner: the heat and the shape. A quick brushing of a neutral, high-smoke-point oil and a hot skillet start the crisping process and create color. Baking the tortilla in a bowl form finishes drying and sets the shape so it can hold heavier fillings. The result is a shell with satisfying crunch, a tender interior edge, and enough structure to double as an edible bowl.
Ingredients
- 4 large flour tortillas, 10-inch diameter
- 2 Tbsp extra light olive oil, canola oil or any high heat cooking oil, plus more as needed
- Kosher salt, optional for sprinkling
Prep and timing
Total time: About 20–30 minutes depending on oven and skillet heat.
- Active time: 10–15 minutes
- Cook time: 10–15 minutes
Tools you’ll need
- Large skillet (preferably 10–12 inch)
- Oven-safe bowls or ramekins to shape the shells (upside-down in a baking sheet works too)
- Pastry brush or spoon for oil
- Tongs or spatula
- Baking sheet
Flavor tips and variations

If you want to add a little extra flavor without complicating the process, try dusting the oiled side of the tortillas with a pinch of chili powder, ground cumin, or smoked paprika before crisping. For cheesy shells, gently press a thin layer of shredded cheese onto the hot surface of the tortilla for the last 20–30 seconds in the skillet—then transfer to the oven-shaped form so the cheese sets into the shell. You can also use corn tortillas if you prefer a corn-forward taste and naturally gluten-free option, but the cooking time and temperature might need slight adjustment.
These shells are perfect for filling with any combination you like: seasoned ground meat or minced chicken, roasted vegetables, black beans and rice, or a purely vegetarian mix of grilled peppers, avocado, and corn. A bright salsa, simple lime crema, or chopped fresh herbs bring everything together.
Step-by-step instructions
Follow these steps exactly for crisp, stable shells that are ready to hold a hearty salad or taco filling. The directions below follow the ingredient amounts as listed and keep the same order of preparation while making each step clearer and easier to follow.
- Preheat the oven to 400°F (205°C). Position two oven-safe bowls on a rimmed baking sheet, or set two upside-down oven-safe bowls or ramekins so the tortillas will drape over them. Using two forms lets you bake two shells at once; if you only have one form, work in batches.
- Pour about 2 tablespoons of extra light olive oil, canola oil, or another high-heat cooking oil into a small bowl or measuring cup. Have a pastry brush or a spoon ready to apply the oil to each tortilla. Keep extra oil nearby in case a tortilla needs a touch more while crisping.
- Heat a large skillet over medium-high heat until hot but not smoking. A properly heated pan helps the tortillas blister and brown quickly.
- Working with one tortilla at a time, lightly brush one side of the tortilla with the oil. Use just enough oil to coat the surface evenly; the tortilla should be slightly glossy but not saturated. If you prefer, drizzle a little oil into the skillet instead and place the tortilla oil-side down, but brushing directly ensures even coverage.
- Place the oiled side of the tortilla in the hot skillet. Cook for about 20–30 seconds, watching carefully, until the surface begins to bubble and develop spots of golden brown. Use tongs or a spatula to flip the tortilla over and continue cooking for an additional 10–20 seconds on the other side. The goal is quick browning and pliability so the tortilla can shape without tearing.
- Immediately transfer the warm tortilla to one of the prepped oven-safe bowls. Drape it over the bowl so it forms a bowl shape. Press gently at the base and edges so the tortilla conforms to the bowl. Repeat the oiling, skillet browning, and draping process with the remaining tortillas, working quickly so each tortilla remains warm and flexible when shaped.
- Once all tortillas are shaped over the bowls and the baking sheet holds them, place the sheet with the formed tortillas in the preheated oven. Bake for about 8–12 minutes. Baking time depends on your oven and how crisp you like the shells: check at 8 minutes, and keep baking until they reach a deep golden color and feel crisp to the touch. If the tortillas are puffing too much in the oven, gently press down with a spatula partway through baking to maintain the bowl shape.
- When the shells are golden and crisp, remove the baking sheet from the oven. Allow the shells to cool on the forms for 1–2 minutes so they set. Then carefully lift each shell off its bowl by running a thin spatula under the edge and lifting; take care not to crack the shell while it is still a bit warm. Transfer to a cooling rack or serving plate. Optionally, sprinkle a light pinch of kosher salt over the hot shells to enhance flavor.
- Let the shells cool until warm rather than piping hot so they hold their shape when filled. Fill each shell with your chosen salad, meat, or bean mixture just before serving to preserve the crunch. Avoid letting hot, heavily sauced fillings sit in the shell for long periods, which can soften the crispness.
Filling and serving ideas
These Crispy Taco Salad Shells are a fantastic canvas—try one of these combinations or mix and match ingredients you love:
- Classic taco salad: chopped romaine, seasoned ground beef or turkey, shredded cheddar, diced tomatoes, black beans, corn, sliced jalapeño, and a squeeze of lime.
- Southwest grain bowl: cilantro-lime rice, roasted sweet potato, black beans, pico de gallo, avocado slices, and a drizzle of yogurt-lime dressing.
- Chicken and avocado: shredded rotisserie-style chicken, crisp lettuce, chopped cucumber, cilantro, diced avocado, and a light vinaigrette.
- Vegetarian delight: mixed greens, grilled peppers and onions, roasted chickpeas, cotija or feta-style cheese, and a smoky chipotle dressing.
Make-ahead and storage
You can make the shells several hours ahead, but store them in a single layer at room temperature so they don’t trap steam and become soft. If you need to keep them longer, store in an airtight container with a paper towel to absorb any moisture; they should stay crisp for 1–2 days. Re-crisp in a 325°F (160°C) oven for 3–5 minutes if they lose some crunch.
Do not refrigerate the shells before use—the cold, humid environment will soften them quickly. Keep fillings separate until just before serving to preserve texture, especially with juicy salsas or dressings.
Common troubleshooting
- If a tortilla tears while shaping: patch it with a small piece of tortilla tucked under the edge, or press it gently and bake—tears often seal and crisp in the oven. Alternatively, use that tortilla as a flat chip instead of a shell.
- If the shell becomes too soft after filling: that usually means the filling is hot and juicy. Serve immediately or transfer fillings to a warm bowl and add crisp elements (radish, tortilla strips) on top just before eating.
- If shells brown unevenly in the skillet: ensure the pan is evenly heated and brush oil consistently. A quick swirl of oil in the pan before each tortilla can also help even browning.
Why this method is so forgiving
The two-step crisping—skillet then oven—gives you control. Skillet time creates the blistering and quick flavor development; the oven sets shape and deepens crunch without burning. Because you shape the tortillas while warm, they form clean bowls without breaking, and gentle pressure during baking keeps them bowl-like rather than puffing up into domes.
Nutrition snapshot
The shells themselves are a simple combination of flour and oil, so nutritional content varies by brand of tortilla and the amount of oil absorbed during prep. Use whole-wheat or lower-fat tortillas if you prefer a different macronutrient profile. Fillings will determine the overall balance of protein, fiber, and fats.
Final notes
These Crispy Taco Salad Shells are an easy way to elevate any salad or taco night. The process is quick, the results are reliably crunchy, and the same basic steps can adapt to whatever you have on hand. Start with the four large 10-inch flour tortillas and two tablespoons of a high-heat cooking oil, and you’ll be on your way to a bowl that’s as fun to eat as it is to build.
Make them for a weeknight family meal, a party appetizer, or a hands-on dinner where guests assemble their own bowls. With a crisp shell and thoughtful fillings, you’ll turn a simple idea into a memorable dish.
Crispy Taco Salad Shells
Ingredients
Equipment
Method
- Preheat the oven to 350°F (177°C). Arrange oven-safe bowls upside down on a baking sheet to use as molds and have a ladle or small bowl ready for shaping.
- Heat 2 tablespoons oil in a large skillet over medium heat until hot (about 350°F on a thermometer) but not smoking.
- Add one tortilla to the hot oil and fry 30–45 seconds on the first side until golden in spots, then flip and fry the second side 30–45 seconds until the tortilla is deep golden and begins to puff.
- Use tongs to immediately lift the tortilla from the skillet and drape it over an oven-safe bowl; press gently with a ladle or small bowl to shape it into a shell. Sprinkle with kosher salt if desired.
- Repeat frying and shaping with the remaining tortillas, adding more oil to the skillet as needed to maintain the frying temperature.
- Place the shaped tortilla shells (on their bowls) on the baking sheet and bake at 350°F (177°C) for 12–14 minutes, or until crisp and golden brown.
- Remove shells from the oven, lift them off the molds, and cool on a wire rack before serving.
Notes
- Work quickly when shaping hot tortillas to hold their shape.
- Adjust oil amount as needed to keep the skillet hot enough for frying.
- Use oven-safe bowls that create the desired shell size.
- Sprinkle salt immediately after shaping so it adheres.