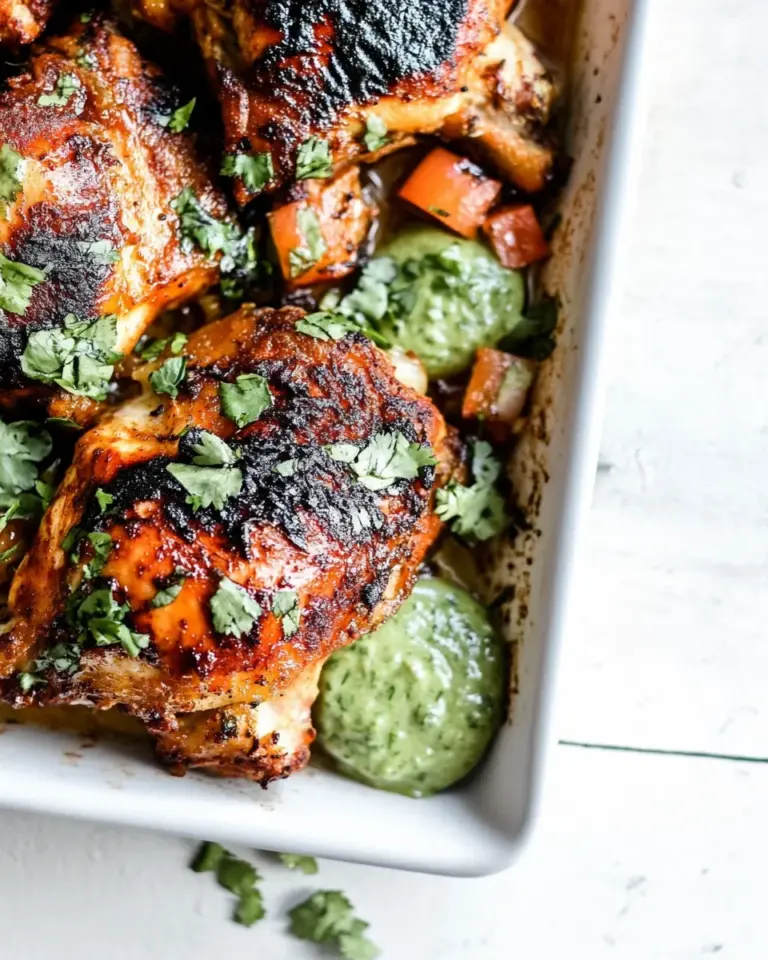
Fermented Honey Garlic Chicken Wings
There’s something undeniably irresistible about sticky, caramelized chicken wings that burst with bright garlic flavor and a whisper of tang. These Fermented Honey Garlic Chicken Wings take the familiar crowd-pleaser and elevate it with a gentle fermentation step that builds depth and complexity without adding extra fuss. Using 4 lbs. chicken wings, a simple brine, and a glaze that sings of sweet honey and savory garlic, this recipe delivers wings that are tender, deeply flavored, and perfect for sharing.
Why this recipe works
Fermentation in this recipe is subtle and deliberate: the brief soak in a lightly salted, garlicky liquid encourages beneficial flavor development and helps the chicken absorb the aromatics, making the wings more flavorful from the inside out. The honey-based glaze caramelizes beautifully in the final bake or broil, creating glossy wings with punchy garlic and a balanced sweetness. White sesame seeds add a toasty finish and crunch for contrast.
Flavor profile
- Sweet and savory: honey provides a rich sweetness that balances the savory base.
- Garlic-forward: plenty of garlic character comes through from the fermenting liquid and the glaze.
- Umami depth: gentle fermentation adds a subtle tang and rounded complexity.
- Crunch and aroma: toasted white sesame seeds add texture and a delicate nutty aroma.
Ingredients
- 4 lbs. chicken wings
- Salt and black pepper
- 1 c. water
- White sesame seeds, for garnish
- 3/4 c. honey
- 8 cloves garlic, peeled and minced
- 2 tbsp. soy sauce (use a reduced-sodium variety if you prefer)
- 2 tbsp. rice vinegar
- 1 tbsp. vegetable oil or other neutral oil
- 1/4 tsp. red pepper flakes (optional, for a touch of heat)
Tools you’ll need
- Large bowl or container with lid
- Small saucepan
- Large rimmed baking sheet
- Wire rack that fits the baking sheet
- Whisk and tongs
- Measuring cups and spoons
Before you start
Plan for a short fermentation time that enhances flavor without requiring long-term fermentation skills. The 1 cup of water in this recipe is used as the base for the fermenting/brining liquid; combined with salt and garlic, it seasons the wings and helps develop that subtle fermented note. Keep the workspace clean, and if you prefer your wings extra-crisp, pat them dry well before baking.
Step-by-step instructions
-
Prepare the wing pieces.
Rinse the 4 lbs. chicken wings under cold water and pat them dry with paper towels. Trim any excess skin or wing tips if desired, and separate drumettes from flats if they are not already separated. Place the wings in a large bowl or container that can be covered.
-
Make the fermentation brine.
In a measuring cup or small bowl, dissolve 1 teaspoon of salt into 1 c. water. Add half of the minced garlic (reserve the rest for the glaze) and stir to combine. Pour this mixture over the wings so they are evenly coated and partially submerged. Season the wings lightly with a pinch of additional salt and a few grinds of black pepper. Cover the bowl or container and let the wings rest in the refrigerator for 6 to 12 hours. This short fermentation will infuse the meat with garlic flavor and a subtle tang.
-
Preheat and prepare for baking.
When the fermentation time is nearly complete, preheat your oven to 425°F (220°C). Line a rimmed baking sheet with foil for easier cleanup and place a wire rack on top. The rack allows hot air to circulate and promotes even browning. Remove the wings from the brine and pat them very dry with paper towels—this step is key for crisp skin. Discard the brine.
-
Season the wings.
Arrange the wings in a single layer on the wire rack. Lightly season the wings on both sides with salt and black pepper. Drizzle 1 tbsp. vegetable oil over the wings and toss gently to coat, then spread them out so each wing has room to crisp.
-
Bake until mostly cooked through.
Bake the wings in the preheated oven for 30 to 35 minutes, flipping them once halfway through. You want the wings to be cooked through and starting to brown, but not fully lacquered with glaze yet. Internal temperature should reach at least 165°F (74°C).
-
Make the honey garlic glaze.
While the wings bake, combine 3/4 c. honey, the remaining minced garlic, 2 tbsp. soy sauce, 2 tbsp. rice vinegar, and 1/4 tsp. red pepper flakes (if using) in a small saucepan. Warm the mixture over medium-low heat, stirring frequently, until the honey thins and the garlic softens, about 3 to 5 minutes. Remove from heat and whisk in 1 tbsp. vegetable oil to give the glaze a silky texture.
-
Glaze and finish baking.
After the initial baking time, brush a generous layer of the honey garlic glaze over each wing. Return the wings to the oven and bake for an additional 6 to 10 minutes, watching closely so the glaze caramelizes without burning. For extra sticky, browned edges, switch the oven to broil for 1 to 2 minutes at the end—keep the oven door slightly open and stay attentive to prevent charring.
-
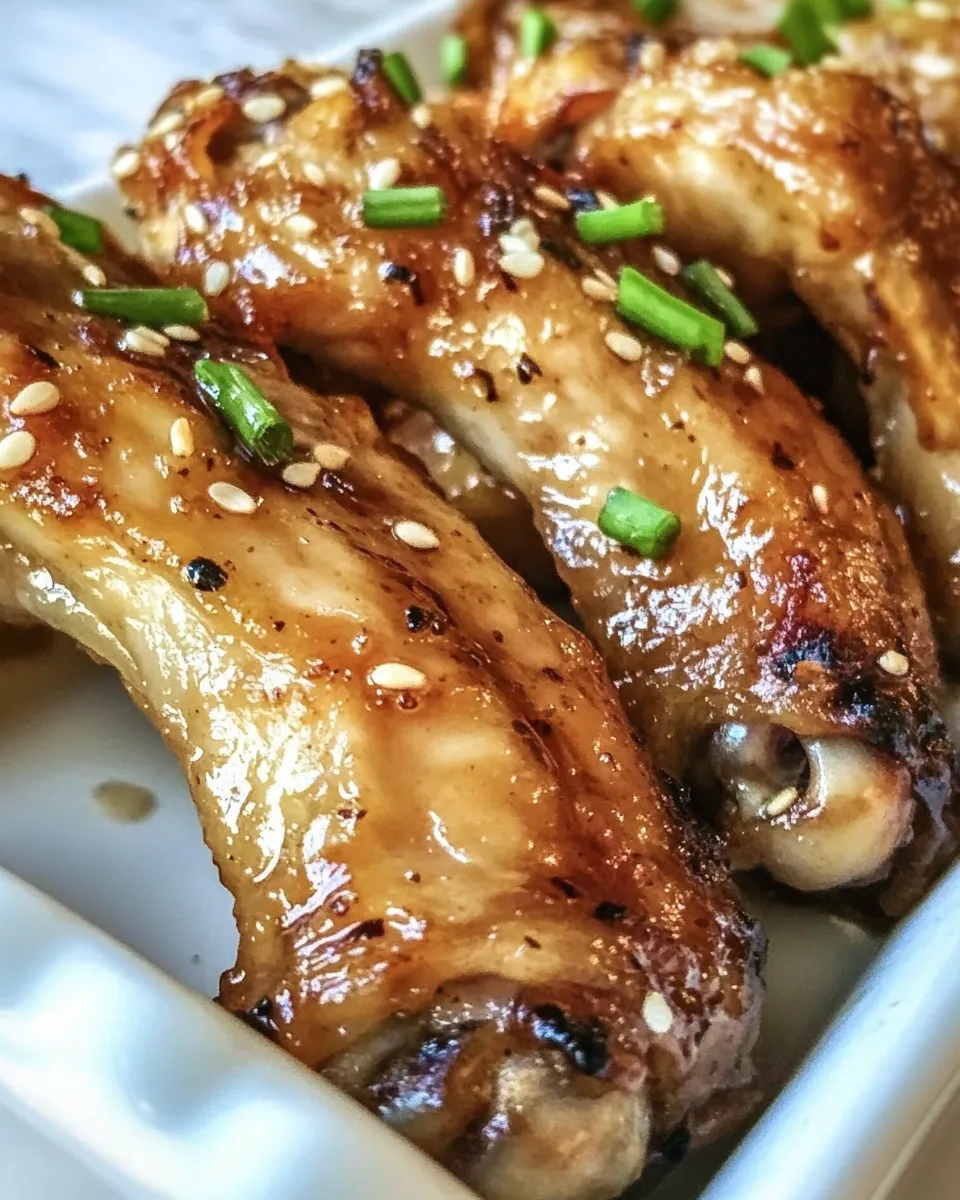
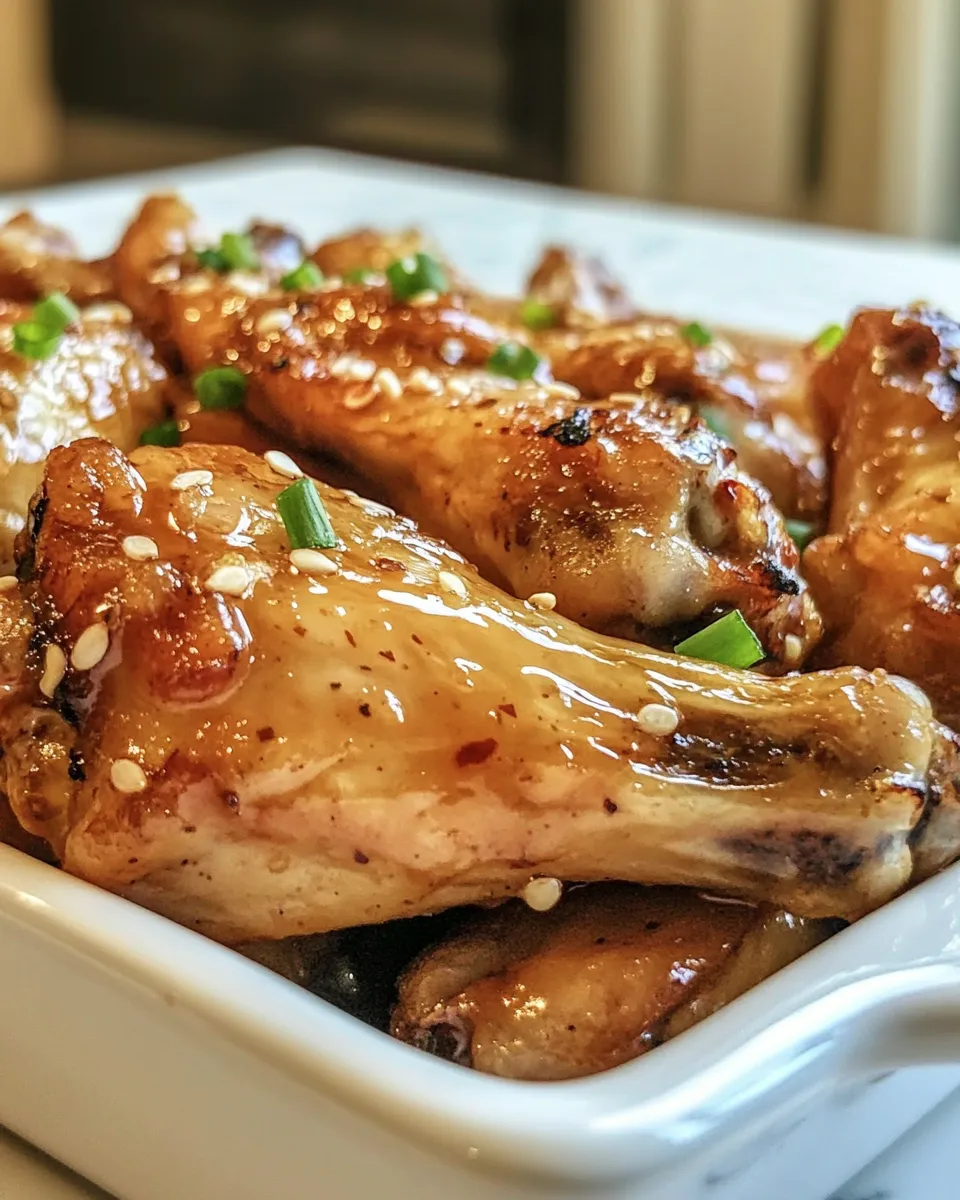
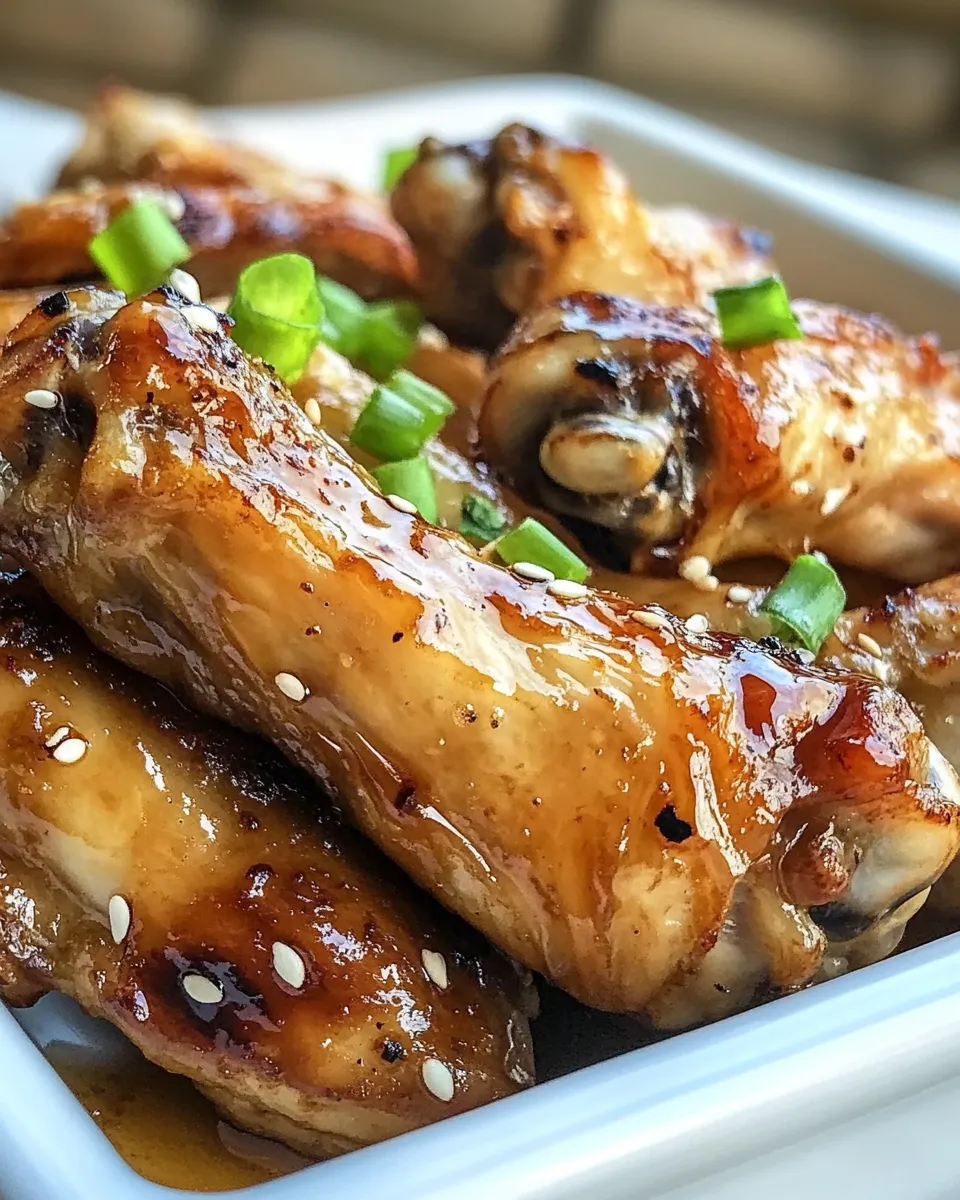
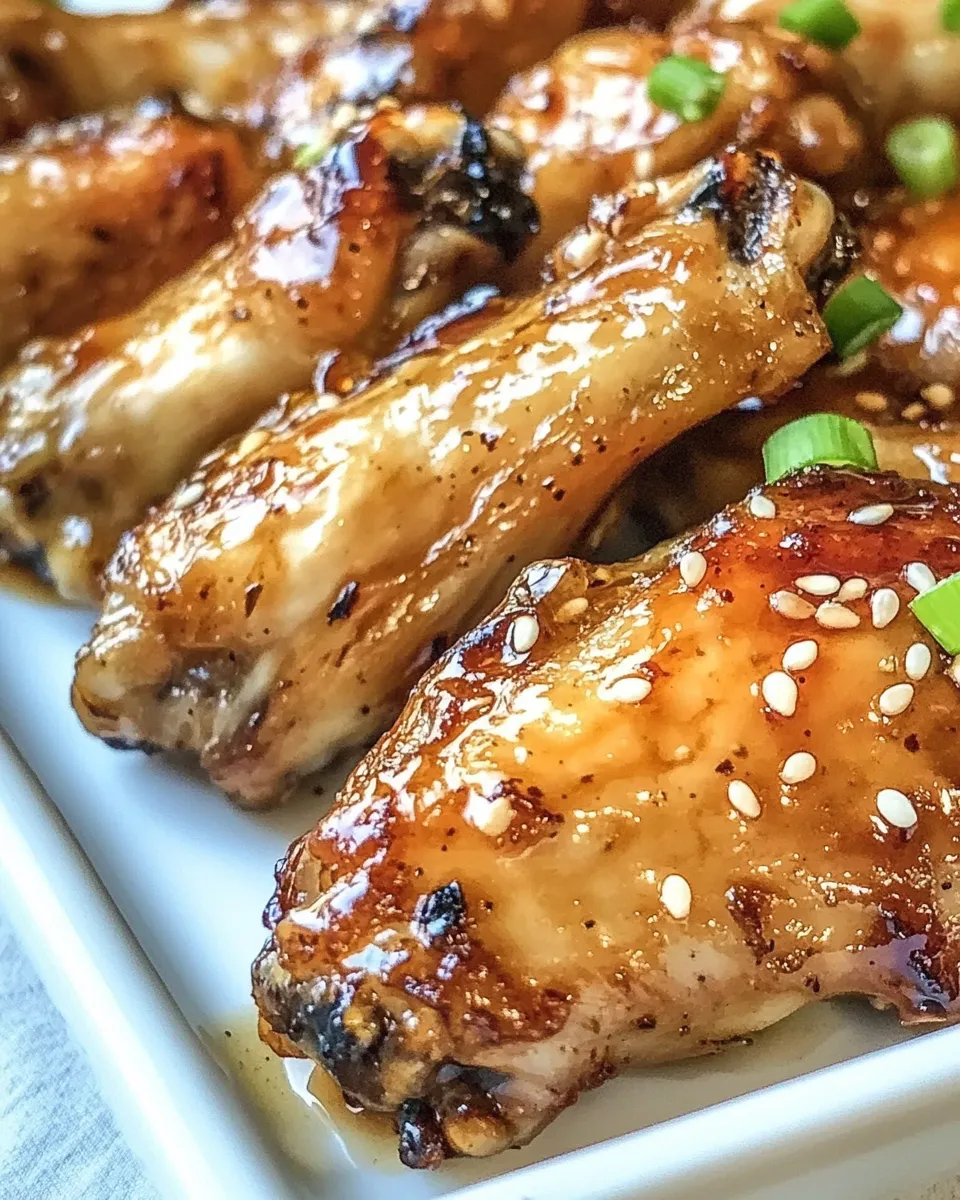
Rest and garnish.
Remove the wings from the oven and let them rest for 3 to 5 minutes so the glaze sets. Transfer the wings to a serving platter and sprinkle white sesame seeds over the top for a toasty finish and visual pop. Add a final grind of black pepper, if desired.
-
Serve.
Serve these Fermented Honey Garlic Chicken Wings warm, alongside crisp vegetable sticks, a cooling dip, or steamed rice. They’re perfect for game night, casual gatherings, or a cozy dinner for two.
Timing and yields
This recipe yields approximately 4 to 6 servings, depending on appetite and whether the wings are the main attraction. Prep time is roughly 15 minutes active, plus 6 to 12 hours for the brief fermentation. Total cook time is about 40 to 50 minutes. Plan ahead for the fermentation step so the wings have time to develop that subtle complexity.
Tips for success
- Dry wings crisp better: Pat wings completely dry after fermentation. Moisture is the enemy of crisp skin.
- Use a wire rack: Elevating the wings on a rack lets hot air circulate for even browning and crispiness.
- Watch the sugar: Honey caramelizes quickly. If broiling, stay close to prevent burning.
- Adjust heat: If you want more kick, increase the red pepper flakes or add a splash of chili paste to the glaze.
- Make-ahead glaze: Prepare the glaze up to 2 days in advance and store it refrigerated. Warm gently before brushing on the wings.
- Serving suggestion: A squeeze of fresh lemon or lime over the finished wings brightens the sweetness and amps up the flavor.
Storage and reheating
Store leftover wings in an airtight container in the refrigerator for up to 3 days. Reheat on a wire rack set over a baking sheet in a 375°F (190°C) oven for 8 to 12 minutes, or until heated through and the glaze is slightly renewed. Avoid microwaving if you want to preserve the texture of the skin.
Variations to try
- Ginger-honey twist: Add 1 tablespoon finely grated fresh ginger to the glaze for a warm, zesty lift.
- Spicy-sesame: Stir 1 tablespoon toasted sesame oil into the glaze and double the red pepper flakes for a smoky, spicy profile.
- Sticky soy-sesame: Increase soy sauce to 3 tablespoons and reduce honey to 1/2 cup for a less sweet, more savory glaze.
Final notes
These Fermented Honey Garlic Chicken Wings balance a bright garlic character with glossy honey sweetness and a whisper of fermentation that deepens the overall flavor. The method is straightforward: a short brine/ferment, a high-temperature roast for crisp skin, and a final sticky glaze that bakes to perfection. Whether you’re feeding a crowd or craving a flavorful weeknight dinner, this approach yields wings that are memorable and addictive—great for sharing, dunking, and enjoying straight from the platter.
Enjoy your wings, and feel free to experiment with the glaze components to make this recipe your signature version of Fermented Honey Garlic Chicken Wings.
Fermented Honey Garlic Chicken Wings
Ingredients
Equipment
Method
- Pat the 4 lb chicken wings dry with paper towels, then season all over with kosher salt and freshly ground black pepper to taste.
- Place the metal trivet inside the pressure cooker and pour in 1 cup water.
- Arrange the seasoned wings on the trivet in a single layer or stacked so they sit securely and do not touch the lid.
- Secure the pressure cooker lid, set the vent to sealing, select Manual/High pressure, and cook for 8 minutes.
- When the cook time is up, perform a quick release according to your cooker's instructions, open the lid, and transfer the wings to a serving platter.
- Garnish with white sesame seeds before serving.
Notes
- Pat wings dry to help seasoning adhere.
- Use kosher salt for even seasoning.
- Ensure the trivet is stable to prevent tipping.
- Adjust seasoning after cooking if needed.