Lemon Pepper Chicken
If you love bright, citrusy flavors with a peppery kick and a simple weeknight-friendly method, this Lemon Pepper Chicken is for you. In this post I’ll walk you through a straightforward recipe that delivers crisp, golden edges and juicy centers. The seasoning is bright and aromatic, and the technique is forgiving — perfect for cooks who want something fast, fresh, and reliably delicious.
This Lemon Pepper Chicken recipe uses just a few pantry-friendly ingredients and takes less than 30 minutes from start to finish. The ingredient list is short and precise: just 1/4cupall-purpose flour, 1tbspLemon Pepper Seasoning, 1lbboneless, skinless chicken breaststhinly sliced, and 2tbspbutter. The method transforms these basics into a juicy, flavorful main that pairs beautifully with steamed greens, rice, or a crisp salad.
Why this Lemon Pepper Chicken works
There’s something satisfying about a recipe that relies on excellent technique instead of an army of ingredients. Lightly dusting thin chicken slices in seasoned flour creates a delicate crust that locks in moisture while giving the lemon and pepper a surface to cling to. Cooking in butter adds a rich, slightly nutty flavor and helps the crust brown evenly. The result is a plateful of tender, bright chicken with a subtle crunch and mouthwatering aroma.
Ingredients
- 1/4cupall-purpose flour
- 1tbspLemon Pepper Seasoning
- 1lbboneless, skinless chicken breaststhinly sliced
- 2tbspbutter
Equipment you’ll need
- Large plate or shallow bowl for dredging
- Large skillet (nonstick or stainless steel) — 10 to 12 inches works well
- Tongs or a spatula
- Paper towels and a cutting board
- Measuring spoons and cups
Prep tips before you start
For best results, slice the chicken as thinly as possible — thinner slices cook quickly and stay tender. If the breasts are uneven, press them slightly or slice them evenly with a sharp knife. Patting the chicken dry with paper towels will help the flour mixture adhere and encourage a crisper exterior. Keep everything close at hand because this comes together fast once the pan heats up.
Step-by-step directions
- Prepare the dredging mixture: On a large plate or in a shallow bowl, combine 1/4cupall-purpose flour and 1tbspLemon Pepper Seasoning. Mix them thoroughly so the pepper and lemon components are evenly distributed through the flour.
- Pat the chicken dry: Use paper towels to pat the 1lbboneless, skinless chicken breaststhinly sliced dry. Removing surface moisture helps the flour adhere and promotes better browning.
- Heat the pan: Place a large skillet over medium heat and add 2tbspbutter. Allow the butter to melt and begin to foam but not burn. You want a steady medium heat so the chicken cooks through without the butter smoking.
- Dredge the chicken: Working one piece at a time, press each thin slice of chicken into the flour and lemon-pepper mixture, coating both sides evenly. Shake off any excess flour so the coating is light and even.
- Cook in batches: Add the coated chicken slices to the hot skillet in a single layer without overcrowding. If necessary, cook in two quick batches to avoid steaming the chicken. Cook the first side for about 2 to 3 minutes until the underside is golden-brown.
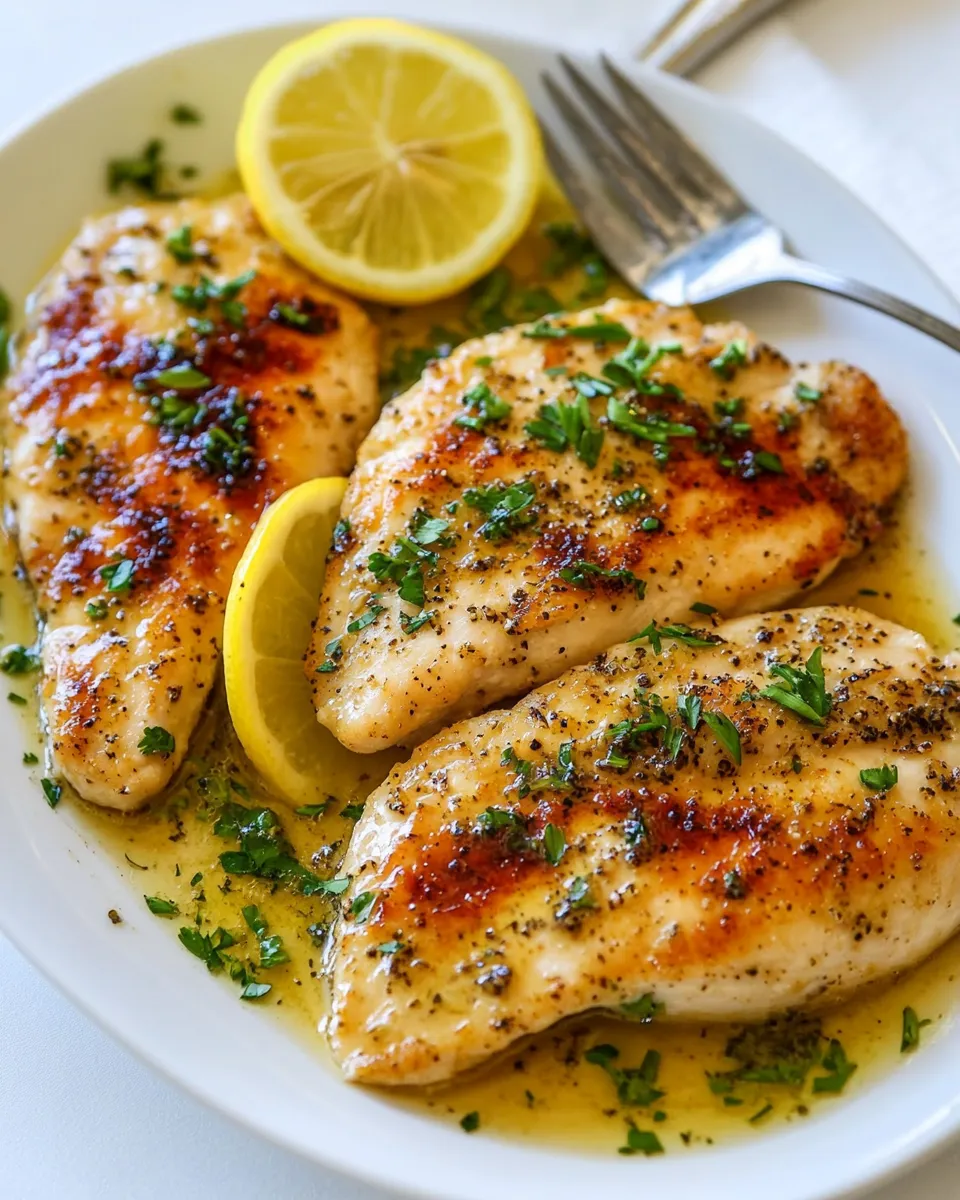
- Flip and finish: Turn each piece with tongs or a spatula and cook the other side for another 2 to 3 minutes, or until the chicken is cooked through and registers 165°F (74°C) at the thickest part. The thin slices will cook quickly — watch carefully so they don’t overcook.
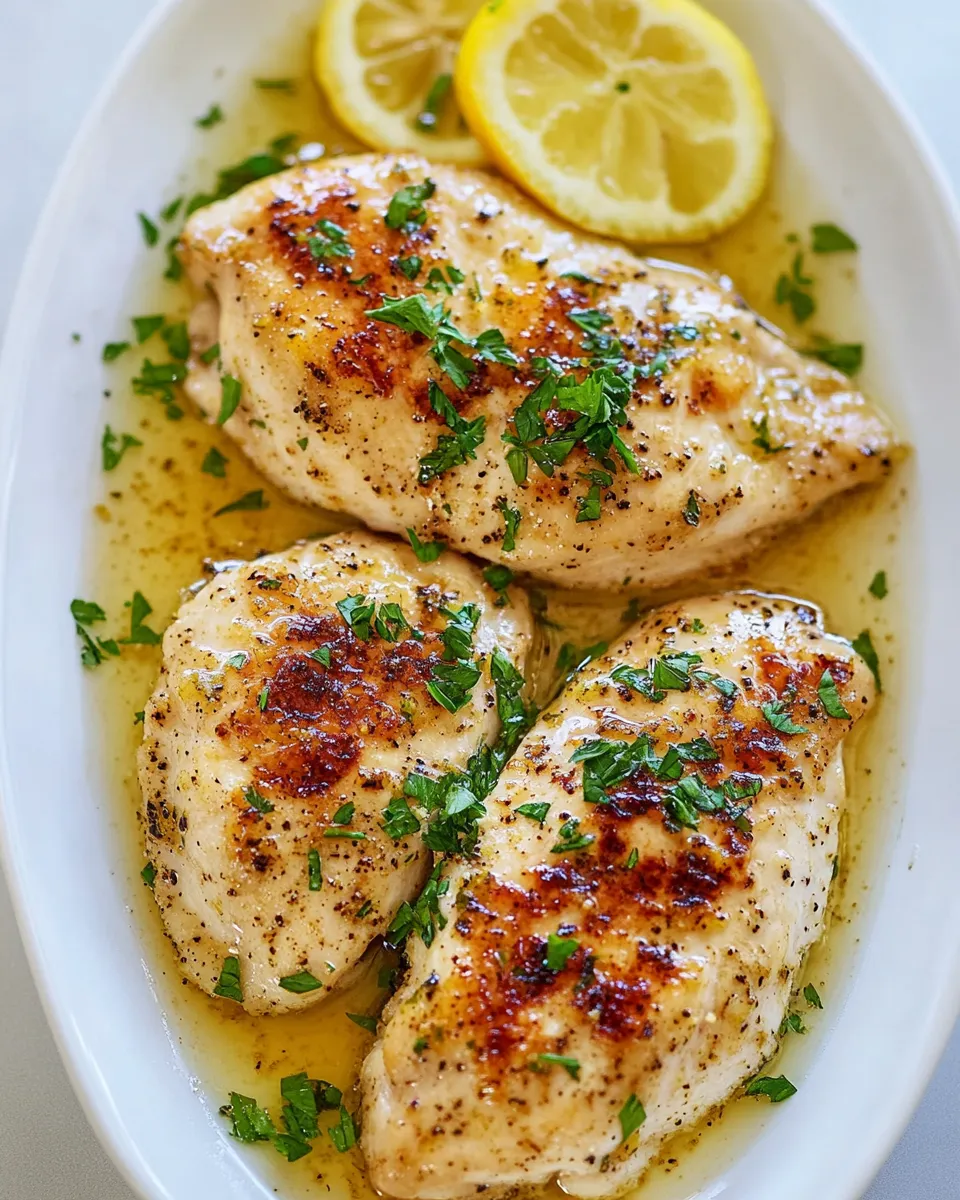
- Transfer and rest: Remove the cooked chicken to a clean plate and let it rest for a couple of minutes. Resting lets the juices redistribute so each bite stays tender.
- Repeat: If you cooked in batches, briefly wipe the skillet with a paper towel and add a small dab of butter if needed before cooking the remaining pieces. Repeat the dredging and cooking process for the remaining chicken.
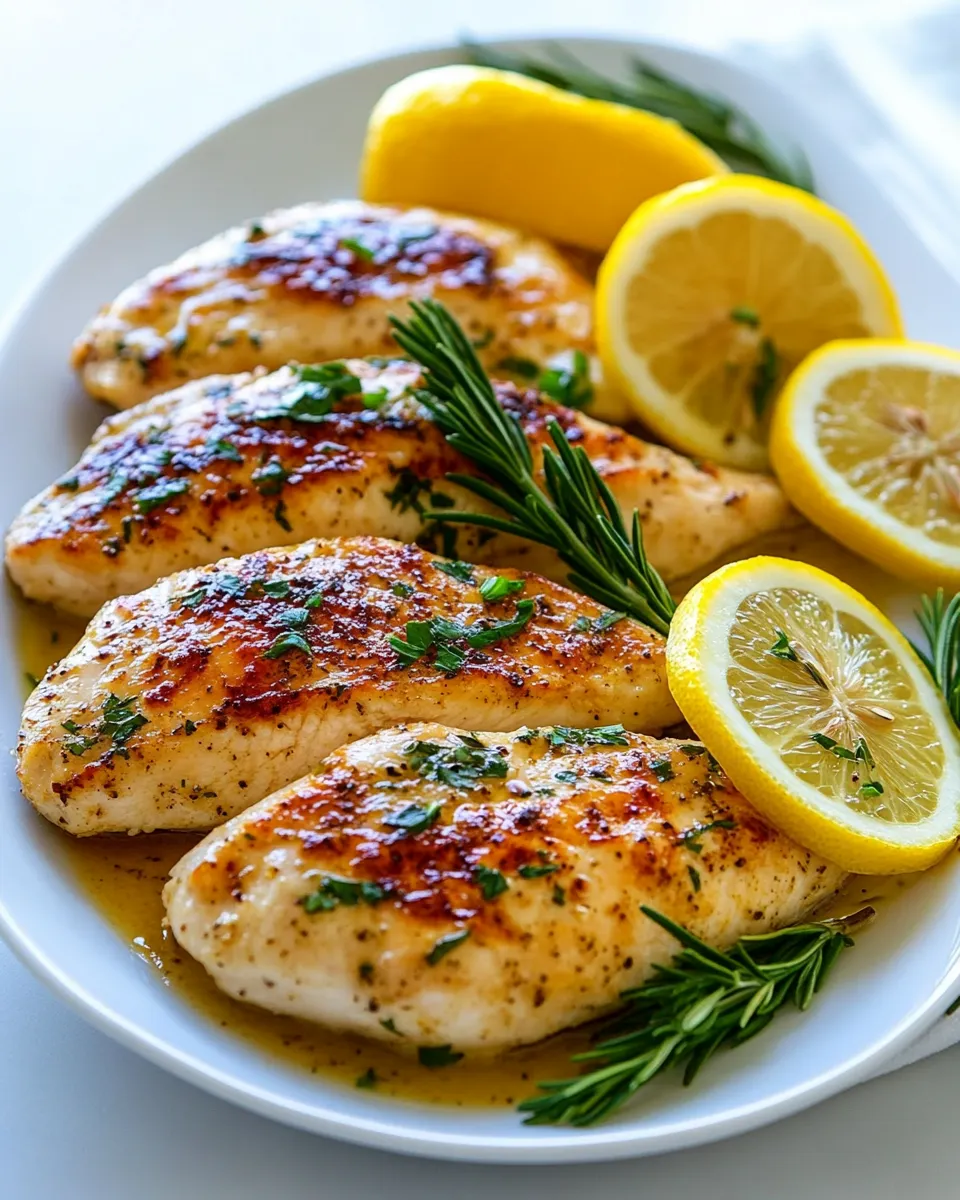
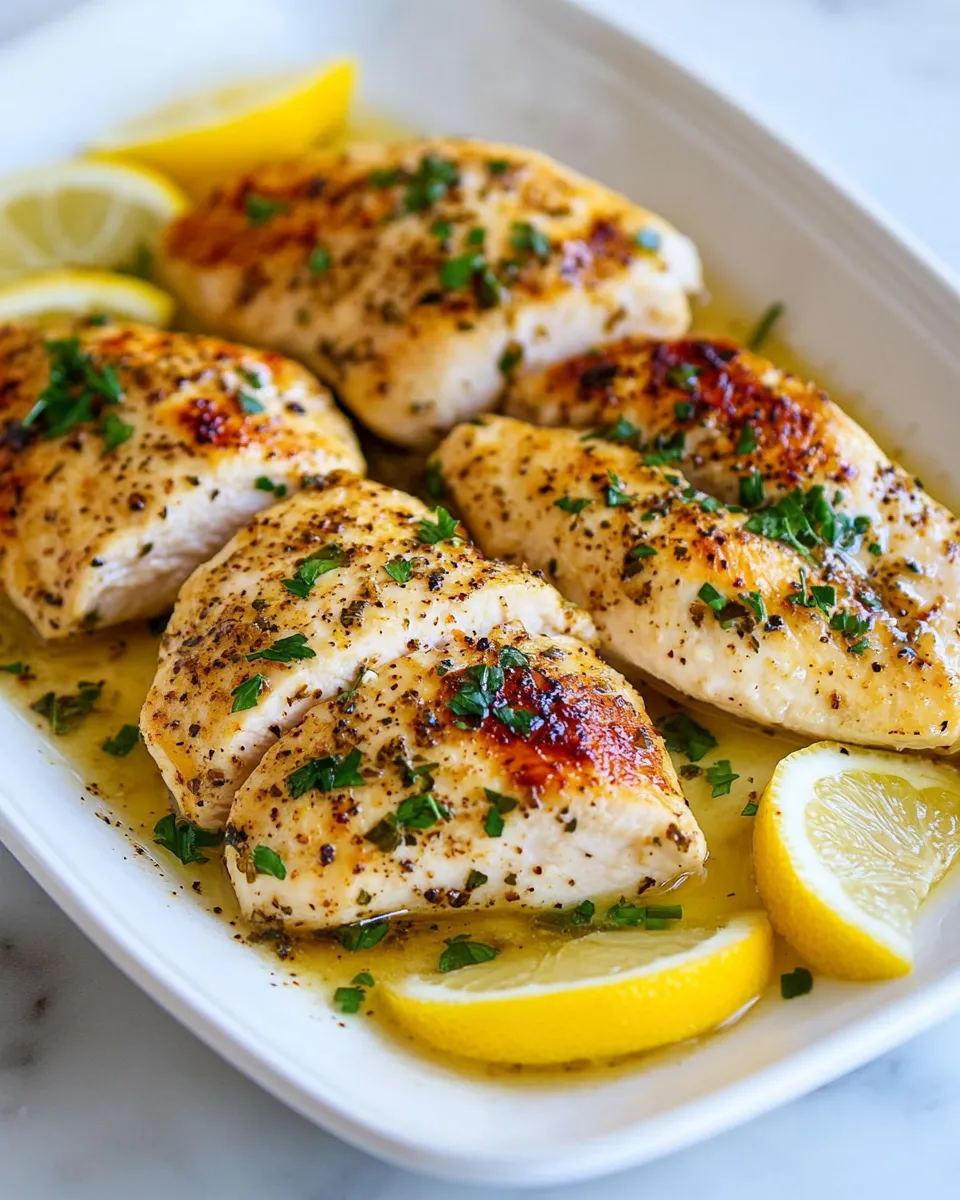
- Serve: Arrange the cooked pieces on a serving platter. The chicken is great on its own or alongside roasted vegetables, a simple salad, or a bed of rice. Spoon any pan juices over the chicken for extra flavor.
Serving suggestions and variations
This Lemon Pepper Chicken plays well with a lot of sides. For a quick weeknight dinner, serve with steamed broccoli and lemon wedges. If you want a more substantial meal, pair it with herbed rice or a light pasta tossed with olive oil, garlic, and freshly cracked black pepper. For a low-carb option, serve the slices over mixed greens and add a drizzle of extra virgin olive oil and a squeeze of fresh lemon.
You can also customize the flavor profile: for a little heat, add a pinch of red pepper flakes to the flour mix. If you prefer an herbaceous twist, stir in a teaspoon or two of dried thyme or oregano with the lemon pepper seasoning. For a crispier crust, pan-fry the chicken in clarified butter or a neutral oil and finish with the butter for flavor at the end.
Storage and reheating
Leftovers keep well for up to 3 days in an airtight container in the refrigerator. Reheat gently in a skillet over low heat to keep the coating crisp and the chicken moist. You can also reheat in a 350°F (175°C) oven for about 8–10 minutes, checking frequently so it doesn’t dry out. If you need to freeze, wrap portions tightly and freeze for up to 2 months; thaw in the refrigerator before reheating.
Why the simple ingredient list is a virtue
With just four ingredients, this Lemon Pepper Chicken is proof that thoughtful technique and quality components beat a long list of additions. The flour provides a delicate protective coating, the lemon pepper delivers the main seasoning profile, and butter brings that rich finishing note. The balance is bright, buttery, and peppery — and it highlights the natural flavor of the chicken rather than masking it.
Final notes and chef’s tips
- If your lemon pepper seasoning is particularly salty, taste a small bit of the raw mixture first and reduce any added salt elsewhere.
- Keep the pan at medium heat. Too hot and the coating will burn before the chicken cooks through; too cool and you’ll end up with a soggy crust.
- When cooking thin slices, timing matters. Stay nearby, and turn the chicken as soon as the edges look set and the underside is golden.
- For an elegant weeknight presentation, arrange the cooked slices overlapping on a platter and scatter a few lemon slices and cracked black pepper over the top.
Quick recap
This Lemon Pepper Chicken is a fuss-free, flavor-forward dish that relies on a light flour coating, bright seasoning, and butter-basted cooking for tender, well-seasoned results. The full ingredient list is short and specific: 1/4cupall-purpose flour, 1tbspLemon Pepper Seasoning, 1lbboneless, skinless chicken breaststhinly sliced, and 2tbspbutter. Follow the step-by-step directions above for a fast, satisfying meal that’s easy to customize and pairs beautifully with many side dishes.
Try this method the next time you need a quick, zesty dinner. It’s simple enough for a busy night but refined enough to serve guests — a dependable weeknight favorite with bright, peppery flavor in every bite.
Lemon Pepper Chicken
Ingredients
Equipment
Method
- In a shallow dish, combine the all-purpose flour and lemon pepper seasoning and mix until evenly blended.
- Pat the thinly sliced chicken breasts dry with paper towels, then dredge each piece in the seasoned flour, pressing lightly to coat both sides and shaking off excess.
- Heat a large skillet over medium heat and melt the 2 tablespoons of butter until foaming.
- Place the coated chicken slices in the skillet in a single layer (cook in batches if needed). Cook until golden and cooked through, about 3–4 minutes per side.
- Repeat with remaining chicken, adding more butter if necessary, then transfer cooked chicken to a plate and serve.
Notes
- Use thin slices for quicker, even cooking.
- Pat chicken dry before dredging for a better coating.
- Cook in batches to avoid overcrowding the pan.