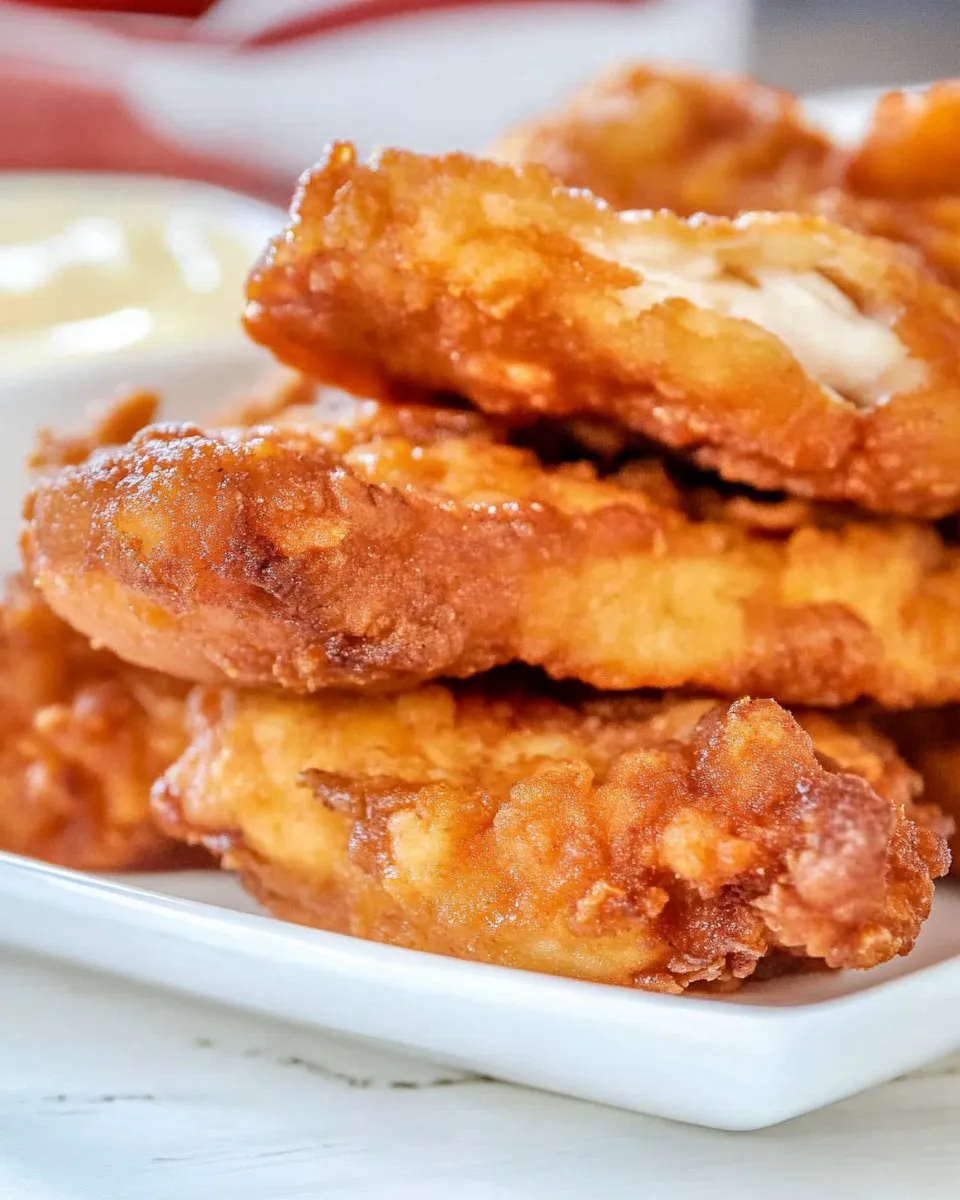
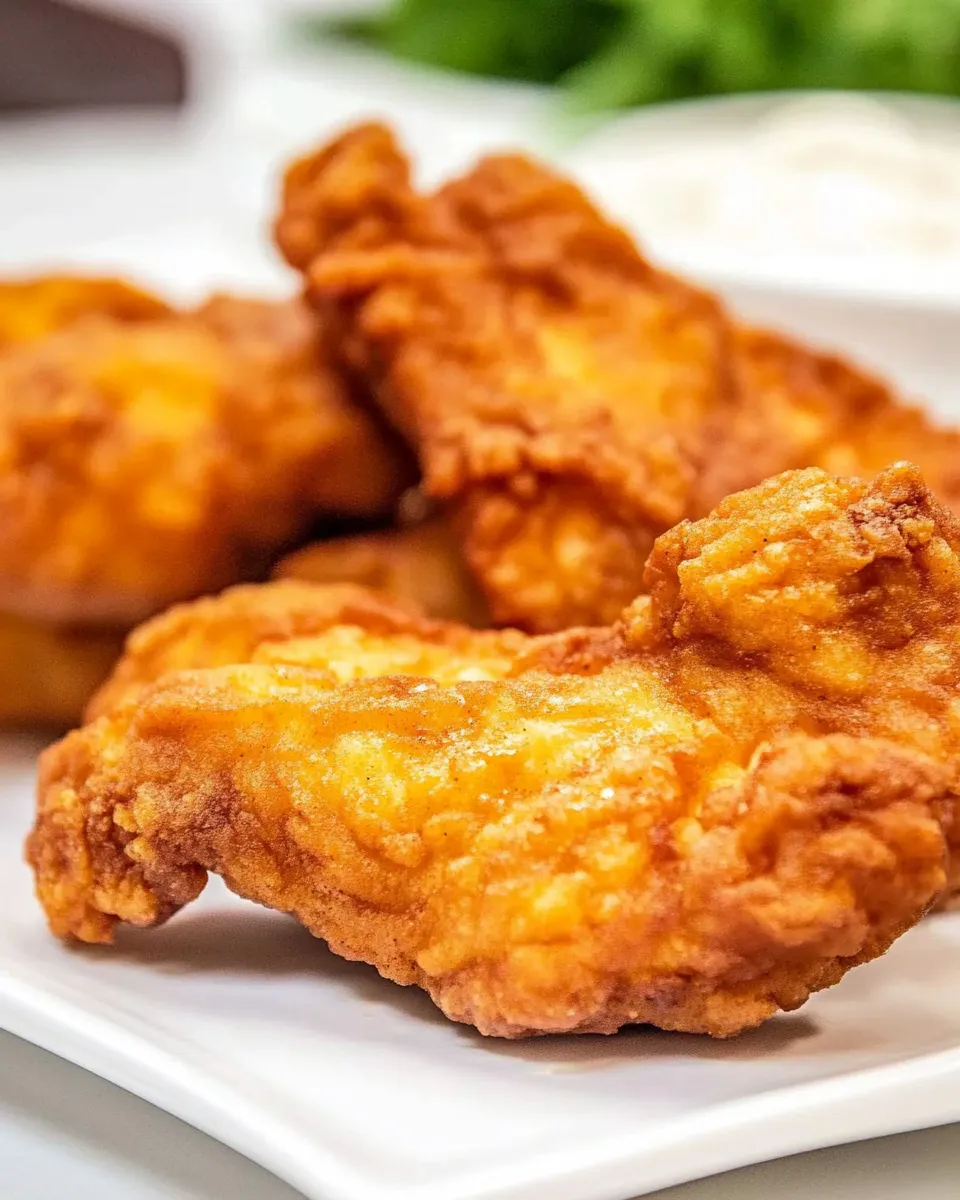
Long John Silvers Chicken Planks
Comfort food lovers, welcome. Today we’re recreating a nostalgic fast-food classic with a simple, dependable batter that yields crunchy, golden chicken planks right in your own kitchen. Think long, juicy chicken tenders wrapped in a crackly, light crust—perfect for dunking in tangy sauces or serving with fries and coleslaw. This recipe uses everyday pantry ingredients and club soda to create an airy, crisp coating that’s hard to resist.
Before we dive in, a few quick notes: the method below keeps the ingredient order and amounts as provided, while polishing the instructions into clear, practical steps you can follow without stress. The result is a restaurant-style finish that’s approachable for cooks at all skill levels.
Ingredients
- 2 pounds chicken tenders
- 2 cups all-purpose flour
- 1/4 cup cornstarch
- 2 teaspoons sugar
- 2 teaspoons salt
- 1/2 teaspoon baking powder
- 1/2 teaspoon baking soda
- 1/2 teaspoon onion salt
- 1/2 teaspoon paprika
- 1/4 teaspoon ground black pepper
- 16 ounces club soda
- vegetable oil for frying
Equipment
- Large mixing bowls
- Whisk
- Deep skillet or Dutch oven
- Thermometer (recommended)
- Tongs or a slotted spoon
- Wire rack and baking sheet
- Paper towels
Prep at a glance
This recipe relies on a simple, fizzy batter. The club soda is the magic: it lightens the flour mixture and keeps the coating from getting dense. Make the batter just before frying so it stays bubbly and the crust stays crisp.
Flavor tips
- Pat the tenders dry with paper towels before battering—this helps the coating adhere.
- Keep the batter cold by using chilled club soda straight from the fridge; contrast between cold batter and hot oil improves crispness.
- Do not overcrowd the frying vessel; cook in batches so the oil temperature recovers quickly and the crust stays crisp.
Step-by-step Instructions
The directions below have been rewritten for clarity while preserving the original order and amounts listed in the ingredient list.
- Prepare the chicken: Place the 2 pounds chicken tenders on a clean work surface. If the tenders are uneven in thickness, gently pound them to an even thickness so they cook uniformly. Pat each piece dry with paper towels to remove excess moisture—this improves batter adhesion and final texture.
- Mix dry ingredients: In a large mixing bowl, combine 2 cups all-purpose flour and 1/4 cup cornstarch. Add 2 teaspoons sugar, 2 teaspoons salt, 1/2 teaspoon baking powder, 1/2 teaspoon baking soda, 1/2 teaspoon onion salt, 1/2 teaspoon paprika, and 1/4 teaspoon ground black pepper. Whisk the dry ingredients thoroughly until they are evenly distributed and there are no lumps. This creates a balanced base for the batter and ensures even seasoning throughout the crust.
- Make the batter: Pour 16 ounces club soda into the dry mixture a little at a time while whisking gently. Whisk just until combined; avoid overmixing. The batter should be smooth with small bubbles from the club soda—this carbonation keeps the coating light and crisp. If the batter seems too thick to coat the tenders evenly, add a tablespoon or two more club soda until you reach a consistency that clings to the chicken but still drips slightly.
- Heat the oil: Add vegetable oil to a deep skillet or Dutch oven to a depth of about 2 inches, or enough to fully submerge the chicken planks during frying. Heat the oil over medium-high heat until it reaches 350°F (175°C) on a thermometer. If you don’t have a thermometer, test the oil by dropping a small spoonful of batter into the oil—if it sizzles and rises steadily to the surface, the oil is ready. Maintaining the correct temperature is important: too hot and the crust will brown before the inside cooks; too cool and the coating will absorb excess oil and become greasy.
- Coat the chicken: Working one piece at a time, hold a chicken tender and dip it into the batter, making sure it is fully coated. Allow any excess batter to drip back into the bowl so you don’t overload the oil. Repeat with additional tenders, but only add as many pieces to the oil as will fit comfortably without crowding—normally three to five tenders per batch depending on your pan size.
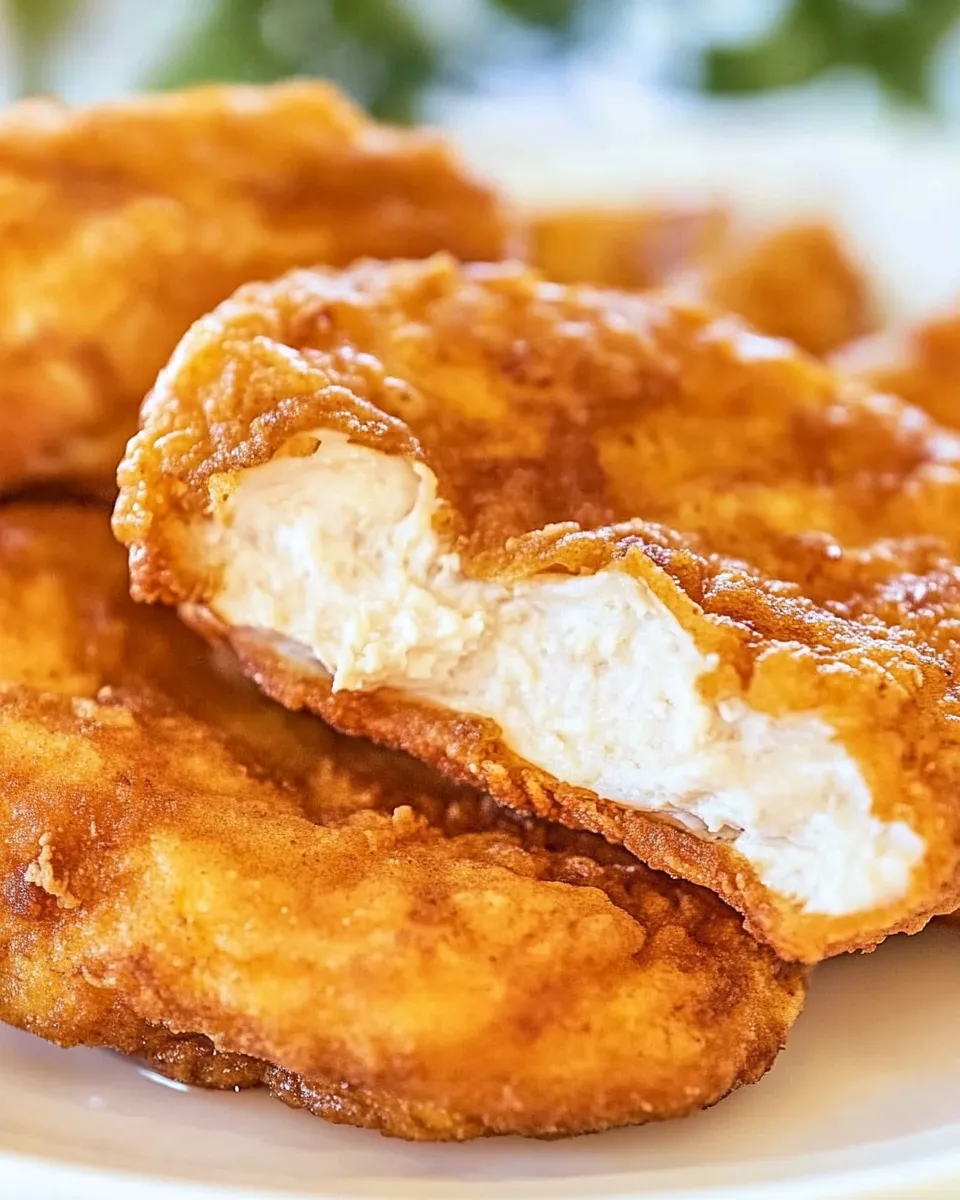
- Fry the tenders: Carefully lower the battered tenders into the hot oil using tongs or a slotted spoon. Fry for about 3 to 5 minutes per side, depending on thickness, turning only once or twice to ensure even browning. The crust should become a deep golden brown and crisp. Use a thermometer to check doneness if desired—the internal temperature of the chicken should reach 165°F (74°C).
- Drain and rest: Remove the cooked planks from the oil with tongs or a slotted spoon and place them on a wire rack set over a baking sheet to drain any excess oil. If you prefer, line a plate with paper towels—but a wire rack helps keep the crust crisp. Let the tenders rest for a minute or two; they will continue to firm up slightly as they cool.
- Repeat and finish: Continue the battering and frying process with the remaining chicken tenders, reheating the oil to 350°F (175°C) between batches if needed. Keep finished pieces on the wire rack in a warm oven (about 200°F/95°C) if preparing multiple batches so everything is hot and crisp when served.
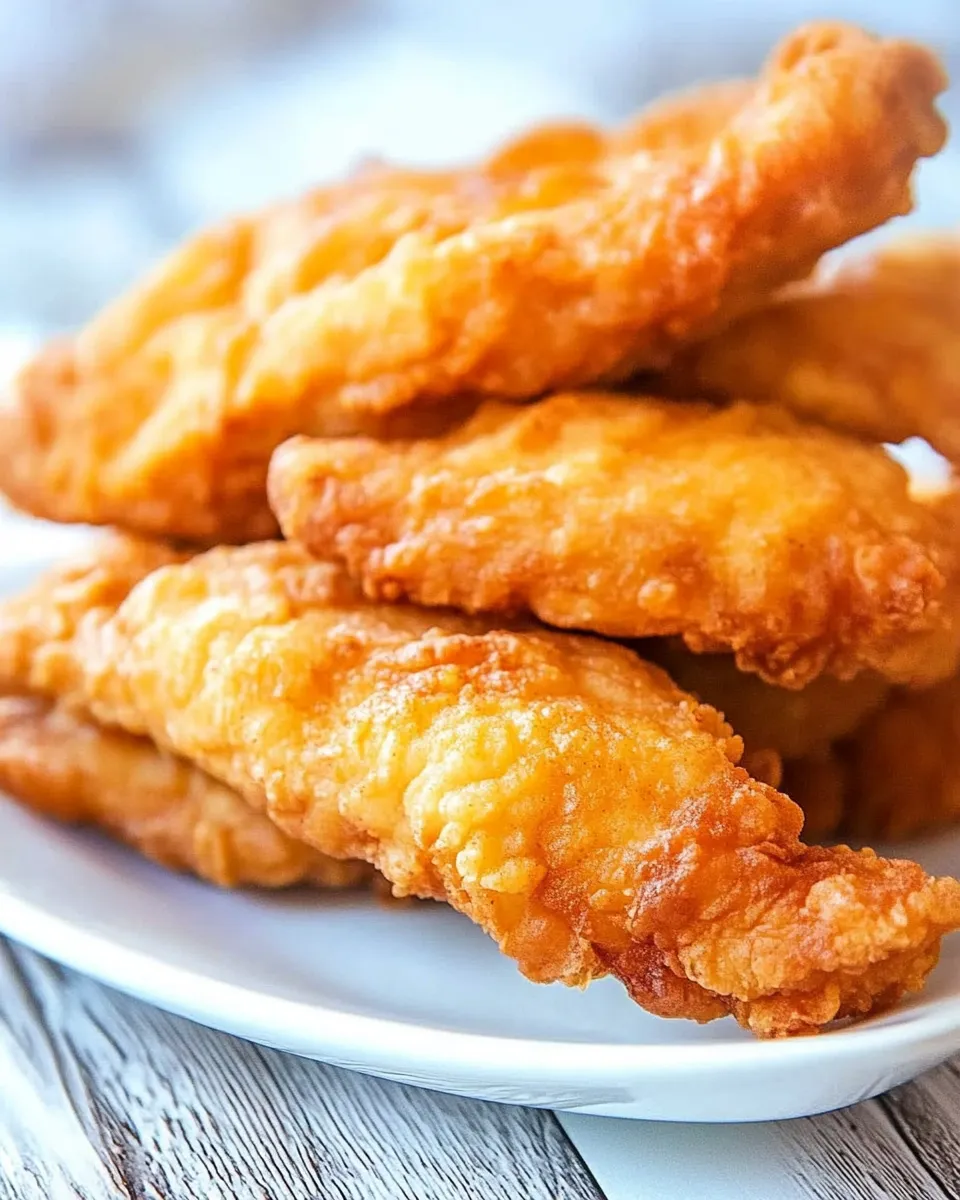
- Serve: Arrange the chicken planks on a platter and serve immediately with your favorite dipping sauces—tartar, ketchup, honey mustard, or a tangy seafood-style sauce all work well. Offer lemon wedges, fries, or a simple green salad on the side for a complete meal.
Make-ahead and storage
You can prepare the batter and dry mix in advance (store the dry mix covered) and batter the chicken right before frying for the best texture. Leftover planks keep well in an airtight container in the refrigerator for up to 3 days. To re-crisp, heat them in a 400°F (200°C) oven for 8–10 minutes on a wire rack until hot and crunchy again.
Why this method works
This recipe leans on a few simple physics tricks: cornstarch and carbonated water pair to produce a lighter, crunchier crust than flour alone. Cornstarch reduces gluten formation, which keeps the coating tender rather than chewy. The club soda introduces bubbles that create a feathery crumb when fried, and the combination of baking powder and baking soda helps with additional lift and browning. Each seasoning—onion salt, paprika, and black pepper—adds depth while the sugar and plain salt balance flavor and encourage an even golden color.
Common issues and fixes
- If your coating slides off, make sure the tenders were patted dry before battering and do not crowd the oil.
- If the crust is too pale and soggy, the oil temperature was probably too low. Let the oil return to 350°F (175°C) between batches.
- If the exterior burns before the chicken is cooked, lower the heat slightly and fry a bit longer at a steady 325–350°F (165–175°C) to allow the interior to reach a safe temperature without over-browning the crust.
Serving suggestions
These chicken planks play well with casual sides and sauces. For a classic diner-style spread, serve with crispy fries or seasoned potato wedges, coleslaw, and several dipping sauces. For a lighter plate, pair with a crisp green salad, pickles, and lemon wedges. They’re also fantastic in a sandwich—layer them on a soft bun with shredded lettuce, a smear of tangy sauce, and pickles for a satisfying handheld meal.
Final notes
This homemade take on a beloved fast-food favorite yields long, flavorful chicken planks with a satisfyingly crisp crust. The ingredient list and measurements are followed closely, and the instructions are rewritten to be clear and practical so you can confidently recreate the recipe at home. With a few simple steps and attention to oil temperature, you’ll have planks that taste like they came from a restaurant—without the wait.
Happy frying, and enjoy your Long John Silvers Chicken Planks.
Long John Silvers Chicken Planks
Ingredients
Equipment
Method
- Heat the oil: If not using a deep-fryer, pour about 8 cups vegetable oil into a heavy, deep pot and heat to 360°F (182°C) using a candy or deep-fry thermometer.
- Make the dry mix: In a large mixing bowl, whisk together the flour, cornstarch, sugar, salt, baking powder, baking soda, onion salt, paprika, and ground black pepper until evenly combined.
- Add club soda: Pour the cold club soda into the dry ingredients and stir gently; the batter will foam—continue stirring until smooth and combined.
- Coat the chicken: Dip each chicken tender into the batter to fully coat.
- Fry the chicken: Carefully lower battered chicken into the hot oil and fry for about 2 to 3 minutes per side, or until the batter is golden and the pieces float to the surface.
- Drain and rest: Remove chicken with a slotted spoon or tongs and place on a wire rack to drain; do not cover.
- Finish: Sprinkle additional salt immediately after frying if desired and serve once slightly cooled.
Notes
- Keep the club soda refrigerated until use for a crisper coating.
- Maintain oil between 350°F and 375°F to avoid greasy or burnt chicken.
- Correctly cooked pieces typically float to the surface.
- Do not cover hot fried chicken or the coating will soften.
- Sprinkle a little salt on the chicken right after frying for extra flavor.