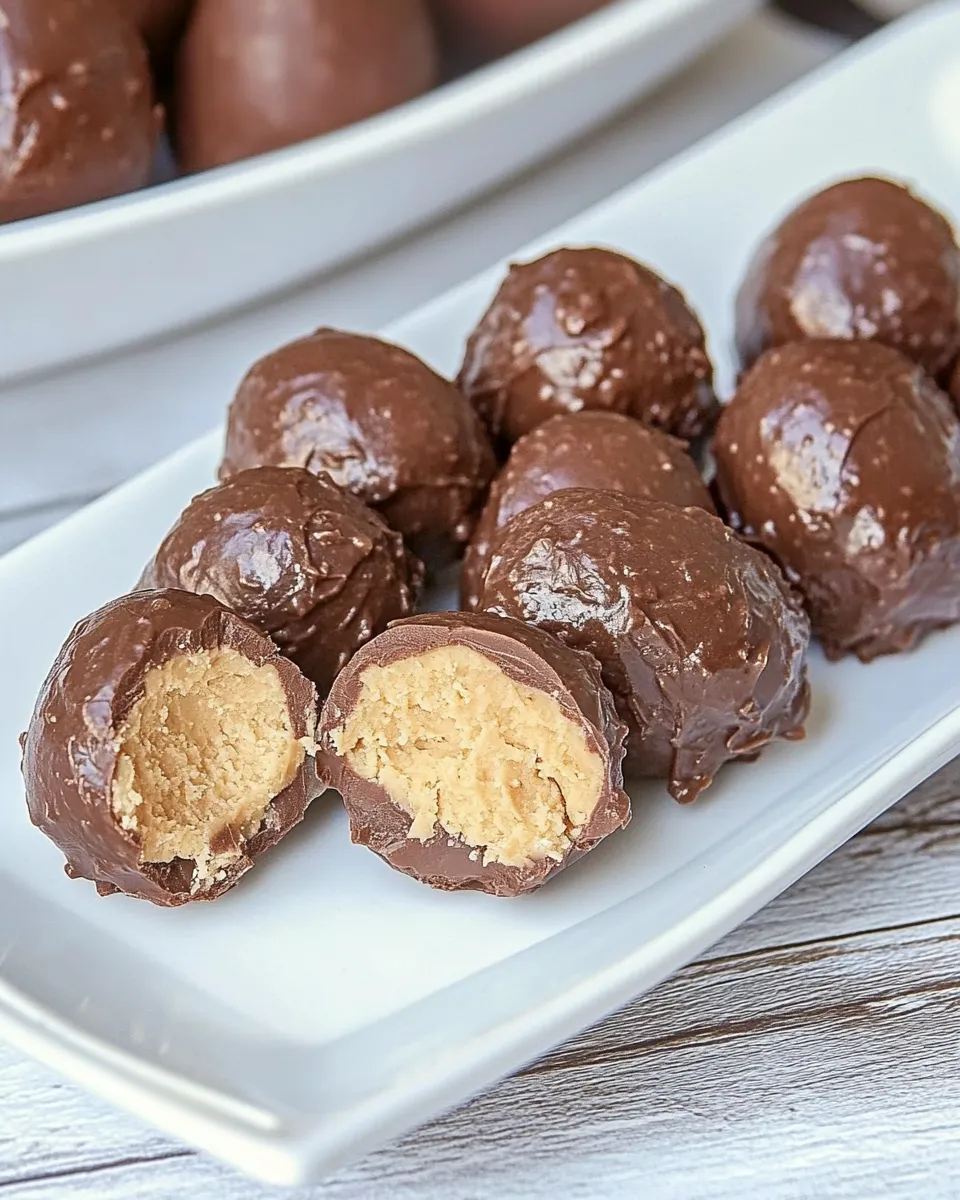
Reeses Peanut Butter Eggs
There’s something undeniably comforting about a small, perfectly shaped bite of peanut butter wrapped in chocolate. These Reeses Peanut Butter Eggs deliver that nostalgia in an easy, make-at-home recipe that comes together with just a handful of ingredients. The filling is creamy, sweet, and peanut-forward, while the chocolate shell provides a snap and glossy finish. With a few simple steps, you’ll have an impressive batch to share (or keep all to yourself).
This recipe uses pantry-friendly ingredients and requires minimal equipment, making it approachable for beginners and satisfying for seasoned home bakers. Below you’ll find an ingredient list, notes on texture and tips for success, and a clear, step-by-step method that mirrors the original order but rewritten for clarity. Make sure you read the tips before you start so your Reeses Peanut Butter Eggs set up beautifully.
Why you’ll love these
- Quick to make but tastes like a treat you’d buy at a candy shop.
- Requires only one bowl for the filling and straightforward chocolate tempering or simple melting method for coating.
- Customizable: press a fork pattern into the top, drizzle with extra chocolate, or keep them perfectly smooth.
- Perfect for parties, gift boxes, or a special homemade indulgence.
Ingredients
- 1 cup peanut butter
- 1/4 cup butter
- 1 3/4 cup powdered sugar
- 1 teaspoon vanilla
- 16 ounces chocolate
- 2 tablespoons butter
Notes on ingredients and swaps
Use a smooth peanut butter for the creamiest filling and best texture. If you prefer a slightly nuttier, textured bite, a natural peanut butter that’s been stirred smooth will also work. The recipe calls for two butter additions: 1/4 cup mixed into the filling for richness, and 2 tablespoons used with the chocolate to give the coating a glossy, silky finish.
If you choose to use a darker or sweeter chocolate, the sweetness balance will change slightly. Choose a good-quality chocolate you enjoy eating on its own for the best results. You can use milk chocolate, semi-sweet, or a mix of semi-sweet and milk to get the flavor you like.
Equipment
- Mixing bowl
- Spoon or electric mixer
- Measuring cups and spoons
- Small cookie scoop or tablespoon
- Tray lined with parchment paper
- Microwave-safe bowl or double boiler for melting chocolate
- Fork or dipping tools
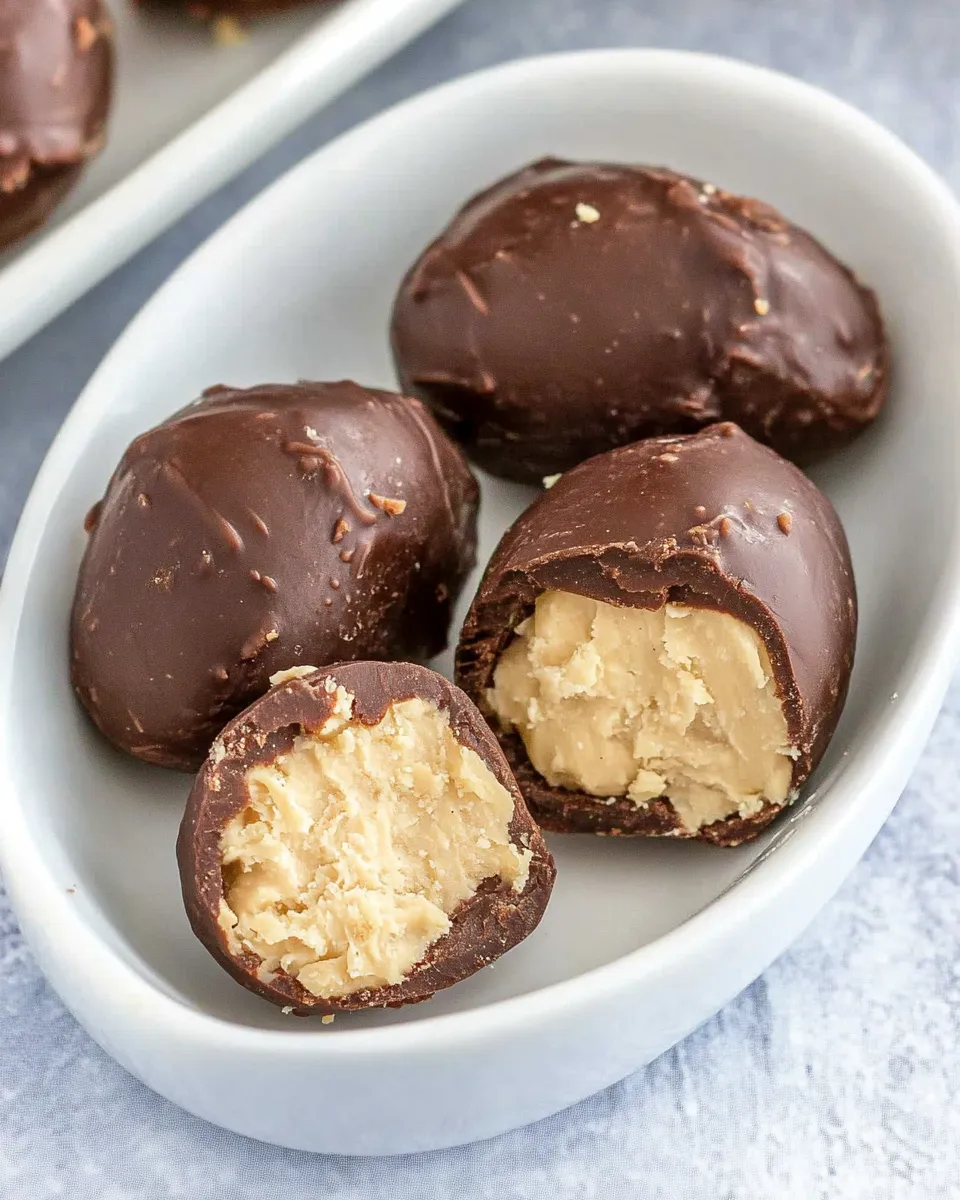
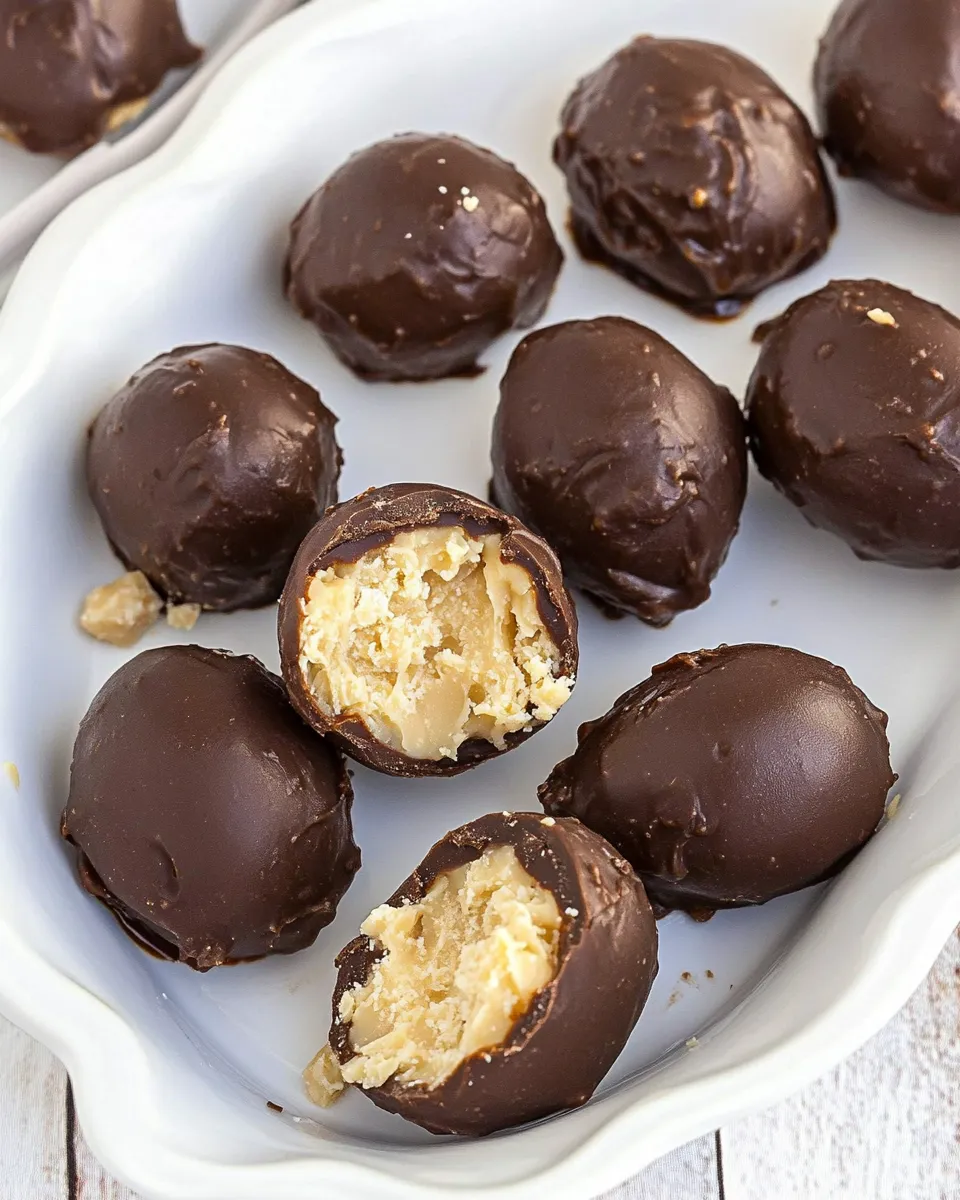
Texture and yield
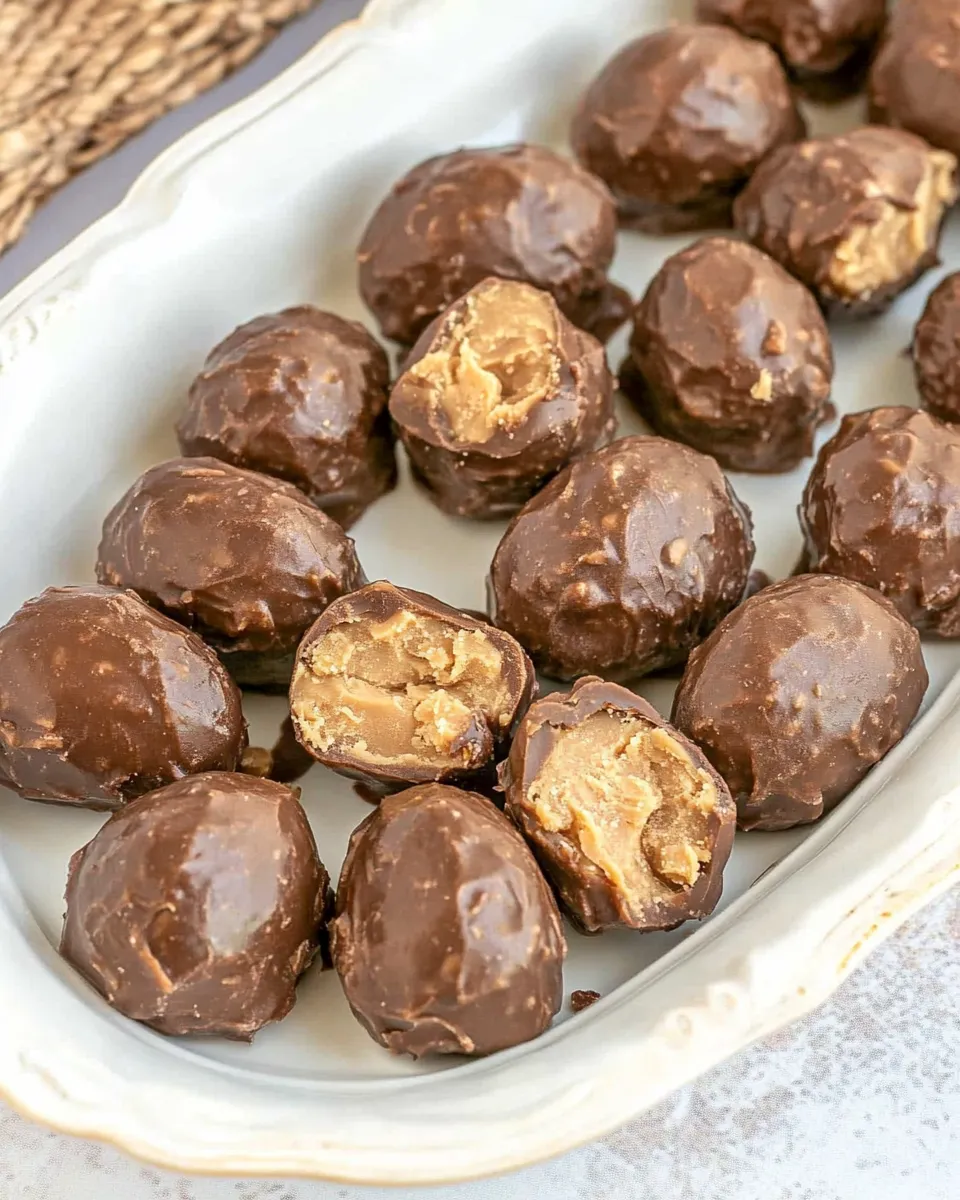
This mixture yields a soft but firm filling that’s easy to shape. You should be able to make about 20–30 eggs depending on the size you shape them. The finished candy has a dense, peanut-buttery center and a smooth chocolate shell. If your filling feels too dry, add a tiny bit more peanut butter; if it’s too soft, chill briefly and add a touch more powdered sugar until it’s manageable.
Rewritten step-by-step directions
Follow these steps in order to make Reeses Peanut Butter Eggs with a consistent, reliable result. The method below preserves the original ingredient amounts and order but rewrites the directions for clarity and ease.
- Prepare your workspace. Line a baking sheet with parchment paper and set out a small cookie scoop or tablespoon for portioning the filling. Place the 16 ounces of chocolate and the 2 tablespoons butter near your melting station so they are ready when you need them.
- Make the peanut butter filling. In a mixing bowl, combine 1 cup peanut butter and 1/4 cup butter. Use a spoon or an electric mixer on low speed to beat them together until smooth and fully combined.
- Add the vanilla. Mix in 1 teaspoon vanilla until evenly incorporated into the peanut butter and butter mixture.
- Incorporate the powdered sugar. Gradually add 1 3/4 cup powdered sugar to the bowl. Stir with a spoon or paddle attachment until the sugar is fully combined and the mixture forms a dough-like consistency that holds together when pressed. If the mixture is sticky, add the powdered sugar a little at a time until it firms up to a manageable texture.
- Shape the filling into eggs. Use a small cookie scoop, tablespoon, or your hands to portion the peanut butter mixture. Roll or shape each portion into an egg shape and place them on the prepared parchment-lined baking sheet. If the mixture becomes too soft to shape, chill it in the refrigerator for 10–15 minutes, then continue shaping.
- Chill the shaped eggs. Once all the eggs are shaped, transfer the baking sheet to the refrigerator and chill for at least 20–30 minutes so the filling firms up. Firm filling helps the eggs hold their shape during the coating process.
- Melt the chocolate and butter for coating. Place the 16 ounces chocolate in a microwave-safe bowl. Add the 2 tablespoons butter. Melt in the microwave in 20–30 second bursts, stirring between bursts until the chocolate is fully melted and smooth. Alternatively, melt the chocolate and butter together in a double boiler over simmering water, stirring until smooth. The butter helps thin the chocolate slightly and gives it a glossy finish.
- Coat the chilled eggs. Remove the chilled peanut butter eggs from the refrigerator. Working one at a time, dip each egg into the melted chocolate, using a fork or dipping tool to fully coat the egg. Let excess chocolate drip back into the bowl, then place the coated egg back onto the parchment-lined baking sheet. If you prefer a thinner shell, tap the fork gently on the edge of the bowl to remove excess chocolate before placing the egg on the parchment.
- Optional: add finishing touches. If you want a decorative look, use a fork or a small offset spatula to make a pattern on top before the chocolate sets, or drizzle a little extra melted chocolate over the top for contrast. You can also sprinkle a few chopped peanuts on some eggs for texture if desired.
- Set the chocolate. Allow the coated eggs to set at room temperature until the chocolate firms up, or place the tray in the refrigerator for about 10–15 minutes to speed up the process. Once the chocolate is fully set, the eggs are ready to serve or package.
- Storage. Store the finished Reeses Peanut Butter Eggs in an airtight container in the refrigerator for up to two weeks, or freeze for longer storage. If refrigerated, let them sit at room temperature for a few minutes before serving to soften slightly for the best texture.
Tips for success
- Make sure the peanut butter and butter are at room temperature before mixing so they incorporate smoothly.
- When melting the chocolate, avoid getting any water in the bowl; even a tiny bit of moisture can cause the chocolate to seize and become grainy.
- If the chocolate becomes too thick while dipping, gently rewarm it in short bursts, stirring between each burst, until it reaches a silky consistency.
- For a professional-looking finish, work quickly while the chocolate is fluid and tap off excess chocolate before setting on the parchment.
- To prevent fingerprints on the final candy, handle the eggs by the bottom or chill them briefly after dipping.
Variations and add-ins
Get creative with a few simple swaps and additions:
- Add a pinch of sea salt to the top of each egg after coating for a salted peanut butter variation.
- Mix 1–2 tablespoons of powdered milk into the filling for a slightly creamier, almost nougat-like texture.
- Fold in a handful of finely chopped peanuts for crunch.
- Use dark chocolate for a less sweet contrast or white chocolate for a sweeter, dessert-like treat.
- Make mini eggs using a teaspoon to portion the filling for bite-sized pieces perfect for gifting or party platters.
Frequently asked questions
Can I use natural peanut butter? Yes. If your natural peanut butter separates, stir it thoroughly first so the oil is evenly distributed. You may need to chill the mixture briefly to make shaping easier.
Do I have to temper the chocolate? No. Tempering gives chocolate a professional snap and sheen, but melting the chocolate with 2 tablespoons butter as directed will give you a glossy, smooth coating that’s perfectly fine for homemade candies.
How long do these keep? Stored in an airtight container in the refrigerator, the eggs keep well for up to two weeks. They also freeze well — place them in a single layer on a tray until frozen, then transfer to a freezer-safe container for up to three months.
Serving suggestions
These Reeses Peanut Butter Eggs are wonderful on their own, but you can present them in a few different ways: arrange them on a dessert platter with fresh berries, include them in a homemade candy box, or package them in small cellophane bags tied with a ribbon for gifts. They also pair nicely with a hot cup of coffee or a cold glass of milk.
Final thoughts
Homemade Reeses Peanut Butter Eggs are the kind of simple, nostalgic recipe that rewards patience and a few easy techniques. The creamy peanut butter filling combined with the smooth chocolate shell is a classic flavor combination that’s hard to beat. Follow the clear steps above and use the small tips to troubleshoot any issue that comes up, and you’ll have candy that looks polished and tastes even better than the store-bought kind.
When you make these, take a moment to savor the first bite: the contrast between the rich peanut butter center and the melt-in-your-mouth chocolate shell is exactly what makes this recipe a keeper. Happy candy making!
Reeses Peanut Butter Eggs
Ingredients
Equipment
Method
- Line a baking sheet with wax paper and set aside.
- In a medium mixing bowl, beat 1 cup peanut butter and 1/4 cup softened butter together until smooth.
- Add 1 3/4 cups powdered sugar and 1 teaspoon vanilla; mix until a firm, moldable dough forms.
- Using about 1 tablespoon of the mixture per piece, shape into egg shapes with your hands and place them on the prepared baking sheet.
- Refrigerate the formed eggs for about 30 minutes, or until firm, before coating.
- Melt 16 ounces chocolate in a double boiler or microwave in 30-second increments, stirring between each until smooth.
- Stir 2 tablespoons butter into the melted chocolate until fully combined and smooth.
- Dip each chilled peanut butter egg into the melted chocolate to coat, letting excess drip off, and return to the wax-lined baking sheet.
- Allow the chocolate to set at room temperature or chill briefly until firm, then serve.
Notes
- You can substitute the butter in the chocolate coating with coconut oil.