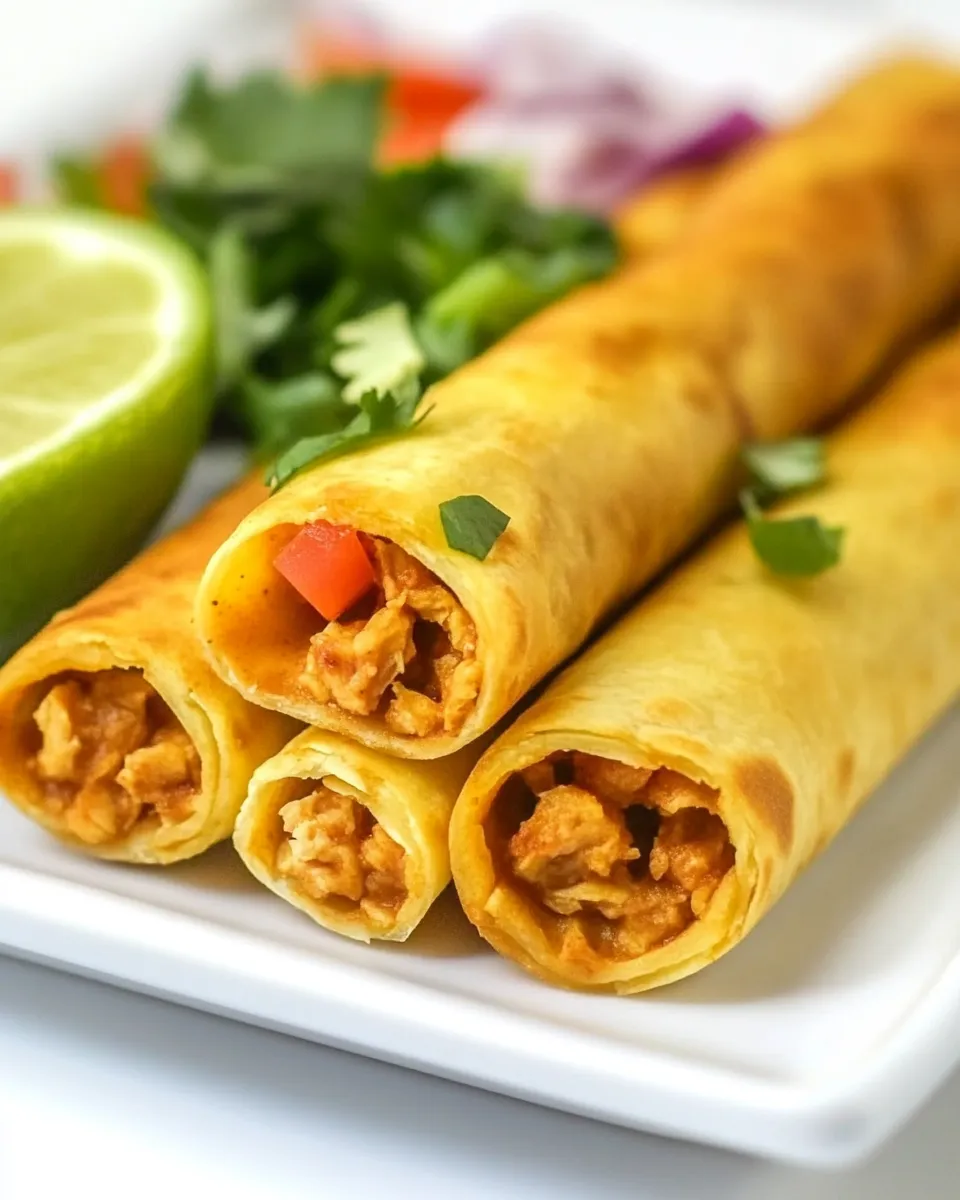
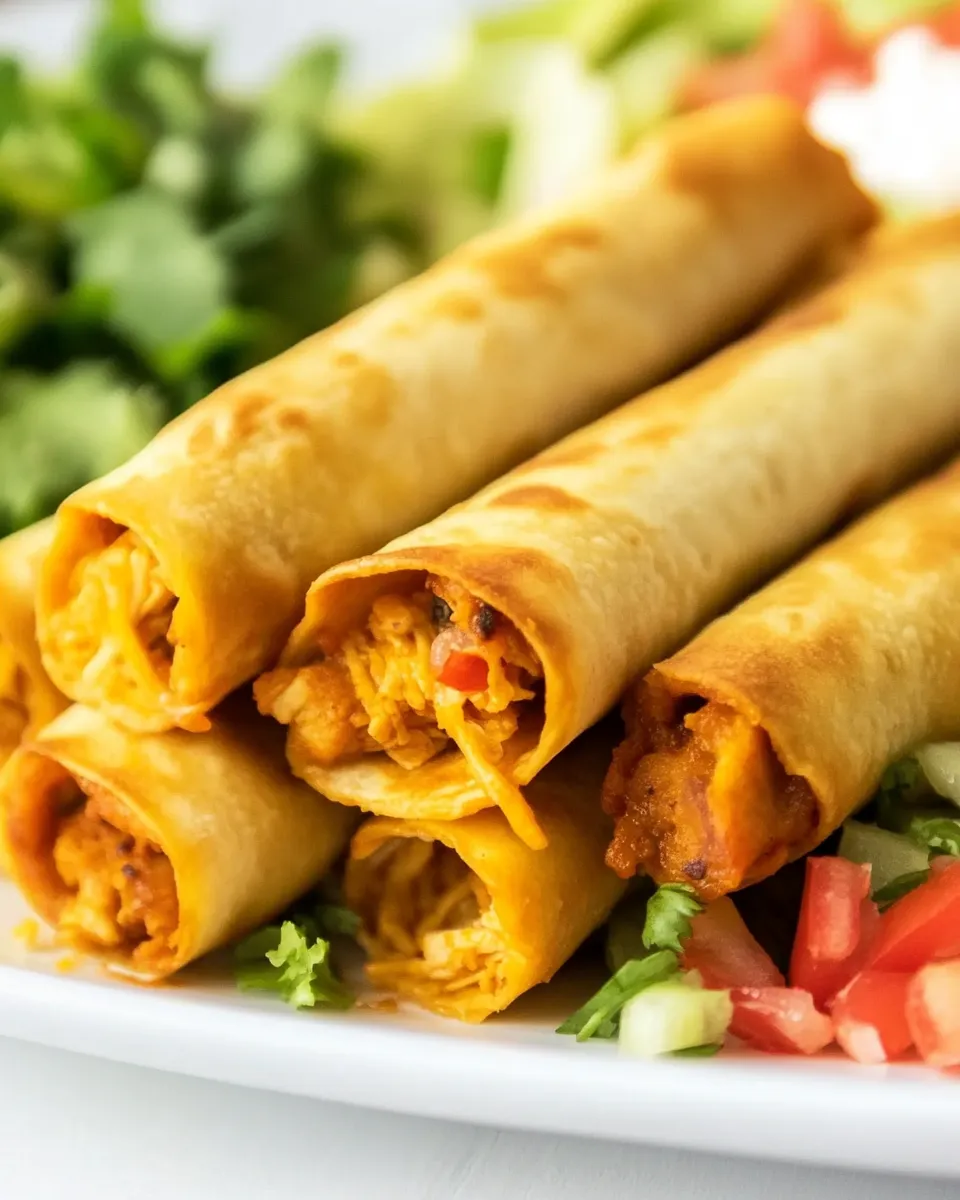
Skinny Chicken Taquitos
Bright, crunchy, and satisfyingly savory, these Skinny Chicken Taquitos are the kind of recipe you’ll reach for when you want big flavor without a lot of fuss. They’re light, straightforward to make, and perfect for weeknight dinners, casual gatherings, or a hearty snack. With just a few simple ingredients and a short prep time, you can have a batch of golden, crisp taquitos fresh from the oven.
Why you’ll love these taquitos
These Skinny Chicken Taquitos are built on a few smart swaps. Using shredded chicken breast keeps the filling lean and protein-packed. A modest amount of reduced-fat shredded cheddar adds cheesiness without overwhelming the dish. Taco seasoning, salt, and a touch of salsa bring savory depth and a little moisture so the filling stays tender. Wrapping everything in small corn tortillas and baking until crisp gives you that irresistible crunch without deep frying.
Ingredients
- 2 chicken breast, or 3 cups shredded chicken breast
- 1/2 cup fat-free shredded cheddar cheese, or reduced fat cheddar cheese
- 2 teaspoons taco seasoning
- 1 teaspoon kosher or sea salt to taste
- 1/2 cup salsa
- 16 small corn tortillas
Equipment
- Baking sheet
- Parchment paper or a nonstick baking mat
- Mixing bowl
- Small skillet or griddle (optional, for warming tortillas)
- Tongs or spatula
Prep and cook time

- Active prep: 15 minutes
- Cook time: 20–25 minutes
- Total time: about 40 minutes
Step-by-step directions
- Preheat your oven to 425°F (220°C). Line a baking sheet with parchment paper or a nonstick baking mat and set it aside.
- If your chicken breasts are not already cooked and shredded, cook them now: place the 2 chicken breast in a pot of simmering water or low-sodium broth, bring to a gentle simmer, and cook until they reach an internal temperature of 165°F (about 15–20 minutes depending on size). Remove the breasts and let them rest for a few minutes, then shred them with two forks until you have about 3 cups of shredded chicken breast.
- In a mixing bowl, combine the shredded chicken breast with 1/2 cup salsa, 2 teaspoons taco seasoning, and 1 teaspoon kosher or sea salt. Stir thoroughly so the spices and salsa coat the chicken evenly.
- Add 1/2 cup fat-free shredded cheddar cheese (or reduced fat cheddar cheese) to the seasoned chicken and mix until the cheese is evenly distributed throughout the filling.
- Warm the 16 small corn tortillas briefly so they are pliable and less likely to crack when you roll them. You can warm them in a dry skillet over medium heat for about 10–15 seconds per side, or wrap them in a damp paper towel and microwave for 20–30 seconds. Keep them covered so they stay warm while you assemble.
- Place a warmed tortilla on a flat surface and spoon approximately 2–3 tablespoons of the chicken mixture near one edge of the tortilla. Spread the filling into a narrow line, leaving a small border at the edges.
- Roll the tortilla tightly around the filling and place it seam-side down on the prepared baking sheet. Repeat this process with the remaining tortillas and filling, arranging the taquitos in a single layer without overlapping.
- If you want extra crispness, lightly spray or brush the tops of the taquitos with a small amount of oil. This step is optional but helps them brown evenly.
- Bake the taquitos in the preheated oven for 20–25 minutes, or until they are golden brown and crisp. Rotate the pan halfway through baking for even browning.
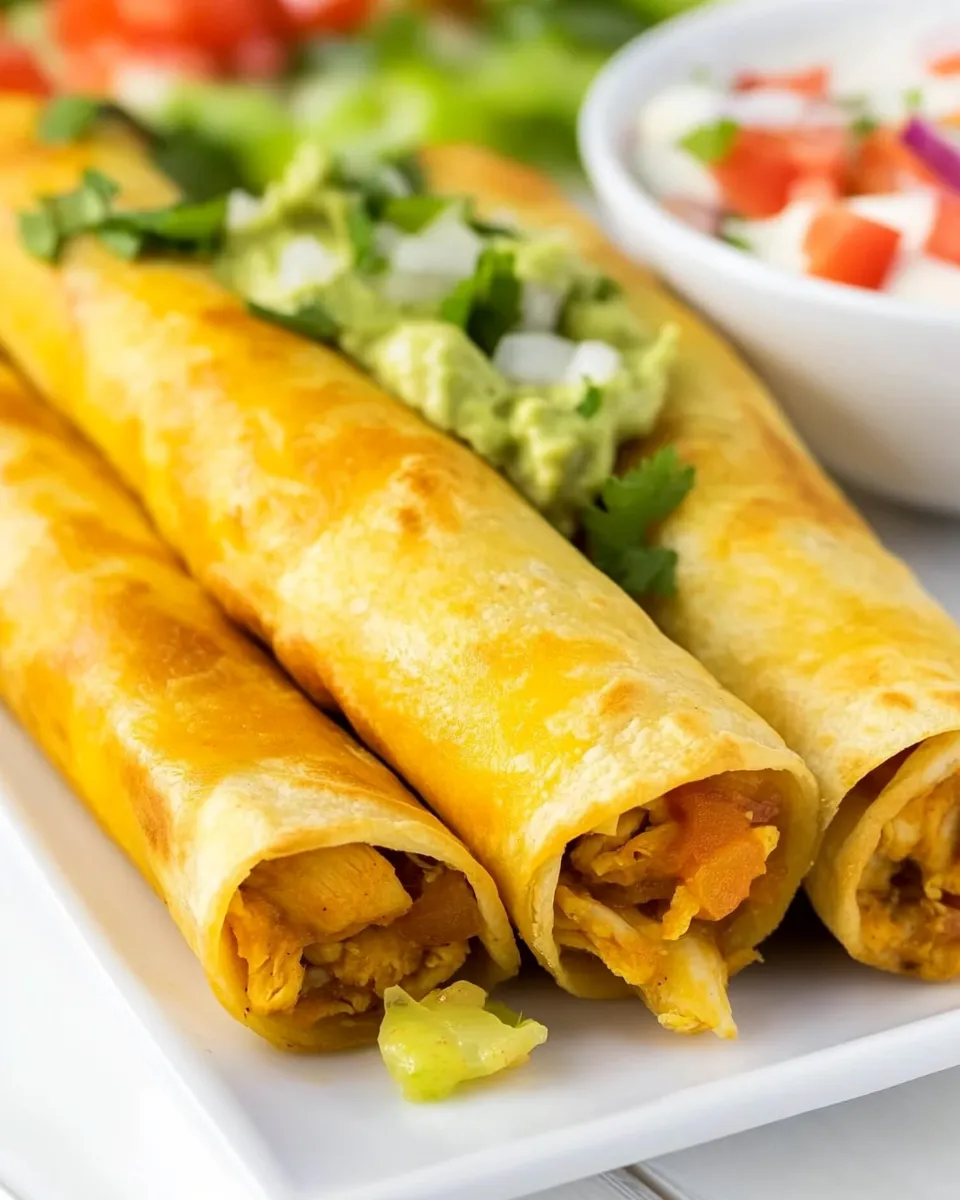
- Remove the baking sheet from the oven and let the taquitos cool for a couple of minutes. Serve warm with extra salsa, a squeeze of lime, or your favorite fresh toppings.
Troubleshooting and tips
- If your shredded chicken seems dry, add a touch more salsa to loosen the mixture before filling the tortillas.
- To avoid tortillas cracking, do not over-warm them. Just make them pliable so they roll easily.
- Arrange taquitos seam-side down on the baking sheet so they stay closed while baking.
- Make ahead: prepare and roll the taquitos, then cover and refrigerate before baking. Bake directly from the fridge, adding a few extra minutes to the cook time.
- Freezing: Arrange assembled, unbaked taquitos on a tray and freeze until solid. Transfer to a freezer-safe bag. Bake from frozen, increasing bake time until hot and crisp throughout.
Serving ideas
These Skinny Chicken Taquitos pair beautifully with a simple green salad, pickled onions, or a bowl of guacamole. For dipping, set out more salsa, plain yogurt or a yogurt-based dip, and lime wedges. Sprinkle with fresh cilantro or a pinch of smoked paprika for a final flourish.
Nutritional notes
This recipe keeps portion sizes and calories in mind by using lean shredded chicken breast and reduced-fat cheese. Small corn tortillas are lower in calories than many larger flour options, and baking delivers that satisfying crunch without frying.
Make it your own
Want to change up the flavor? Add a squeeze of lime to the chicken filling, a handful of finely chopped cilantro, or diced mild peppers for sweetness and texture. If you prefer a spicier bite, stir through a little hot sauce or increase the taco seasoning to taste.
Storage
- Refrigerate leftovers in an airtight container for up to 3 days. Reheat in a 375°F (190°C) oven for 8–10 minutes to restore the crispness.
- Frozen assembled taquitos will keep for up to 2 months. Bake from frozen and add a few extra minutes to the cooking time.
Final thoughts
These Skinny Chicken Taquitos are a gently modern take on a crowd-pleasing classic. They’re quick to pull together, easy to customize, and satisfyingly crunchy without the extra oil. Whether you’re feeding a family or prepping a snack for guests, this recipe is a dependable, delicious choice that’s ready to become a regular in your rotation.
Skinny Chicken Taquitos
Ingredients
Equipment
Method
- Preheat the oven to 400°F (200°C).
- Place the chicken breasts in a casserole dish with 1/2 cup water, cover, and bake 35–40 minutes until juices run clear and the internal temperature reaches 165°F (74°C). Let cool slightly, remove skin if present, and shred the chicken.
- In a medium bowl, combine shredded chicken, 1/2 cup shredded cheddar, 2 teaspoons taco seasoning, 1 teaspoon salt (or to taste), and 1/2 cup salsa until evenly mixed.
- Warm the corn tortillas in a small skillet over medium heat about 20 seconds per side, until pliable. Work quickly so they stay warm.
- Spoon about 3 tablespoons of the chicken mixture onto the center of each warmed tortilla, roll tightly, and place seam-side down on a parchment-lined baking sheet.
- Brush the tops of the taquitos with a little olive oil or lightly mist with nonstick cooking spray.
- Bake the taquitos for 15–20 minutes, until hot and crisp.
- If desired, sprinkle additional shredded cheddar on top and return to the oven briefly until the cheese melts. Serve with Greek yogurt, guacamole, or salsa as desired.
Notes
- Warm tortillas briefly to make them pliable and reduce cracking.
- Work quickly when spreading filling so tortillas stay warm.
- Use shredded rotisserie or pre-cooked chicken as a shortcut if desired.
- You can brush with oil or use nonstick spray to help crisp the taquitos.
- Top with extra cheese and briefly return to oven to melt if desired.