Whataburger Chicken Strips
There’s something deeply comforting about a perfectly crisp, golden chicken strip—juicy meat sealed inside a crunchy coating that sings with each bite. These Whataburger Chicken Strips bring that nostalgic drive-thru magic to your kitchen. With a simple marinade of buttermilk, a lightly seasoned flour dredge, and a quick fry to reach golden perfection, this recipe yields strips that are tender, flavorful, and ideal for dunking in honey mustard or your favorite dipping sauce.
Before we dive into the method, here’s a clear list of ingredients. I tested this with 1 1/2 pounds of chicken tenderloins, which makes a lovely dinner for four when paired with fries or a salad, or a fun appetizer for a party.
Ingredients
- 1 1/2 pounds chicken tenderloins
- 2 1/2 cups buttermilk
- 2 cups all-purpose flour
- 1 1/2 teaspoons salt
- 1 1/2 teaspoons ground black pepper
- 1/2 teaspoon garlic salt
- vegetable oil for frying
- honey mustard sauce or other dipping sauce to serve
Why this works
Two straightforward ideas make these Whataburger Chicken Strips stand out. First, the buttermilk bath breaks down muscle fibers and seasons the meat from the inside, guaranteeing a juicy interior. Second, the seasoned flour coating fries to a reliable crispiness. There’s no need for a double-dip breadcrumb layer here—this single dredge delivers a satisfying crunch and a clean, classic flavor profile that will please both kids and grown-ups.
Equipment you’ll need
- Large bowl for marinating
- Shallow dish for dredging
- Large heavy skillet or Dutch oven for frying
- Tongs and a wire rack or paper towels for draining
- Instant-read thermometer (helpful, optional)
Prep and timing
This recipe is forgiving and moves quickly once you start. Allow at least 30 minutes for the chicken to marinate in the buttermilk—but if you can, an hour or up to 4 hours will make the chicken even more tender. Active cook time is about 12–15 minutes, depending on the size of your tenderloins and the temperature of the oil.
Step-by-step directions
- Marinate the chicken. Place 1 1/2 pounds chicken tenderloins in a large bowl. Pour 2 1/2 cups buttermilk over the chicken, ensuring each tenderloin is coated. Cover the bowl and refrigerate for at least 30 minutes, or up to 4 hours. The buttermilk will gently tenderize and season the meat.
- Prepare the seasoned flour. In a shallow dish, combine 2 cups all-purpose flour, 1 1/2 teaspoons salt, 1 1/2 teaspoons ground black pepper, and 1/2 teaspoon garlic salt. Whisk the mixture until the spices are evenly distributed and there are no lumps. This seasoned flour is the only coating the strips need.
- Heat the oil. Pour vegetable oil into a heavy skillet or Dutch oven so it reaches about 1/2 to 3/4 inch up the sides. Heat the oil over medium-high heat until it reaches approximately 350°F (175°C). If you don’t have a thermometer, test the oil by dropping a small pinch of flour in—if it sizzles immediately, the oil is ready. Keep the heat steady so the oil doesn’t smoke or get too hot.
- Dredge the strips. Remove the chicken from the buttermilk, allowing any excess to drip off back into the bowl. One by one, press each tenderloin into the seasoned flour, coating all sides thoroughly. Shake off any extra flour so the coating is even but not clumpy. Place the dredged strips on a plate or tray while you work through the batch.
- Fry in batches. Carefully add a few chicken strips to the hot oil, taking care not to overcrowd the pan. Overcrowding drops the oil temperature and produces greasy coating rather than a crisp crust. Fry for about 3 to 4 minutes per side, turning once with tongs, until the strips are deep golden brown and cooked through. The internal temperature should reach 165°F (74°C) when tested with an instant-read thermometer.
- Drain and rest. Use tongs to transfer cooked strips to a wire rack set over a baking sheet or to a plate lined with paper towels to drain. Rest the strips for a couple of minutes—this helps the juices redistribute and keeps the coating crisp.
- Finish the remaining strips. Continue frying the remaining chicken in batches, returning the oil to the proper temperature between batches. If the oil gets too hot, reduce the heat slightly; if it cools too much, allow it to recover before adding more chicken.
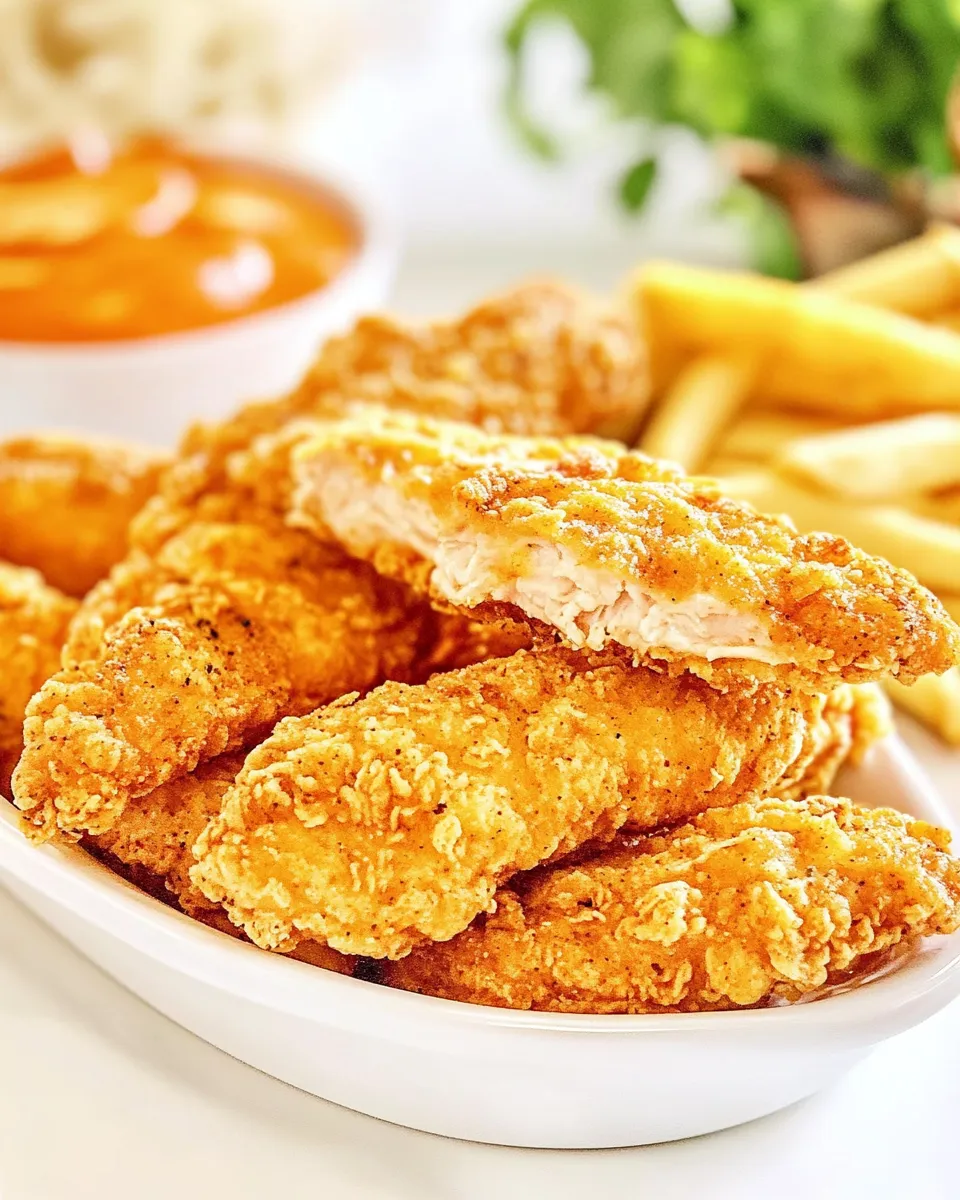
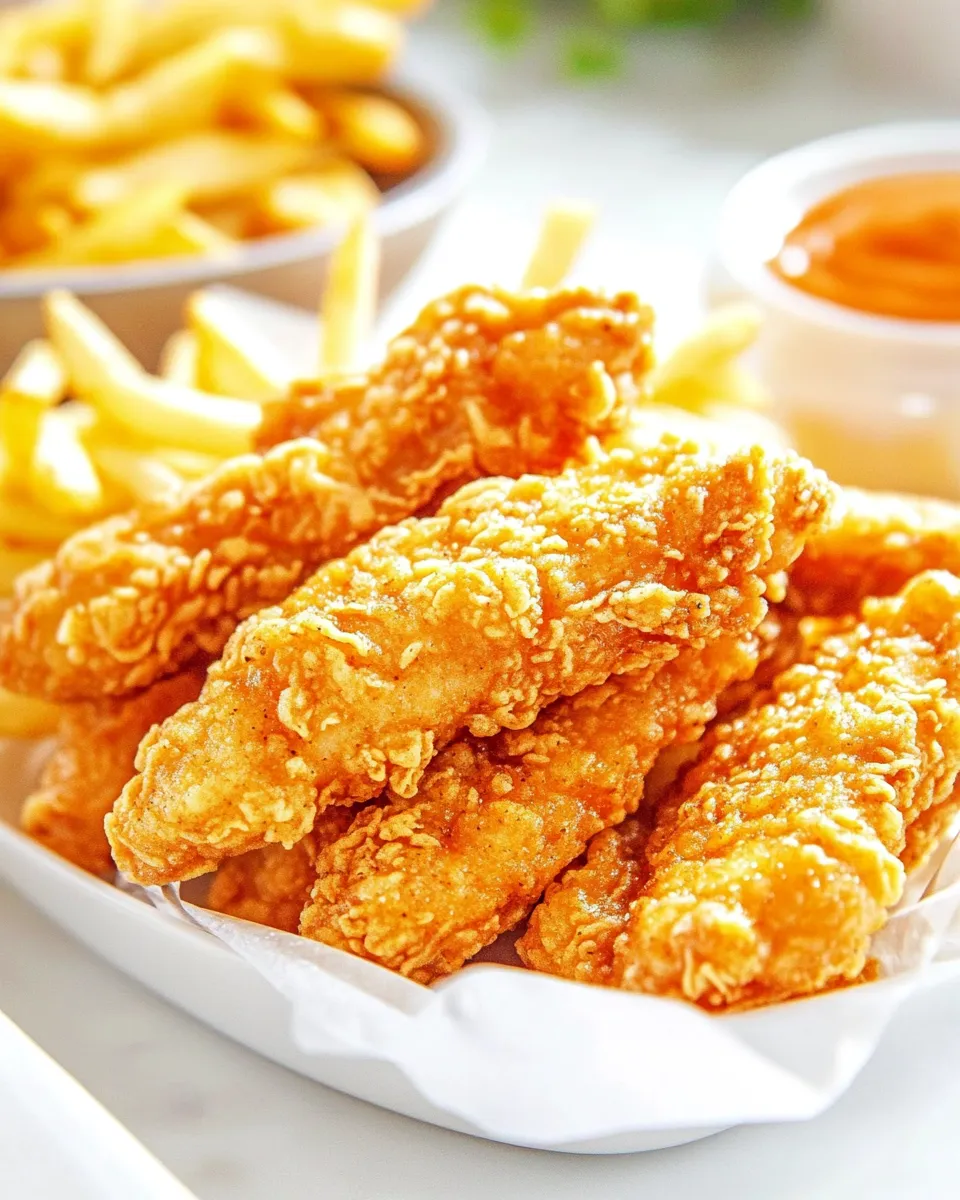
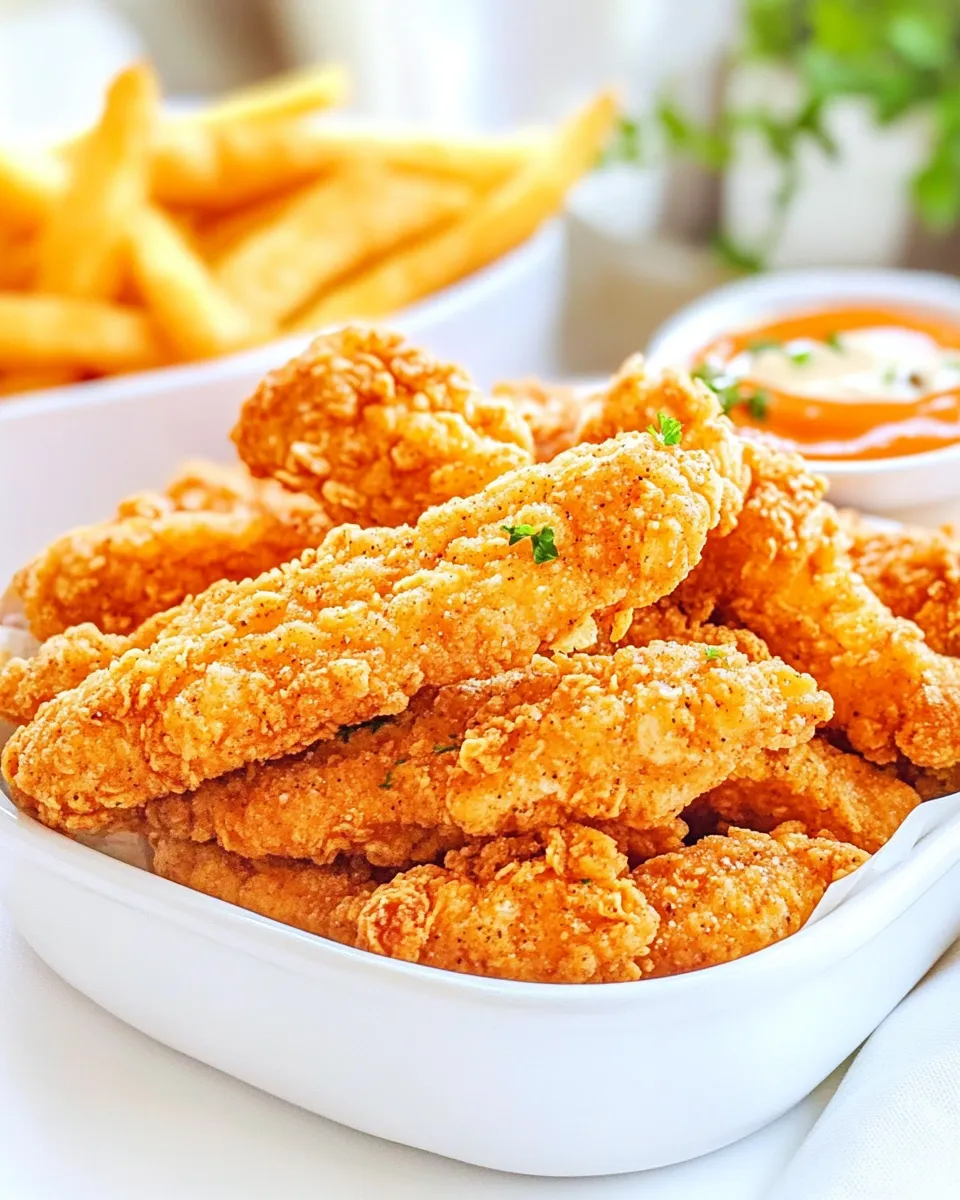
- Serve. Arrange the Whataburger Chicken Strips on a platter with honey mustard sauce or your favorite dipping sauces. They are best enjoyed warm and crispy.
Troubleshooting and tips
- If your coating gets soggy, the oil temperature is likely too low. Let the oil return to about 350°F before adding more chicken.
- Keep the strips similar in size so they cook evenly. If some are much thicker, consider pounding them lightly to uniform thickness.
- To make the coating extra-crisp, you can double-dip: after the first dredge and a quick return to buttermilk, dredge again in the seasoned flour. This is optional and not necessary for the classic result.
- For easier cleanup, use a splatter screen and don’t overfill the pan with oil.
Serving suggestions
Serve these Whataburger Chicken Strips in a basket lined with parchment for a casual presentation, or stack them on a platter with lemon wedges for brightness. They pair beautifully with crinkle-cut fries, a crisp green salad, coleslaw, or roasted vegetables. Offer an assortment of dipping sauces—honey mustard is classic, but ranch, barbecue, or a spicy sriracha mayo are all excellent companions.
Make-ahead and storage
If you want to prepare in advance, marinate the chicken in buttermilk up to 4 hours ahead. Dredge and store the strips in the refrigerator for up to a few hours, separated on a tray so the coating doesn’t stick. Fried strips are best eaten the day they’re made; if you must store leftovers, cool completely, then refrigerate in an airtight container for up to 3 days. Reheat in a 400°F (200°C) oven or in an air fryer for 5–7 minutes to recapture crispness.
Flavor variations
While the recipe as written creates a classic strip, you can easily adapt the seasoning to suit your preferences. Add 1 teaspoon paprika for a smoky note, 1/2 teaspoon cayenne for heat, or a teaspoon of onion powder for deeper savory flavor. Mix these into the seasoned flour so the spices fry with the crust.
Final thoughts
These Whataburger Chicken Strips are simple, satisfying, and built on reliable techniques: a tenderizing buttermilk soak, a seasoned flour dredge, and careful frying to golden brown. The recipe stays faithful to straightforward flavors, making each bite familiar and addictive. Whether you’re cooking for a weeknight dinner, a game-day crowd, or a cozy family lunch, these strips are an easy route to crisp, juicy chicken everyone will reach for.
Quick recipe card
Yield: Serves 3–4
Prep time: 10 minutes (plus 30–240 minutes marinating)
Cook time: 12–15 minutes
Ingredients reminder:
- 1 1/2 pounds chicken tenderloins
- 2 1/2 cups buttermilk
- 2 cups all-purpose flour
- 1 1/2 teaspoons salt
- 1 1/2 teaspoons ground black pepper
- 1/2 teaspoon garlic salt
- vegetable oil for frying
- honey mustard sauce or other dipping sauce to serve
Method summary: Marinate the chicken in buttermilk for at least 30 minutes. Mix flour with salt, black pepper, and garlic salt. Heat vegetable oil to about 350°F. Dredge tenderloins in the seasoned flour, shake off excess, and fry in batches for 3–4 minutes per side until golden and cooked through. Drain on a rack, rest briefly, and serve with honey mustard or your preferred dipping sauces.
Enjoy these Whataburger Chicken Strips warm, crisp, and perfect for dunking. They hit the comforting notes you expect from a classic strip while staying straightforward enough to make any night feel a little more special.

Whataburger Chicken Strips
Ingredients
Equipment
Method
- Place the chicken tenderloins in a large bowl and pour in the buttermilk to fully submerge; cover and refrigerate for at least 2 hours or overnight.
- In a shallow bowl or plate, whisk together the flour, salt, black pepper, and garlic salt until evenly combined.
- Stir about 1/2 cup of the reserved buttermilk into the flour mixture until it forms a shaggy, slightly wet batter; discard any remaining soaking buttermilk.
- One at a time, dredge each chicken tenderloin in the batter to coat completely, then place on a wire rack and let rest a few minutes so the batter adheres.
- Heat vegetable oil in a deep fryer or large heavy-bottomed pot to 350°F (175°C). Use enough oil so strips can float while frying.
- Carefully add 3–4 breaded strips to the hot oil without crowding and fry until golden brown and cooked through, about 3–5 minutes depending on thickness; the internal temperature should reach 165°F (74°C).
- Remove the strips with tongs and drain on a wire rack set over a rimmed baking sheet; repeat with remaining strips.
- Serve the chicken strips hot with honey mustard or your preferred dipping sauce.
Notes
- Soaking in buttermilk tenderizes and flavors the chicken.
- Do not overcrowd the fryer to keep the oil temperature steady.
- Use an instant-read thermometer to ensure strips reach 165°F internally.
- Let fried strips drain on a rack to preserve crispiness.