Chicken Artichoke Pizza Recipe
If you’re craving a pizza that balances creamy, tangy, and savory notes with a tender chicken finish, this Chicken Artichoke Pizza Recipe is a go-to. Think of the best comfort-food pizzas—only brighter thanks to artichoke hearts, smooth ricotta, melty mozzarella, and a grating of Parmesan. It’s an approachable recipe you can make on a weeknight, and it scales well for guests. Below you’ll find a friendly, tested method, clear step-by-step directions, and helpful tips so your pizza turns out crisp-edged, golden, and loaded with flavor.
Why you’ll love this Chicken Artichoke Pizza Recipe
This pizza brings together a handful of pantry-friendly ingredients into a dish that feels slightly gourmet but is simple to prepare. The ricotta adds a luxurious creaminess that keeps the chicken and artichokes from drying out. The mozzarella stretches and browns beautifully under heat, and Parmesan gives a salty, nutty finish. Using roasted, shredded chicken cuts down on hands-on time and lets the oven do most of the work.
Ingredients
- ▢olive oil
- ▢1 pizza dough
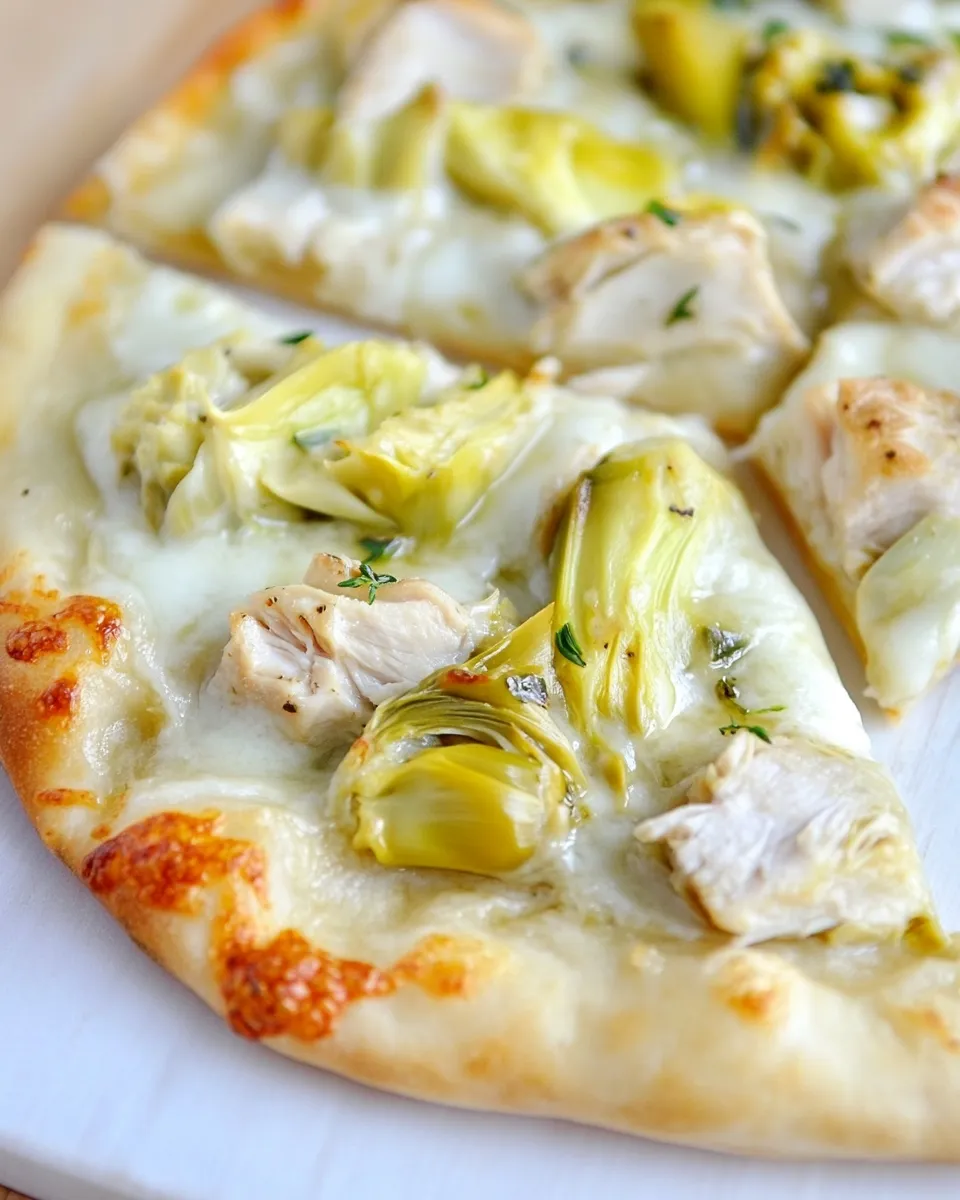
- ▢4 ounces Ricotta cheese
- ▢2 cups chicken breasts, (about 2 breasts) roasted and shredded
- ▢1 (14-ounce) can artichoke hearts, drained and quartered
- ▢4 ounces Mozzarella cheese, sliced
- ▢4 ounces Parmesan cheese, grated
Equipment
- Baking sheet or pizza stone
- Parchment paper or silicone baking mat
- Mixing bowl
- Rolling pin or hands for stretching dough
- Sharp knife and cutting board
- Measuring spoons and cups
Prep work (15–20 minutes)
Start by preheating your oven to 475°F (245°C), or follow the pizza dough package instructions if different. If you’d like an extra-crisp bottom, place a pizza stone in the oven as it heats. While the oven is warming, prepare the ingredients so assembly is seamless:
- Brush a thin film of olive oil over your baking sheet or a sheet of parchment paper to prevent sticking.
- If your roasted chicken isn’t shredded yet, use two forks to pull it into bite-sized pieces. Aim for about 2 cups of shredded chicken (about 2 breasts).
- Drain the artichoke hearts and quarter them so each piece is a manageable bite.
- Slice the mozzarella into 4 ounces of even slices.
- Measure out the ricotta and grate the Parmesan.
- If your pizza dough is refrigerated, let it sit at room temperature for 10–15 minutes so it’s easier to stretch.
Assembly & Baking — step-by-step
Follow these steps in order. The directions have been rewritten into a clearer, step-by-step format while keeping ingredient amounts exactly the same and respecting the original sequence.
- Prepare the baking surface: Lightly oil a baking sheet or place parchment paper on it, then drizzle a little olive oil where the dough will sit. This keeps the crust from sticking and helps crisp the bottom.
- Stretch the dough: On a lightly floured surface or directly on the prepared parchment, gently stretch or roll the 1 pizza dough into a roughly 12-inch circle (or desired shape). Work slowly so the dough doesn’t spring back; let gravity help by holding and turning the dough if needed.
- Transfer the dough: Place the stretched dough onto the prepared baking sheet or onto the parchment if using a stone. If your oven is very hot, consider a quick prebake for 3–4 minutes to set the crust before adding wet toppings.
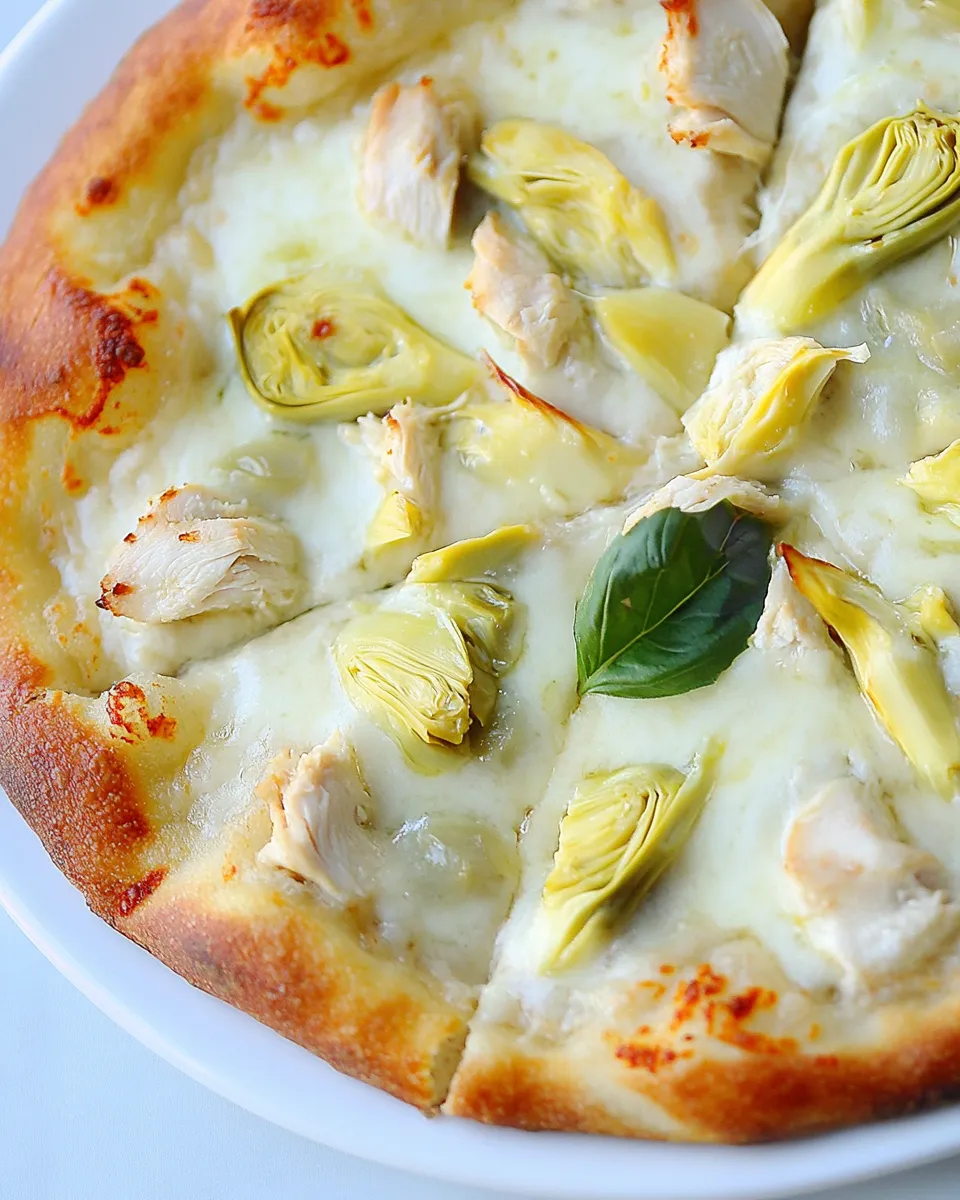
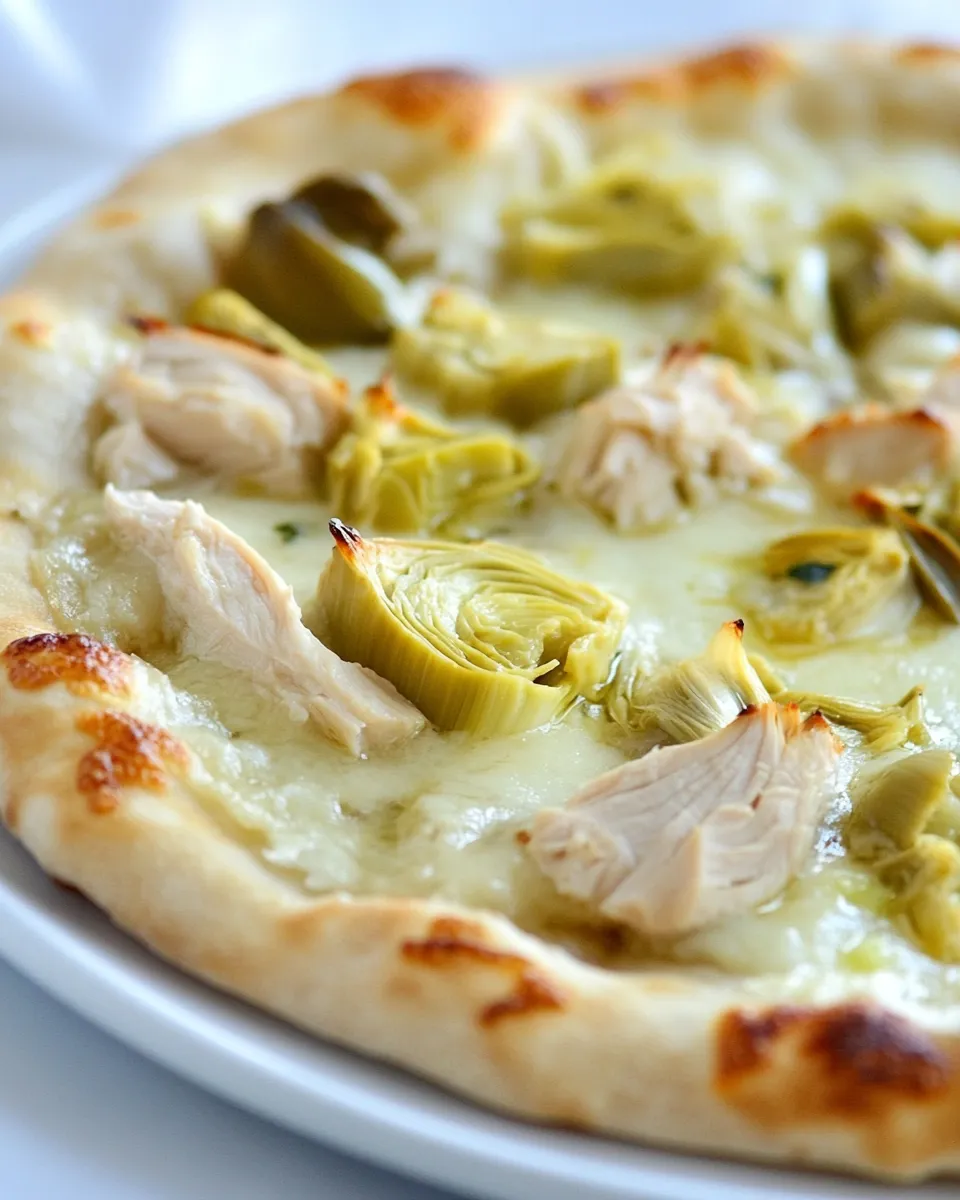
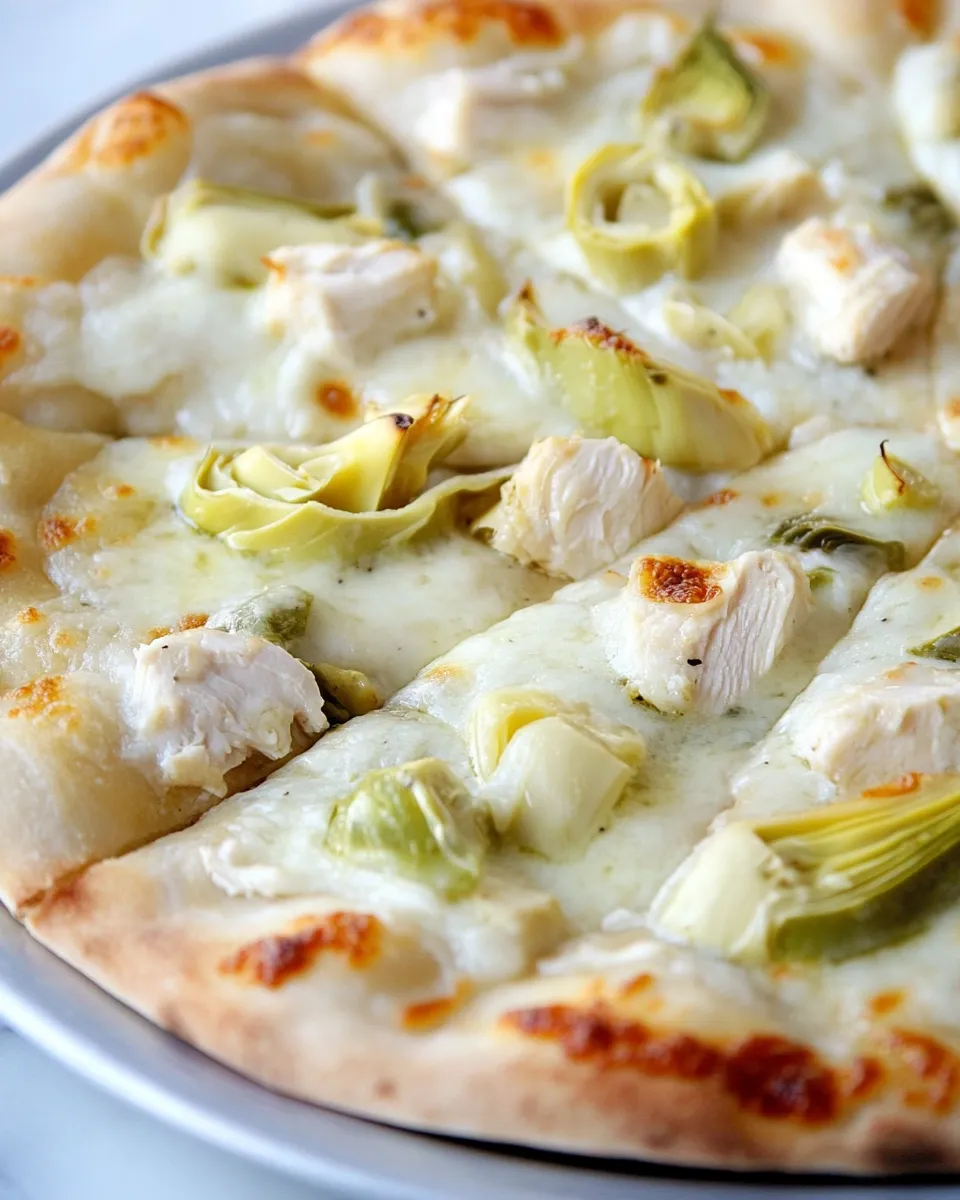
- Dot with ricotta: Spoon the 4 ounces Ricotta cheese in small dollops across the dough, spacing them evenly. You want creamy pockets, not a single thick layer. Use the back of the spoon to slightly spread each dollop so the ricotta forms small islands of creamy goodness.
- Add the chicken: Scatter the 2 cups chicken breasts, roasted and shredded, evenly over the ricotta. Make sure the chicken is distributed so every slice has a good balance of meat.
- Arrange the artichokes: Evenly place the 1 (14-ounce) can artichoke hearts, drained and quartered, across the pizza. Tuck pieces into gaps so they’re nicely integrated with the chicken and ricotta.
- Top with mozzarella: Lay the 4 ounces Mozzarella cheese, sliced, over the pizza. The slices should overlap slightly in places to encourage even melting and browning.
- Finish with Parmesan and oil: Sprinkle the 4 ounces Parmesan cheese, grated, all over the pizza for a savory finish. Drizzle the top with a little olive oil—just enough to glisten and help with browning.
- Bake: Place the pizza in the preheated oven (on the stone if using) and bake for 10–12 minutes, or until the crust is golden and the cheeses are bubbly and starting to brown. If you prebaked the crust, check after 6–8 minutes since it may finish faster.
- Rest and slice: Remove the pizza from the oven and let it rest for 3–5 minutes. This brief rest helps the cheese set slightly so slices cut cleanly. Use a sharp pizza cutter or a large chef’s knife to slice and serve.
Serving suggestions
Serve this Chicken Artichoke Pizza Recipe fresh from the oven with a crisp green salad on the side—baby arugula dressed in lemon vinaigrette is a lovely match. If you like heat, offer red pepper flakes at the table. A drizzle of extra virgin olive oil just before serving elevates the flavors and gives the crust a glossy finish.
Flavor and texture notes
- The ricotta creates pockets of creamy richness that temper the bright tang of the artichokes.
- Roasted, shredded chicken adds a satisfying chew and takes on subtle toasted edges in the oven.
- Mozzarella melts into gooey ribbons while Parmesan adds a nutty, salty crust on top.
- Olive oil helps the cheeses brown and adds a fruity undertone that ties the whole pizza together.
Variations and swaps
Keep the basics intact but tailor the pizza to your tastes:
- Make it herby: Add fresh basil leaves after baking or sprinkle dried oregano over the mozzarella before it goes in the oven.
- Go lighter: Use part-skim mozzarella if you prefer a less gooey finish.
- Make it smoky: Use a touch of smoked paprika on the shredded chicken or substitute smoked mozzarella for a deeper flavor.
- Add vegetables: Thinly sliced red onion, roasted red peppers, or baby spinach can be tucked under the cheese for extra color and nutrition.
Storage and reheating
If you have leftovers, store them in an airtight container in the refrigerator for up to 3 days. To reheat and preserve the crisp crust, warm slices in a 375°F (190°C) oven for 8–10 minutes on a baking sheet, or until heated through. For a quick option, warm an individual slice in a skillet over medium heat until the bottom crisps and the cheese softens.
Make-ahead tips
- Shred chicken in advance: Roast and shred the chicken up to two days before baking. Keep it refrigerated in an airtight container.
- Prep artichokes: Drain and quarter the canned artichokes ahead of time so assembly is quicker.
- Assemble just before baking: Because of the ricotta’s moisture, it’s best to top and bake immediately after assembling to keep the crust from getting soggy.
Troubleshooting
- Soggy crust: Make sure the oven is fully preheated and consider a short prebake of the dough for 3–4 minutes. Also, avoid over-saucing; here the ricotta should be dotted rather than spread in a single, wet layer.
- Uneven browning: Rotate the pizza halfway through baking if your oven has hot spots. Using a pizza stone or preheating the baking sheet also helps with a uniform crust.
- Cheese not melting: Ensure your oven temperature is high enough—around 475°F (245°C) gives the best melt and browning for the cheeses listed.
Final thoughts
Simple, satisfying, and full of contrast, this Chicken Artichoke Pizza Recipe delivers a dinner that feels special without a lot of fuss. The combination of ricotta, shredded roasted chicken, quartered artichoke hearts, sliced mozzarella, and grated Parmesan is a reliably delicious one—especially when finished with a good drizzle of olive oil and served straight from the oven. Whether you’re feeding a small crowd or keeping it all for yourself, this pizza hits the mark on flavor and comfort.
Ready to bake? Gather your ingredients and in about 30–40 minutes you’ll have a golden, cheesy pizza that’s both familiar and a little unexpected in the best way. Enjoy!
Chicken Artichoke Pizza Recipe
Ingredients
Equipment
Method
- Preheat the oven to 500°F (260°C) and place a rimmed baking sheet or pizza pan in the oven if you prefer a hotter surface.
- Drizzle a little olive oil onto a 14-inch rimmed baking sheet or pizza pan to coat the surface.
- Stretch or roll the pizza dough onto the prepared pan to a roughly 14-inch circle, leaving a small border for the crust.
- Brush or drizzle a bit more olive oil over the top of the dough.
- Using a rubber spatula or the back of a spoon, spread the ricotta evenly over the dough, leaving the outer edge uncovered.
- Evenly distribute the shredded roasted chicken over the ricotta, then arrange the quartered artichoke hearts on top.
- Top with sliced mozzarella, then sprinkle the grated Parmesan evenly over the pizza.
- Bake in the preheated oven for 13 to 15 minutes, until the crust is golden brown and the cheeses are melted and bubbling.
- Remove the pizza from the oven, let it rest 1–2 minutes, slice, and serve.
Notes
- Prep time excludes dough rising and cooking the chicken.
- Use rotisserie chicken to save time.
- Drain canned artichokes well before using.
- Watch closely near the end of baking to avoid over-browning.