Instant Pot Rotisserie Chicken
There’s something endlessly satisfying about a whole roasted chicken with golden, seasoned skin and juicy, tender meat that practically falls off the bone. This Instant Pot Rotisserie Chicken gives you all those rotisserie vibes in a fraction of the time—no special equipment needed. It’s an easy, weeknight-friendly meal that yields a flavorful, aromatic bird every time. The spice blend is simple yet bright: kosher salt, paprika, onion powder, dried thyme, white pepper, cayenne, black pepper, and garlic powder. Follow the clear, step-by-step instructions below and you’ll have a gorgeous, versatile chicken ready for sandwiches, salads, rice bowls, or just a satisfying dinner with roasted vegetables.
Why this method works
Pressure cooking locks in moisture while the quick sauté or broil at the end helps crisp the skin. Using the Instant Pot lets the spices penetrate the meat, and finishing under high heat (or with the oven broiler) gives that attractive browned exterior reminiscent of a rotisserie chicken. The recipe is intentionally straightforward: one spice rub, a little liquid, and a simple cooking plan. The result is a dependable roast with rich flavor and a crisped skin that’s perfect for easy dinners and leftover lunches.
Ingredients
- 1 whole chicken (about 3–4 pounds), giblets removed
- 1 tablespoon kosher salt
- 1 teaspoon paprika
- ½ teaspoon onion powder
- ½ teaspoon dried thyme
- ½ teaspoon white pepper
- ¼ teaspoon cayenne pepper
- ¼ teaspoon black pepper
- ¼ teaspoon garlic powder
- 1 cup water or low-sodium chicken broth
- 1 tablespoon neutral oil (for searing, optional)
Tools
- 6- or 8-quart Instant Pot
- Trivet or steamer rack that fits inside the Instant Pot
- Kitchen twine (optional)
- Meat thermometer
- Oven or broiler for finishing (or use the Instant Pot’s sauté if you prefer)
Prep and seasoning
Pat the chicken dry with paper towels to remove excess moisture—this helps the rub adhere and promotes better browning during the finishing step. Combine the seasonings in a small bowl and rub them all over the chicken, including under the skin where possible for deeper flavor. If you like, tie the legs together with kitchen twine to help the chicken cook evenly. Set the trivet inside the Instant Pot and pour in the water or broth; this creates the steam that will pressure cook the chicken gently.
Step-by-step instructions
The following directions have been rewritten into a clear, stepwise format. They keep the same logical order as a classic pressure-cooked whole chicken recipe but are easier to follow and match the ingredient list exactly.
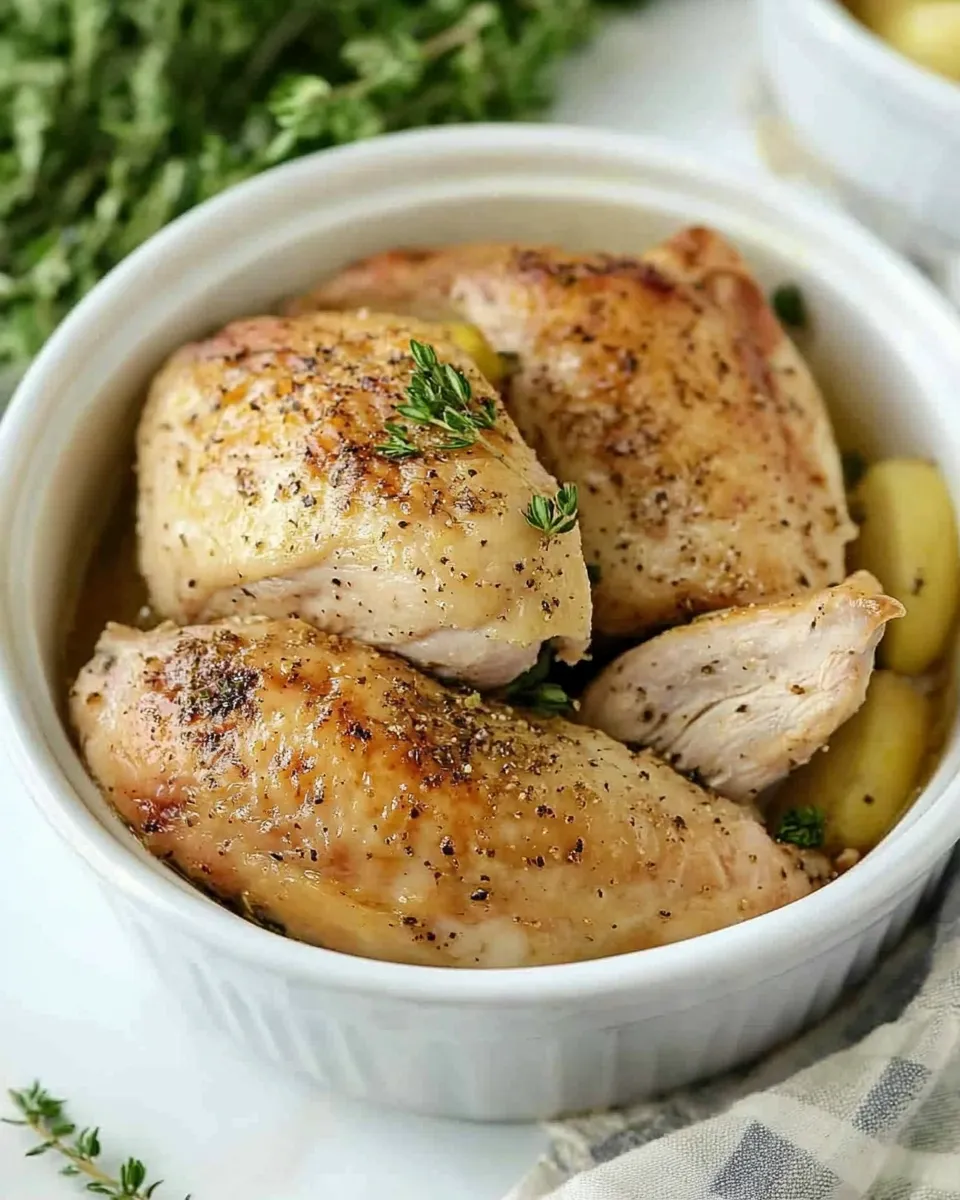
- Prepare the chicken: Remove the giblets from the cavity if present and pat the chicken completely dry with paper towels. Dry skin helps the spice rub stick and makes finishing more effective.
- Make the spice rub: In a small bowl, combine 1 tablespoon kosher salt, 1 teaspoon paprika, ½ teaspoon onion powder, ½ teaspoon dried thyme, ½ teaspoon white pepper, ¼ teaspoon cayenne pepper, ¼ teaspoon black pepper, and ¼ teaspoon garlic powder. Stir the spices together until evenly mixed.
- Season the chicken: Rub the spice mix all over the chicken, coating the exterior thoroughly. Gently loosen the skin over the breasts with your fingers and rub some seasonings under the skin as well for extra flavor. Place the seasoned bird on a plate until ready to cook.
- Set up the Instant Pot: Place the trivet or steamer rack in the Instant Pot insert. Pour 1 cup water or low-sodium chicken broth into the bottom of the pot. The liquid is necessary to generate steam for pressure cooking.
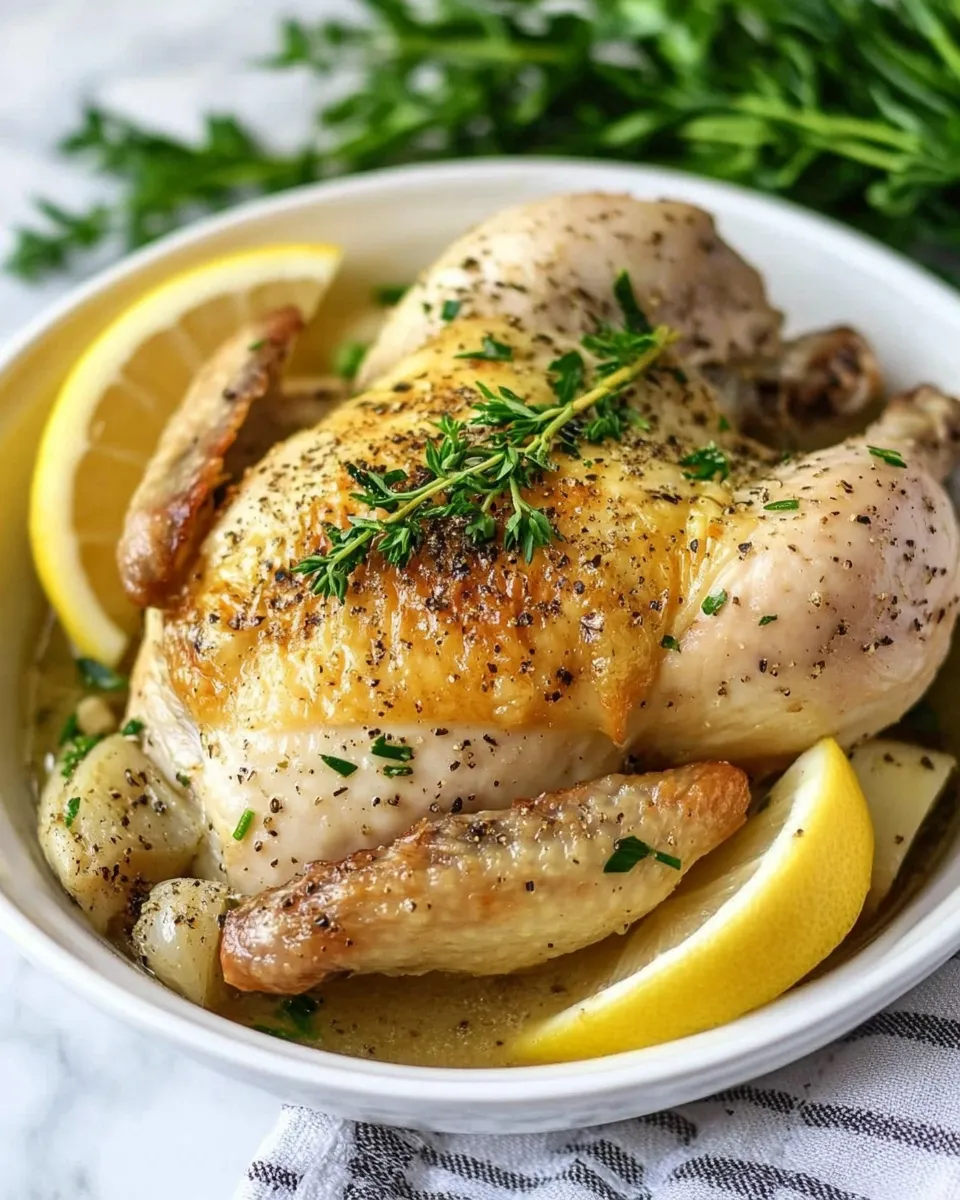
- Position the chicken: Carefully place the chicken breast-side up on the trivet. If the legs stick out or the chicken seems uneven, you can tuck the wing tips under the body and tie the legs together with kitchen twine to promote even cooking.
- Pressure cook: Close and lock the lid. Make sure the pressure valve is set to the sealing position. Select Manual or Pressure Cook on high pressure and set the time for 6 minutes per pound of chicken. For a 3-pound bird, this will be 18 minutes; for a 4-pound bird, set it for 24 minutes.
- Natural pressure release: When the cooking time finishes, allow the pressure to release naturally for 10 minutes. After 10 minutes, carefully move the valve to venting to release any remaining pressure, then unlock and remove the lid.
- Check temperature: Insert an instant-read thermometer into the thickest part of the thigh without touching bone. The internal temperature should read 165°F. If it’s below that, return the chicken to the pot and pressure cook for an additional 3–4 minutes, then allow another 5–10 minute natural release and recheck.
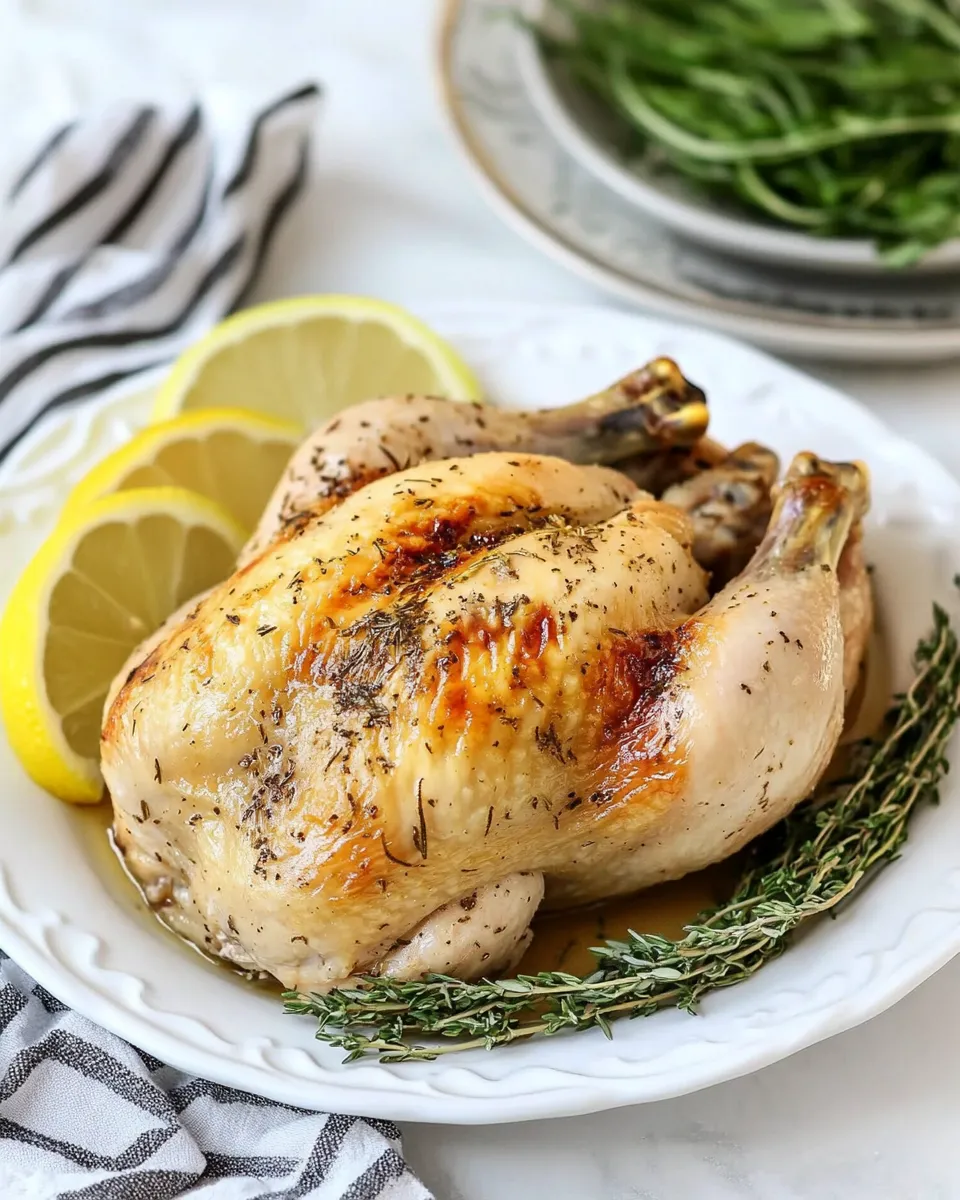
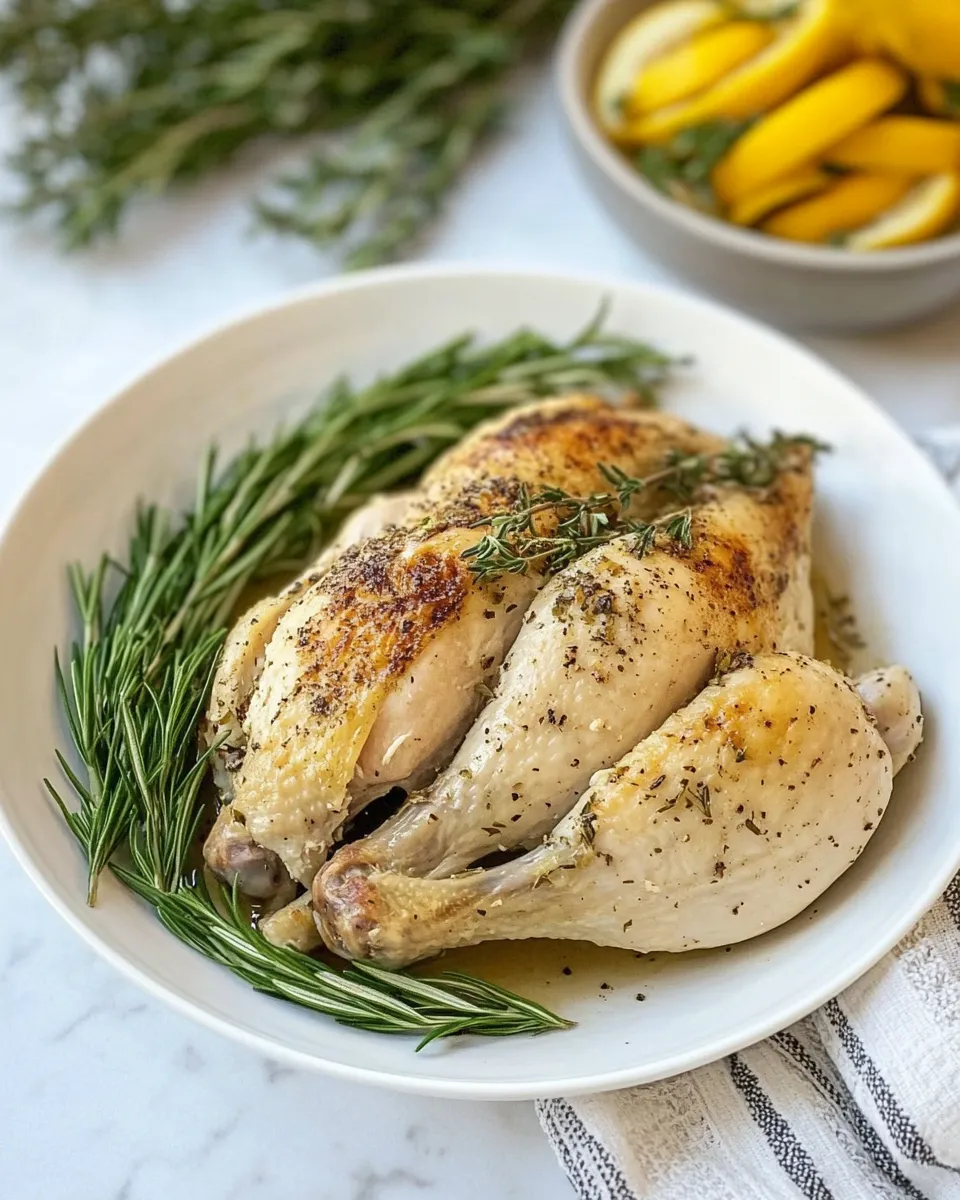
- Finish the skin for crispiness: For that rotisserie-style browned exterior, transfer the cooked chicken to a rimmed baking sheet or ovenproof dish. Brush a light coating of the optional neutral oil over the skin to encourage browning. Finish under a preheated oven broiler on high, about 3–6 minutes, watching closely until the skin is evenly golden and crisp. Rotate the pan if needed for even color. Alternatively, you can use the Instant Pot’s sauté function with the lid off and a touch of oil to crisp the skin in batches, but the broiler gives the most consistent results.
- Rest before carving: Let the chicken rest 10–15 minutes to allow the juices to redistribute. Carve and serve warm.
Serving suggestions
This Instant Pot Rotisserie Chicken is versatile. Serve it with a simple green salad, roasted vegetables, or steamed rice. Shred leftovers for tacos, sandwiches, or chicken noodle soup. The concentrated juices at the bottom of the baking sheet or Instant Pot make a great base for a quick pan gravy—strain them, simmer with a little flour or cornstarch slurry, and taste for seasoning.
Storage and reheating
Store leftover chicken in an airtight container in the refrigerator for up to 4 days. To reheat while keeping the meat moist, place slices in a covered oven-safe dish with a splash of broth and heat at 325°F until warmed through. For shredded chicken, microwave briefly with a tablespoon of water or broth and cover to trap steam.
Troubleshooting
- Chicken is underdone: If the thermometer reads under 165°F in the thigh, return the bird to the Instant Pot and pressure cook on high for 3–4 minutes, then allow another natural release before checking again.
- Skin didn’t brown: The pressure cooking step steams the bird, so the skin will be pale afterward. Use the oven broiler for a few minutes to achieve a golden, crisp finish—keep a close eye on it to avoid burning.
- Too salty: Next time, reduce the kosher salt slightly if your taste or the saltiness of your broth calls for it. For this recipe, the 1 tablespoon kosher salt is designed to flavor the whole bird evenly.
Notes and tips
- Patience during the natural release is important. It helps keep the meat tender and juicy by allowing pressure and temperature to equalize gradually.
- Loosening the skin and getting a bit of rub under it gives more flavor right where the meat is thickest.
- Use a light oil for the broil step so the skin crisps without charring too quickly.
- Leftover bones make excellent stock. Place them in a pot with water, onion, carrot, celery, and herbs; simmer for several hours for a rich homemade broth.
This Instant Pot Rotisserie Chicken delivers a reliably flavorful, moist bird with a crisp finish. It’s a great centerpiece for dinners all week long and an easy template to adapt with different spice blends or finishing glazes. Enjoy the simplicity and the delicious results—this is one whole chicken recipe you’ll come back to again and again.
Instant Pot Rotisserie Chicken
Ingredients
Equipment
Method
- Whisk the kosher salt, paprika, onion powder, dried thyme, white pepper, cayenne, black pepper, and garlic powder together in a small bowl to make the spice rub.
- Pat the whole chicken dry with paper towels. Rub the spice mixture all over the exterior of the chicken and under the skin where possible. Place the chicken on a tray, cover, and refrigerate overnight.
- When ready to cook, stuff the chicken cavity with quartered lemon and/or onion if using.
- Set the Instant Pot to Sauté on high and add the olive oil. When hot, sear the chicken breast side down until browned, about 4–5 minutes, then carefully turn and brown the other side 3–4 minutes. Use tongs to help maneuver the bird. Remove the chicken to a platter.
- Place the trivet into the Instant Pot and add 1/2 to 1 cup chicken broth or water to the pot. Put the chicken on the trivet breast side up.
- Secure the lid, set the valve to SEAL, select High Pressure, and set the timer for 24 minutes for a 4-pound chicken.
- When the cook time ends, allow a natural pressure release for 15 minutes, then carefully quick-release any remaining pressure and remove the lid.
- Transfer the chicken to a platter, tent with foil, and let rest about 10 minutes before carving and serving.
Notes
- Refrigerating overnight helps the rub penetrate for better flavor.
- Use a 4-pound chicken for the timing given.
- Adjust pressure time slightly for larger or smaller birds.
- Searing adds color but can be skipped to save time.