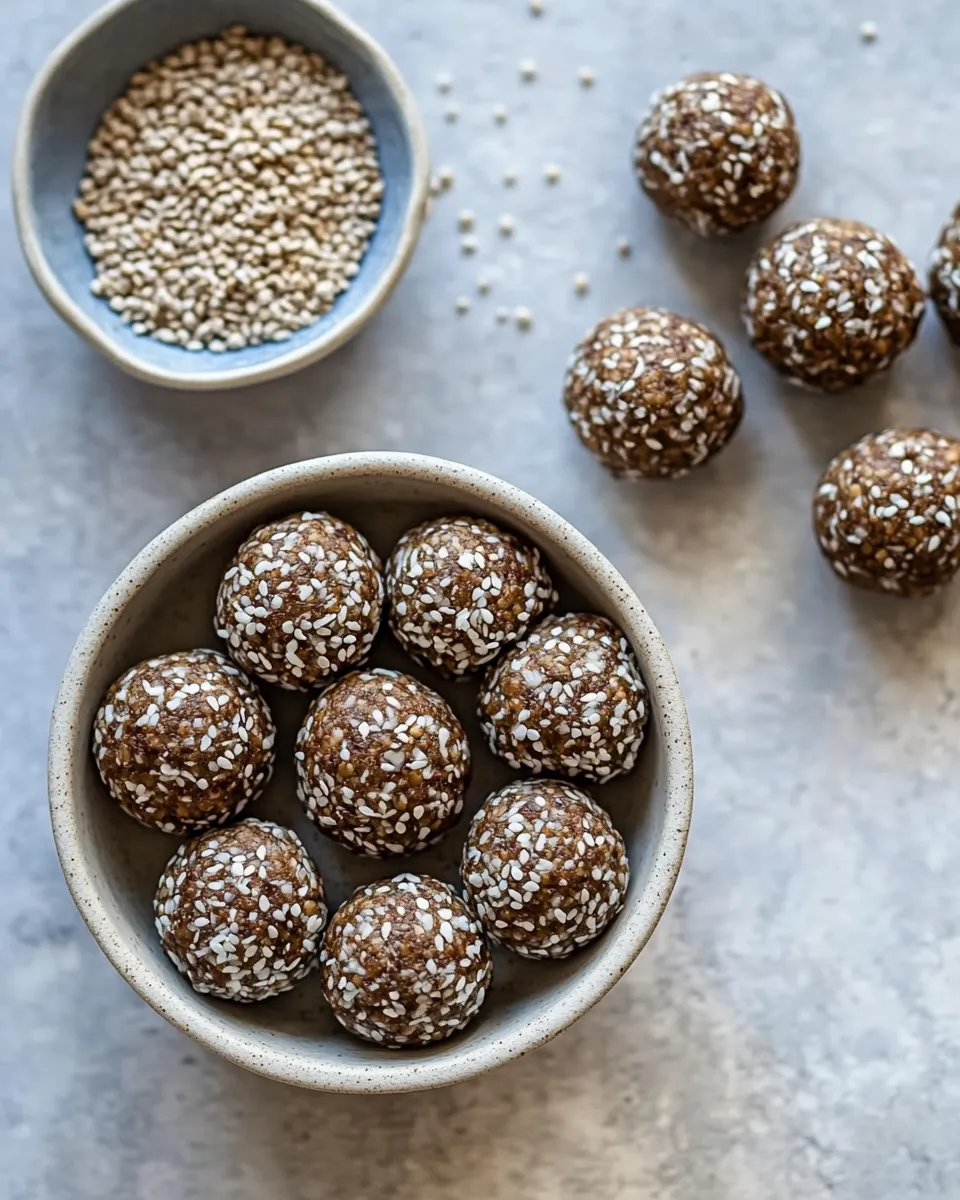
No Bake Protein Power Balls
These No Bake Protein Power Balls are a fast, feel-good snack that delivers a satisfying hit of protein, fiber, and healthy fats in every bite. Packed with oats, your favorite protein powder, chia or hemp seeds, and creamy almond or peanut butter, they come together in minutes with no oven required. Whether you need a pre-workout nibble, an afternoon pick-me-up, or a lunchbox treat, these little energy orbs are a pantry-friendly solution that tastes like a hug for your hunger.
Why I Love These Power Balls
They’re ridiculously simple and flexible. You can use quick oats or rolled oats, whichever you have on hand. Swap protein powders to suit your taste—whey, pea, or soy all work well—and the base of dates plus nut butter creates a chewy, rich texture that holds everything together. Add cinnamon for warmth and mini chocolate chips for a dessert-like finish. Best of all? No baking, no babysitting, and perfectly portioned for grab-and-go convenience.
Ingredients
- ⅔ cup quick oats or rolled oats
- ½ cup protein powder of choice*
- 3 Tbsp chia seeds or hemp seeds
- 1 cup unsweetened almond butter or peanut butter**
- 6 pitted medjool dates or 3 to 5 Tbsp pure maple syrup
- Pinch sea salt
- 1 tsp ground cinnamon optional
- 2-6 Tbsp water***
- ⅓ cup mini chocolate chips optional
Notes on Ingredients
Use quick oats if you want a finer texture and slightly faster binding; choose rolled oats for chewier balls. The protein powder can be dairy-based or plant-based—pick the one that matches your dietary needs. Chia seeds add a gel-like binder while hemp seeds bring a nutty mouthfeel; either is delicious. For sweetness and stickiness, medjool dates give natural depth; if you don’t have dates, pure maple syrup is your liquid alternative. Mini chocolate chips are optional but make these feel indulgent. The water amount is a range: add just enough to make the mixture come together but not be sticky.
Kitchen Tools You’ll Need
- Food processor or high‑powered blender (dates are easiest to work with this way)
- Mixing bowl
- Spoon or small cookie scoop
- Parchment paper–lined tray or plate
- Storage container with lid
Step-by-Step Directions
Follow these rewritten directions to make perfect No Bake Protein Power Balls every time. The steps preserve the original ingredient amounts and order, but they’re clearer and easier to follow.
- Prep the dates or syrup: If you’re using medjool dates, remove the pits and place the dates in a food processor. Pulse until they form a thick, sticky paste. If you’re using 3 to 5 tablespoons of pure maple syrup instead, skip this step and add the syrup later when combining wet ingredients.
- Combine dry base: In a large mixing bowl, add ⅔ cup quick oats or rolled oats, ½ cup protein powder of choice, and 3 tablespoons chia seeds or hemp seeds. Add a pinch of sea salt and 1 teaspoon ground cinnamon if you’re using it. Stir these dry ingredients together so they are evenly distributed.
- Add the nut butter: Measure 1 cup unsweetened almond butter or peanut butter and add it to the bowl with the dry ingredients. If you used dates, also add the processed date paste to the bowl now. If you chose maple syrup instead of dates, add the syrup here with the nut butter. Use a sturdy spoon or spatula to mix until the oats and protein powder are coated and the mixture looks uniform.
- Adjust texture with water: Gradually add 2 tablespoons of water to the mixture and stir. If the mixture is still dry or crumbly and won’t hold together when pressed, add more water, one tablespoon at a time, up to 6 tablespoons total. You want a pliable, slightly tacky dough that holds its shape when squeezed but is not overly wet.
- Fold in chocolate chips: If you’re using ⅓ cup mini chocolate chips, fold them in gently at this stage so they’re evenly distributed. If you prefer to press the chips onto the surface after rolling, reserve them and roll each ball in the chips instead.
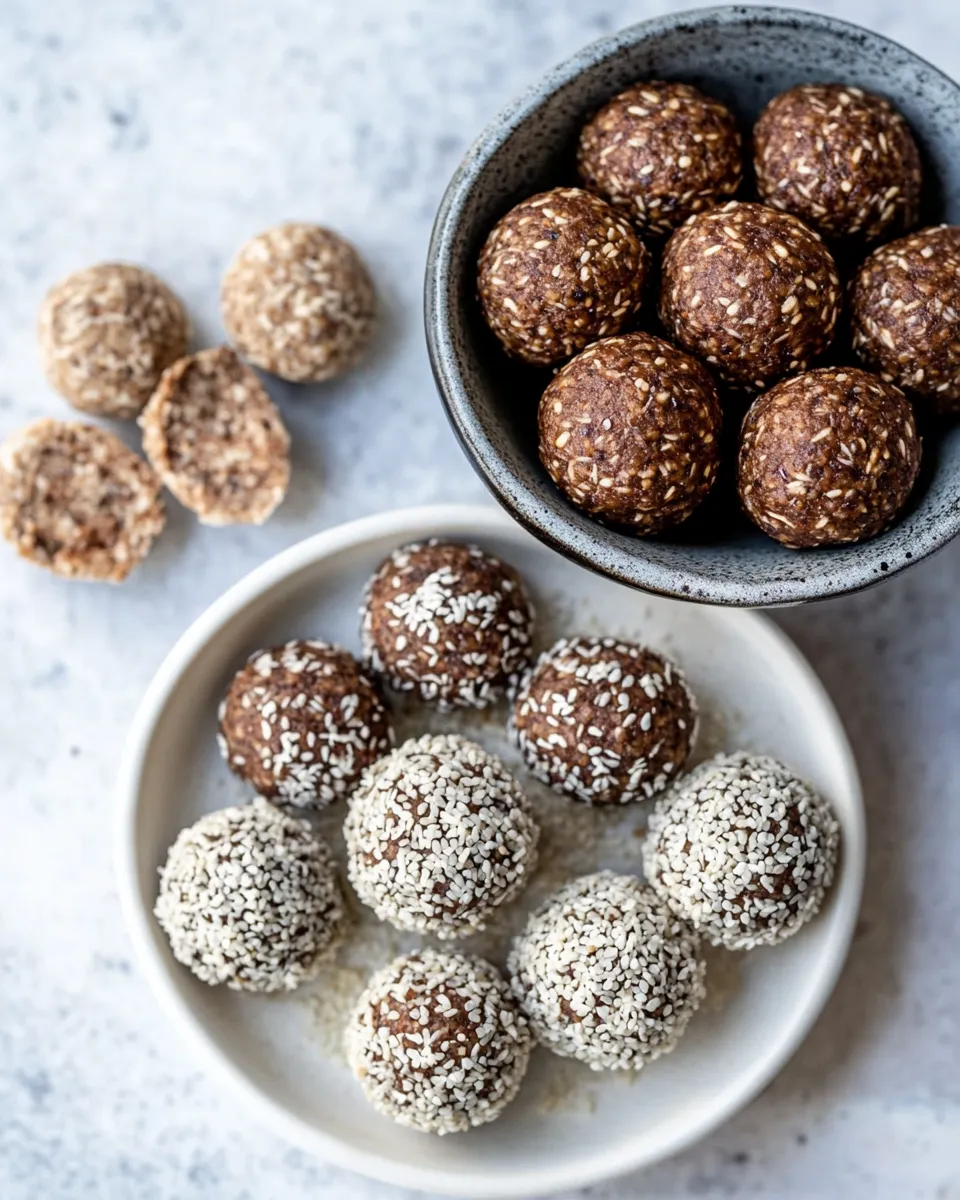
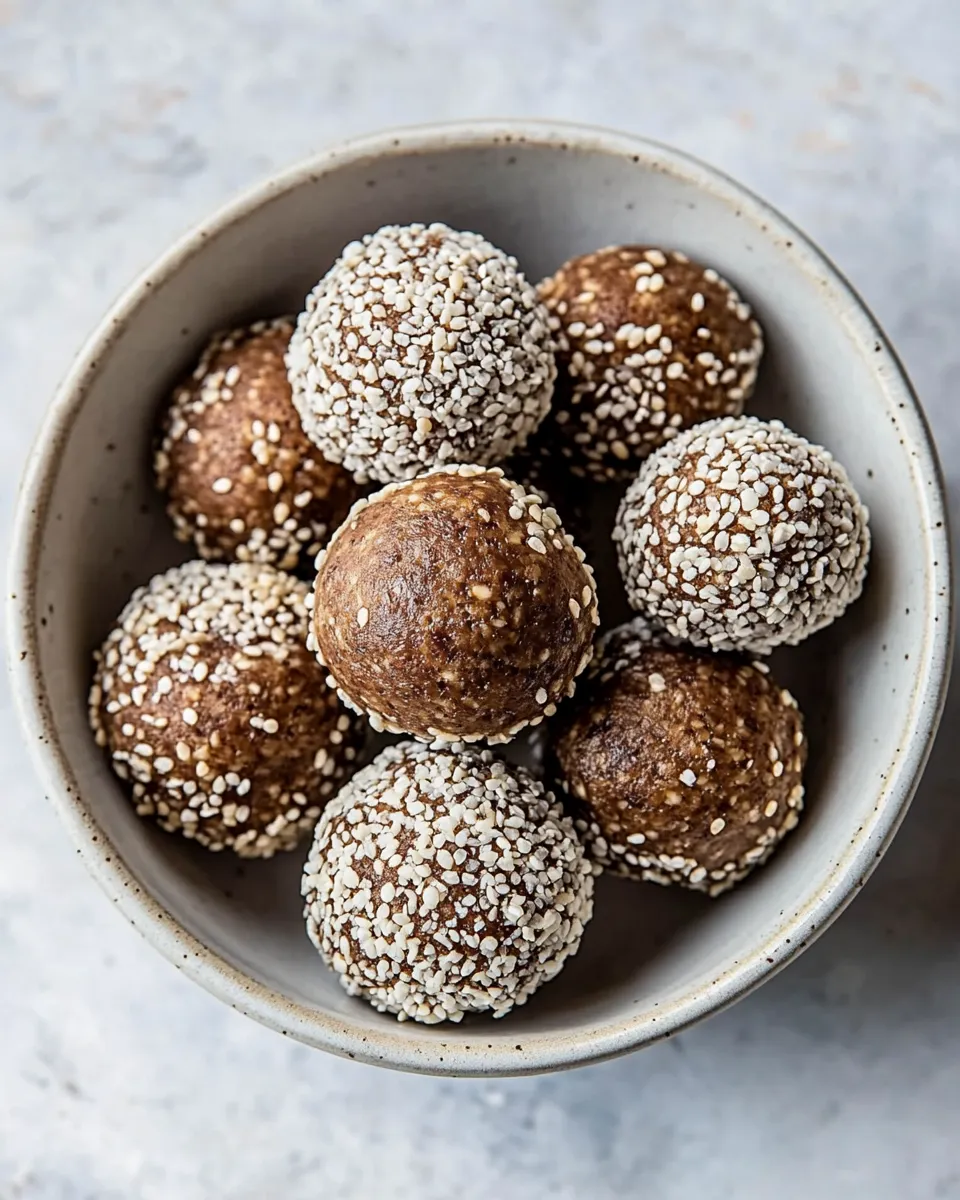
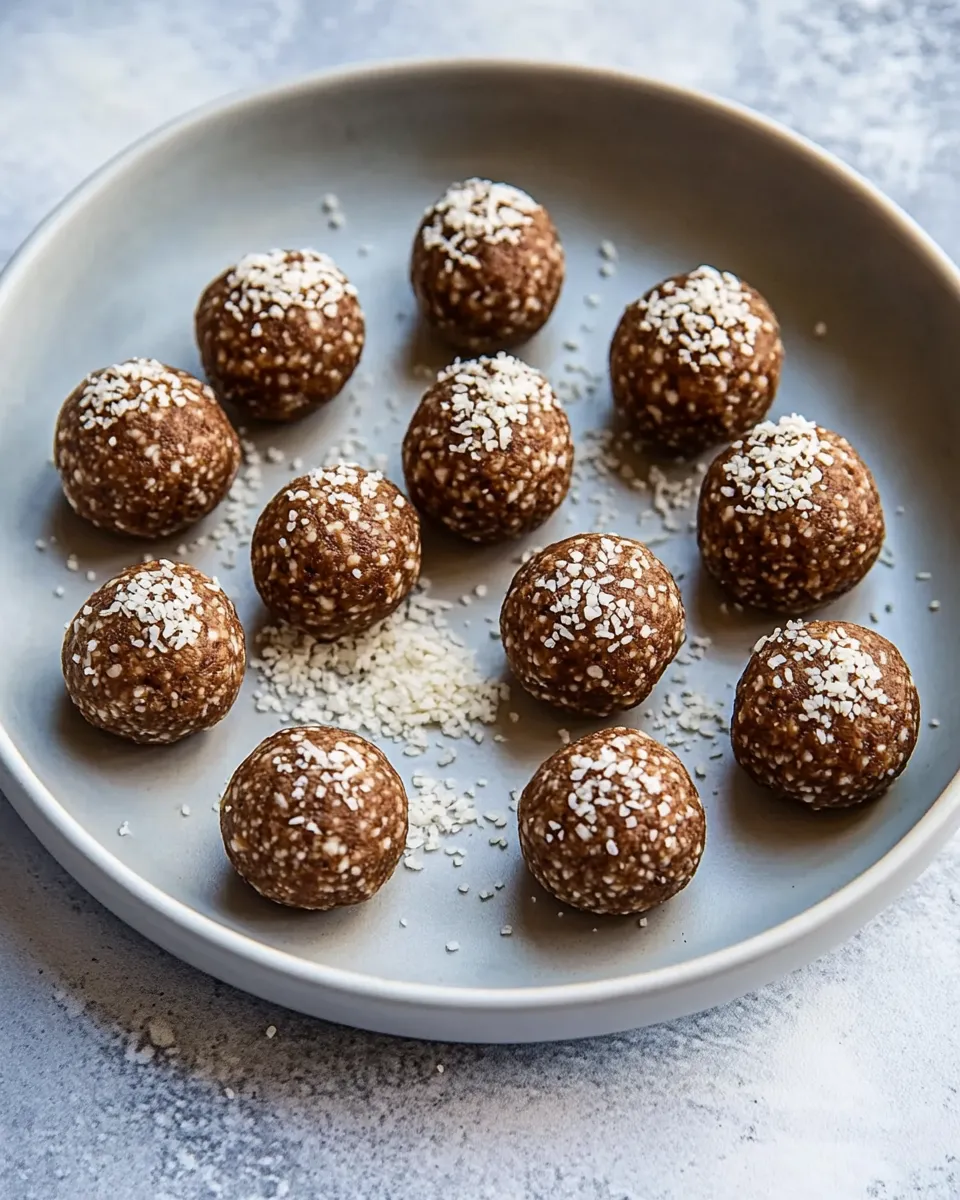
- Form the balls: Scoop about 1 to 1.5 tablespoons of the mixture with a spoon or small cookie scoop. Press the mixture firmly between your palms and roll into a compact ball. Repeat until all the mixture is used. Aim for uniform size so the texture and portioning are consistent.
- Chill to set: Place the formed balls on a parchment-lined tray or plate. Chill them in the refrigerator for at least 20 minutes to help them firm up. If you’re short on time, a 10-minute stint in the freezer will also do the job.
- Store and serve: Transfer the set power balls to an airtight container. They’ll keep in the refrigerator for up to 10 days or in the freezer for up to 3 months. Let frozen balls sit at room temperature for 5 to 10 minutes before eating, or enjoy straight from the fridge for a chewier bite.
Troubleshooting & Tips
- If the mixture is too dry and won’t hold together: Add extra water, a little at a time, up to the 6 tablespoons listed. You can also add an extra tablespoon of nut butter if needed.
- If the mixture is too wet or sticky: Add a tablespoon of quick oats or a teaspoon of protein powder at a time until it firms up.
- No food processor? Soak dates in warm water for 10 minutes to soften, then mash well with a fork until paste-like before adding to the bowl.
- Want a smoother texture? Use quick oats instead of rolled oats and blend the oats briefly in a blender before mixing.
- Nut allergy? Substitute sunflower seed butter and ensure your protein powder is nut-free.
- Make them kid-friendly by rolling the balls in shredded coconut, cocoa powder, or crushed cereal.
Variations to Try
These power balls are a canvas—get creative with flavors and add-ins.
- Berry Blast: Stir in 2 tablespoons of freeze-dried raspberry powder and swap mini chocolate chips for chopped dried cranberries.
- Mocha Boost: Add 1 teaspoon instant espresso powder and use chocolate protein powder.
- Sunflower Crunch: Use sunflower seed butter and fold in 2 tablespoons of chopped toasted sunflower seeds for crunch.
- Peanut Butter Chocolate: Use peanut butter and dark chocolate chips, plus a pinch of flaky sea salt on top for a café-style finish.
- Spiced Oat: Increase ground cinnamon to 1 teaspoon and add 1/4 teaspoon ground ginger for a warm, spiced profile.
Nutrition Snapshot
Each ball packs a balance of complex carbs from oats and dates or maple syrup, plant-based protein from powder and nut butter, and omega-rich fats from chia or hemp seeds. That combination helps steady blood sugar, fuel workouts, and keep hunger at bay between meals. Exact calories and macronutrients will vary depending on the protein powder and nut butter you choose.
Meal Prep & Gift Ideas
Power balls are excellent for meal prep. Make a double batch on Sunday and portion into small containers or snack bags for the week. They’re also lovely packaged in treat boxes with a ribbon for friends or neighbors—compact, homemade gifts that travel well.
Frequently Asked Questions
Can I use rolled oats instead of quick oats? Yes. Rolled oats will give a chewier texture; quick oats will make a softer, more cohesive ball.
Do I need dates, or is maple syrup fine? Both work. Dates create a thicker, less sticky texture and add fiber; maple syrup is a liquid sweetener option that still binds the mixture.
How long do these keep? In the refrigerator, up to 10 days. Stored in the freezer, they maintain quality for about 3 months.
Can I make these without a food processor? Yes. Soften dates in warm water and mash them thoroughly or use maple syrup. Mix ingredients in a bowl and press firmly to form balls.
Final Thoughts
No Bake Protein Power Balls are a reliable, customizable snack that fits into busy lives without fuss. They strike the perfect balance between wholesome ingredients and crave-worthy flavor. Keep the pantry staples on hand and you’ll always have a nutritious snack ready in under 15 minutes.
Printable Recipe Card
Yield: about 12–16 balls depending on size
Prep time: 10 minutes | Chill time: 20 minutes
Ingredients:
- ⅔ cup quick oats or rolled oats
- ½ cup protein powder of choice*
- 3 Tbsp chia seeds or hemp seeds
- 1 cup unsweetened almond butter or peanut butter**
- 6 pitted medjool dates or 3 to 5 Tbsp pure maple syrup
- Pinch sea salt
- 1 tsp ground cinnamon optional
- 2-6 Tbsp water***
- ⅓ cup mini chocolate chips optional
Directions:
- Process the dates into a paste if using; otherwise plan to add maple syrup with the nut butter.
- Mix oats, protein powder, chia or hemp seeds, salt, and cinnamon in a large bowl.
- Add almond or peanut butter and the date paste or maple syrup; mix until combined.
- Add water 1–2 tablespoons at a time, up to 6 tablespoons, until the mixture holds together when pressed.
- Fold in mini chocolate chips if using.
- Scoop and roll into 1–1.5 tablespoon balls; place on a parchment-lined tray.
- Chill 20 minutes in the refrigerator (or 10 minutes in the freezer) to set. Store chilled or frozen.
Enjoy your No Bake Protein Power Balls as a quick snack, post-workout bite, or lunchbox addition. Keep experimenting with flavors and mix-ins until you find your signature version.
No Bake Protein Power Balls
Ingredients
Equipment
Method
- Add the oats, protein powder, chia or hemp seeds, nut butter, pitted dates (or maple syrup), sea salt, and cinnamon (if using) to a food processor.
- Process until the mixture begins to combine, stopping to scrape down the bowl as needed; blend thoroughly so the dates break down and incorporate.
- With the processor running, add 2 to 6 tablespoons of water a little at a time, processing between additions, until the dough holds together when pressed and resembles thick cookie dough (about 4 Tbsp is typical).
- Add the mini chocolate chips and pulse just until they are distributed throughout the dough without fully pulverizing them.
- Scoop or roll the dough into 16 equal-sized balls using a small cookie scoop or your hands, pressing firmly to shape each ball.
- Place the power balls in an airtight container and store as desired.
Notes
- I use unflavored, unsweetened goat whey protein, but any protein powder works.
- Vanilla protein powder is ideal for extra flavor.
- If your nut butter is salted, you may omit the added sea salt.
- You will likely need about 4 tablespoons of water to reach the right consistency.
- If nut butter is refrigerated, warm it 20–30 seconds for easier mixing.