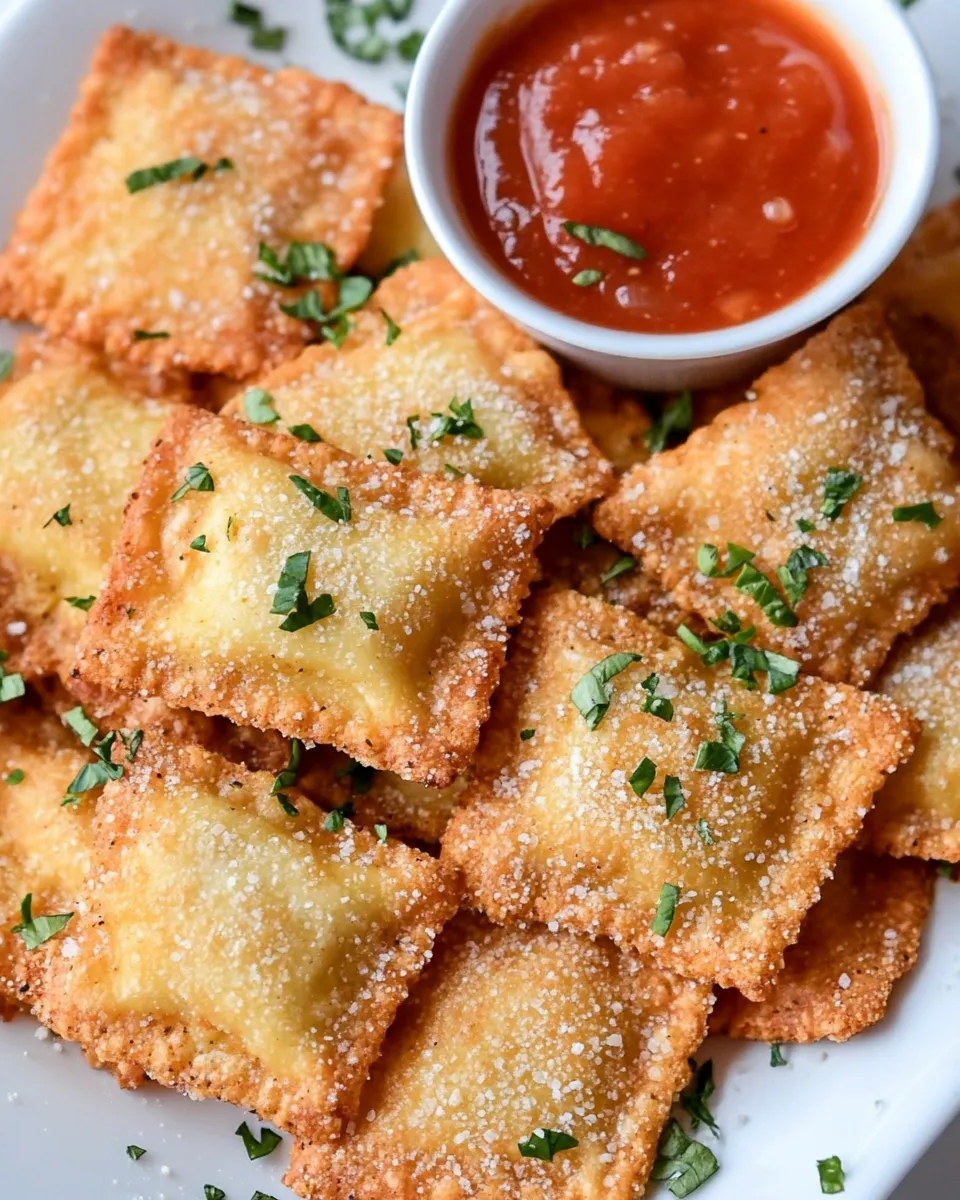
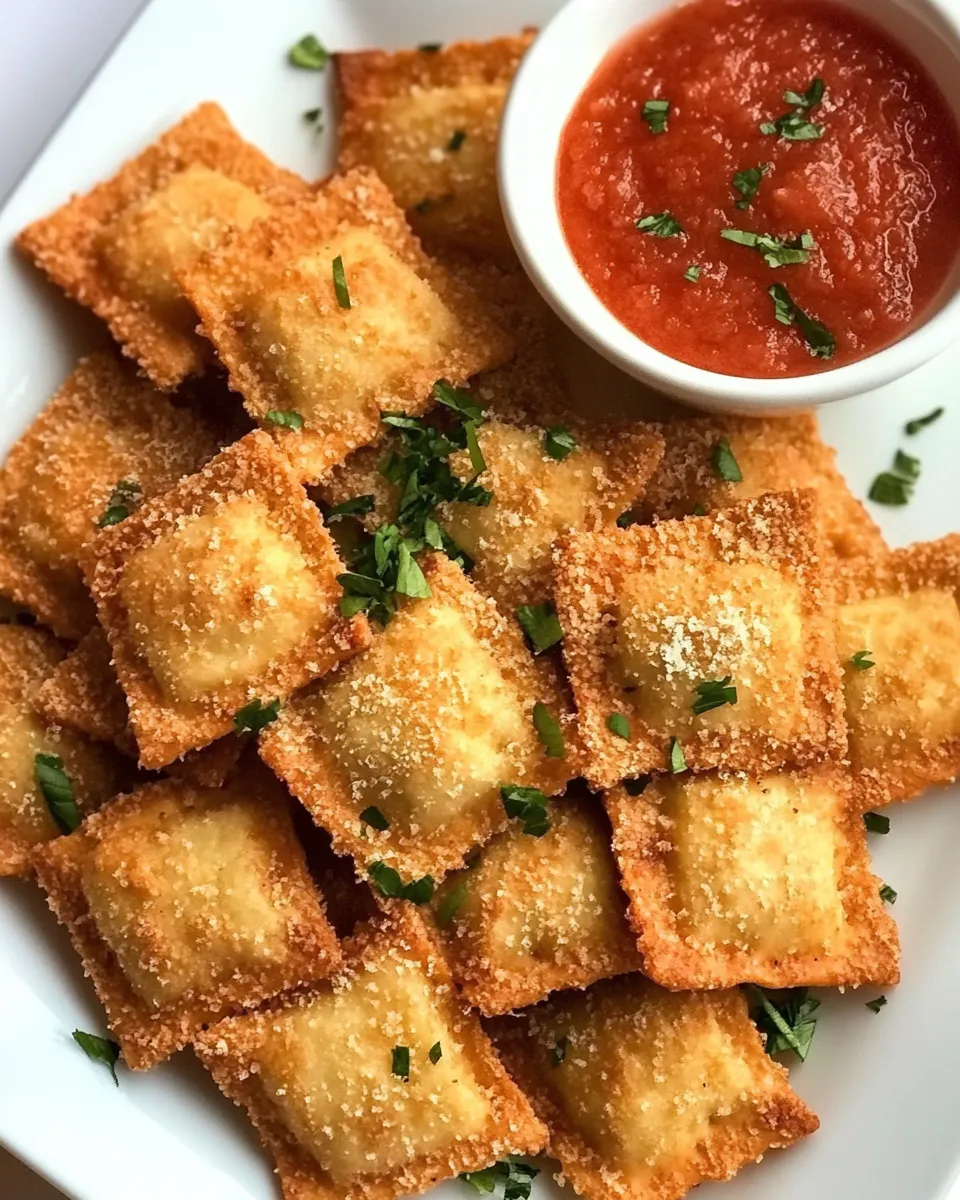
Olive Garden Toasted Ravioli
There’s something irresistibly nostalgic about diving into a plate of crunchy, perfectly seasoned little pillows of pasta. This Olive Garden Toasted Ravioli recipe captures that classic restaurant vibe with a simple, pantry-friendly approach that delivers crunch, flavor, and melty goodness inside. It’s a great appetizer, party snack, or even a fun weeknight treat when you want a special bite without an all-day effort. The ingredients are straightforward and the technique is forgiving, which makes this an ideal recipe to keep in your back pocket.
Why this version works
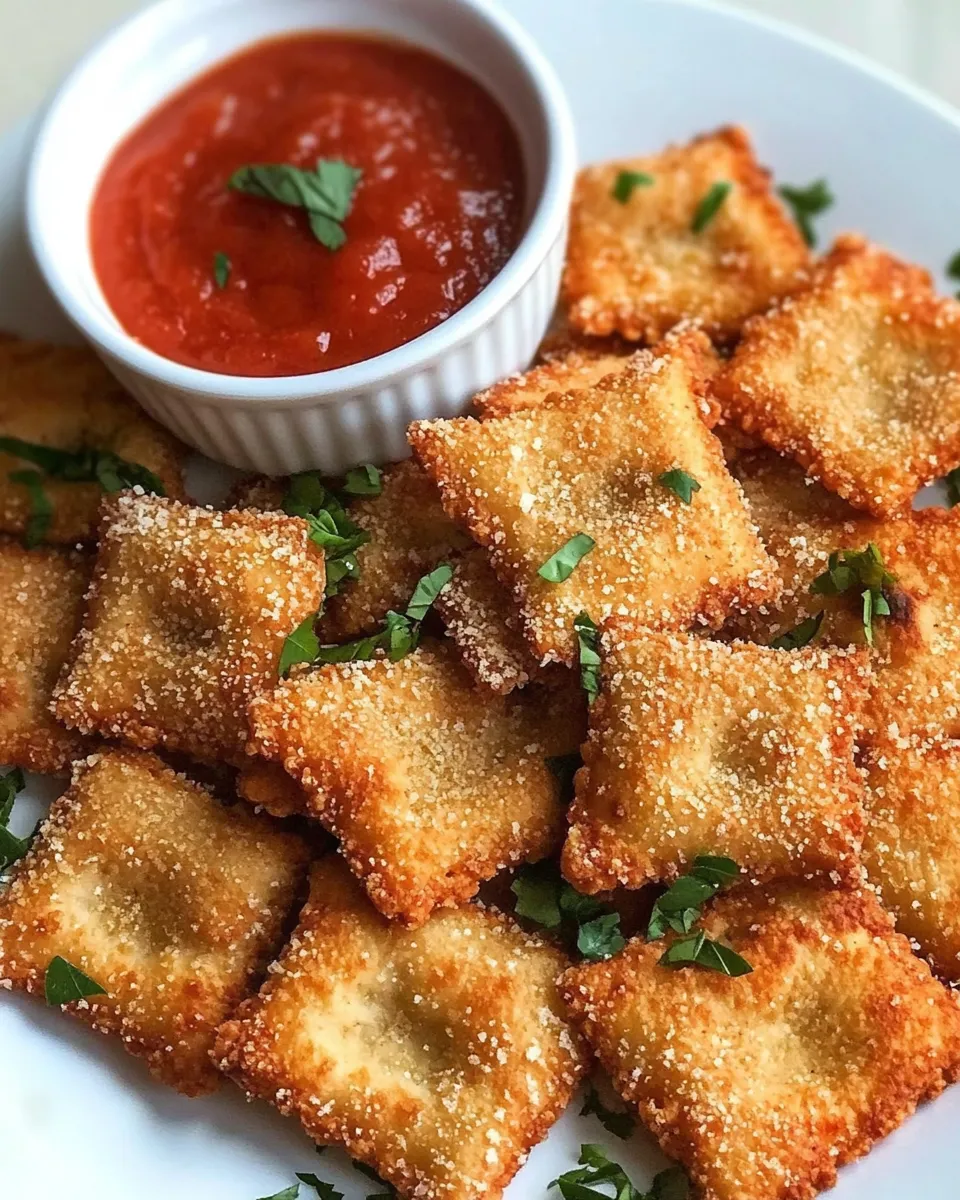
This take uses frozen meat ravioli as the foundation, giving you the richness of a savory filling while letting you focus on creating a crisp, golden shell. The dredge is a classic trio: flour, an egg wash, and breadcrumbs spiced with Italian seasoning and garlic salt. A quick fry at the right temperature yields an exterior that’s crunchy but not greasy, and the inside stays juicy and satisfying. Serve with your favorite warm marinara for dunking and watch how fast these disappear.
Ingredients
- 16 ounce meat ravioli
- 2 eggs, beaten
- 1/4 cup water
- 1 teaspoon garlic salt
- 1 cup flour
- 1 cup breadcrumbs
- 1 teaspoon Italian seasoning
- oil for frying
Equipment you’ll need
- Large pot for boiling (optional step listed below)
- Shallow bowls or dishes for the dredging stations
- Large, deep skillet or Dutch oven for frying
- Wire rack set over a baking sheet or paper towels for draining
- Tongs or a slotted spoon for handling the ravioli
- Instant-read thermometer (helpful for checking oil temperature)
Prep and timing
Total time: about 35–40 minutes, depending on how many batches you fry. Active time is mostly hands-on while breading and frying. This recipe is best made in small batches so each ravioli gets evenly browned and the oil temperature remains stable.
Step-by-step instructions
Follow these clear, sequential steps to make Olive Garden Toasted Ravioli that are crisp on the outside and tender inside. The order mirrors the original method but with clarified steps and consistent ingredient names and amounts.
- Prepare the egg wash. In a shallow bowl, whisk together the 2 eggs and 1/4 cup water until fully combined and slightly frothy.
- Season the flour. Place the 1 cup flour into a second shallow bowl. Sprinkle the 1 teaspoon garlic salt into the flour and mix so the seasoning distributes evenly.
- Make the breadcrumb mixture. In a third shallow bowl, combine the 1 cup breadcrumbs with 1 teaspoon Italian seasoning. Stir to incorporate the herbs throughout the crumbs.
- Preheat the oil. Pour enough oil into a large, deep skillet or Dutch oven so it will be about 1 to 1.5 inches deep. Warm the oil over medium-high heat until it reaches 350°F (175°C) on an instant-read thermometer or until a pinch of breadcrumb sizzles immediately when dropped in. Maintaining a steady temperature is key to crisp, non-greasy results.
- Bread the ravioli in batches. Working with a few ravioli at a time, first dredge each ravioli in the seasoned flour, shaking off any excess. Next, immerse it fully in the egg wash, letting any extra drip off. Finally, press the ravioli into the breadcrumb mixture so both sides are evenly coated. Set the breaded ravioli on a plate while you finish breading the remaining pieces. Repeat until all 16 ounces of meat ravioli are coated.
- Fry the breaded ravioli. Carefully place a few breaded ravioli into the hot oil without crowding the pan; overcrowding lowers the oil temperature and yields greasy, unevenly cooked results. Fry for about 2 to 3 minutes per side or until the breadcrumbs are golden brown and crisp. Use tongs or a slotted spoon to turn the ravioli gently for even browning.
- Drain and rest. Remove the ravioli from the oil and transfer them to a wire rack set over a baking sheet, or to a plate lined with paper towels. This allows excess oil to drain and keeps the pieces crispy. If desired, keep the finished ravioli warm in a low oven while you finish frying the rest.
- Repeat until complete. Continue frying the remaining ravioli in batches, monitoring and adjusting the heat as needed to keep the oil temperature steady. Once all ravioli are fried and drained, give them a brief rest of 1 to 2 minutes to let the filling settle before serving.
Serving suggestions
These crunchy bites are fantastic with a warm marinara or tomato-basil dipping sauce. Consider garnishing with a sprinkling of grated cheese and a few fresh basil leaves for color and a hint of brightness. For a crowd, arrange them on a large platter with small bowls of sauce so guests can dunk and enjoy.
Troubleshooting and tips
- Oil temperature matters: If the oil is too cool, the ravioli will absorb oil and become greasy. If it’s too hot, the breadcrumbs will brown before the filling is warm. Aim for about 350°F and adjust the burner as needed between batches.
- Work in small batches: Frying too many at once cools the oil and causes uneven coloring. Two to four ravioli per batch in a typical skillet gives the most consistent results.
- Keep them crispy: Transfer fried ravioli to a wire rack rather than paper towels when possible. The rack lets air circulate and preserves the crunch. If you must use paper towels, avoid stacking the ravioli directly on top of each other.
- Customize the coating: Swap plain breadcrumbs for panko for an extra-crunchy texture, or add a pinch of red pepper flakes to the breadcrumbs for a subtle kick.
Make-ahead and storage
To prepare some elements ahead of time, bread the ravioli and store them in a single layer on a tray covered loosely with plastic wrap in the refrigerator for up to a day. Fry just before serving for the best texture. Leftovers will keep in the refrigerator for 2–3 days. Reheat in a 350°F oven on a wire rack until warmed through and crisp again, about 8–10 minutes.
Notes on ingredients
The recipe calls for 16 ounces of meat ravioli. If you prefer a different filling—cheese, vegetable, or a plant-based protein—you can use that instead. Keep the same weight so the frying time and batch sizes remain consistent. The eggs create the adhesive layer that helps the breadcrumbs stick. The small amount of water thins the eggs slightly for easier coating. Garlic salt seasons the flour directly, but you can adjust that amount to taste or swap in plain salt and a pinch of garlic powder if you prefer more control.
Why it tastes like a restaurant favorite
The combination of a seasoned, three-step breading process and frying at the right temperature recreates that addictive crunch diners expect. The warmth of the filling paired with the crisp outer shell creates a contrast of textures that feels indulgent and comforting. Small touches—like a well-seasoned breadcrumb mix and a proper drain on a wire rack—lift this from good to great.
Variations and flavor ideas
- Spicy twist: Add 1/4 teaspoon red pepper flakes to the breadcrumb mixture for heat.
- Herb-forward: Increase the Italian seasoning to 1 1/2 teaspoons and add a tablespoon of finely chopped fresh parsley to the breadcrumbs.
- Cheesy crust: Stir a few tablespoons of finely grated hard cheese into the breadcrumbs for an extra savory crust.
- Air-fryer option: If you prefer less oil, arrange the breaded ravioli in a single layer in an air fryer basket coated lightly with oil spray and cook at 375°F for 6–8 minutes, flipping halfway. Results will be slightly different but still delicious.
Final thoughts
This Olive Garden Toasted Ravioli recipe is an easy way to bring a restaurant classic to your table with minimal fuss. The method is approachable, the ingredients are simple, and the payoff is huge—golden, crunchy bites that everyone will reach for. Whether you’re hosting a casual get-together, making game-day snacks, or simply treating yourself, this recipe delivers big on flavor and texture.
Quick recap
- Prep the egg wash, seasoned flour, and breadcrumb mixture.
- Heat oil to approximately 350°F and bread the ravioli in the order: flour, egg wash, breadcrumbs.
- Fry in small batches until golden brown, about 2–3 minutes per side.
- Drain on a wire rack, serve warm with marinara, and enjoy.
Now grab a bowl of warm sauce, invite friends or family, and enjoy a plate of crunchy, savory Olive Garden Toasted Ravioli that tastes like it came straight from a beloved restaurant—only better because you made it at home.

Olive Garden Toasted Ravioli
Ingredients
Equipment
Method
- Whisk the 2 beaten eggs with 1/4 cup water in a shallow bowl to make an egg wash; set aside.
- Combine 1 cup breadcrumbs, 1 teaspoon Italian seasoning, and 1 teaspoon garlic salt in a separate shallow bowl; set aside.
- Place 1 cup flour in a third shallow bowl for dredging.
- Heat oil in a deep fryer or heavy skillet to 350°F (about medium-high) with 2–3 inches of oil for deep frying.
- Working in batches, dredge each ravioli first in flour, then dip into the egg wash, and finally coat thoroughly with the breadcrumb mixture.
- Carefully place the breaded ravioli into the hot oil and fry until golden brown, turning as needed for even color, about 2–4 minutes per batch depending on size.
- Remove fried ravioli with tongs or a slotted spoon and drain on paper towels.
- Serve hot with your favorite marinara sauce for dipping.
Notes
- Work in batches to avoid overcrowding the oil.
- Use a thermometer to keep oil at 350°F.
- Drain on paper towels to remove excess oil.
- Serve immediately for best crispness.