Crispy Baked Chicken Wings (without Baking Powder)
There’s something deeply satisfying about a batch of golden, crackling wings straight from the oven that begs for a napkin and a big, happy smile. This Crispy Baked Chicken Wings (without Baking Powder) recipe uses simple pantry ingredients—2lbs chicken wings and 1 tablespoon salt among them—to create wings that are crisp on the outside, tender inside, and ready to dress in whatever sauce you love. No special powders needed, just technique, time, and a hot oven.
Why this method works
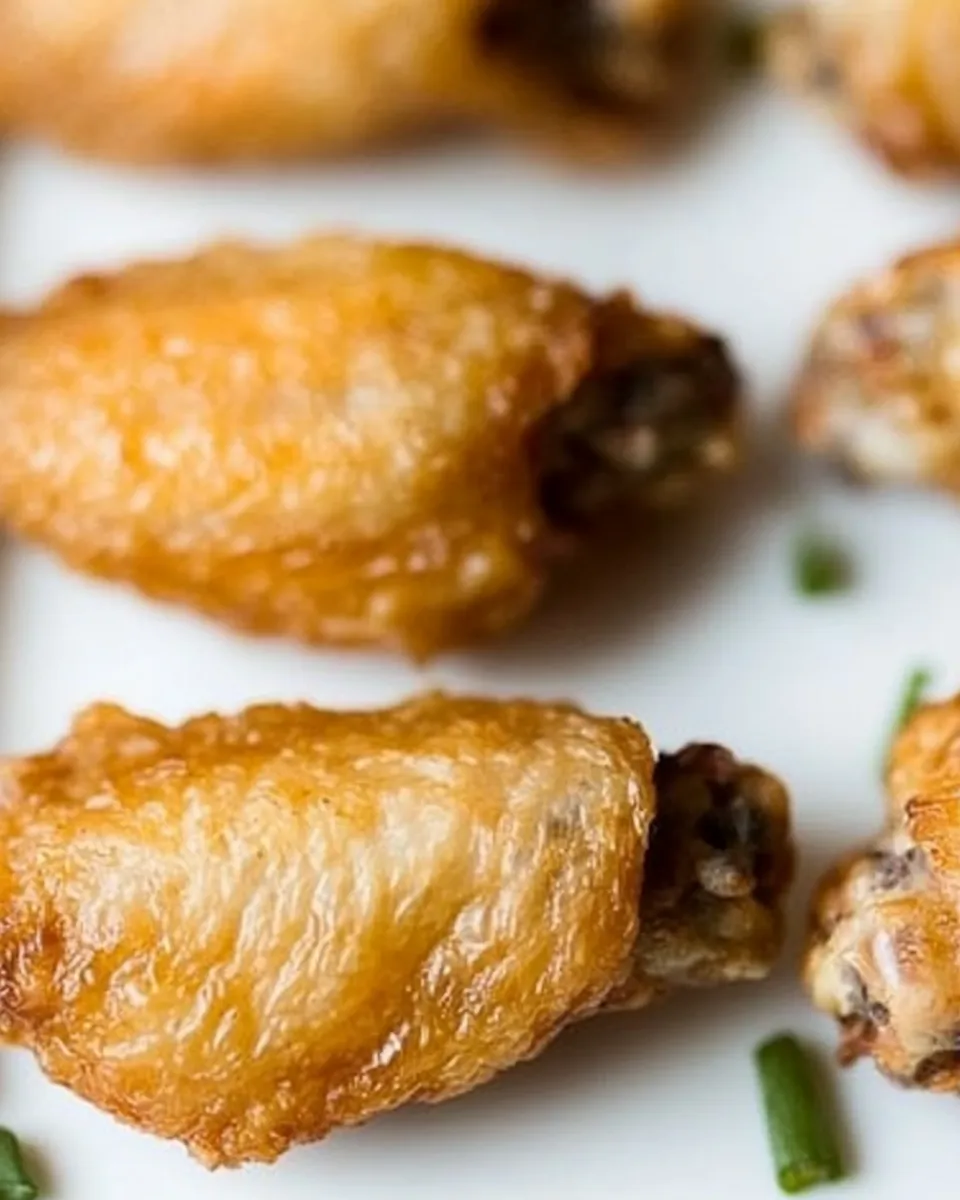
Many recipes promise impossibly crunchy wings with the help of chemical leaveners, but you can get excellent texture without them. The secret here is drying the wings, seasoning them simply with the listed ingredients, and baking on a wire rack so hot air circulates evenly. A brief rest in a hot oven and a final high-heat blast produces the brown, blistered skin that makes wings irresistible. The result is Crispy Baked Chicken Wings (without Baking Powder) that hold up well to sauces and stay crisp longer than steamed or crowded-bake alternatives.
Ingredients
- 2lbs chicken wings
- 1 tablespoon salt
Equipment
- Baking sheet
- Wire rack that fits inside the baking sheet
- Paper towels or a clean kitchen towel
- Large bowl or tray for seasoning
- Tongs
- Instant-read thermometer (optional)
Prep and timing
Total time: about 1 hour 10 minutes, including drying and two oven intervals. Active hands-on time is under 20 minutes. This makes Crispy Baked Chicken Wings (without Baking Powder) a great option for weekend snacks or a weeknight dinner with a simple side.
Taste and variations
The base here is intentionally lean: just chicken wings and salt. That allows the natural flavor of the chicken to shine and gives you a neutral canvas for sauces or rubs. If you like classic flavors, toss the finished wings in a warm garlic-butter sauce or a tangy vinegar-based glaze. Prefer something spicy? Mix a spoonful of chili paste into a small amount of honey and brush on the wings after the final bake. For a smoky note, add a pinch of smoked paprika to the salt before seasoning.
Step-by-step instructions
Follow these clear, reordered steps—kept in the same overall sequence as the original directions—to make Crispy Baked Chicken Wings (without Baking Powder) that are reliably crisp and flavorful.
- Preheat the oven. Set your oven to 425°F (220°C). Place a baking sheet on the middle rack and let it warm while you prep the wings. Preheating the baking sheet helps promote even browning when the wings first go in.
- Prepare the wings. Remove the wings from packaging and, if still whole, separate them into drumettes and flats by cutting at the joint. Pat each piece thoroughly dry with paper towels or a clean kitchen towel. The drier the skin, the better the crispiness.
- Season simply and evenly. Transfer the dried wings to a large bowl or tray. Sprinkle 1 tablespoon salt over the wings, then toss with your hands or tongs until each piece is evenly coated. This step seasons both the skin and meat and begins to draw out moisture from the surface for crisping.
- Arrange on the rack. Remove the preheated baking sheet from the oven and place the wire rack on top. Arrange the wings in a single layer on the rack, spacing them so that air can circulate around every piece—crowding will steam the skin instead of crisping it.
- Bake the wings. Slide the baking sheet with the rack into the oven and bake for 35 minutes. This initial stage cooks the wings through and renders some of the fat from the skin.
- Flip and continue baking. After 35 minutes, carefully remove the sheet from the oven and use tongs to flip each wing so the other side faces up. Return the wings to the oven and bake for another 15 minutes. This helps promote even browning on both sides.
- Finish at high heat for extra crisp. For an extra-crispy finish, increase the oven temperature to 450°F (230°C) or switch to the broiler for 3–5 minutes. Watch closely during this step to prevent burning. Once the skin is deeply golden and blistered in spots, remove the wings.
- Check doneness. Use an instant-read thermometer inserted into the thickest part of a drumette; the internal temperature should register 165°F (74°C). If you don’t have a thermometer, ensure the juices run clear and the meat is opaque all the way through.
- Rest briefly, then serve. Let the wings rest for 3 to 5 minutes to allow juices to redistribute. Serve them plain to showcase the crisp skin, or toss with your favorite sauce while still hot so the coating adheres nicely.
Serving suggestions
These crispy, oven-baked wings pair beautifully with simple sides. Try them with a crunchy slaw, carrot and celery sticks, or a light salad to balance the richness. For dips, go with cool yogurt-based ranch, tangy barbecue, or a bright chili-lime sauce. The neutral seasoning also makes them ideal for building a variety of bites: toss with buffalo sauce for wings that feel classic, or brush with a sweet and sticky glaze for a crowd-pleasing finish.
Tips for success
- Dry thoroughly: The single most important step is removing surface moisture from the wings. Pat them well and, if you have time, leave them uncovered in the fridge for 30–60 minutes to dry out further.
- Don’t crowd the pan: Airflow is crucial. Use a wire rack so hot air circulates beneath the wings and fat can drip away.
- Adjust time for size: If your wings are noticeably smaller or larger than average, adjust the initial bake by 5–10 minutes accordingly and always verify internal temperature.
- Use the hot-sheet trick: Placing wings onto a preheated baking sheet gives them a quick sear that aids in browning.
- Finish under broiler sparingly: A short broil yields blistering and extra color, but it can go from perfect to charred quickly—stay attentive.
Make-ahead and storage
These wings are easy to prepare ahead of time. Bake them as directed, then cool and store in an airtight container in the refrigerator for up to 3 days. To re-crisp, arrange on a wire rack over a baking sheet and reheat in a 400°F (200°C) oven for 8–10 minutes, or until warm and the skin has regained its crunch. For longer storage, freeze cooked wings on a tray until solid, then transfer to a freezer bag for up to 3 months; reheat straight from frozen at 425°F (220°C) for 12–16 minutes.
Troubleshooting
If the skin isn’t as crisp as you hoped, consider these adjustments: ensure the wings were patted bone-dry before seasoning; avoid crowding on the rack; raise the final oven temperature briefly or add a short broil; or let the wings sit uncovered in the refrigerator for a while before baking to dry the skin further. If the interior is underdone while the exterior is too dark, lower the oven temperature to 400°F and extend the cooking time so heat penetrates without burning the skin.
Nutrition
Because this recipe uses only wings and salt, calorie and fat content depend on portion size and whether you toss the wings in sauce before serving. Baking allows some fat to drip off, making the wings lighter than deep-fried counterparts while still delivering satisfying flavor and texture.
Final thoughts
Simple recipes are often the best because they let technique and quality shine. This Crispy Baked Chicken Wings (without Baking Powder) method focuses on drying, even air circulation, and controlled heat to create wings that are crispy, juicy, and adaptable to any flavor direction you choose. Keep the ingredient list short, respect the steps, and these wings will be a fast favorite whether you’re feeding friends, family, or just treating yourself.
Printable recipe
Ingredients
- 2lbs chicken wings
- 1 tablespoon salt
Directions
- Preheat oven to 425°F (220°C) and place a baking sheet in the oven to heat.
- Separate whole wings into drumettes and flats if needed. Pat each wing completely dry with paper towels.
- Place wings in a large bowl or on a tray and sprinkle evenly with 1 tablespoon salt. Toss to coat every piece.
- Place a wire rack on the hot baking sheet and arrange the wings in a single layer with space between pieces.
- Bake for 35 minutes.
- Remove from oven, flip each wing with tongs, and return to bake for an additional 15 minutes.
- Increase oven temperature to 450°F (230°C) or broil for 3–5 minutes to achieve extra crispness, watching closely to avoid burning.
- Confirm internal temperature reaches 165°F (74°C) or that juices run clear. Let rest 3–5 minutes.
- Serve plain or toss with your preferred sauce while hot.

Crispy Baked Chicken Wings (without Baking Powder)
Ingredients
Equipment
Method
- Preheat your oven to 450ºF (230ºC).
- Bring a kettle or pot of water to a rolling boil.
- Place the wings in a large pot, sprinkle with the salt, and pour the boiling water over them until just covered.
- Return the pot to a boil, then reduce heat to a simmer and cook the wings for 10 minutes.
- Drain the wings thoroughly and pat them as dry as possible with paper towels.
- Line a sheet pan with foil if desired, set a wire rack on the pan, and arrange the wings in a single layer on the rack.
- Bake the wings in the preheated oven for 30 minutes, or until the skin is crisp and golden.
Notes
- Patting the wings very dry helps them crisp in the oven.
- Use a wire rack so air can circulate around the wings for even crisping.
- Line the baking sheet with foil for easier cleanup.